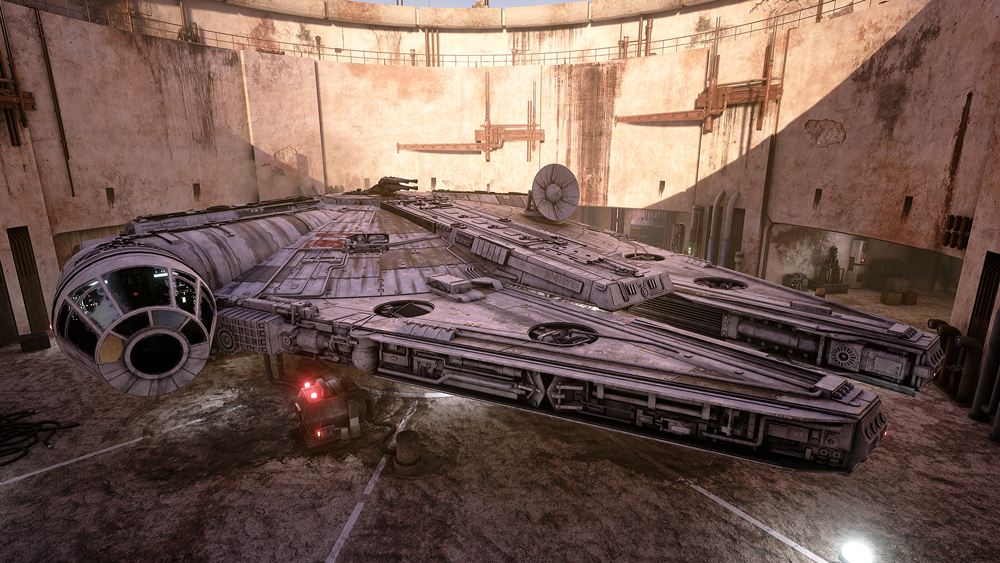
Jason Lewis, senior environment artist at Obsidian Entertainment had wanted to model the Millennium Falcon in order to explore it in Unreal Engine 4: “The whole project started with just building the Falcon as a real-time model, and then needing an environment to show it off in, then the project just grew from there,” he explains.
“The goal for the Falcon was to create one of the highest detail real-time models ever,” he continues. “So going with that mentality I decided that high-end PC hardware would be needed to run it at smooth frame rates, and surprisingly what we produced actually runs pretty well on even mid-range hardware.”
The finished model took Lewis eight months of working in his free time to complete; and he estimates he spent 350 hours developing this one asset.
In the following steps, he outlines his process for creating the famous Falcon…
01. Gather reference
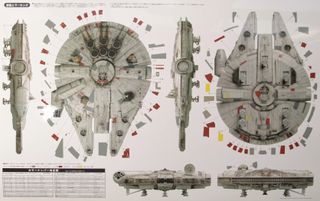
The first step in creating the Falcon model was to gather as much good reference imagery as possible. I collected photos from the internet, as well as lots of screengrabs from the original movies. The basic forms and proportions were created using orthographic drawings from model kits (primarily the 1:72 scale Falcon kit from the Japanese company Fine Molds as it has the reputation for being one of the most screen-accurate model kits available).
02. Modelling process
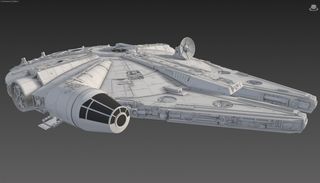
Modelling was pretty straightforward. Most of it was just following the reference imagery. The thing about the Millennium Falcon is that the entire ship is made up of relatively simple shapes, so it isn’t really difficult to model. It's more a test of sheer will, as it uses a significant amount of simple shapes to give the illusion of complexity. I made the decision early on that most of the details in the ship would be modelled as opposed to normal map details.
03. Testing in Unreal Engine 4
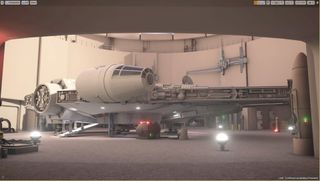
Once modelling was finished, the asset was imported into Unreal 4 to test scale, collision, basic lighting, and proportions to make sure that everything looked correct from a human-scale, first-person perspective.
Get the Creative Bloq Newsletter
Daily design news, reviews, how-tos and more, as picked by the editors.
The Falcon was the first asset brought into UE4, then from there I built out docking bay 94 and its interior, and then we started to add the city around it. It was here that I decided to expand the project far beyond its original scope and recruit more people to help finish it.
04. Optimise the process
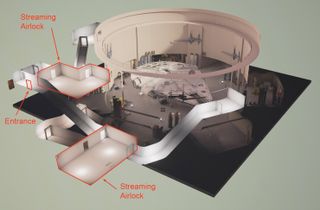
The original Docking Bay 94 interior was small and simple: a single hallway and staircase leading from the entrance of the bay, down to where the Falcon sits, but then I realised two things: once you got down to the Falcon there was no way to see the detail on top of the ship. I added a second hallway that led to an upper-level control room and had an upper-level ring around the entire circumference of the bay.
Also, since we didn’t make any LODs for our models, in order to keep frame rate up, we relied on lots of streaming of sections of the map in and out of visibility and memory. Since the Falcon was such a large system-intensive asset, we needed more time from when you enter the bay to stream the ship into memory, so I made the bay larger with some air-lock rooms to allow time for streaming.
05. Texturing and UVs
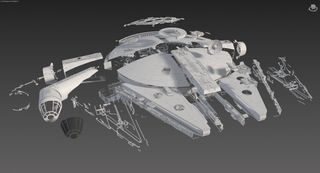
Once I got the Docking Bay interior sorted out, and got all the streaming triggers set up and working, it was time to move onto UVs and texturing for the Falcon. It took quite some time to decide how to approach texturing for the Falcon. So I broke the Falcon model up into several pieces (50 to be exact) each with its own unique 0-1 space UV layout.
The problem was that since it was such a large asset, a normal diffuse/normal/spec texturing approach wouldn’t work as texture resolutions would have to be very high to keep the texel density from turning to mush when the player got close to it.
At that point I had heard a little about Unreal Engine 4’s layered material system, so I did more research into the system and decided that it offered exactly what I needed for the Falcon, good distant fidelity combined with good texel density up close.
06. Modelling process
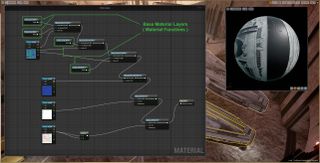
So to put it simply, UE4’s layered material system works like this: you first set up a library of tileable materials that represent your base surface types (they don’t have to be tileable materials, but that is the real power of the layered material system in my opinion).
For the Falcon I had four base surfaces, base painted grey metal/distressed painted grey metal/bare metal/and stained, scorched metal. Those are then set up as material functions instead of standard materials, then for each piece of the Falcon, I gave it a unique material into which I inserted the base material functions and used greyscale masks that match each piece’s 0-1 UV layout to blend between the different surface types.
This allowed me to use one 4k grey-packed mask for each piece of the Falcon (four masks packed in the RGBA channels of a single image to define the four base materials), instead of using three 4k maps for each piece. In addition to the 4k mask, I also used a 1k normal map for each piece, as well as the 1k maps to define the base materials.
So, all in all, I was able to get good up-close texel density from the tiling base materials without it looking like tiled textures due to the high fidelity of the 4k mask textures.
07. Import into Unreal Engine 4
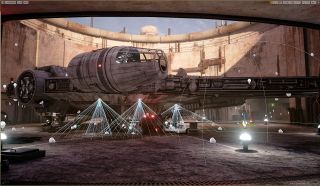
Once the texturing and material setup was finished, the final model was imported into UE4 and placed in Docking Bay 94. The final step was to light the Docking Bay interior and the Falcon. At this point our lighting artist had done a base pass on the overall lighting scheme for the entire level and all I had to do was the detail lighting in the bay itself. This included landing lights around the ship, down lighting from the lower saucer section, emitted light from the engines, several self-lit areas in the recessed parts of the ship and all the little navigational lights on the ship itself.
08. Lighting the Falcon
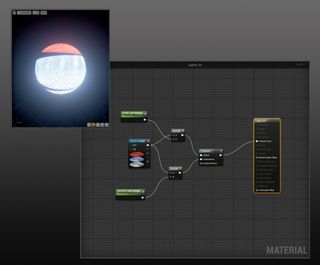
Lighting was a pretty even split of placed lights in UE4 and emissive materials on the Falcon model. Most of the placed lights were static lights. I only used stationary lights where I really needed them, in places where I wanted the specular highlights and sharper real-time shadows. Emissive materials actually do a really good job of emitting baked lighting in a scene.
I used the GI Replace node in the material editor to control emitted static lighting separately from the visible light on emissive materials so we could get really strong lighting in the lightmaps without causing the visible light to over-bloom.
09. Polish and clean-up
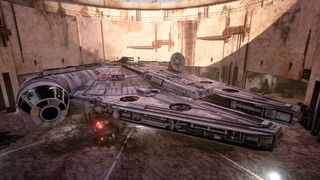
A bit of polish and clean-up of lightmap UVs on a few parts of the ship was next: animating the glow on the ship’s engines (this was done with some sine and cosine nodes multiplied against each other and plugged into a multiplier that went into the emissive slot in the material), adding the steam particles to the ship, and adding a very simple cockpit to the interior to be seen from a distance only.
This article was originally published in 3D World magazine issue 216. Buy it here.
Related articles:

Thank you for reading 5 articles this month* Join now for unlimited access
Enjoy your first month for just £1 / $1 / €1
*Read 5 free articles per month without a subscription

Join now for unlimited access
Try first month for just £1 / $1 / €1
Ian Dean is Editor, Digital Arts & 3D at Creative Bloq, and the former editor of many leading magazines. These titles included ImagineFX, 3D World and video game titles Play and Official PlayStation Magazine. Ian launched Xbox magazine X360 and edited PlayStation World. For Creative Bloq, Ian combines his experiences to bring the latest news on digital art, VFX and video games and tech, and in his spare time he doodles in Procreate, ArtRage, and Rebelle while finding time to play Xbox and PS5.
