8 Creative Cloud tips and tricks
Try out these top creative Cloud tips to get more out of the Adobe suite and boost your design projects.

If you’re a creative, chances are you’re using part or all of Adobe Creative Cloud for your work. This comprehensive design suite offers a host of incredibly powerful tools and include apps like Photoshop and Premiere Pro – currently voted number one in our round up of the best video editing software. There's a ton of features for graphic design work and desktop printing, and even apps to help you share your creativity online. Plus, Creative Cloud is one of the best cloud storage platforms for your project files.
In this guide, we've got eight top Creative Cloud tips to help you get the most out of this multifaceted suite. Not signed up yet? Don't miss our Adobe Creative Cloud discounts guide to get the best deal.
01. Organise assets into libraries
Staying organized is a challenge for creatives of all stripes, especially if you’re working with multiple brands that each have their own styles. Thankfully, Creative Cloud offers libraries to help you organize your design elements, such as color swatches, logos, and fonts, any way you want. Libraries are also and make them available across all of your design apps.
To create a new library, open up any Creative Cloud app and pull up the Libraries module (under the Windows menu). Click on the dropdown menu and select Create New Library to make a new folder. You can name it after a project, a client, or whatever you like.
From there, you can add any design element that’s currently in your open document into the library. Just drag and drop, or click the + icon to select specific graphics, text styles, colors, or effects.
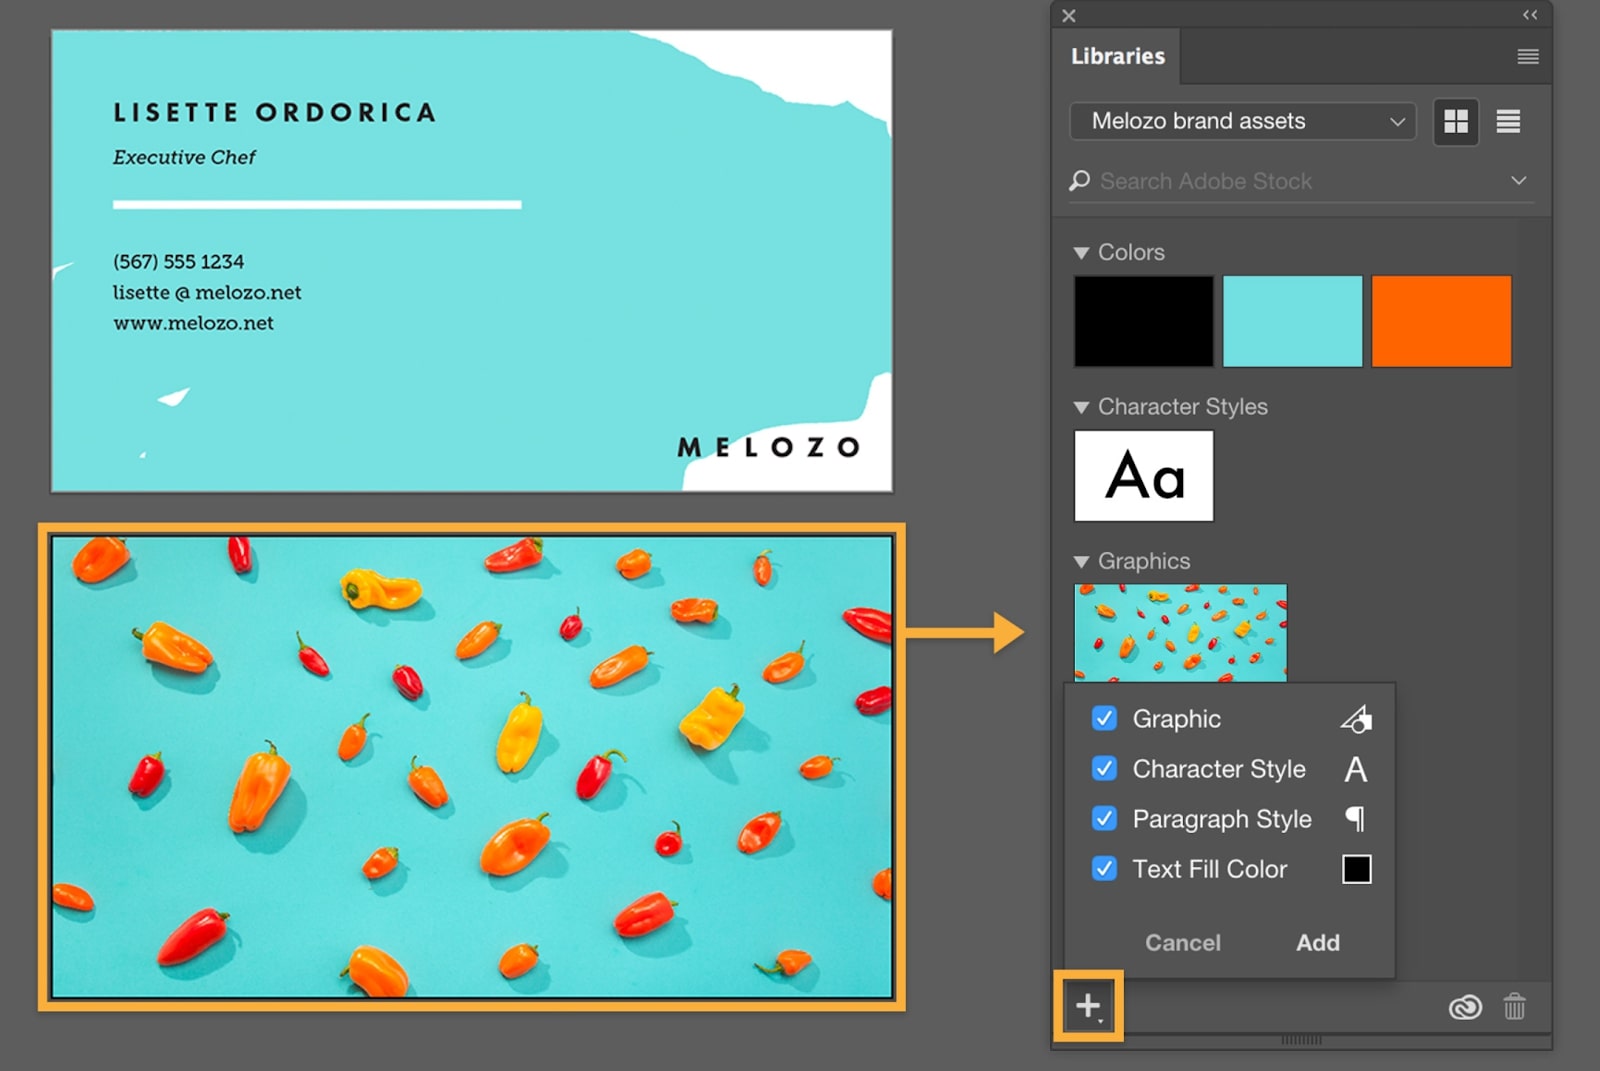
If you need to access these design elements in another document, just open the Libraries module and navigate to your library. Then you can drag and drop any assets you need into your new project.
02. Sync files across your devices
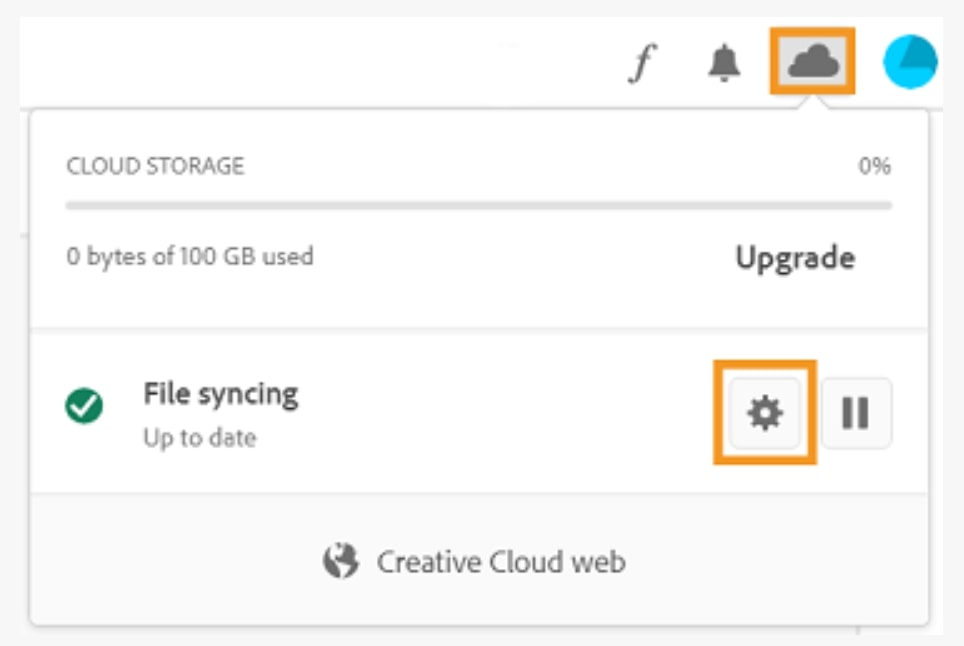
Creative Cloud comes with 100 GB of cloud storage, which you can use to sync projects across all your devices. When you make changes on your computer, for example, those changes will be available when you open the same file from the cloud on your smartphone. This makes it easy to manage your projects across devices, whether you’re at home, in the office, or working in the field.
Get the Creative Bloq Newsletter
Daily design news, reviews, how-tos and more, as picked by the editors.
To manage your sync settings and create a dedicated sync folder, you’ll have to use the Creative Cloud desktop app. You can also change the upload and download speeds if you need to save bandwidth. Once the sync folder is set up, files added to it from any device will be accessible across your Creative Cloud apps.
03. Share your work in real time
Getting feedback from collaborators or a client is an important part of every project. With the Photoshop plugin LiveShare PS, you can instantly share Photoshop documents with anyone.
LiveShare PS enables you to create a video conference with your Photoshop document open in screen sharing mode. Anyone in the meeting can point and draw on your document to suggest changes, and any changes you make to the document are displayed in real time.
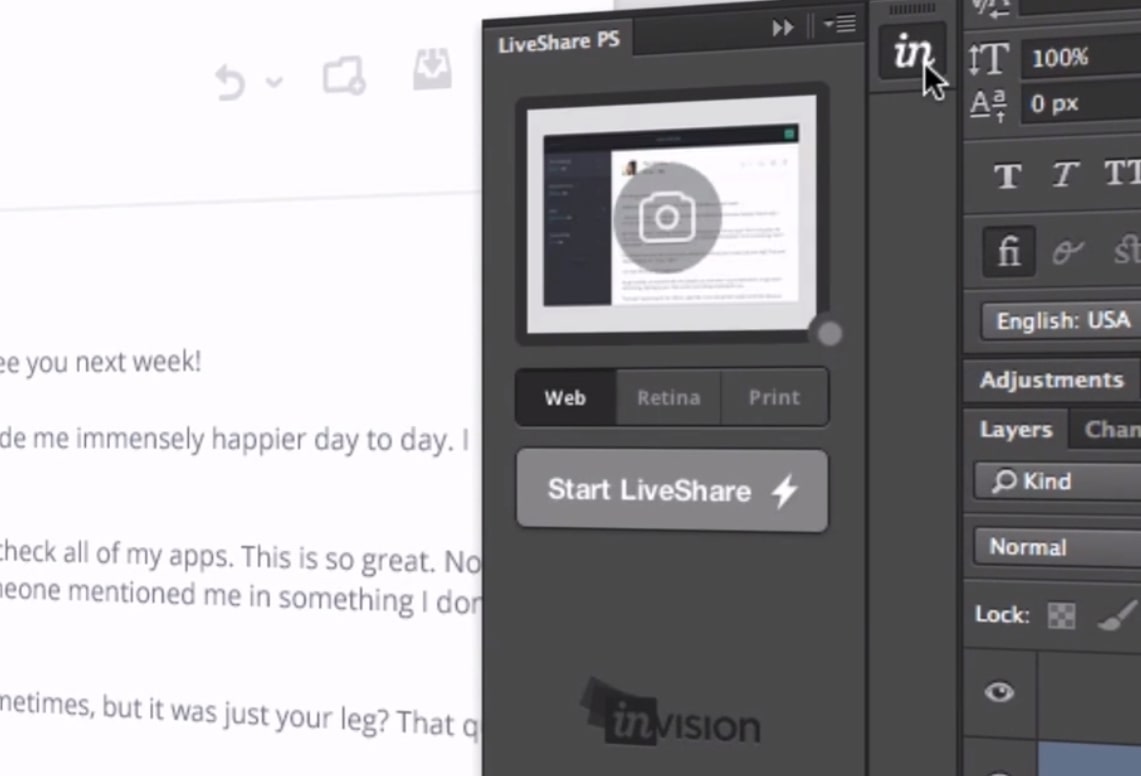
This plugin also has a few other capabilities. You can seamlessly create shareable screenshots of your canvas. LiveShare PS also makes it easy to send a preview of your Photoshop document to a mobile device so you can see how your design looks on a smartphone screen.
04. Trace images and sketches
Want to base a new drawing or design off of an existing piece of artwork? The Live Trace tool in Illustrator makes it easy. Just open the artwork and click Live Trace, and Illustrator will build a vector-based sketch of the image.

What’s especially nice about this tool is that you have a ton of control over the output. For example, you can control how tightly the trace follows the original art, the minimum line width to trace, and whether jagged edges are removed in the traced sketch. The Live Trace tool is great if you want to make a vector-based version of an existing image in order to make intricate changes or redesign it at a higher resolution.
05. Identify fonts from a photo
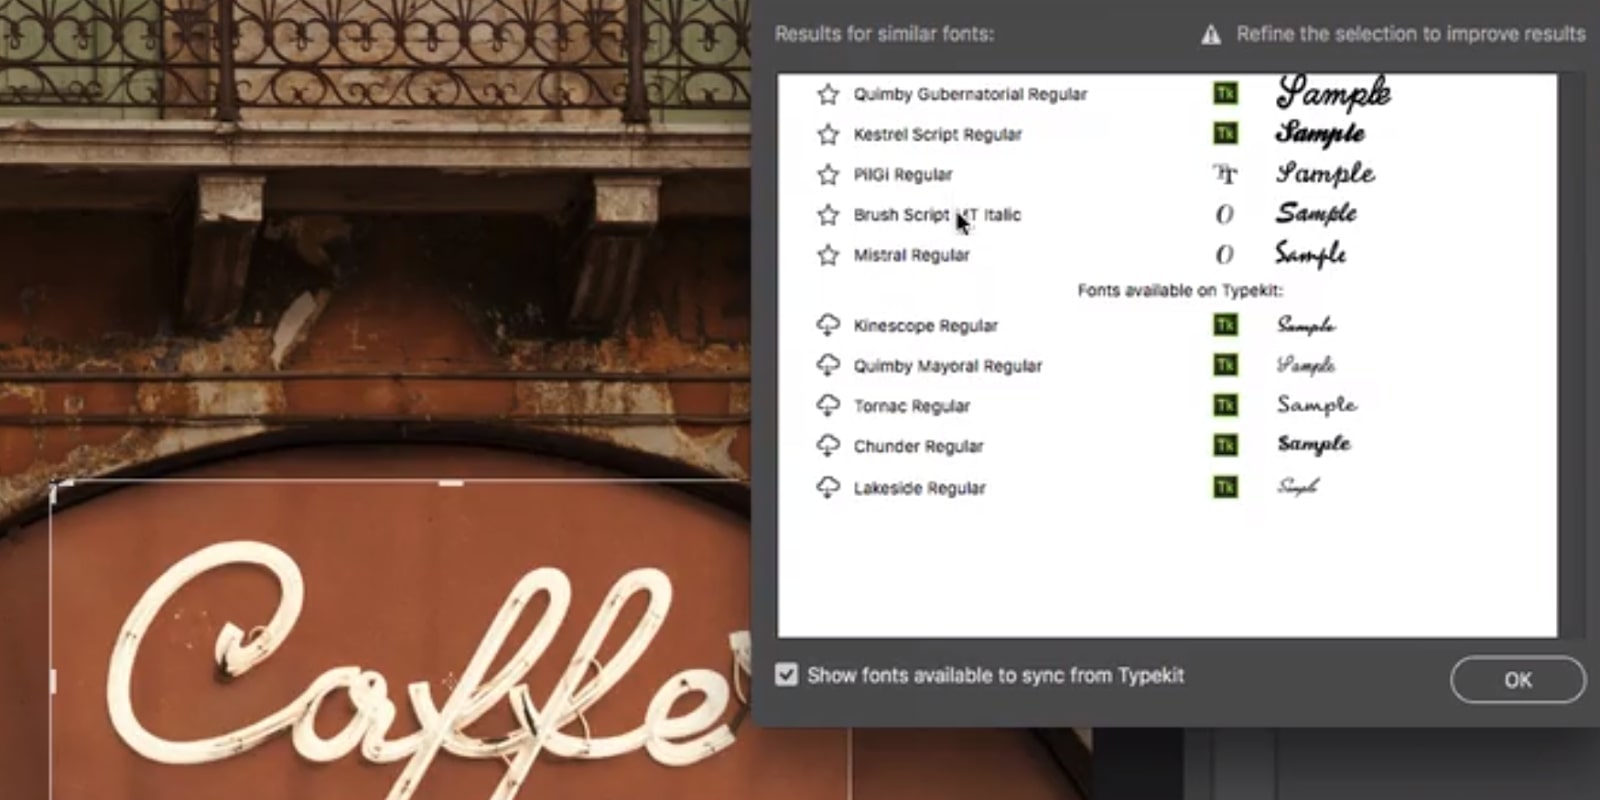
If you happen to find that perfect font that you want to use in your designs out in the world, Photoshop can help you figure out what it is. Just take a picture of the design containing the font and open it in Photoshop. Then use the marquee tool to draw a box around the lettering and select Type > Match Font.
Photoshop will suggest possible matches, and you can choose which one is the closest fit. If you don’t already have the font installed on your computer, you can instantly download it from Adobe Typekit.
06. Animate your photos
Another neat Creative Cloud trick you can do with Photoshop is animate a part of a photo. For example, if you have a photo of a mountain in the clouds, you can make a quick animation so that the clouds appear to be drifting.
To start, just select the portion of the image you want to animate and copy it into a new layer. Open the Timeline panel under the Windows menu, then click Create Video Timeline. Create a position keyframe at the end of the frame by clicking Position. Now, drag the layer that contains the subject to be animated and drop it where you want it positioned at the end of the animation.
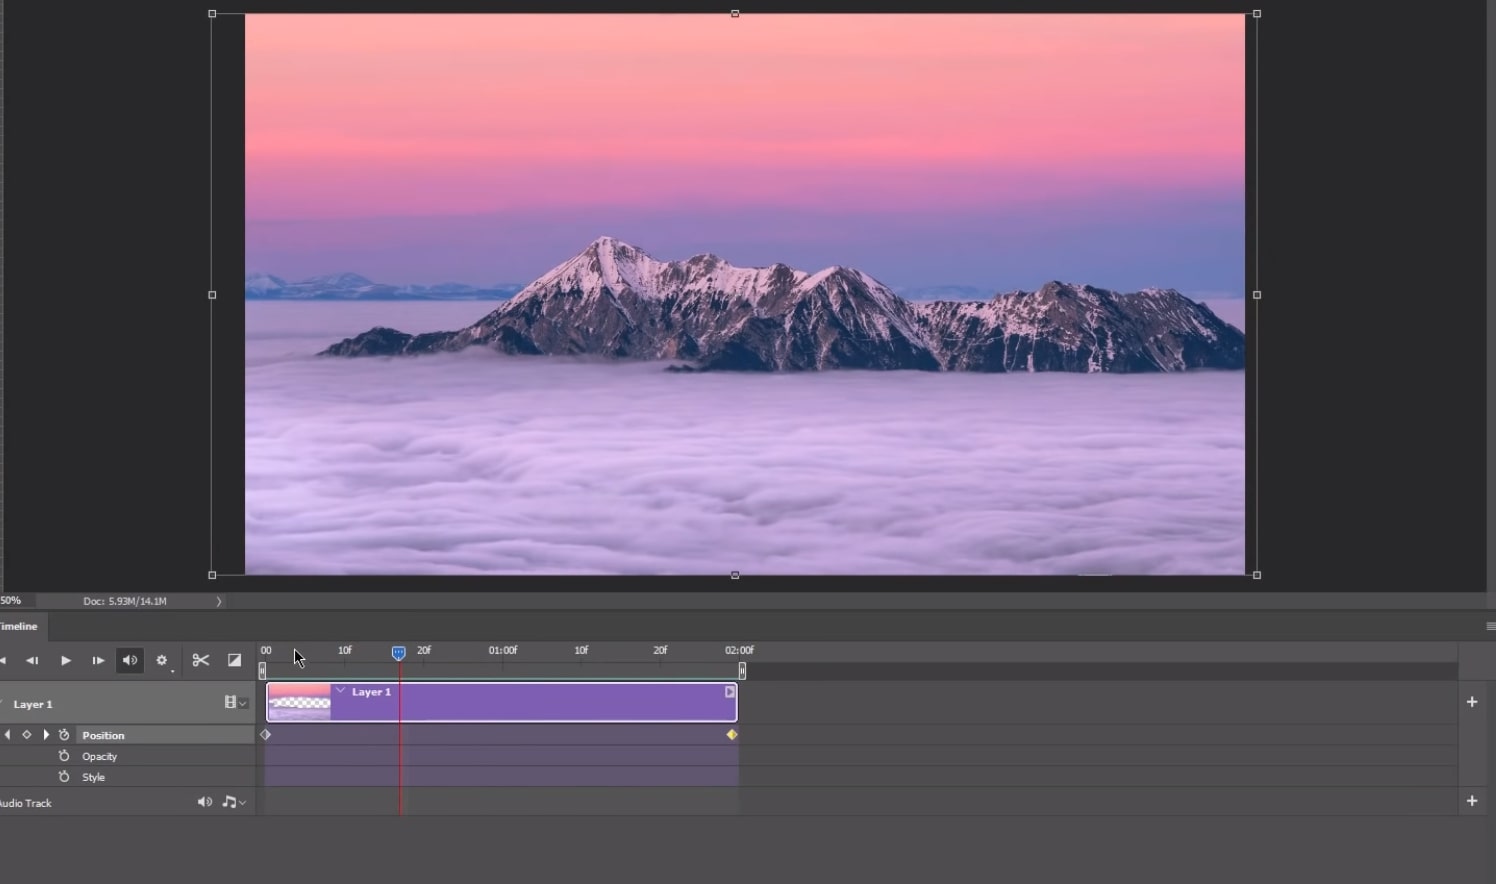
Hit the space bar to watch your animation play out on your screen. You can create more keyframes or move the animation layer to change the look of your video.
07. Modify individual letters
If you’re building a logo, you can make your work stand out by creating custom lettering in Illustrator. To get started, choose a font that’s close to the final look you want, and use it to create your basic design.
Then, use the direct selection tool and click on any individual letter to view its control points. You can round out edges or extend the length of any lines by dragging these control points. Alternatively, you can grab an entire letter and move it around. This enables you to change the spacing between letters or to rearrange the horizontal alignment of letters within the same word.

08. Create custom photo brushes
One of the best ways to make your photos stand out is to selectively change the exposure, coloring, or contrast of a specific part of the image rather than making global adjustments. With Lightroom brushes, you can quickly fine-tune your photos. If you use brushes frequently, it’s a good idea to create presets so that you have a quiver of photo adjustments ready to go.
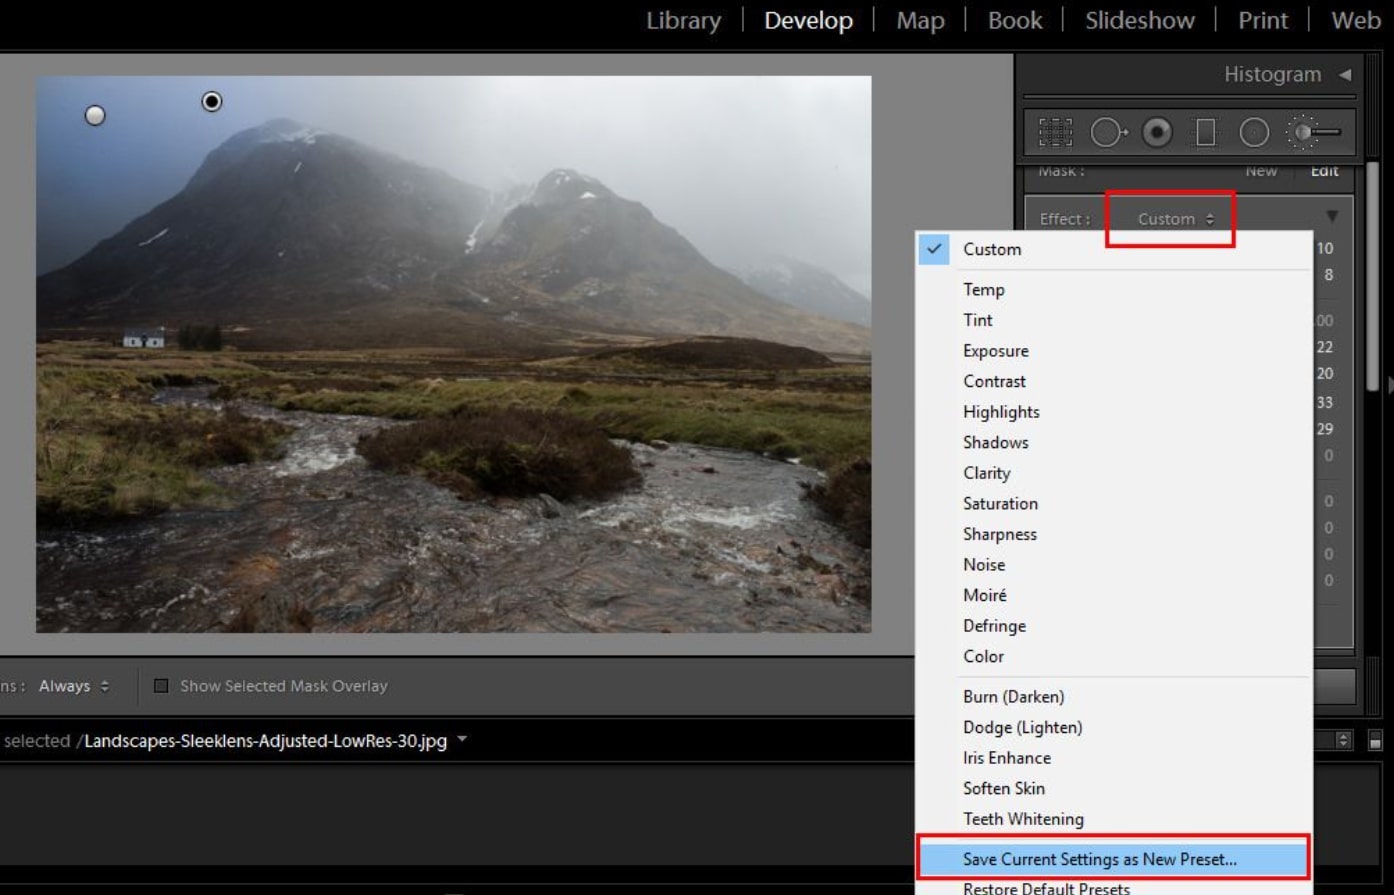
To create a brush preset, open the Develop panel in Lightroom and select the brush tool. Change the brush adjustment settings to suit your photo, then click the text at the top of the adjustment panel that says Custom. In the drop-down menu, select Save Current Settings as New Preset and give your brush a name.
The next time you want to access the same brush, you’ll find it in that same drop-down menu.
Read more:
- Download Photoshop: How to try Photoshop for free or with Creative Cloud
- 65 brilliant Photoshop tutorials to try
- The best Photoshop alternatives

Thank you for reading 5 articles this month* Join now for unlimited access
Enjoy your first month for just £1 / $1 / €1
*Read 5 free articles per month without a subscription

Join now for unlimited access
Try first month for just £1 / $1 / €1

Michael is a freelance journalist and photographer based in Bellingham, Washington. His interests span a wide range from business technology to finance to creative media, with a focus on new technology and emerging trends. Michael's work has been published in TechRadar, Tom's Guide, Business Insider, Fast Company, Salon, and Harvard Business Review.
