Adobe Fuse: What it is and how to use it to create 3D characters
Quickly create humanoid models in Adobe Fuse.
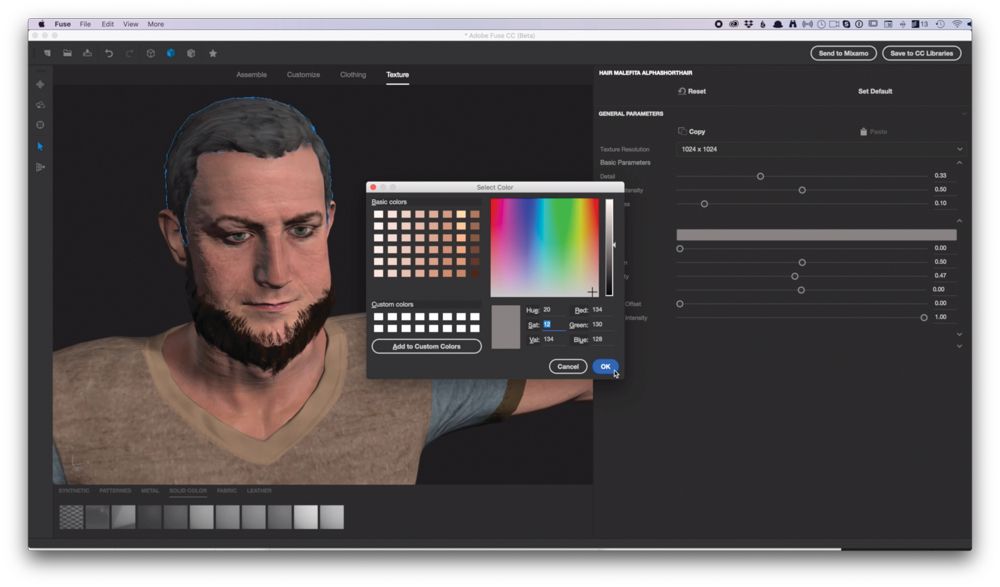
Adobe Fuse has recently been added to Adobe's Creative Cloud suite, and it's shaking up the world of character design. Creating new characters can be a tricky task for any 3D artist, and it’s even harder when the artist is new to CGI creation. While downloading basic models from stock sites can certainly be a good starting point, Adobe Fuse helps when you need something more bespoke.
Adobe Fuse enables artists to create bespoke humanoid models, and clothe them using the array of clothing presets that come with the software. Adobe Fuse is primarily designed to work with Adobe Photoshop’s 3D system.
What is Adobe Fuse?
This often-underused system allows a 3D model to be part of a normal ‘2D’ Photoshop file. The model can be posed directly within Photoshop thanks to a wide array of poses and animations that can be stopped at the desired point for a still. Adobe Fuse files can be exported as OBJ models with their associated textures for rigging in 3D applications. They can also be uploaded to Adobe’s Mixamo service, where rigging and animation can be managed on the fly for the creation of an animated FBX or OBJ file.
At first glance the current options in Fuse are limited (it is still classed as Beta software by Adobe). However, the wide range of customisation points for modifying the body, along with detailed control of elements such as eye detail and skin effects, make the creation of many unique characters very easy. This makes Fuse an ideal solution for a wide range of character uses.
We've put together a step-by-step guide to creating a character with Adobe Fuse. Let's see what it can do.
Click on the icon at the top-right of the image to enlarge it.
01. Create a character
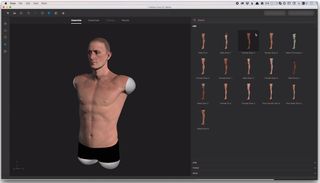
Starting with the head, Adobe Fuse allows the artist to choose the major body parts. Although there are distinct body parts for each figure, the four main constituent parts (head, torso, legs and arms) can be assembled together in whatever order the artist desires.
Get the Creative Bloq Newsletter
Daily design news, reviews, how-tos and more, as picked by the editors.
Adobe Fuse will do its best to create a blend between the elements. Fuse follows normal 3D application conventions in terms of its UI, making it easy to move around and zoom in on the figure.
02. Customise the Adobe fuse figure
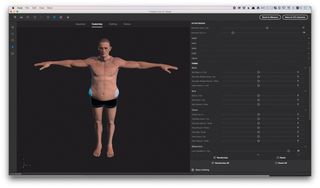
Customising the figure can be done using a couple of methods. On the right-hand side of the UI are a range of sliders that control a wide variety of points on the model. The more intuitive method involves moving the mouse over an element and clickdragging it. Responsiveness is quick no matter what computer hardware Fuse is running on, and the appropriate slider is highlighted in the UI when selected.
03. Add clothing
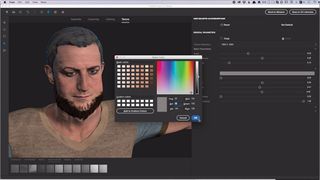
Clothing is the one area where Adobe Fuse could definitely do with more options. Still, colours can be changed and if the artist wants to tweak a feature on the underlying body model, any selected clothing will re-proportion itself to accommodate the change on the fly. Skin and hair can also be aged and changed, with convincing wrinkles and wear and tear on the skin. Eye colour and even cataracts can be added to the eye to denote age.
04. Integrate with Photoshop
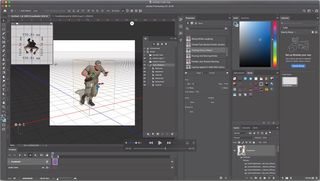
By exporting the Adobe Fuse model to a Creative Cloud Library, the character can be easily added to Photoshop. The model can be relit, moved and scaled within Photoshop, and works as a normal layer. Poses to the model can be easily added from hundreds of options from the Properties palette, and facial expressions can be modified as well. This allows a large range of options to be integrated into any Photoshop document.
05. Work with other 3D applications
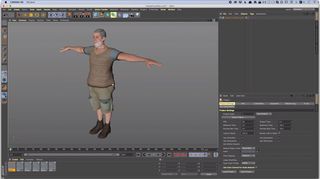
Fuse can provide a base model that can be exported as an OBJ file with all the necessary textures (up to 4K). This file can then be imported into a 3D application for rigging for animation, or just to be used as a still.
Textures are applied as generic UVs which means they could be further enhanced with texture work within the 3D application, or via texture-painting applications such as Allegorithmic’s Substance Painter.
06. Process with Mixamo
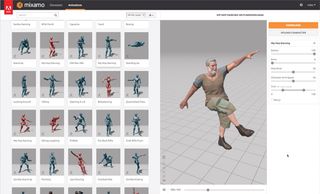
Adobe Fuse characters can be processed through the Mixamo animation service. Fuse models are exported to Mixamo directly through the ’Send to Mixamo’ button on the UI, and after the model is uploaded, it is automatically rigged and can then have one of the hundreds of free-to-use motion samples applied to it. These can then be downloaded as an FBX or similar file to be used in any Digital Content Creation software.
This article was originally published in issue 245 of 3D World, the world's best-selling magazine for CG artists. Buy issue 245 or subscribe to 3D World.
Related articles:

Thank you for reading 5 articles this month* Join now for unlimited access
Enjoy your first month for just £1 / $1 / €1
*Read 5 free articles per month without a subscription

Join now for unlimited access
Try first month for just £1 / $1 / €1
Mike Griggs is a veteran digital content creator and technical writer. For nearly 30 years, Mike has been creating digital artwork, animations and VR elements for multi-national companies and world-class museums. Mike has been a writer for 3D World Magazine and Creative Bloq for over 10 years, where he has shared his passion for demystifying the process of digital content creation.
