A beginner's guide to watercolour brush techniques
Get the most out of your watercolour brushes with this expert insight.

Various brush types and application can result in a soft and dewy composition, or a hard-edged, vibrant scene. Primarily, I’ll use the highest quality round Kolinsky Sable brushes I can find, but I began developing my watercolour techniques with student-grade brushes to discover my preferences.
Although they got the job done, cheaper brushes suffer from stray brush hairs, an inability to hold as much water as I like, and pointy tips that don’t last too long. Once I invested in higher-quality brushes, my technique improved greatly.
Once you’ve discovered the brushes that you enjoy working with most, it’s important to treat those brushes kindly. While watercolour doesn’t require harsh mediums and rigorous rules to work with, some care goes a long way in preserving your brushes, and that includes reserving them for water media only.
Working with a brush that was previously used with oils or even acrylics will diminish its effectiveness in carrying water and pigment. Keep your brushes upright or flat and pointy and your paintings will thank you for it.
01. Watercolour brush types

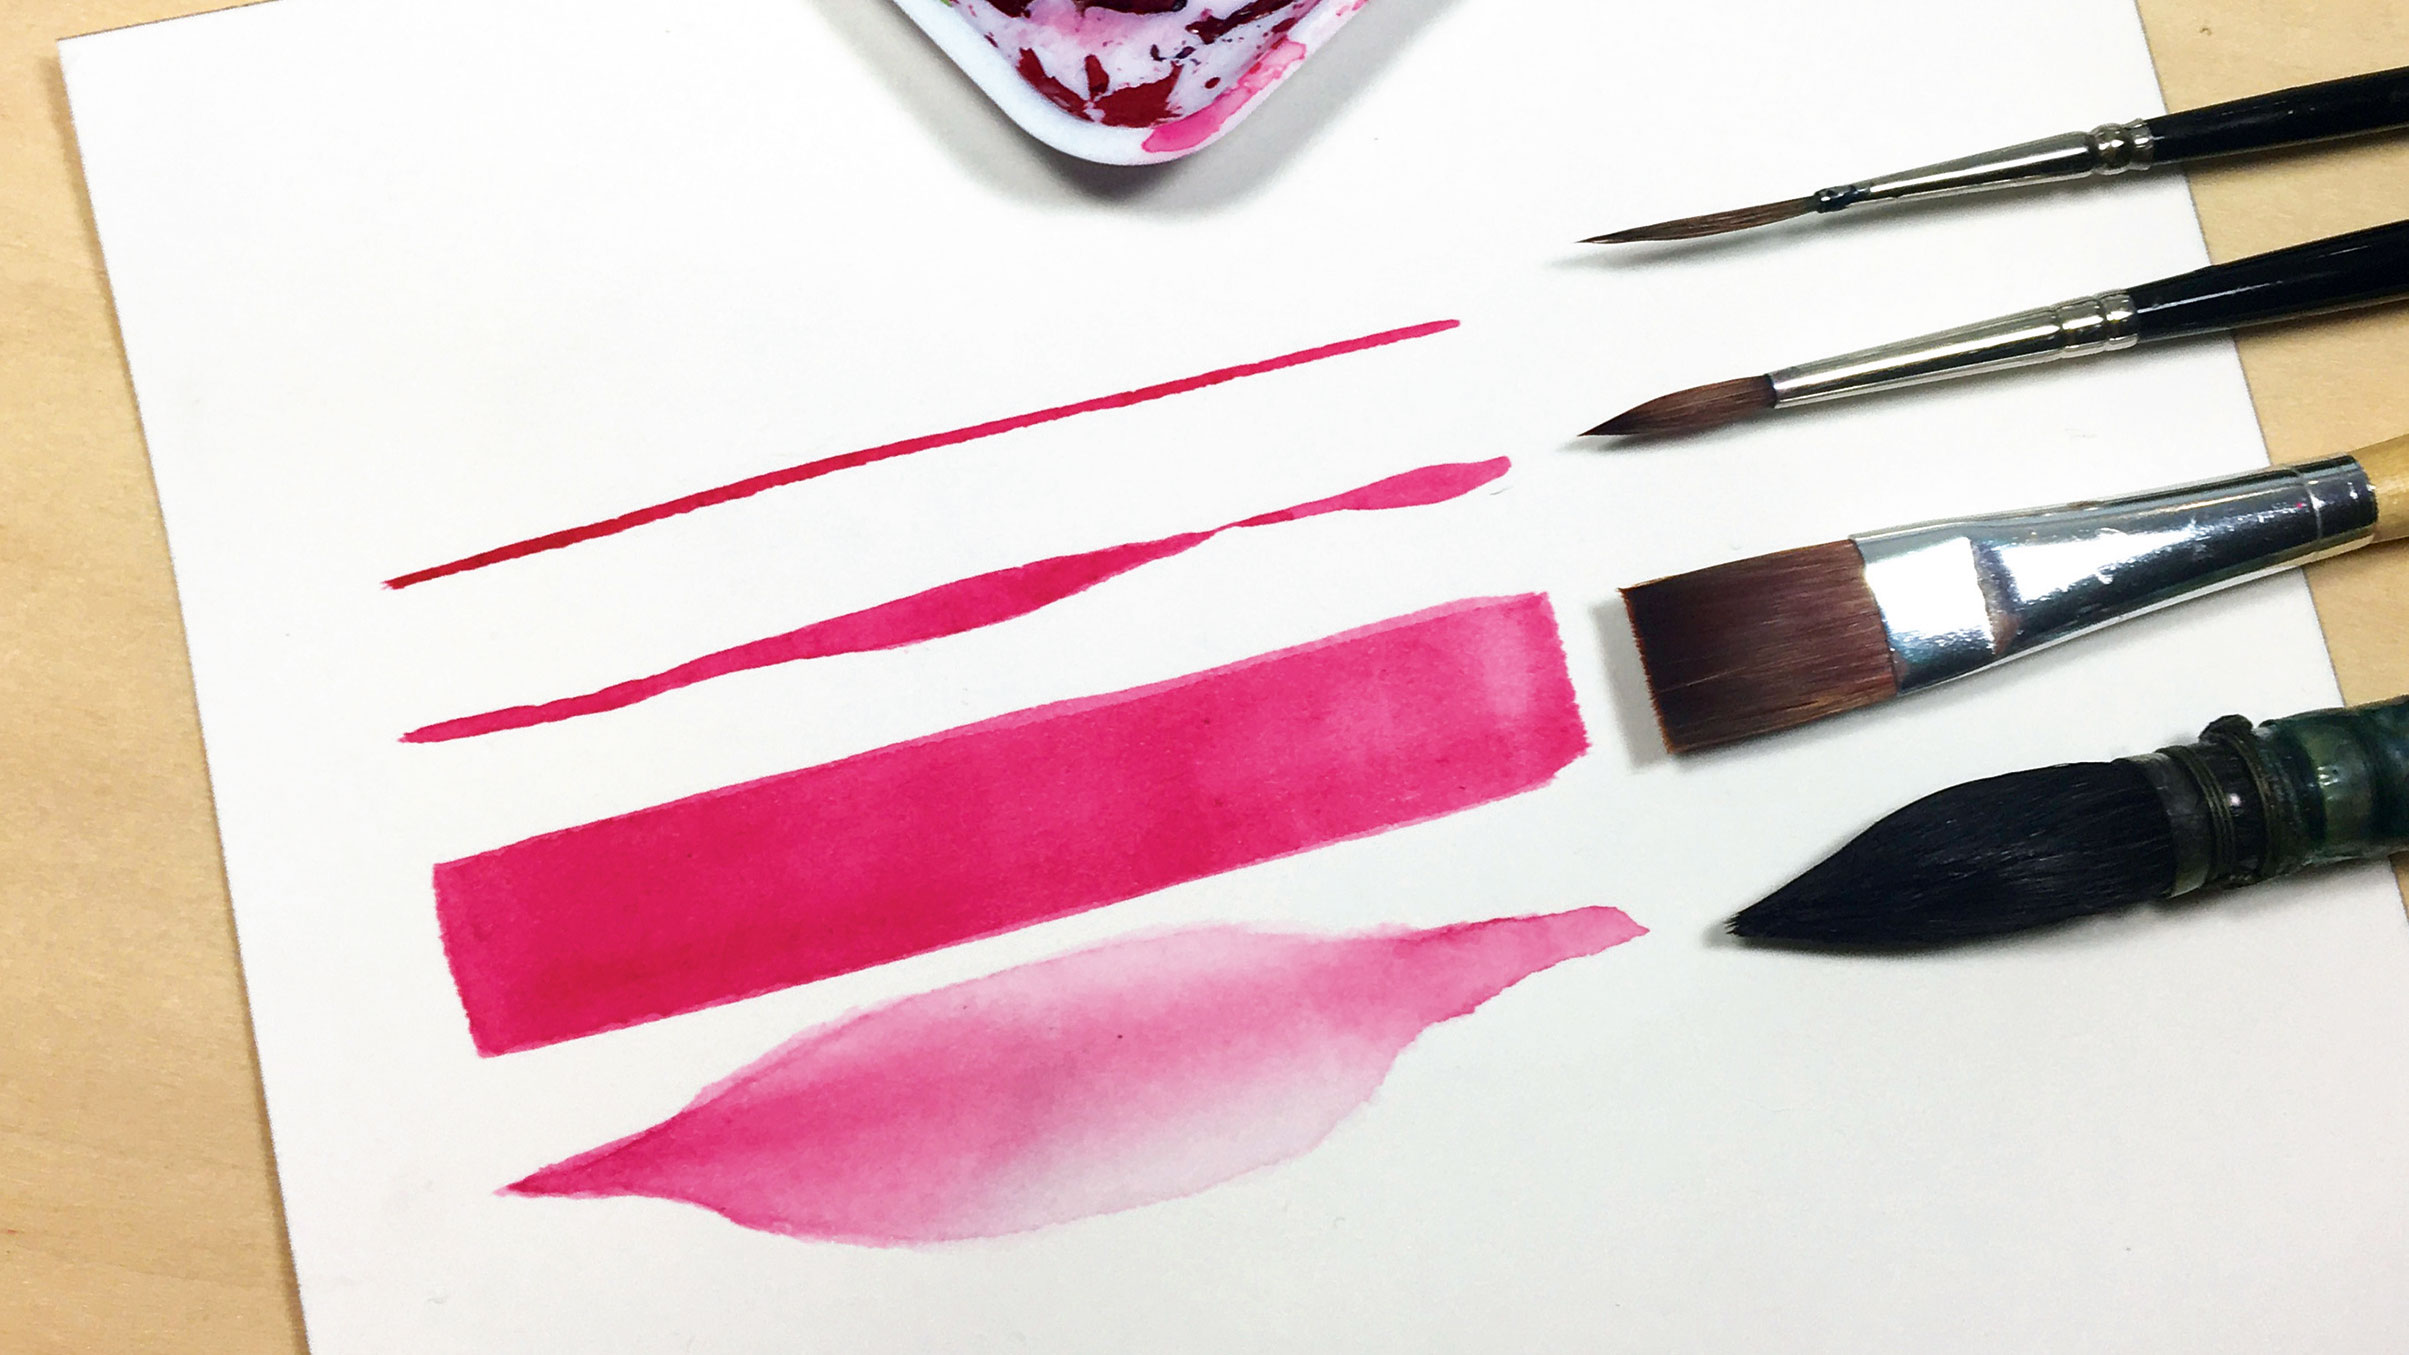
Every brush has the potential for many uses with watercolour, and some are better than others for specific tasks. Round brushes are the most commonly used because of their versatility. Liner brushes are excellent for maintaining width, and Flat brushes are able to create crisp edges. Finally, a Mop brush is ideal for soaking and distributing large amounts of water.
02. Contouring with a steady hand

To achieve precise strokes, your application technique requires a steady hand. Sitting while aiming for precision is best, but you can also stabilise your hand with your little finger anchoring the paper (I tend to use Arches hot pressed watercolour paper.)
Another technique when using a Round brush is to twist the brush while dragging, to achieve thinner lines. Remember, the larger the Round brush, the more versatile your stroke will be.
Get the Creative Bloq Newsletter
Daily design news, reviews, how-tos and more, as picked by the editors.
Another thing to keep in mind is that, when loading up your brush with watercolour, you need to pay attention to the ratio of water pigment as this affects the fluidity of the paint as it's applied to the surface. It's also important to practise gaining control of the brush by creating strokes that butt up against each other but don't overlap.
03. Varying the line width

To get the most out of your brushes, learning to vary the line width can contribute to some expressive strokes. This helps to develop a sense of the watercolour that your brushes contain in one stroke, which in turn assists in consistency.
Take the tree paint test on the left in the image above. A large round brush is excellent for creating its branches that vary in width. Meanwhile the trunk is a good example of how, once you're comfortable, you can challenge yourself to maintain consistency as the watercolour dries.
As for the brush test on the right, this shows how a Flat brush can create flat shapes, zigzags and expressive marks. It's possible to create varying widths with Round and Flat brushes, demonstrating their versatility on paper.
04. Drybrushing creates interesting effects

Especially effective with a Flat brush, drybrushing is achieved when the bristles separate because there’s less moisture present. This can be used to create a range of effects, including hair, grass and wood grain. The shorter the brush, the easier this is to achieve.
Try varying your application technique with coarser brushes, such as scrubbing, patting or dragging at various angles. I enjoy creating expressive eyelashes by twisting a lowmoisture Round brush.
Drybrushing can be tricky with sable brushes, so you may want to experiment with brushes that encourage more texture with coarser hair, such as synthetic blends, hog or ox bristle brushes.
05. Combining brush techniques

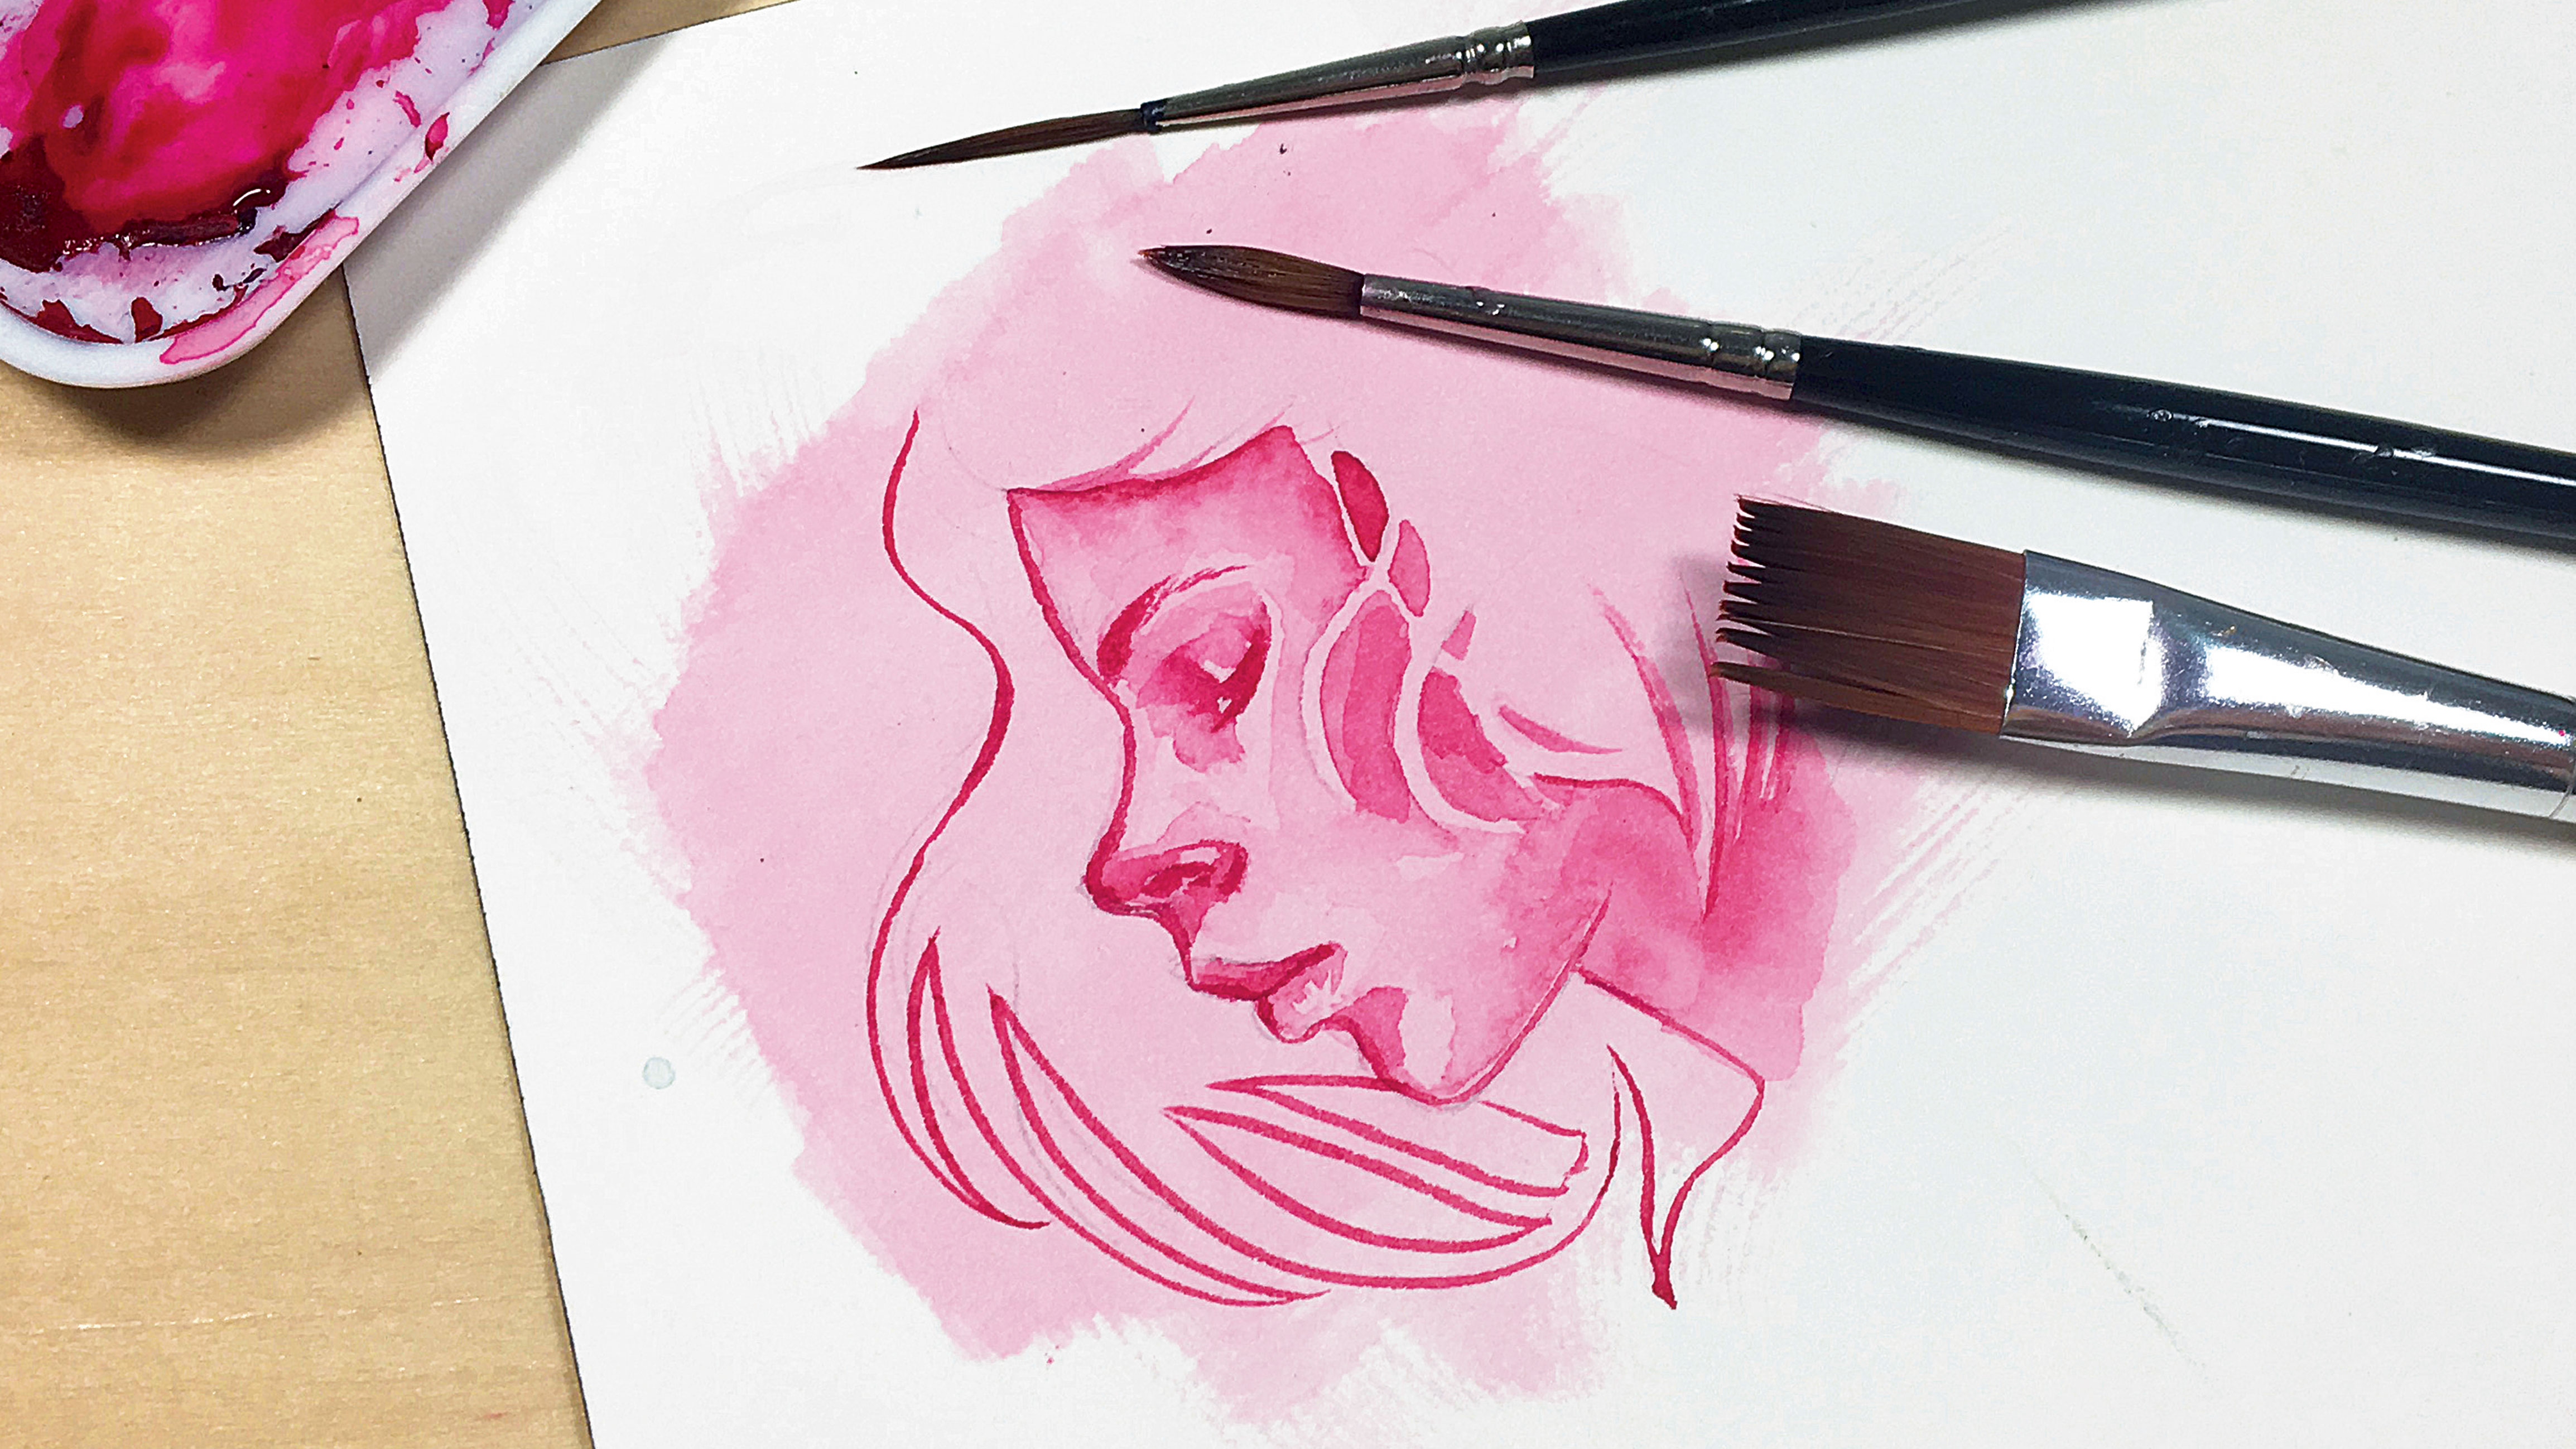
With time and practice, you’ll discover ways in which you can combine techniques to create interesting results. In my portrait above I've combined several different brushstrokes to create a dynamic painting.
For filling in the face, I’ve used my trusty size 2 Round brush, layering several times to build up my value range. Meanwhile I’ve used my liner brush on the hair outline. This enables me to more easily maintain a consistent width in the stroke.
If you look closely, you'll see pencil marks in the bottom left hand corner. To lighten pencil lines before applying watercolour, roll a kneaded eraser over the lines to gently lift the graphite. Later on, this makes it easier to erase once the watercolour is dry. Finally, I’ve used a Flat brush to lay down a base layer with dry brush texture at the edges.
Watercolour requires some intuitiveness and so the more comfortable you are with your brush techniques, the more receptive you’ll be to those magical moments when the watercolour tells you what your next move will be!
This article originally appeared in issue 163 of ImagineFX, the world's leading magazine for digital artists. Subscribe here.
Related articles:

Thank you for reading 5 articles this month* Join now for unlimited access
Enjoy your first month for just £1 / $1 / €1
*Read 5 free articles per month without a subscription

Join now for unlimited access
Try first month for just £1 / $1 / €1
