6 Instagram hacks to transform your feed
Use these hacks to tackle common irks on Instagram.

With over 800 million users, Instagram's popularity shows no signs of waning. It even launched its own TV platform, IGTV, recently. And while there are plenty of ways to make money on Instagram, whether that be via Stories or the main feed – or a mixture of the two – its interface can still irritate.
If you find yourself frustrated at the inability to clearly paragraph in Instagram, or are wondering how to find the hashtags most relevant to your feed and audience, you're in luck. Read on to discover our top Instagram hacks to make your life easier, your feed look better, and to hopefully attract more followers to your profile.
01. Insert line breaks in Instagram

Not being able to separate text is probably one of Instagram's most annoying features. Luckily there are a few workarounds to add some lovely white space into your captions.
The easiest way to add a line space is to press return, add a special character – such as _ or >> or an emoticon, press return again and then keep on typing. Instagram will give your special character or emoticon a line of its own.
If you find it fiddly to do this within Instagram's interface, you can also create your whole caption complete with line breaks in a separate app such as Notes, and then copy and paste it over. Instagram will copy the formatting of your original post, and you will have lovely line breaks separated with your chosen characters or emoticons.

The second way to create line breaks involves creating actual white space instead of using special characters to trick Instagram. Here's how you do it:
Write your caption in Instagram, press return (do not add a space after the end of your content or else this won't work) and then copy and paste the following into the interface:
Get the Creative Bloq Newsletter
Daily design news, reviews, how-tos and more, as picked by the editors.
[⠀⠀⠀⠀⠀⠀⠀⠀⠀]
You can either copy the spaces between the brackets, or copy the whole thing and then delete the brackets – be sure not to delete the spaces between them. The result should be beautiful clean white space in your caption. Repeat as many times as necessary.
If you become tired of copying and pasting these special brackets/spaces to get your line breaks, you can always add them automatically using Text Replacement (more on that in tip #5).
02. Maximise your bio in Instagram
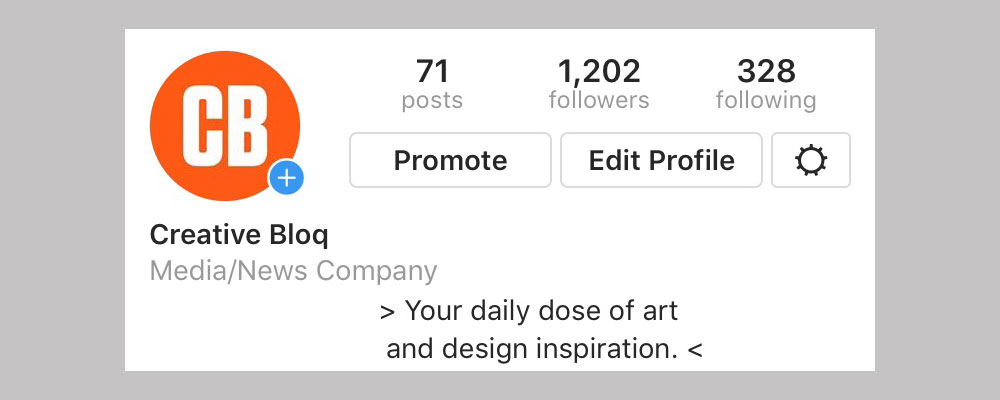
Your bio should be short, to the point and provide as much information about you as possible in the 150 characters available. To create a bio that has spaces, write it first in Notes or another app, and then copy it over. You can also create interesting alignments by adding in spaces before you copy it. You may have to fiddle around a little bit to get the perfect centre alignment, for example, but it'll be worth it.
Don't forget that your bio is the only place on your profile that you can add a live link, so make it a good one. You can also add relevant emoticons, hashtags and links to other accounts here to make your profile more likely to appear in searches.
03. Make rainbow text in Stories
Did you know you can make the text in Instagram Stories rainbow coloured? Here's how...
First, write something on your Story (press the Aa button and then type your message), and then select all the text. Hold until a little white pointer appears. Then, with a different finger, tap and hold a colour, until the spectrum of colours appears. Do not let go. The final step is to drag both fingers to the left, one across your text, another across your colour spectrum. Go slowly and you should get a rainbow effect.
Don't worry if you don't get this first time as it takes a bit of practice. If it's not working, it's likely that you didn't select your text properly. Check back that a little white pointer has appeared and try again.
04. Find relevant hashtags

Sometimes it can be hard to think up hashtags, which is why it's useful to be able to see a whole bunch of related hashtags based on the one you can think of.
To do this, go to the magnifying glass 'Explore' function and type in a keyword. Tap across to the Tags column and then choose a hashtag from the list you see. When you click on that page, you'll get a whole page of posts with that hashtag. Click on a hashtag and look at the grey bar that says Related. This shows you all the related hashtags, and should give you plenty of ideas for which hashtags to use.
05. Use text replacement to add hashtags
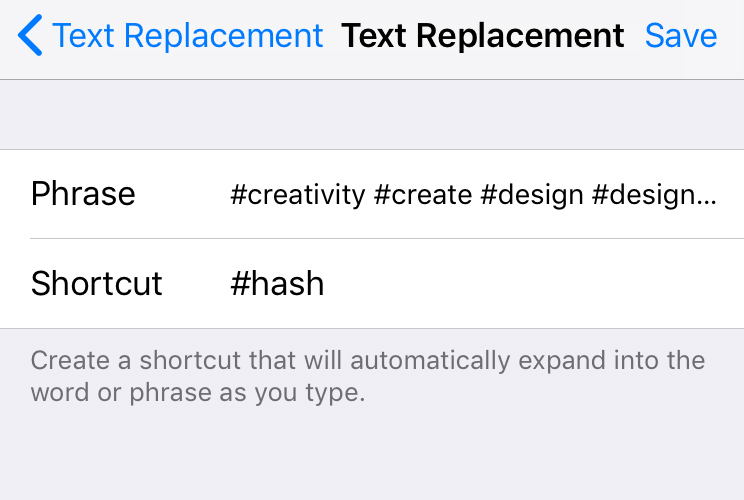
Once you've got a list of hashtags you regularly use, you'll probably get bored of typing out the same ones every time you post. The good news is you can use text replacement to speed up this process.
To do this on iOS, go to Settings > General > Keyboard, and then find Text Replacement. Click on the + sign to add a new shortcut.
Under Phrase, type the hashtags that you want to appear, for example, #creativity #design #designadvice #designinspiration. Then, in the Shortcut section, add the word or words that you will type to get those hashtags, for example, #hash.
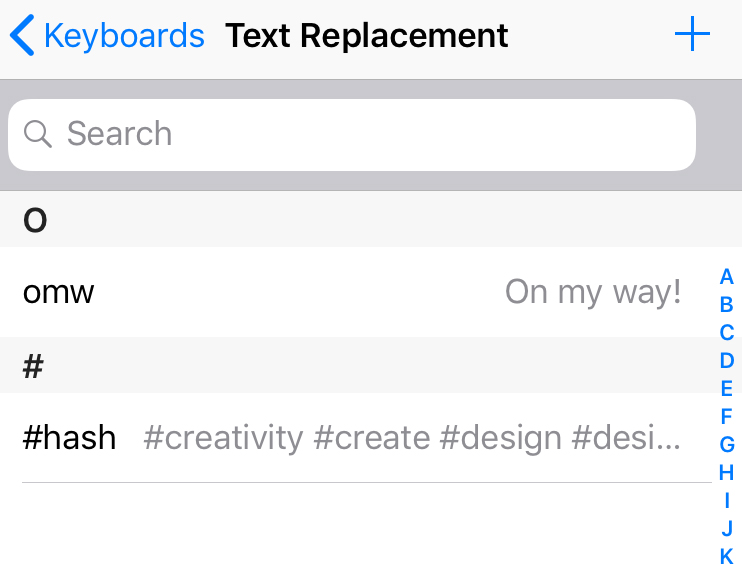
On Android, the process is pretty similar. To get there, go to Settings, Language and input, Google Keyboard, Text correction, and then Personal Dictionary. Once you're in the dictionary, select your language and click +. This allows you to add shortcuts as above to access hashtags faster.
Once these are saved, the next time you type #hash in Instagram (or anywhere on your phone, so watch out), these hashtags will appear. You can save as many different combinations of hashtags as you like, and can also use text replacement to insert line breaks, or write automatic replies to common enquiries you might get on Instagram, for example.
06. Access your favourite filters faster
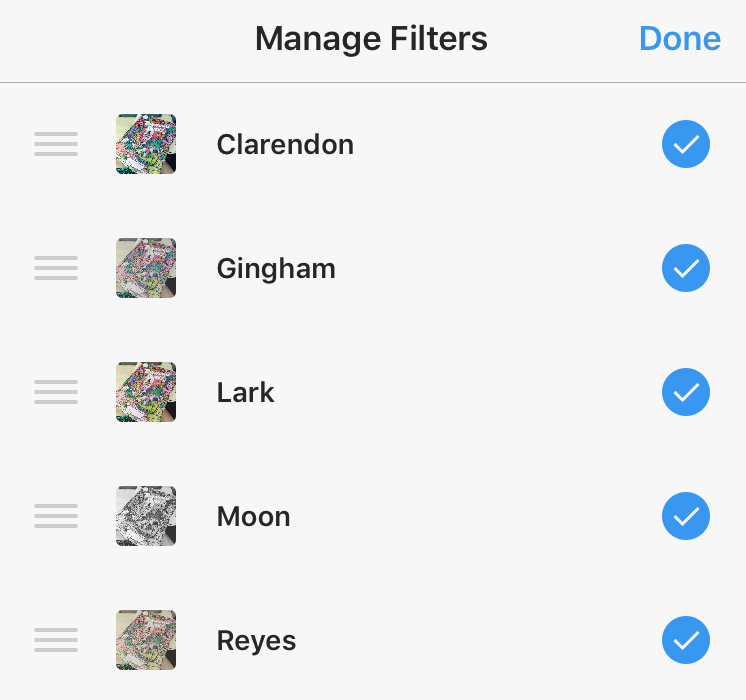
If you usually use the same filters – and for visual cohesion on your feed, we recommend you do – then you might be pleased to know you can rearrange them so the ones you use the most are easiest to access.
To do so, go to Filter when you post a photo or video, and then scroll right to the end of the filters, where you'll see it says Manage. Click on this and you'll see a list of all the filters. If you hold down the three lines of each filter you can move them around, or even uncheck the blue tick to hide any filters you never use. Don't worry, this isn't permanent, you can easily rearrange the order later on, or unhide any hidden filters again later by checking the circle if you change your mind.
Read more:

Thank you for reading 5 articles this month* Join now for unlimited access
Enjoy your first month for just £1 / $1 / €1
*Read 5 free articles per month without a subscription

Join now for unlimited access
Try first month for just £1 / $1 / €1

Rosie Hilder is Creative Bloq's Deputy Editor. After beginning her career in journalism in Argentina – where she worked as Deputy Editor of Time Out Buenos Aires – she moved back to the UK and joined Future Plc in 2016. Since then, she's worked as Operations Editor on magazines including Computer Arts, 3D World and Paint & Draw and Mac|Life. In 2018, she joined Creative Bloq, where she now assists with the daily management of the site, including growing the site's reach, getting involved in events, such as judging the Brand Impact Awards, and helping make sure our content serves the reader as best it can.
