How to model a complex 3D city scene in Blender
17 expert tips and useful advice on creating an urban scene.
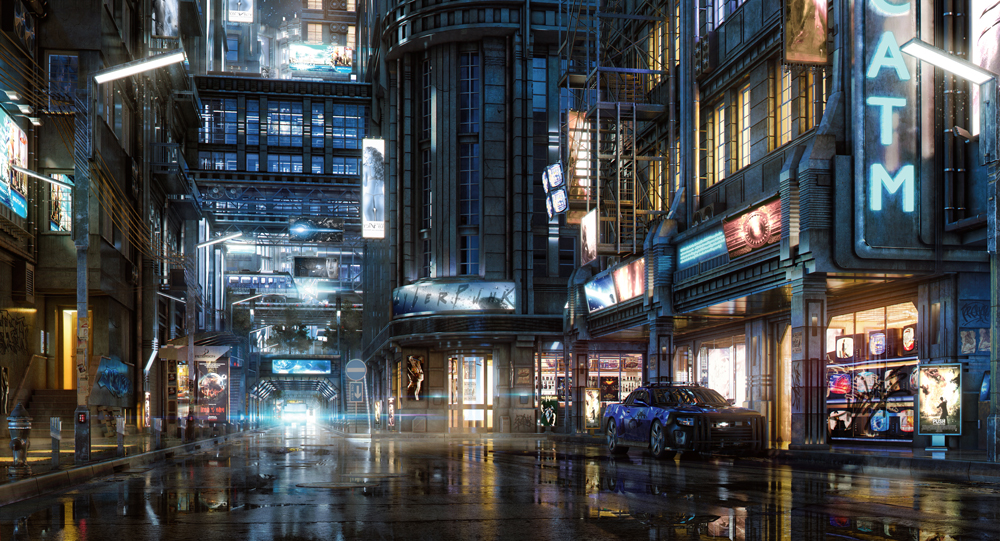
Creating a complex 3D city scene is no small undertaking, and a project such as this one requires a significant amount of repetitive modelling actions.
To explain the process behind creating this, the following steps and tips should guide you through my workflow in Blender. They should also come in handy for users of various software – and prove to be more than just a Blender tutorial.
01. Gather ideas and inspiration
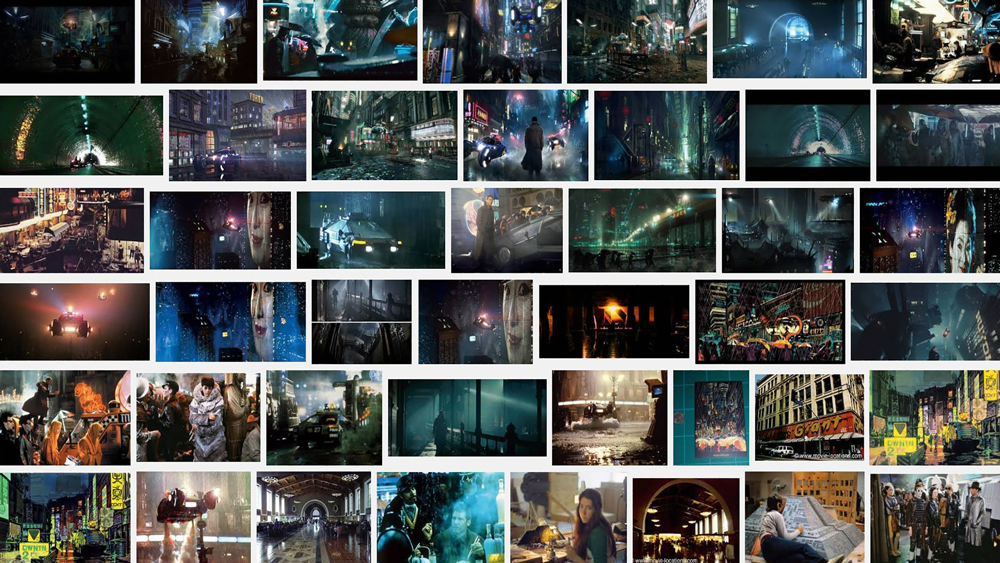
Forming ideas and deciding what to make is the first step to creating anything. Inspiration is everywhere; in everyday objects, movies, books and the art of others. The idea to make a noir and slightly cyberpunk city scene came to me after watching Blade Runner. I wanted to see if I could achieve this look with my skills and Blender software.
02. Use reference
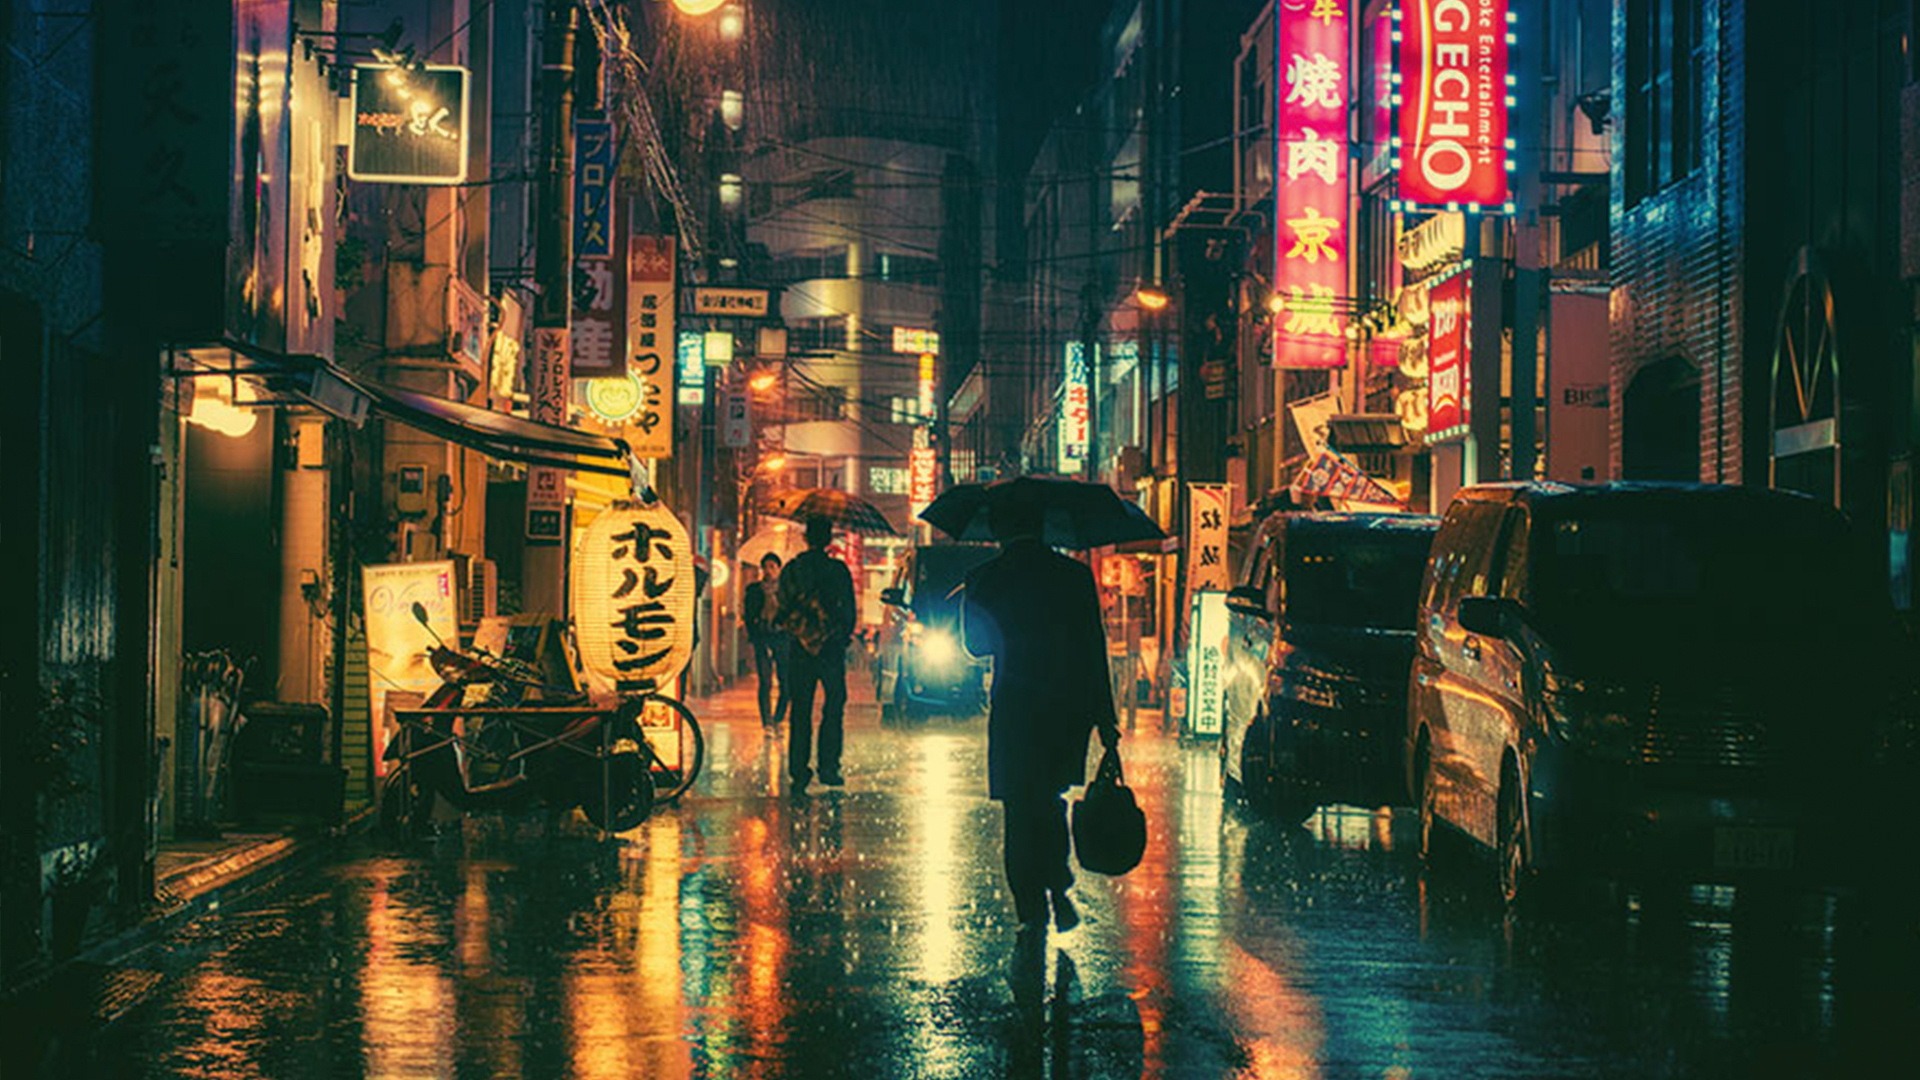
It's not always necessary to use reference during the creation process, but it makes life much easier. Using real-life pictures saves time, as instead of making things from scratch, you can recreate them from photos and ensure they look correct. I used plenty of photos of colonial buildings, wet roads, street lamps, bus stops, different materials, and cyberpunk/futuristic game and movie trailers, such as Blade Runner (pictured).
03. Sketch out a plan
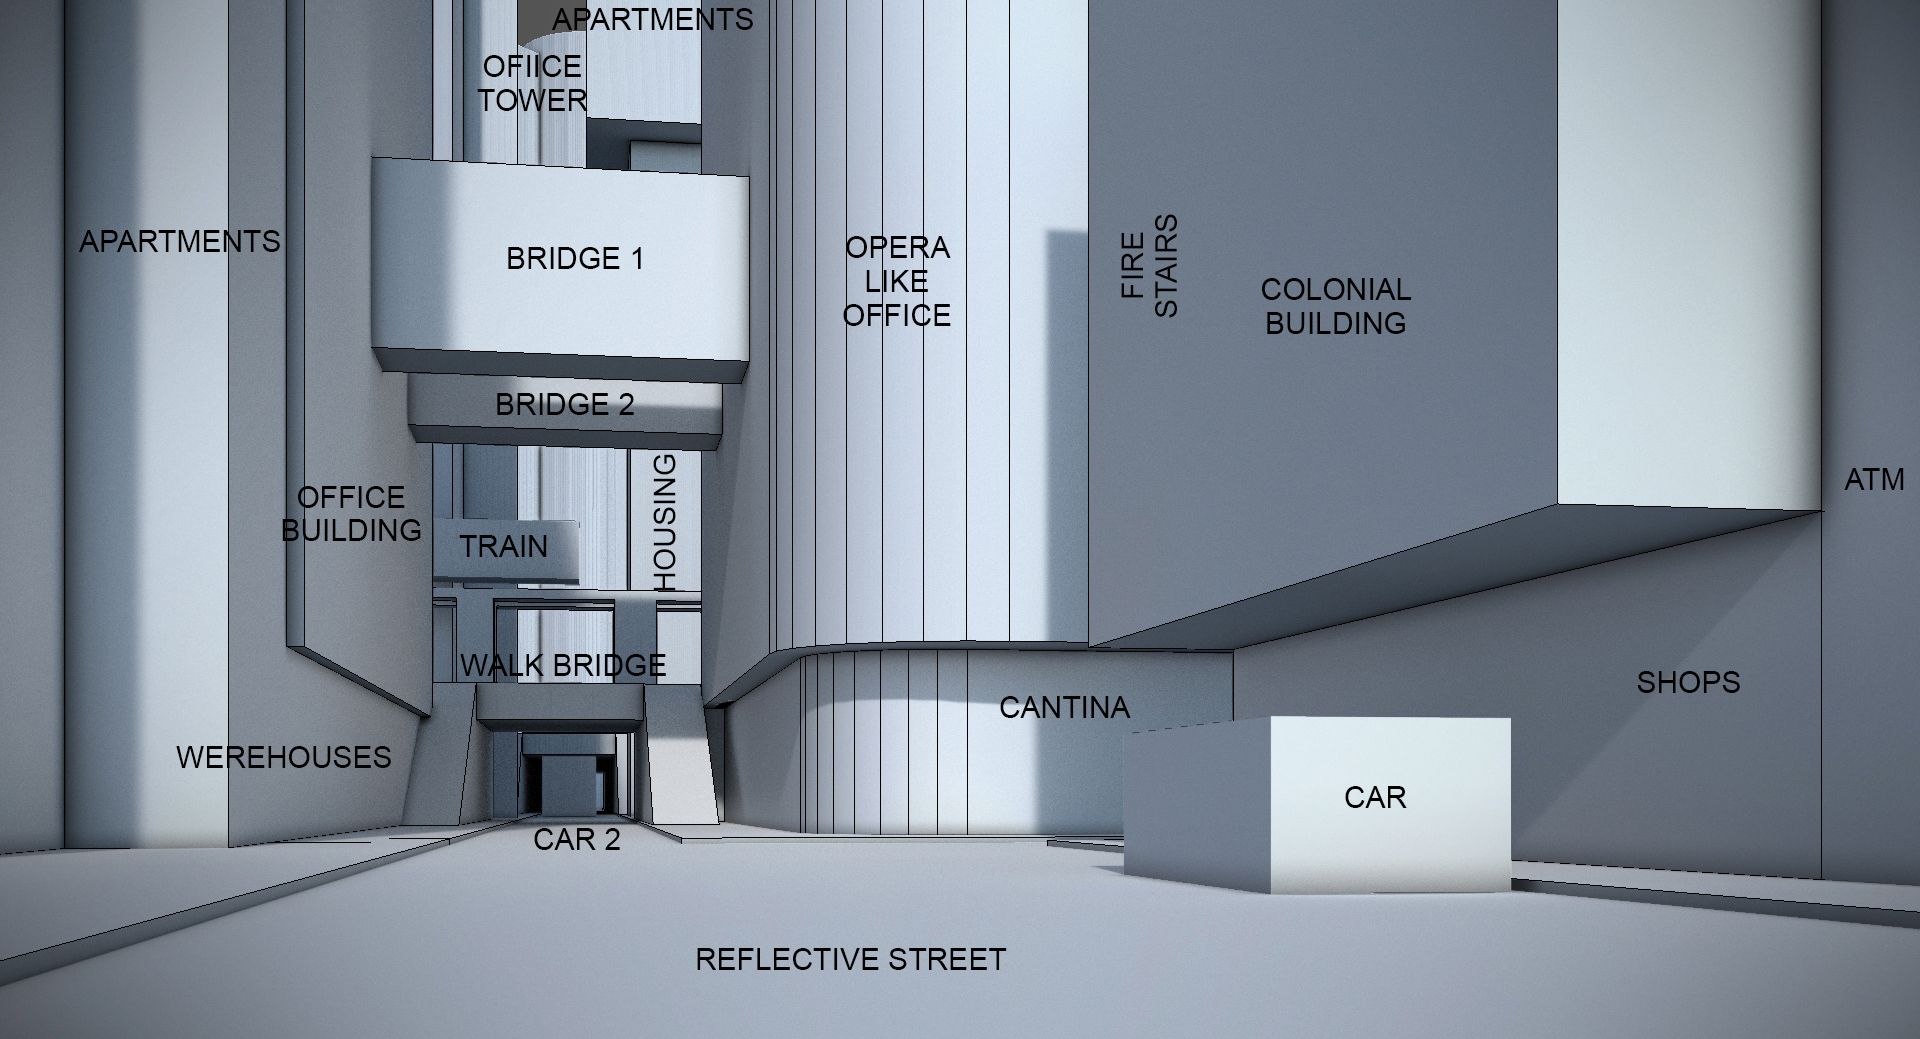
Once the idea is established, it’s good to make a general concept of the scene we want to create. Some people sketch doodles, others do matte paintings or make a photomontage. I sketch directly in 3D software by setting a camera and placing the basic objects to create a general comp. Here I set two rectangular planes as a road crossing, then added multiple cuboids, like buildings and vehicles.
04. Create a composition
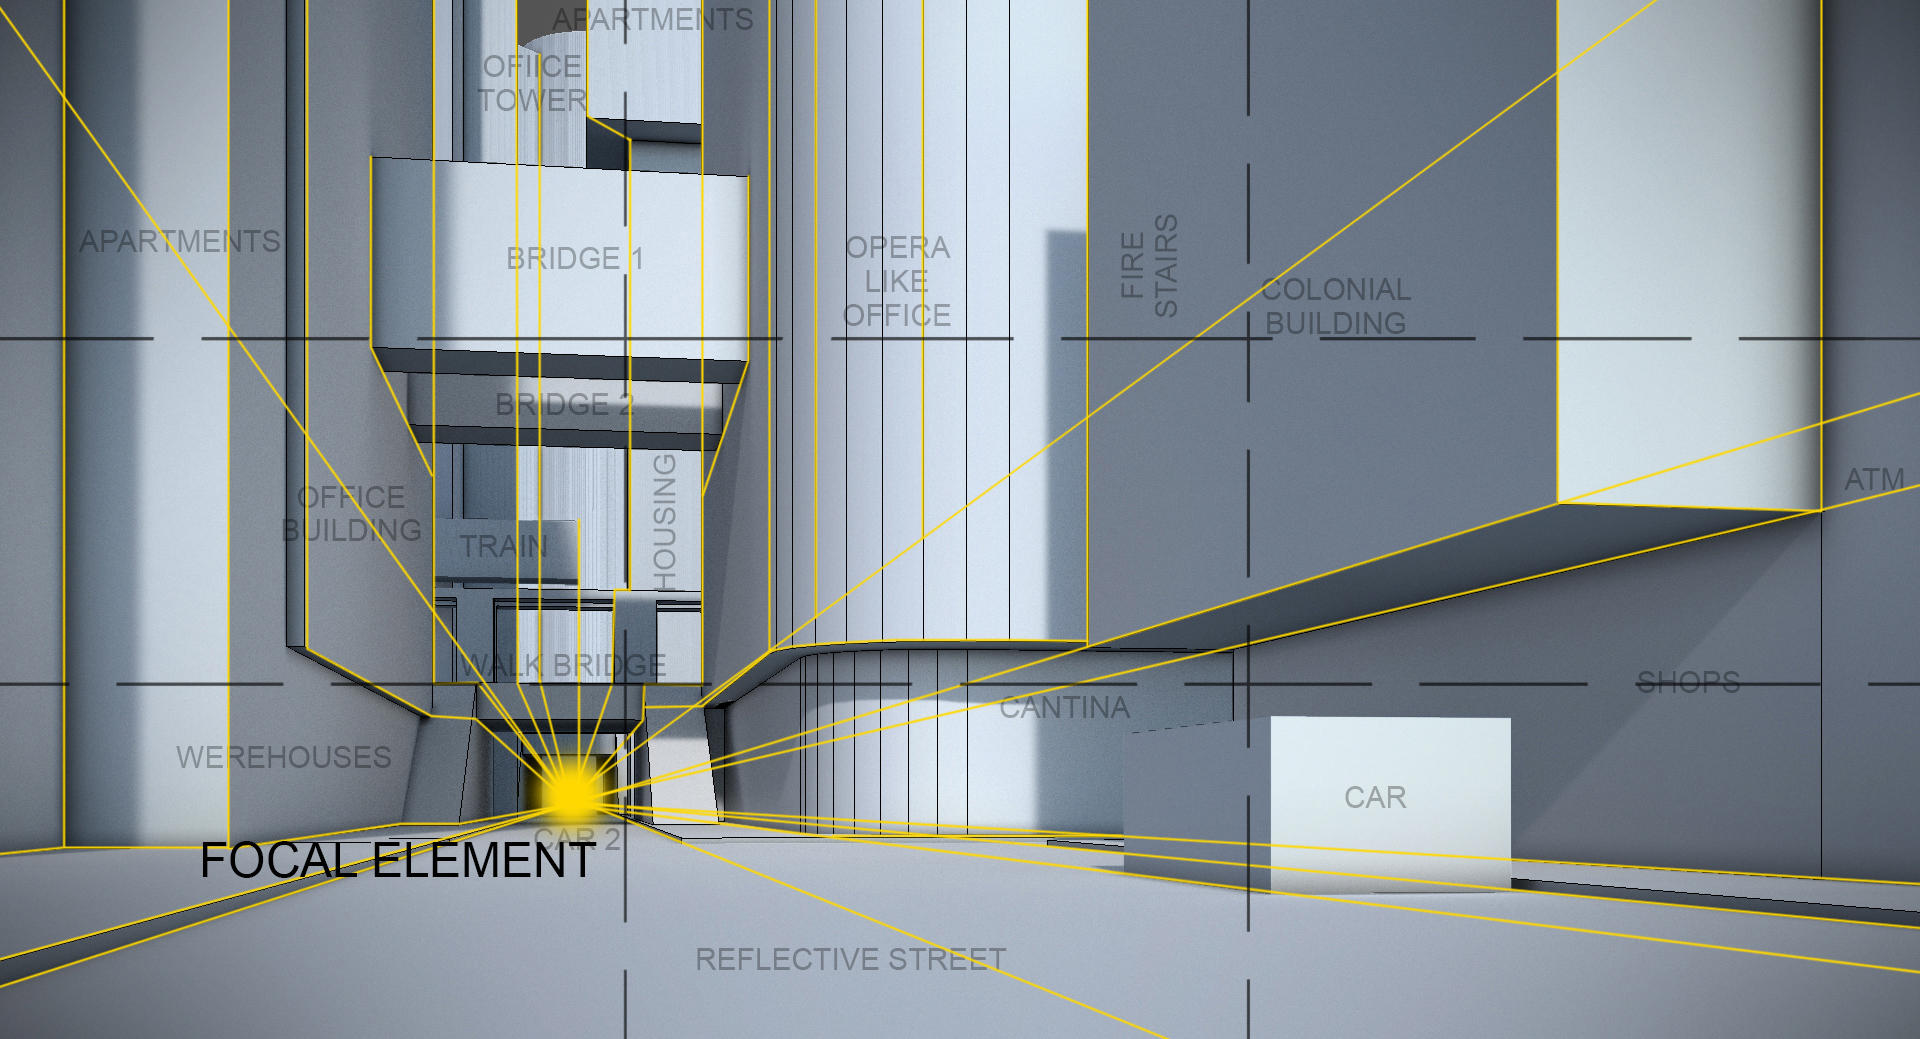
Working with primitives allows us to establish our intended composition fast, and change things quickly. At this point, we don’t need to know what type of buildings they’ll be – we just need basic shapes to work as walls for the urban interior, limiting field of view and guiding the viewer. I direct the viewer along the street into the tunnel by placing the guidelines of the buildings from all sides of the picture.
05. Use real-life scale
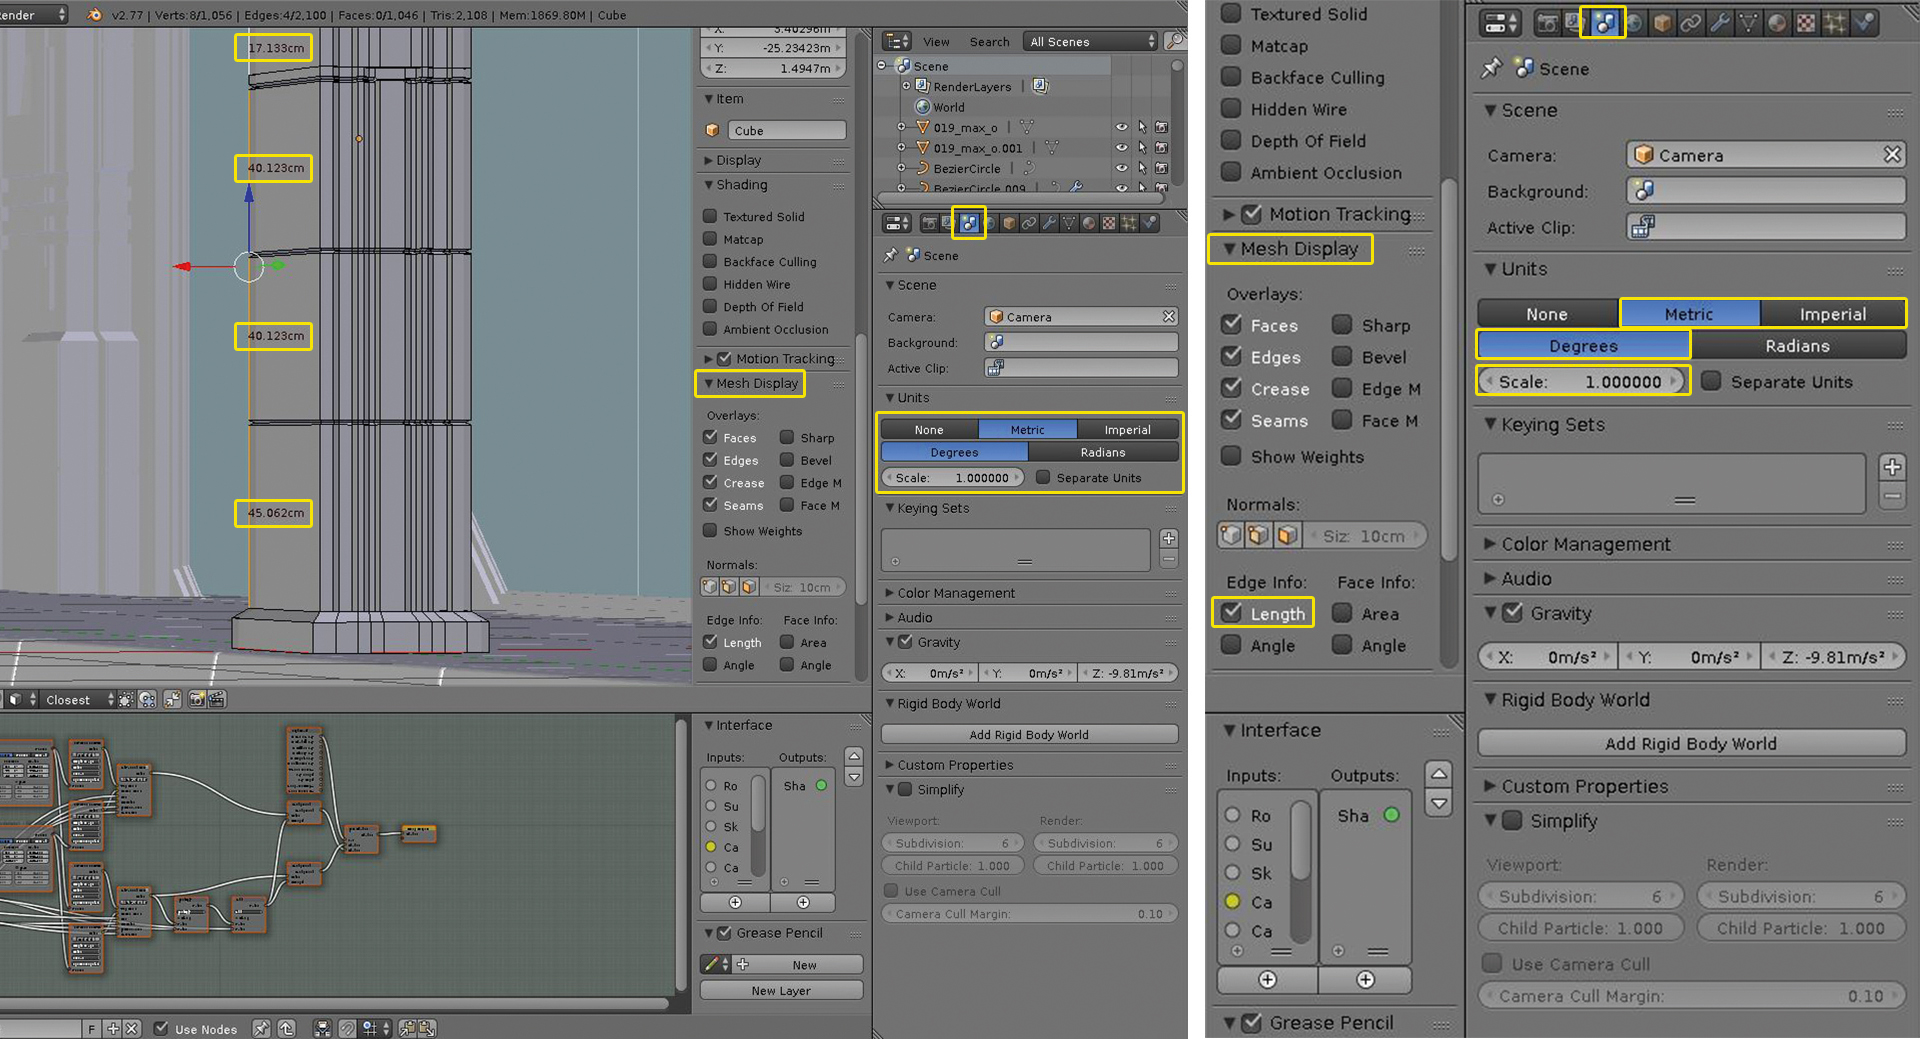
When working with just the basics, it’s still important to use objects to scale – even if the scene is just fantasy. By keeping realistic measurements, it’s easier to achieve reliable results and helps avoid incorrect size relations between objects on the scene and texture inaccuracies. In Blender, change the measurement method in the Scene tab.
Get the Creative Bloq Newsletter
Daily design news, reviews, how-tos and more, as picked by the editors.
06. Model the city structure
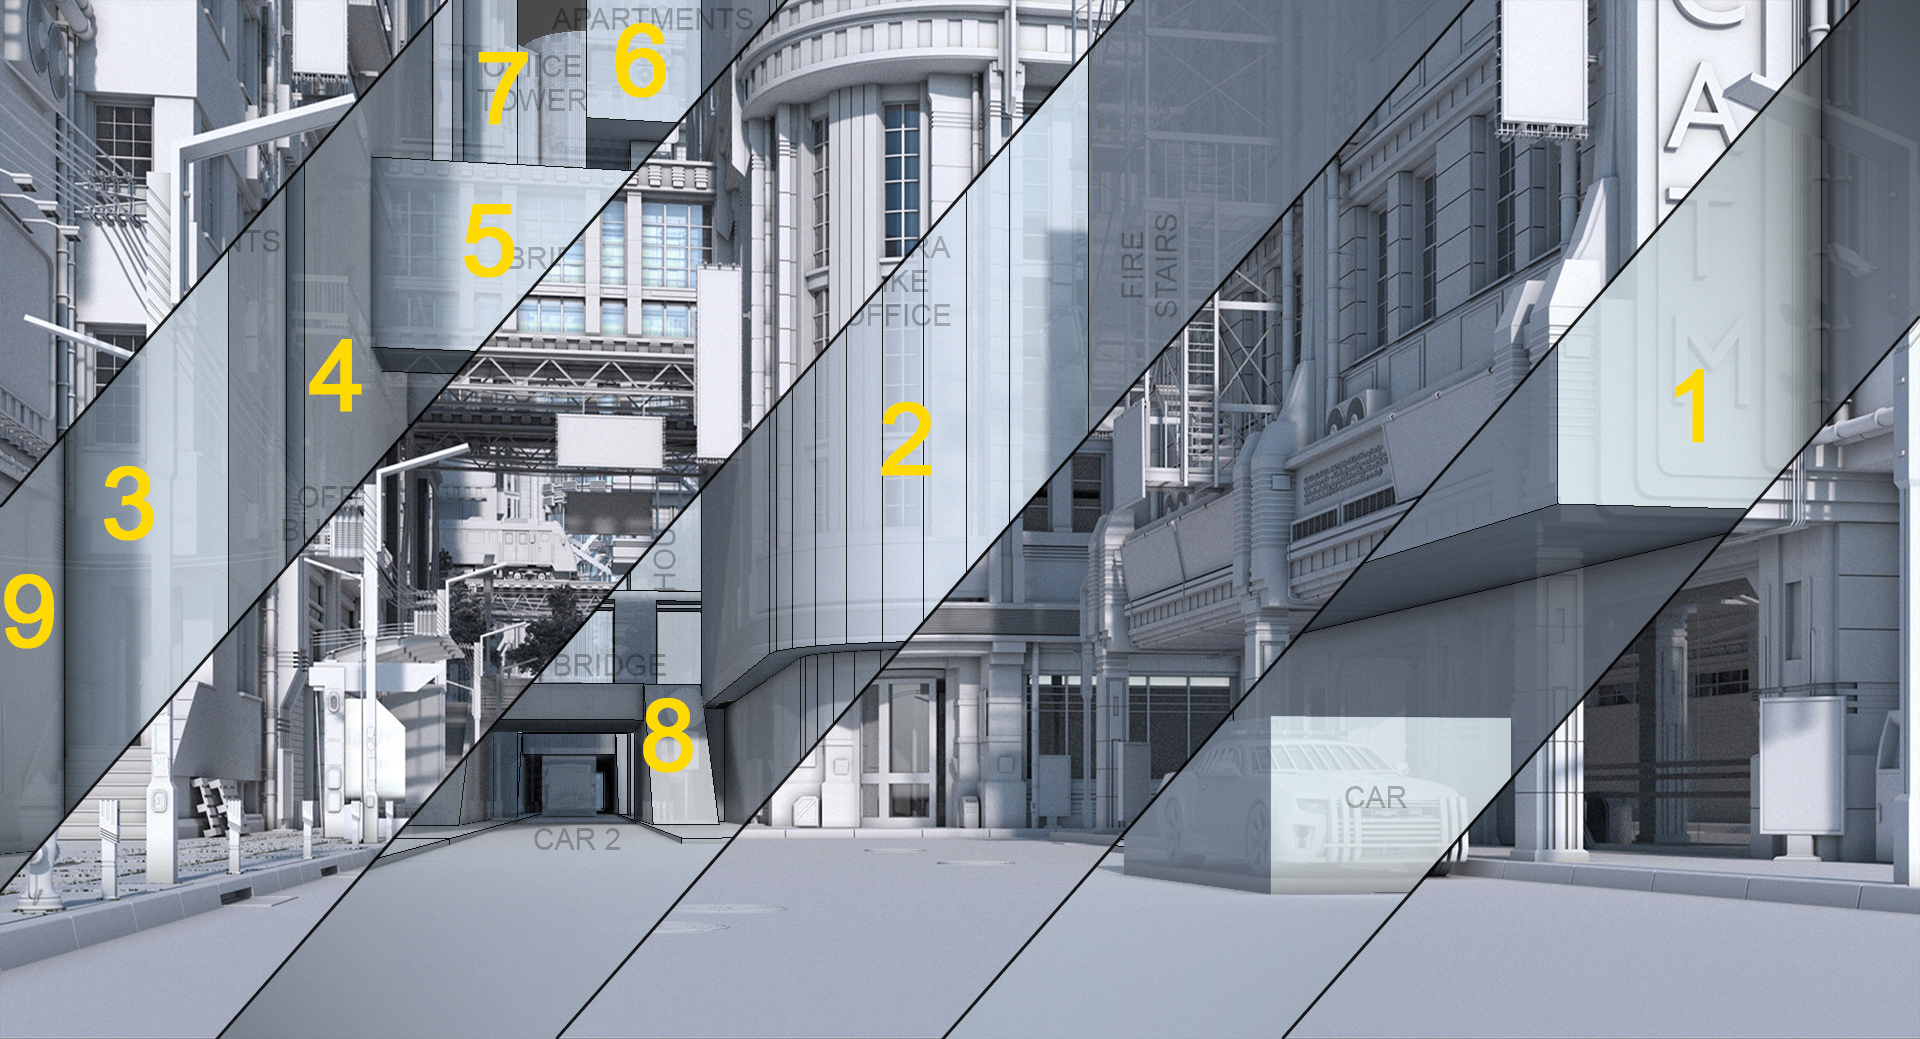
The next step is all about replacing the created basic objects with real objects. Here, all of the gathered reference photos come in handy. A lot of people say that it’s better to work on the whole picture at once, but I like to focus on each individual element at a time. In this case, I make building after building (as the numbers on the illustration show) and make sure that they match more or less stylistically to one another.
07. Repeat basic shapes
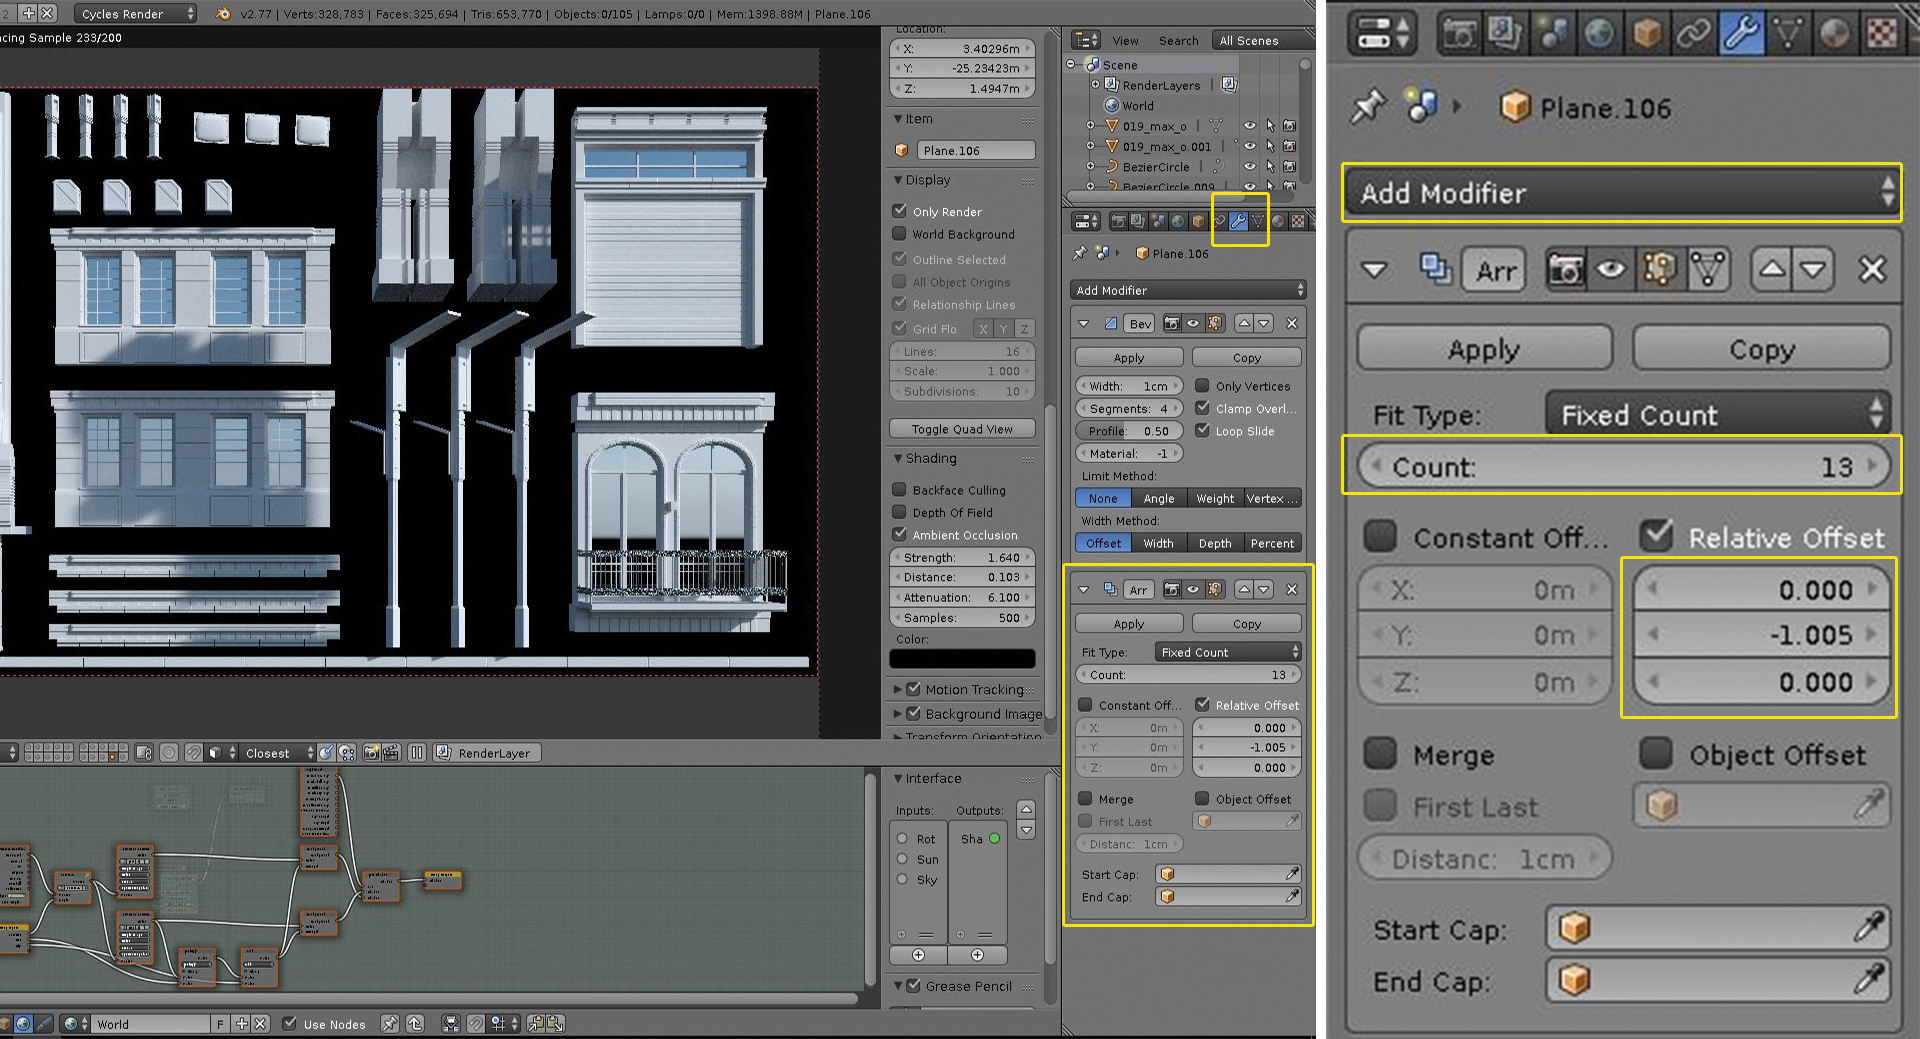
It's vital to use the Array/Modifier function to create buildings in 3D. Create as many repetitive assets as possible: ledges, ornaments, pillars, windows and doors. In architecture, many elements are simple primitive shapes multiplied many times. The more recurrent assets are created at the beginning, the faster work will be in the future.
08. Set the main light source
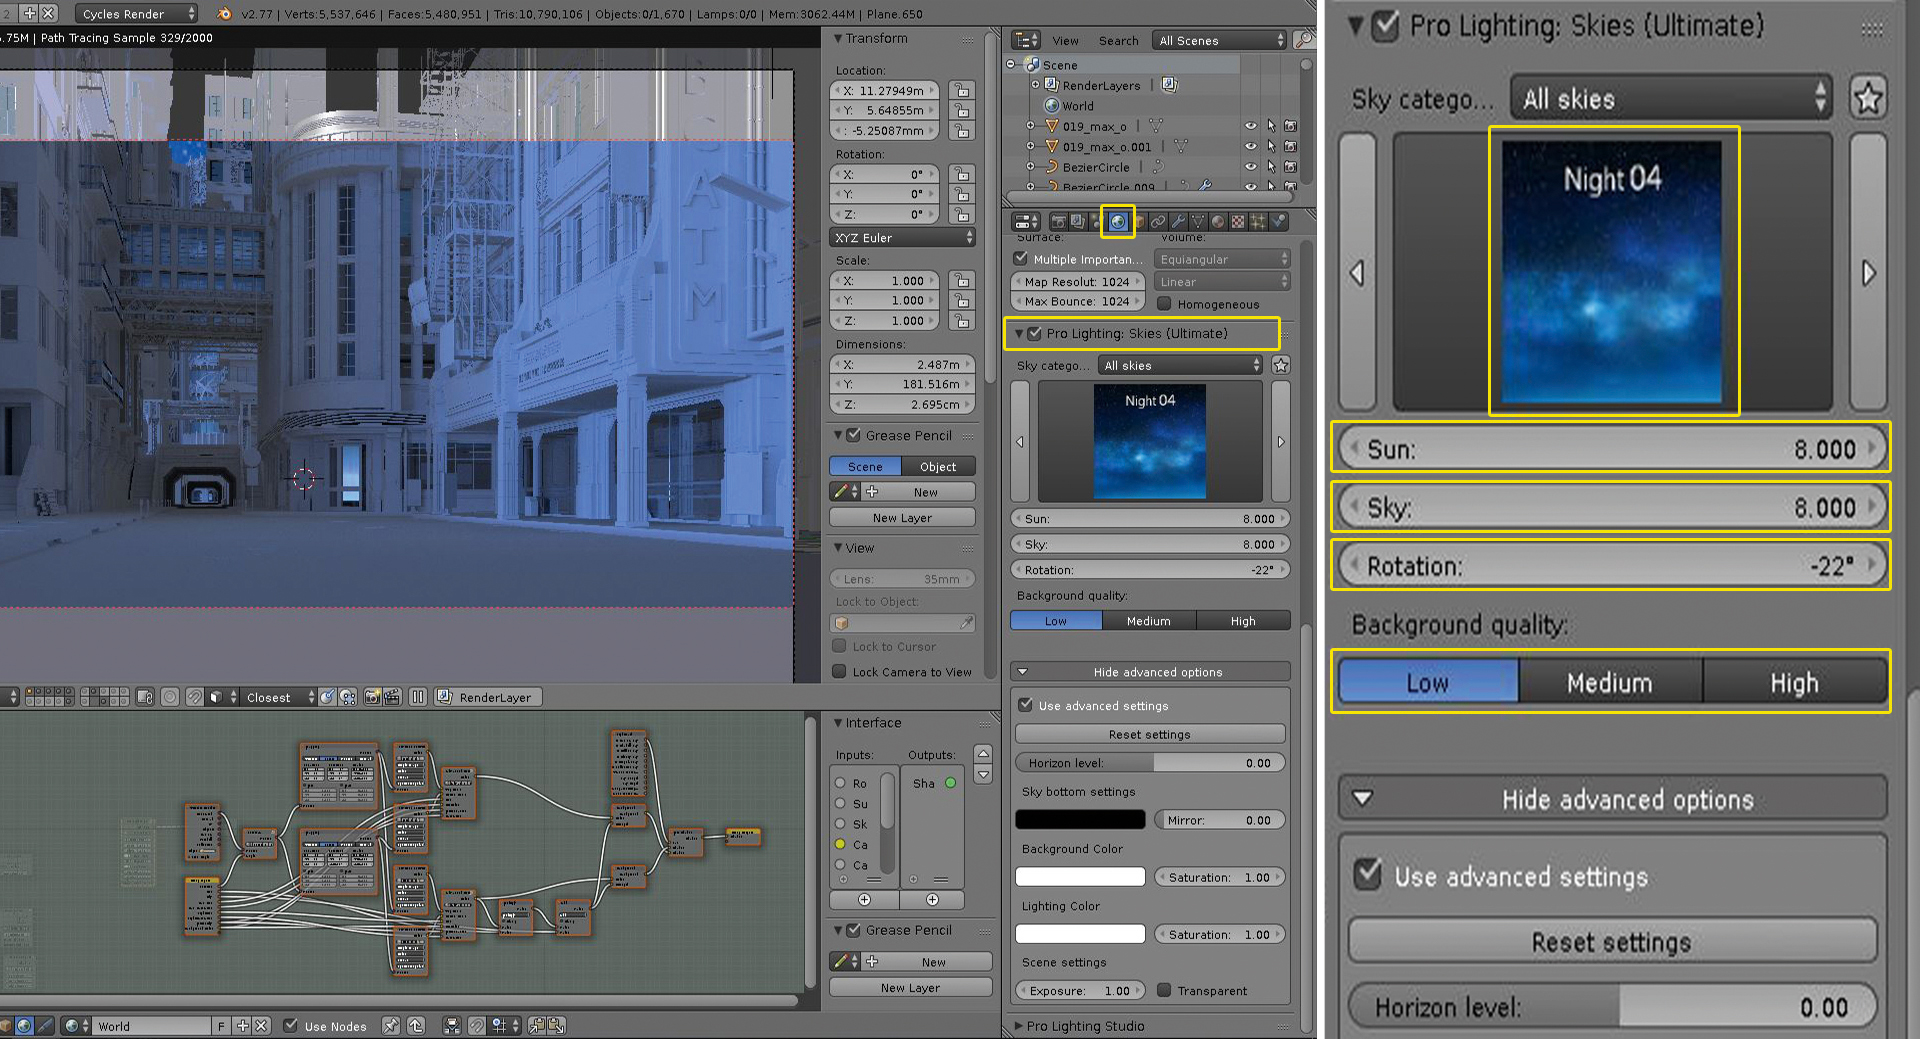
After modelling buildings, it’s a good idea to set the main light in the scene. When rendering architecture, it’s necessary to set the HDRI Environment map as the main illumination source, as in most cases this gets the best results. I use the Pro Lighting Skies Ultimate add on (HDRI map: Night 04).
It’s easier and faster than setting all the nodes manually and allows me to test different lighting styles quickly. Any other night or blue evening environment map will do the trick.
09. Add environment elements

Lighting from the environment texture will reveal the imperfections on modelled surfaces and missing details. It’s a good time to start adding smaller environment elements such as street lamps, bins, pavement tiles and street signs – remembering most of those elements are objects within the Array modifier. The more objects the better.
10. Apply ambient light
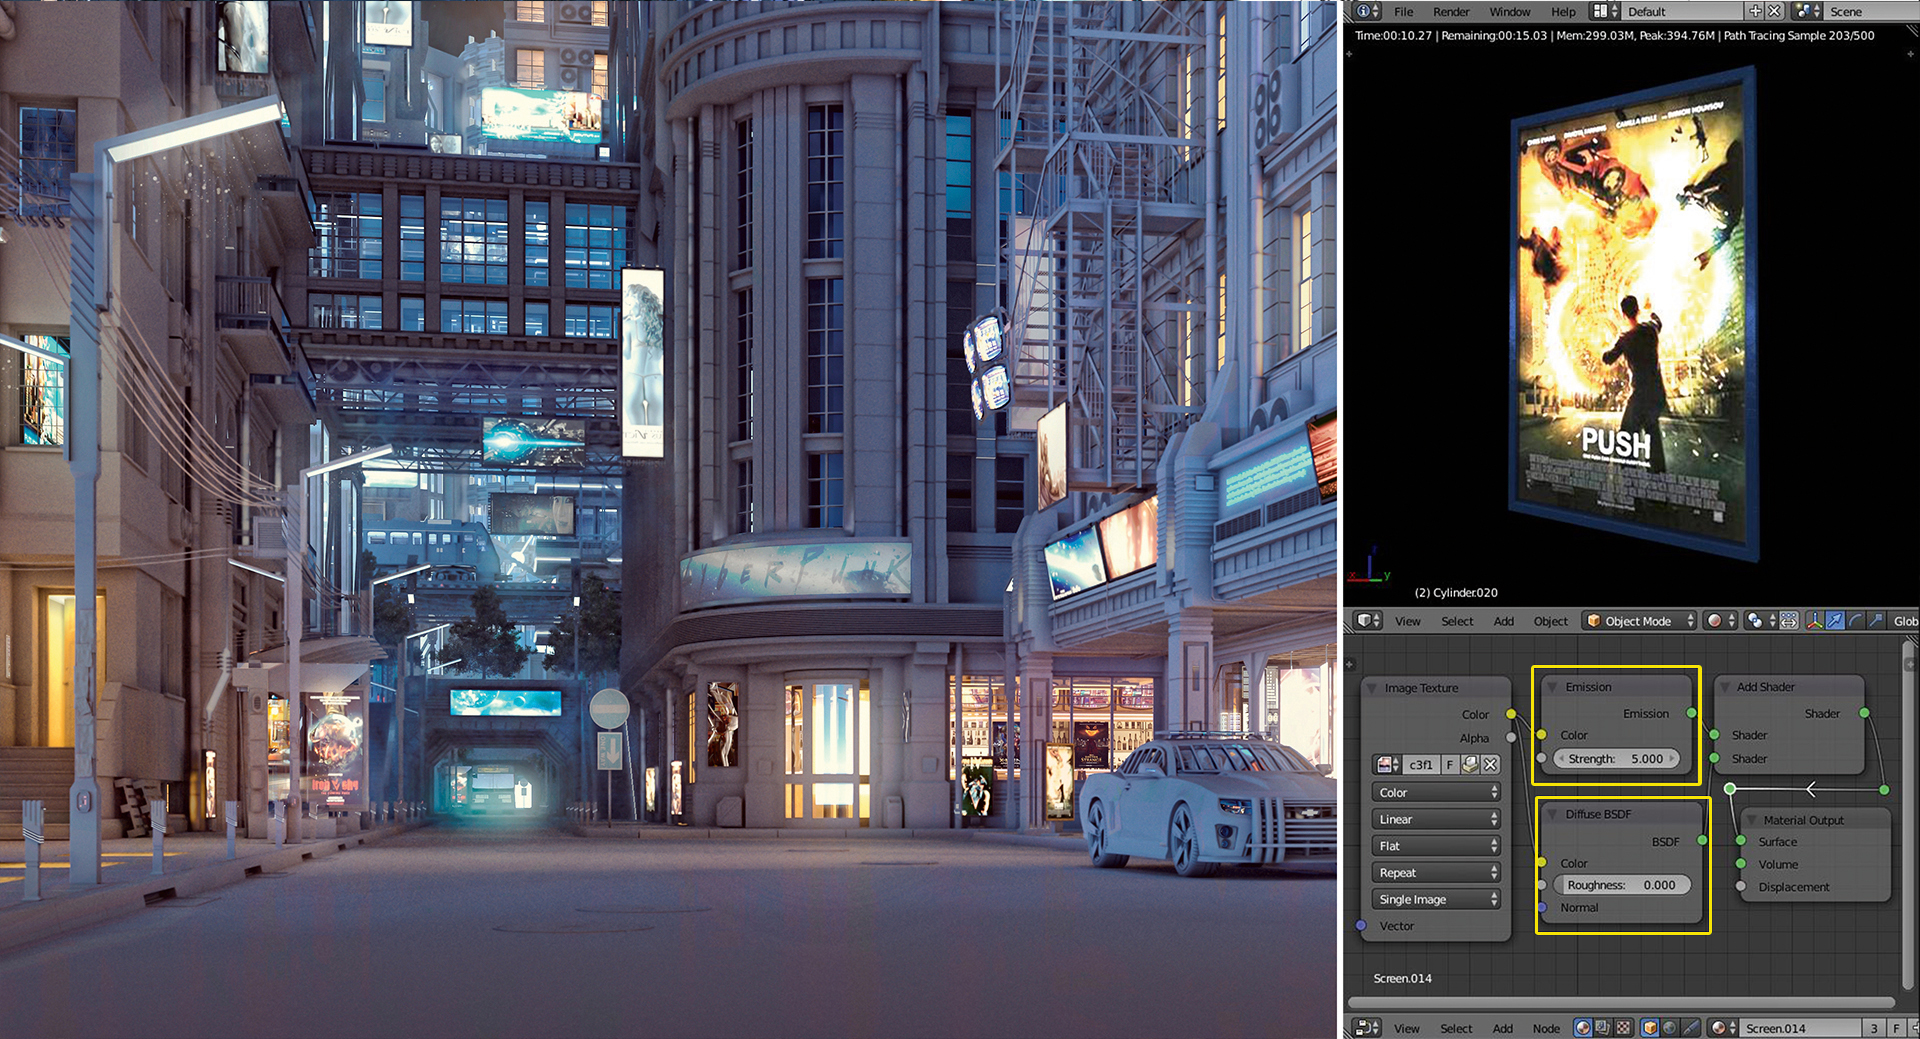
I set the materials on the scene as a white diffuse material (except glass shaders) and add additional light sources. I want to collide cold blue street illumination with warm lights. Additional lights are planes with the Emission shader, except for TV screens and billboards; these are textures plugged into the colour input of Emission and Diffuse nodes, which are added together.
11. Texture main elements
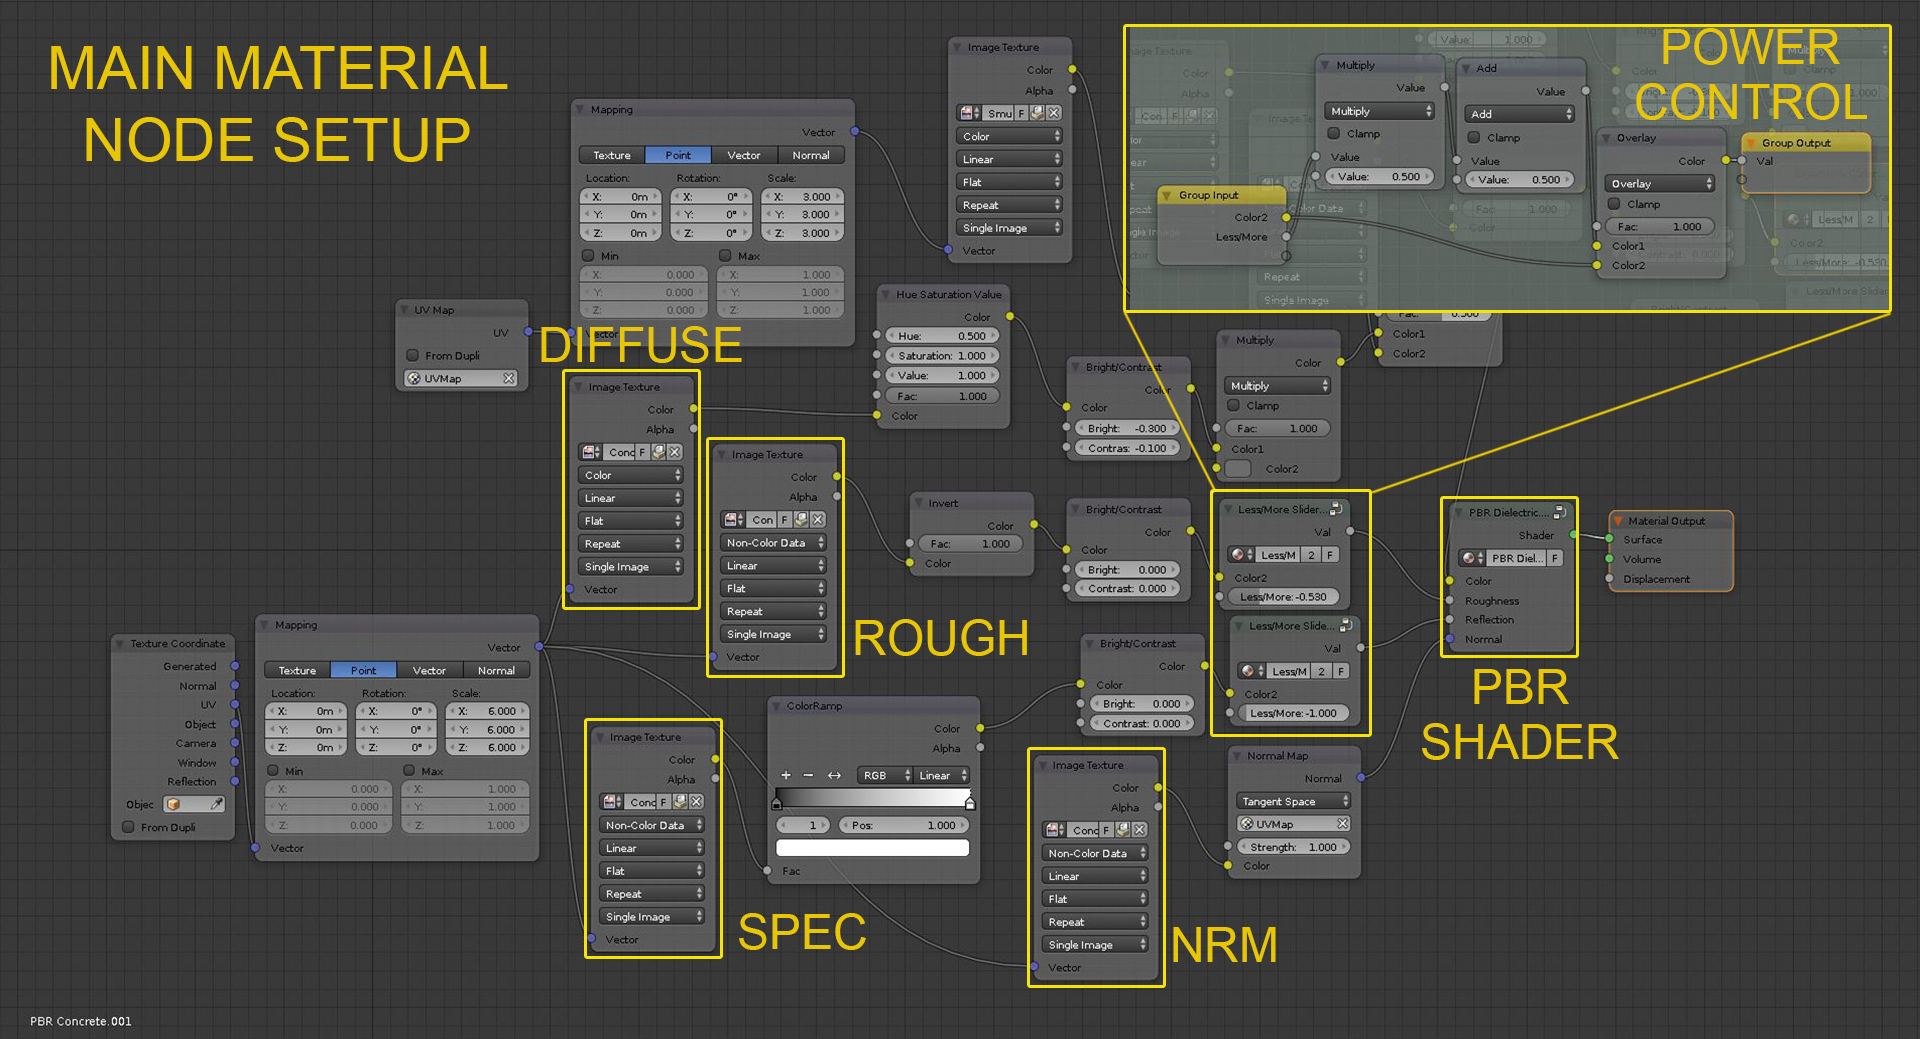
Once the lighting is set, it’s time to add materials. In this particular scene in Blender, it’s easier to tweak materials to look good with lights you’ve already created than the other way around. Practically all materials use PBR shaders (there are plenty of online tutorials on this) and are a mix of albedo, roughness, specular and normal textures.
12. Strike a quality balance
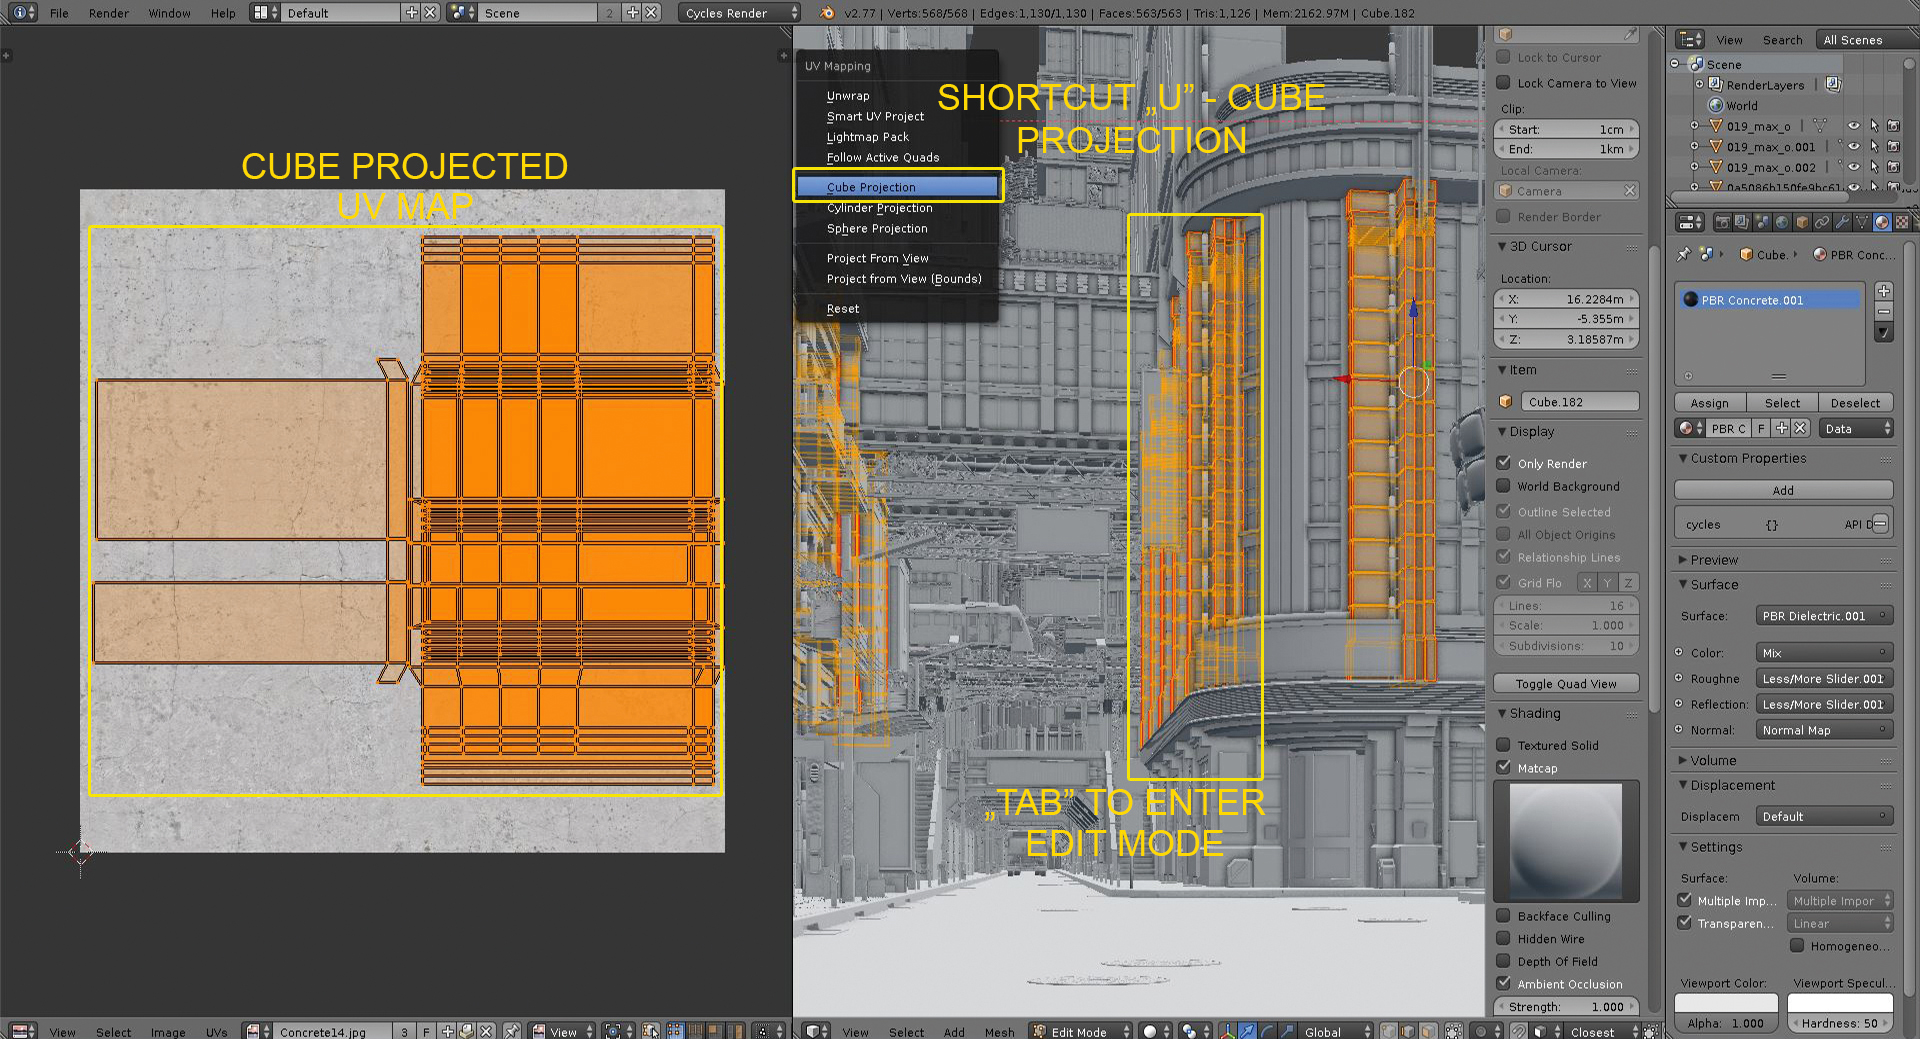
Since the scene is large, be aware of texture size, so as to save memory. The further an element is from the camera, the less detailed it can be and the lower quality texture it requires. There’s no point having high-quality textures in the whole scene, especially when they’ll be visible only in the first row of objects in the picture. The same goes for UV maps of objects – since the scene is full of modelled details, most objects have Cube Projected UV maps.
13. Mix materials
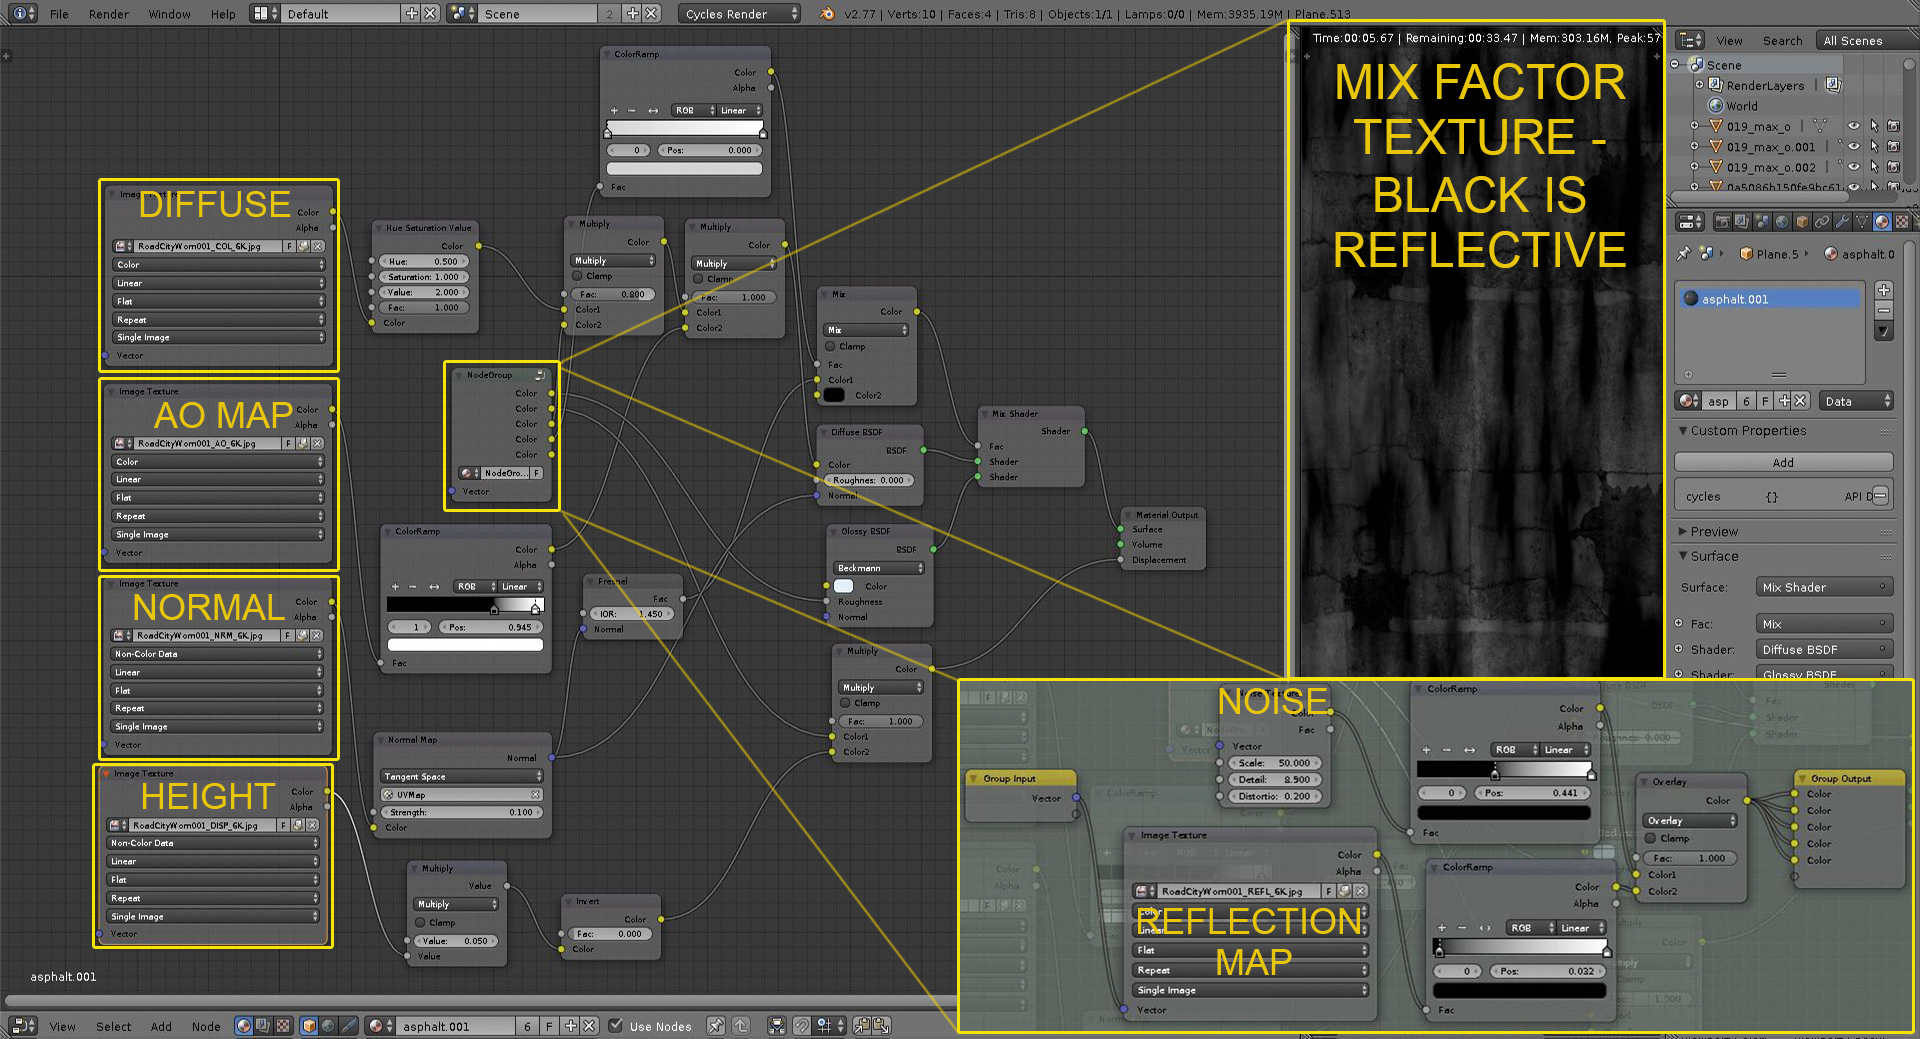
One exception for PBR shaders is the wet road material. This is a mix of two materials that use the same textures, the only difference is the first is very rough and the second is very smooth and reflective. When mixing these materials, I use the noise texture added to hand-painted black or white textures created in Texture Paint mode.
14. Make details
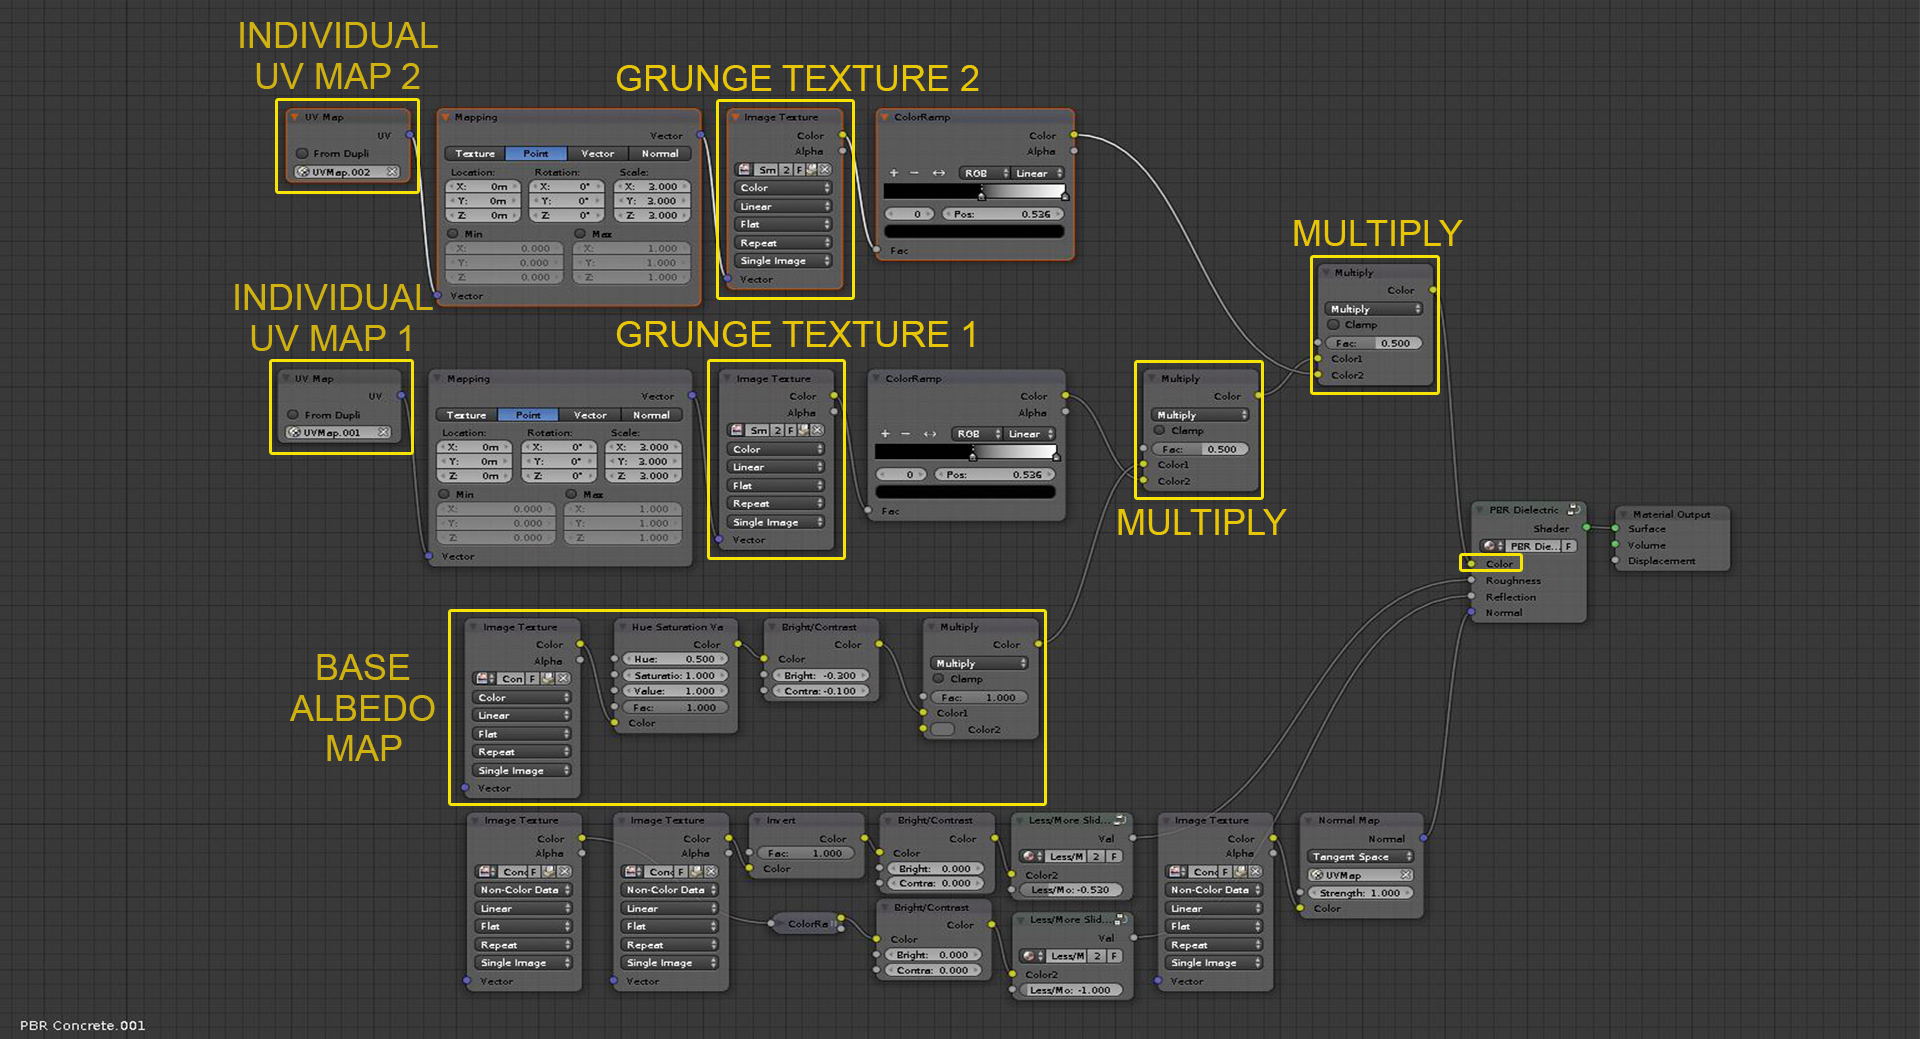
After all the main materials are set and are working well with my lighting, it’s time to add some imperfections, such as dust, scratches, drips, water streaks and cracks. This can be done by simply multiplying the Diffuse map with a ‘grunge texture’ (with its own UV coordinates). To add grunge details in a couple of places, I use Substance Painter as a material generation tool, for example with the street lamps and some of the ledges.
15. Render layers
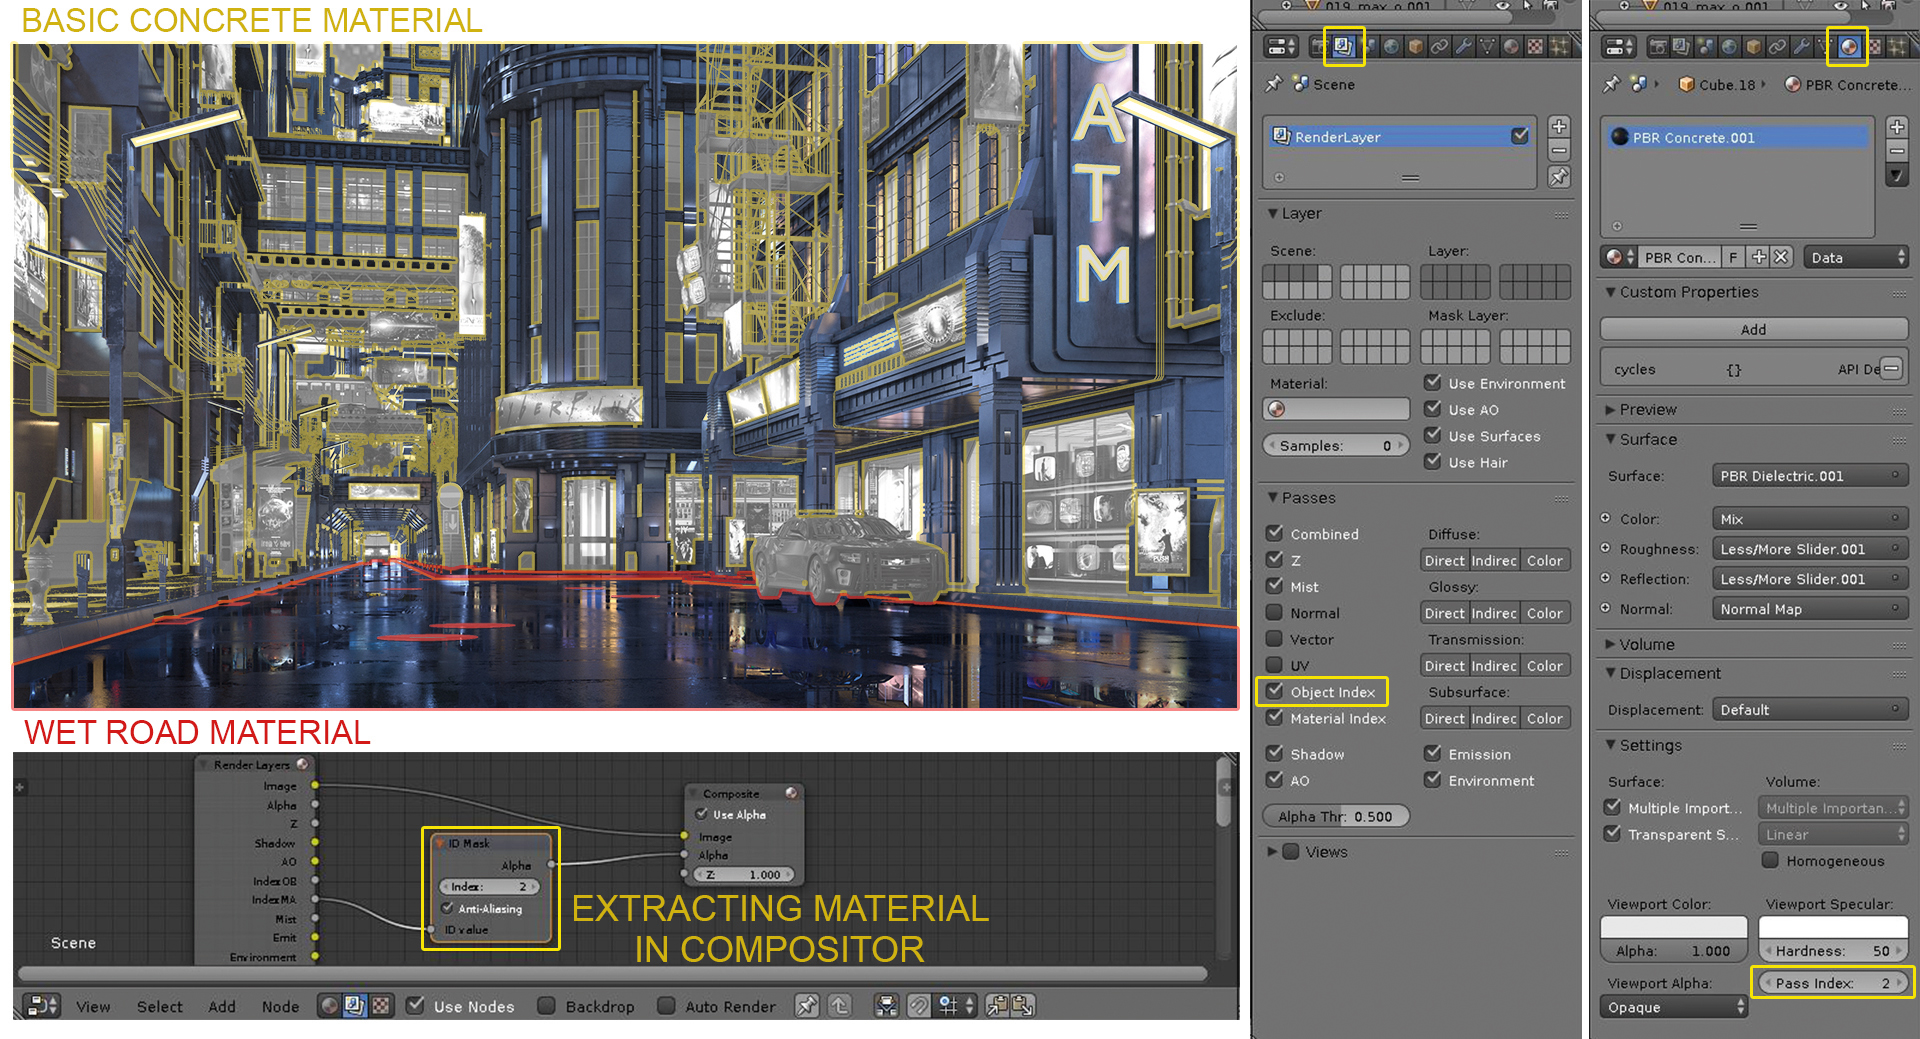
I render my scene using Cycles Render Engine but it doesn’t look like it will in the end. It’s not important to get a 100 per cent perfect look directly in Blender. Things can be fixed in post-processing, so it’s a good idea to render the main materials as separate render layers, giving them a different Pass Index in the Material tab. Then it’s easy to extract them after rendering is finished for further editing.
16. Make two renders
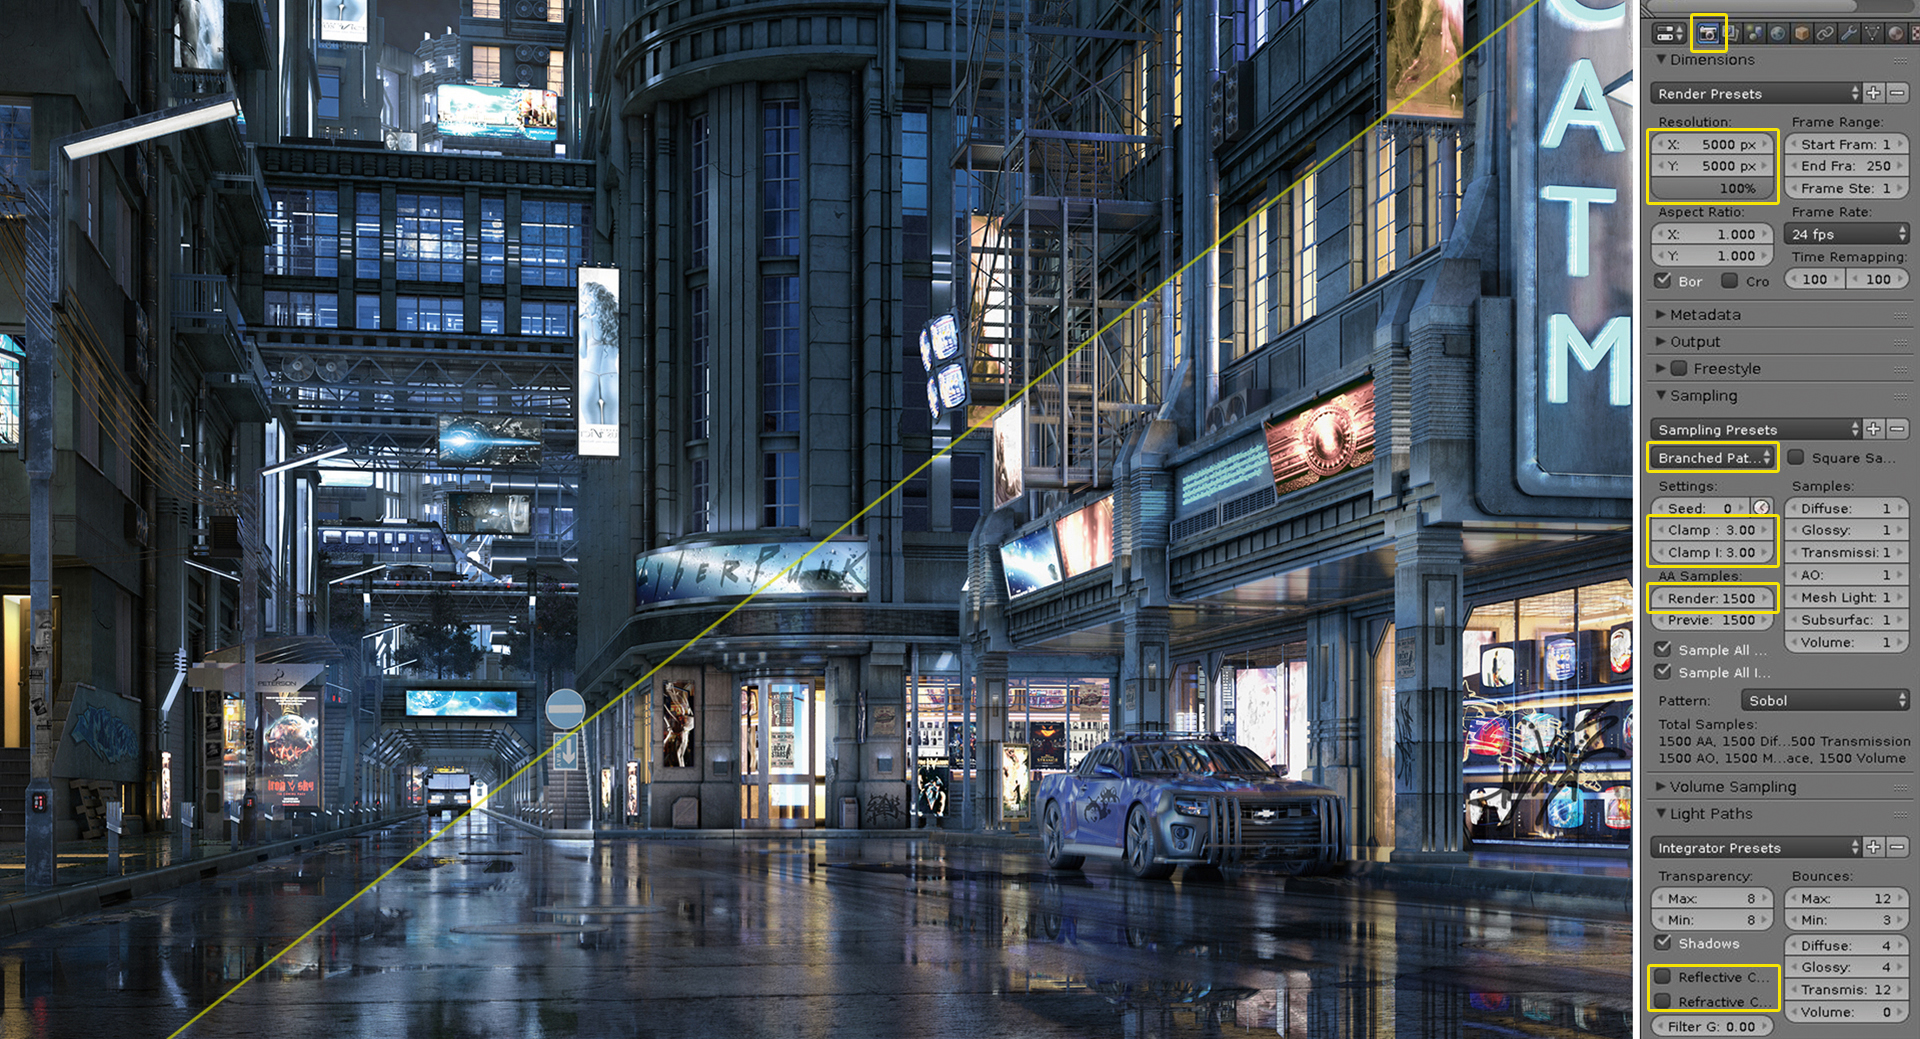
I render this scene twice, making two completely different images. One is bright and reflective and the second is toned down and diffused. This way, I have more control in post-processing, as I can mix both images together. I recommend this technique to everyone – make more than one render and then the pick elements that came out nicely in each to combine into one shot.
17. Composite in Photoshop
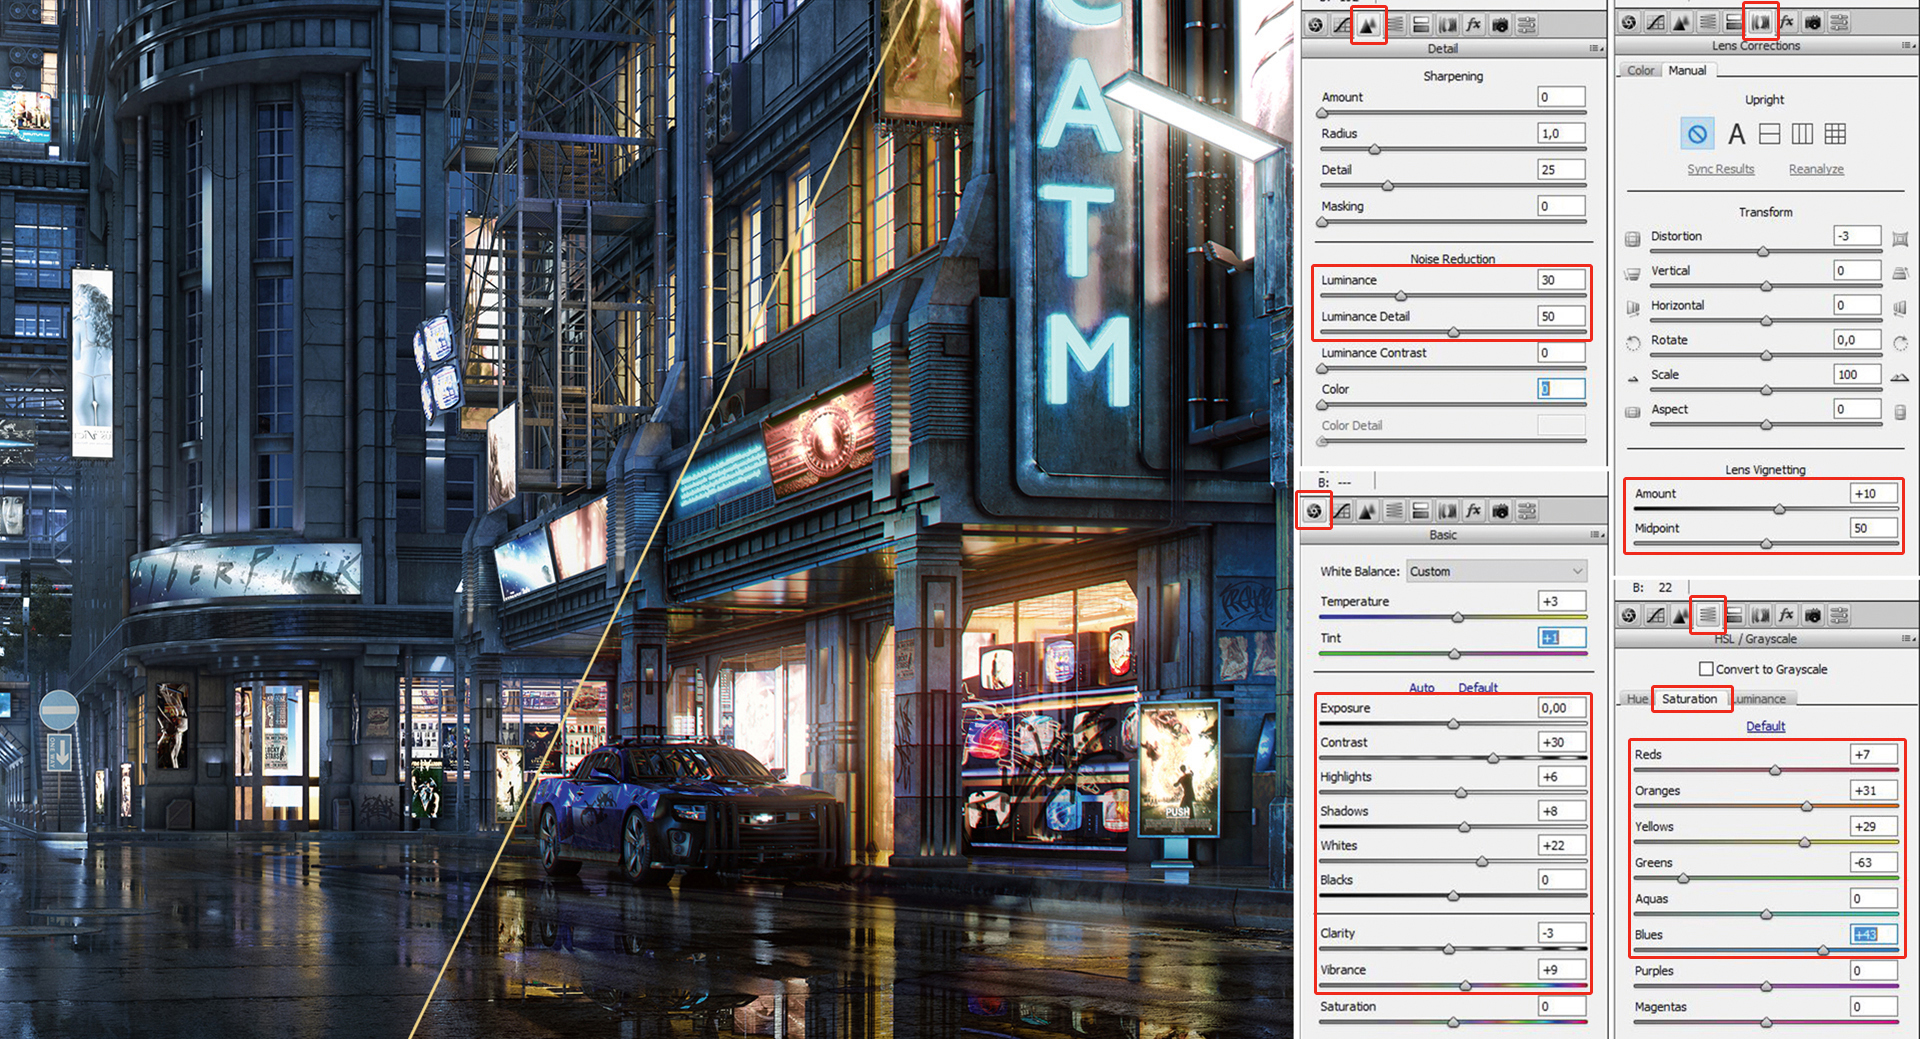
At the end, in Photoshop, I like to do everything that requires a lot of effort to make in Blender, including colour grading; brightness and contrast balance; and levels and filter effects. Most of the time I use the Camera Raw Filter function, which is a very powerful tool. Photoshop is also a good place to add missing details, imperfections and atmospheric effects, such as smoke or mist elements and lens flares. You can do this by matte painting or by overlaying individual textures; lens flares, for example, are just .png files placed over the picture with the Blend Mode Screen option selected.
This article was originally published in issue 214 of 3D World, the world's best-selling magazine for CG artists – packed with expert tutorials, inspiration and reviews. Subscribe to 3D World here.
Related articles:

Thank you for reading 5 articles this month* Join now for unlimited access
Enjoy your first month for just £1 / $1 / €1
*Read 5 free articles per month without a subscription

Join now for unlimited access
Try first month for just £1 / $1 / €1
