Master wet-in-wet watercolour painting
Create a colourful array of flowers quickly and easily and using the wet-in-wet technique.
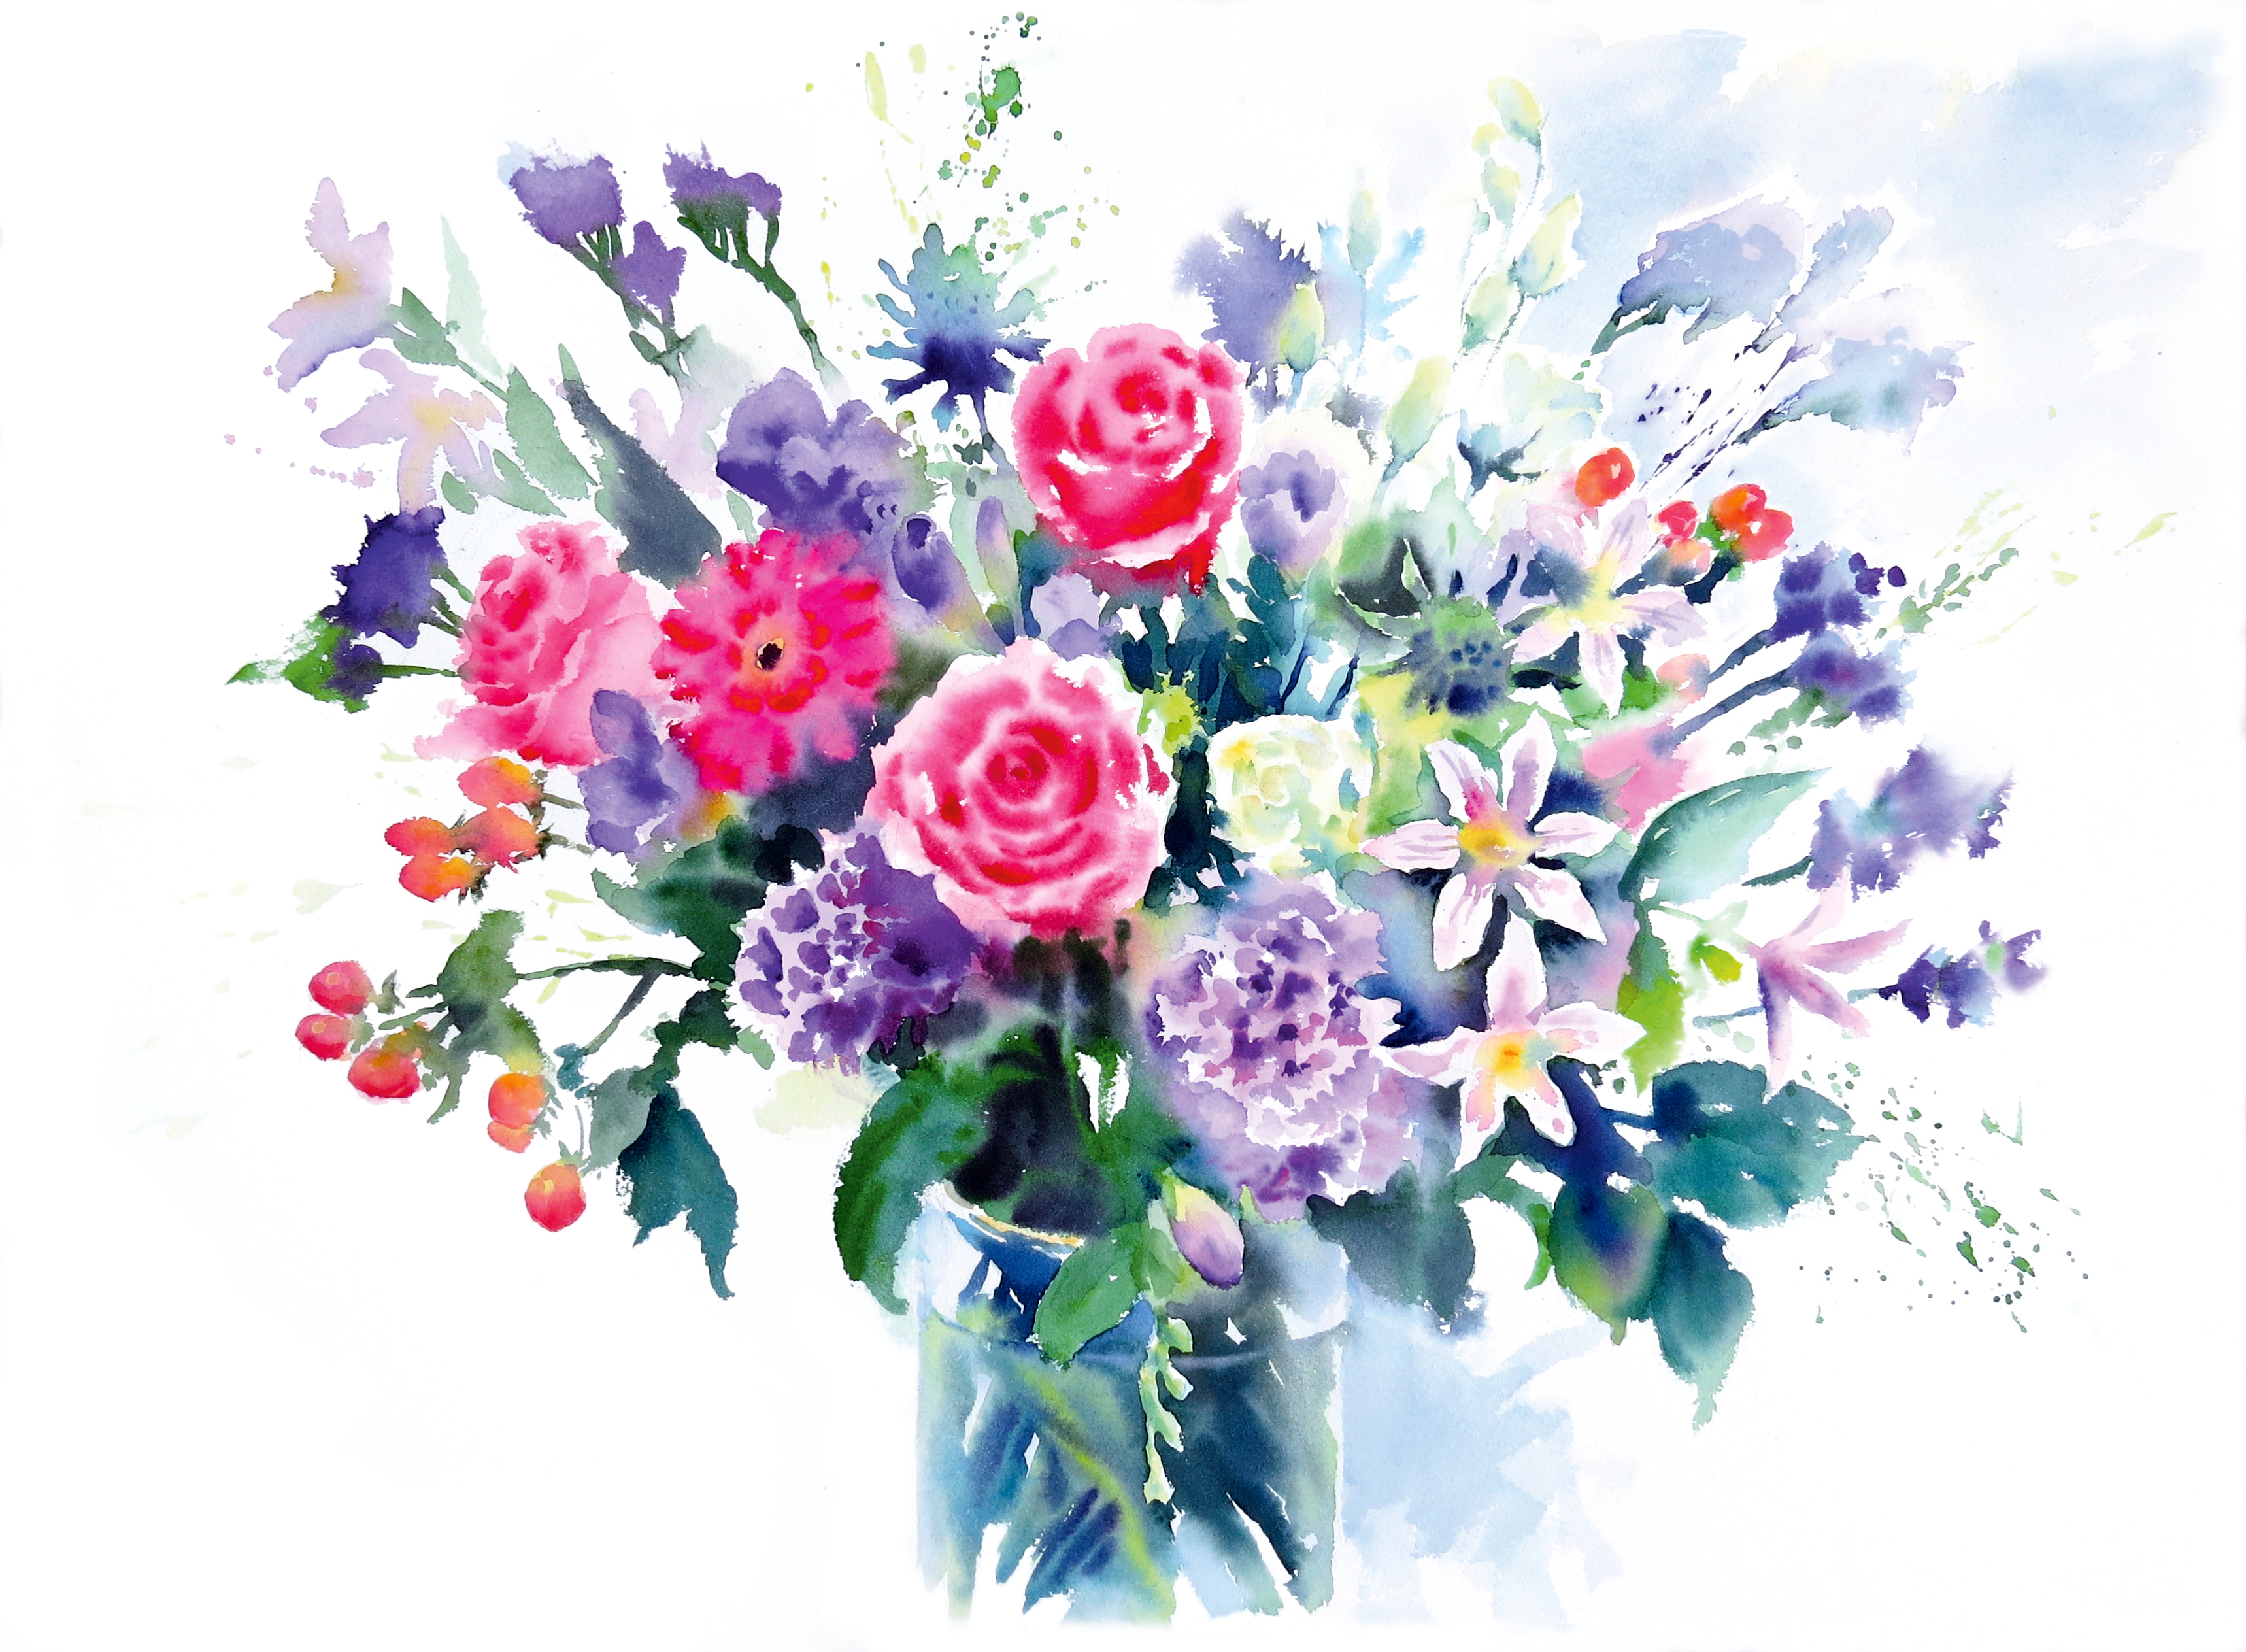
Watercolour is wonderful. I discovered its appeal while I was still at art college, and used a tiny palette to make sketches when I was out on my bike in Leicestershire, UK. I later discovered it was also the perfect medium for painting wildlife in the African bush.
In both instances I had to work quickly, so I allowed my colours to blend into one another before they had dried. The drifts and blends created when wet pigments merge on paper transfix me just as much now as they did then.
This wet-in-wet technique involves adding wet paint into wet washes, and allowing the added pigment to spread out unhindered. True, it is sometimes unpredictable, but that makes the challenge even more exciting.
Flowers and foliage offer the perfect excuse for practising wet-in-wet, because the organic forms and rich, deep colours lend themselves to a relaxed application. You can see from this workshop that, even though the paint is applied fairly freely, the overall appearance gives the impression you have painted more detail. Grab the best watercolour paints and let’s get started!
01. Start from the centre
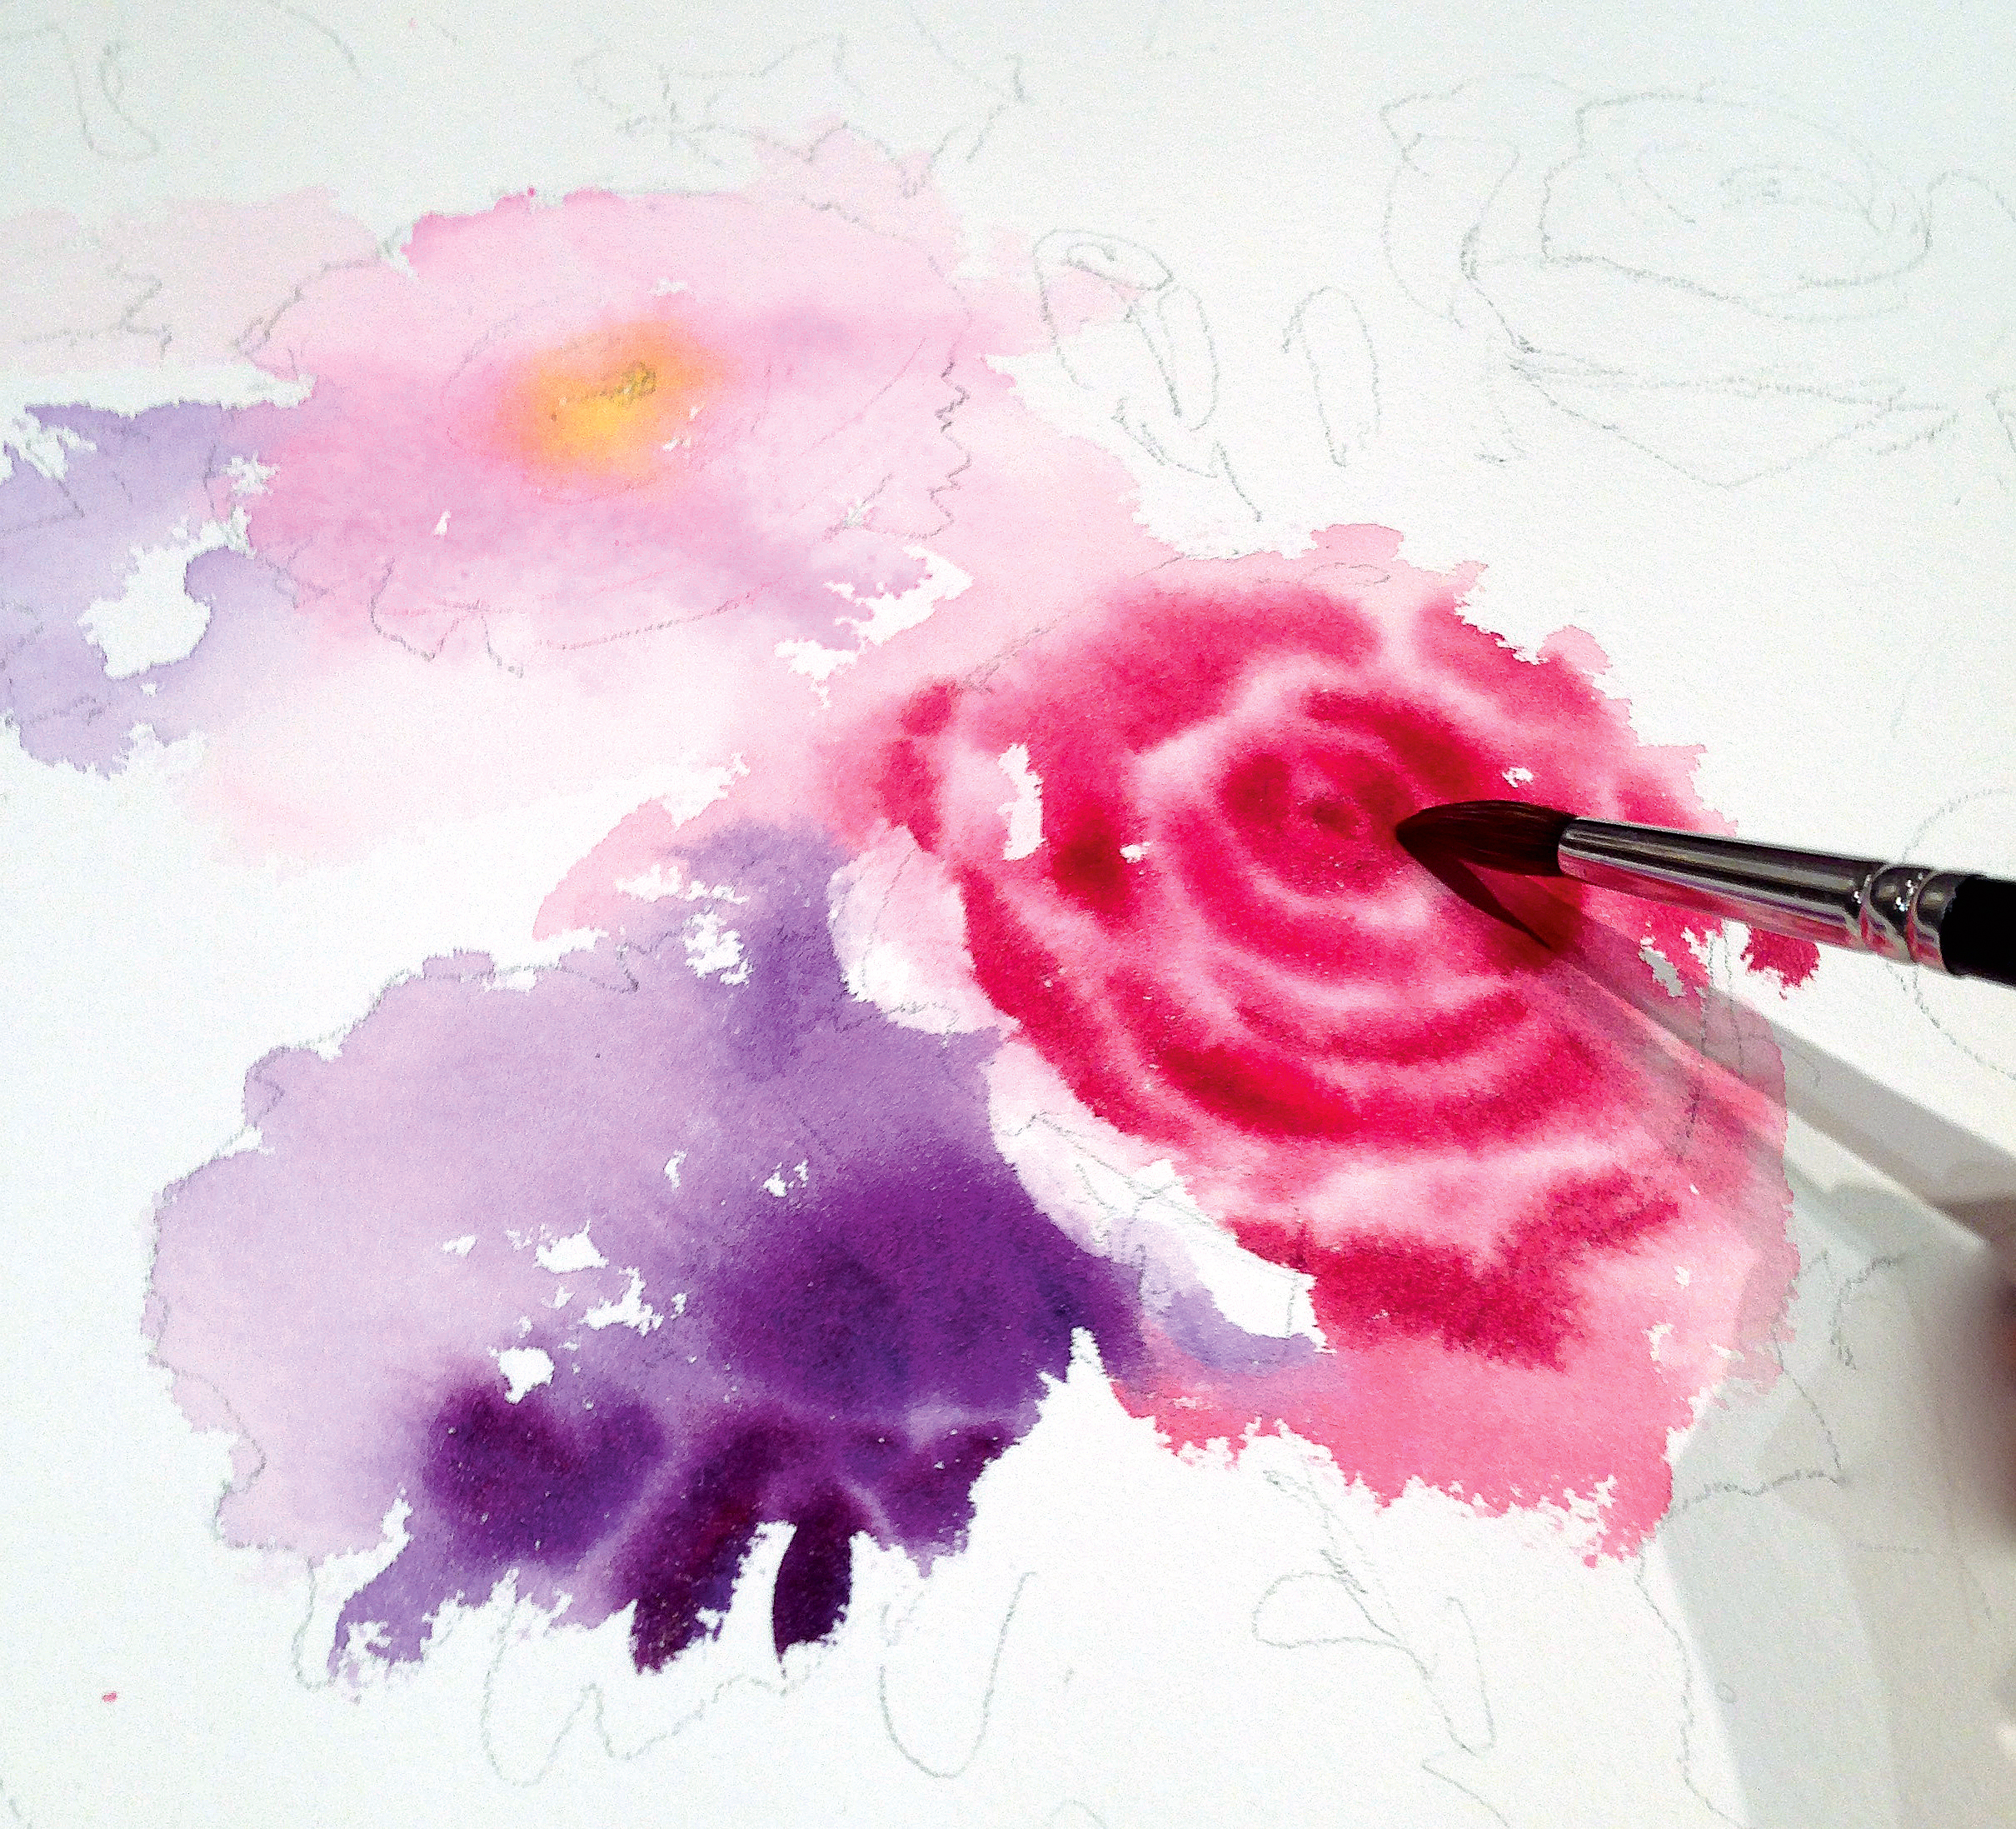
After roughly sketching the bouquet, I paint the whole overall shape of the middle rose with a dilute wash of Permanent Rose. While the wash is still damp, I add more concentrated pigment of the same colour in thin concentric strokes to represent the shadow areas between the petals, enabling them to spread out into the wash to make gentle grades of colour. I darken the centre with a touch of neat pigment.
02. Build up the layers
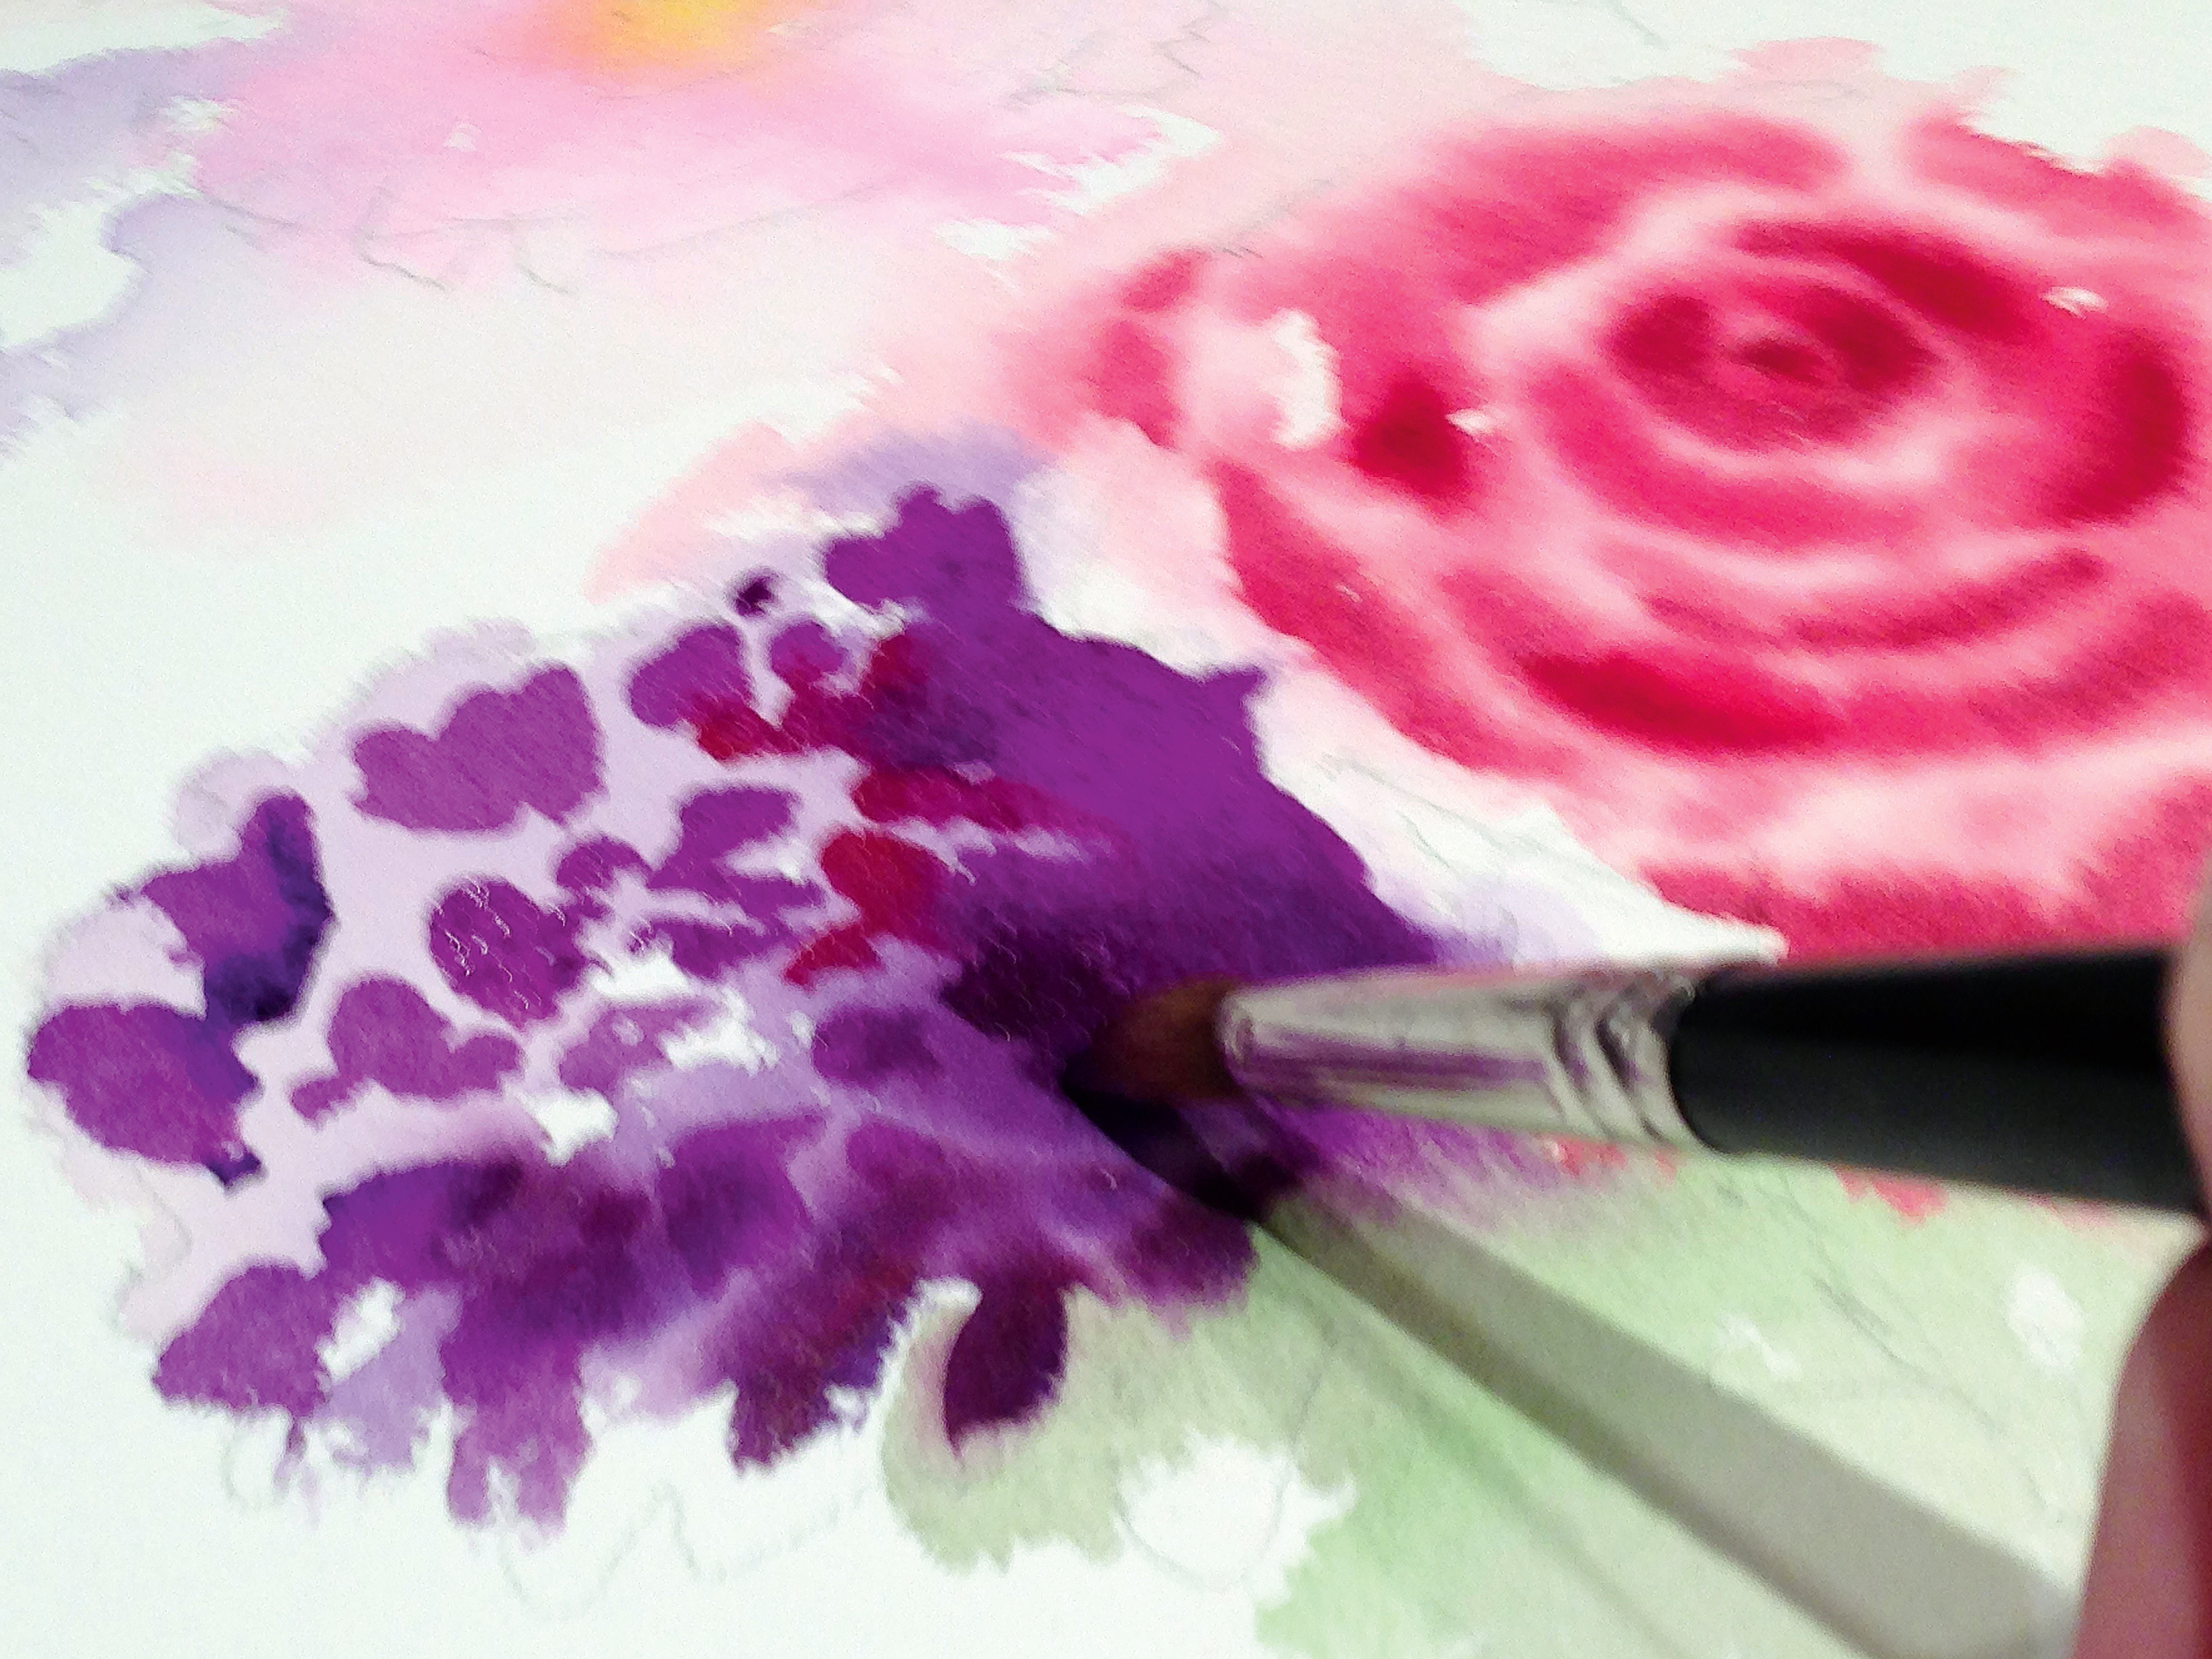
The carnation is darker than the rose, so I use this flower to shape the edge of the pale rose petal in front of it. I then add deeper violet wet-in-wet over the pale wash and in small triangular dabs, to represent the shadows between the petals (for all these layers, you'll need the best watercolour paper, of course).
03. Add adjacent flowers
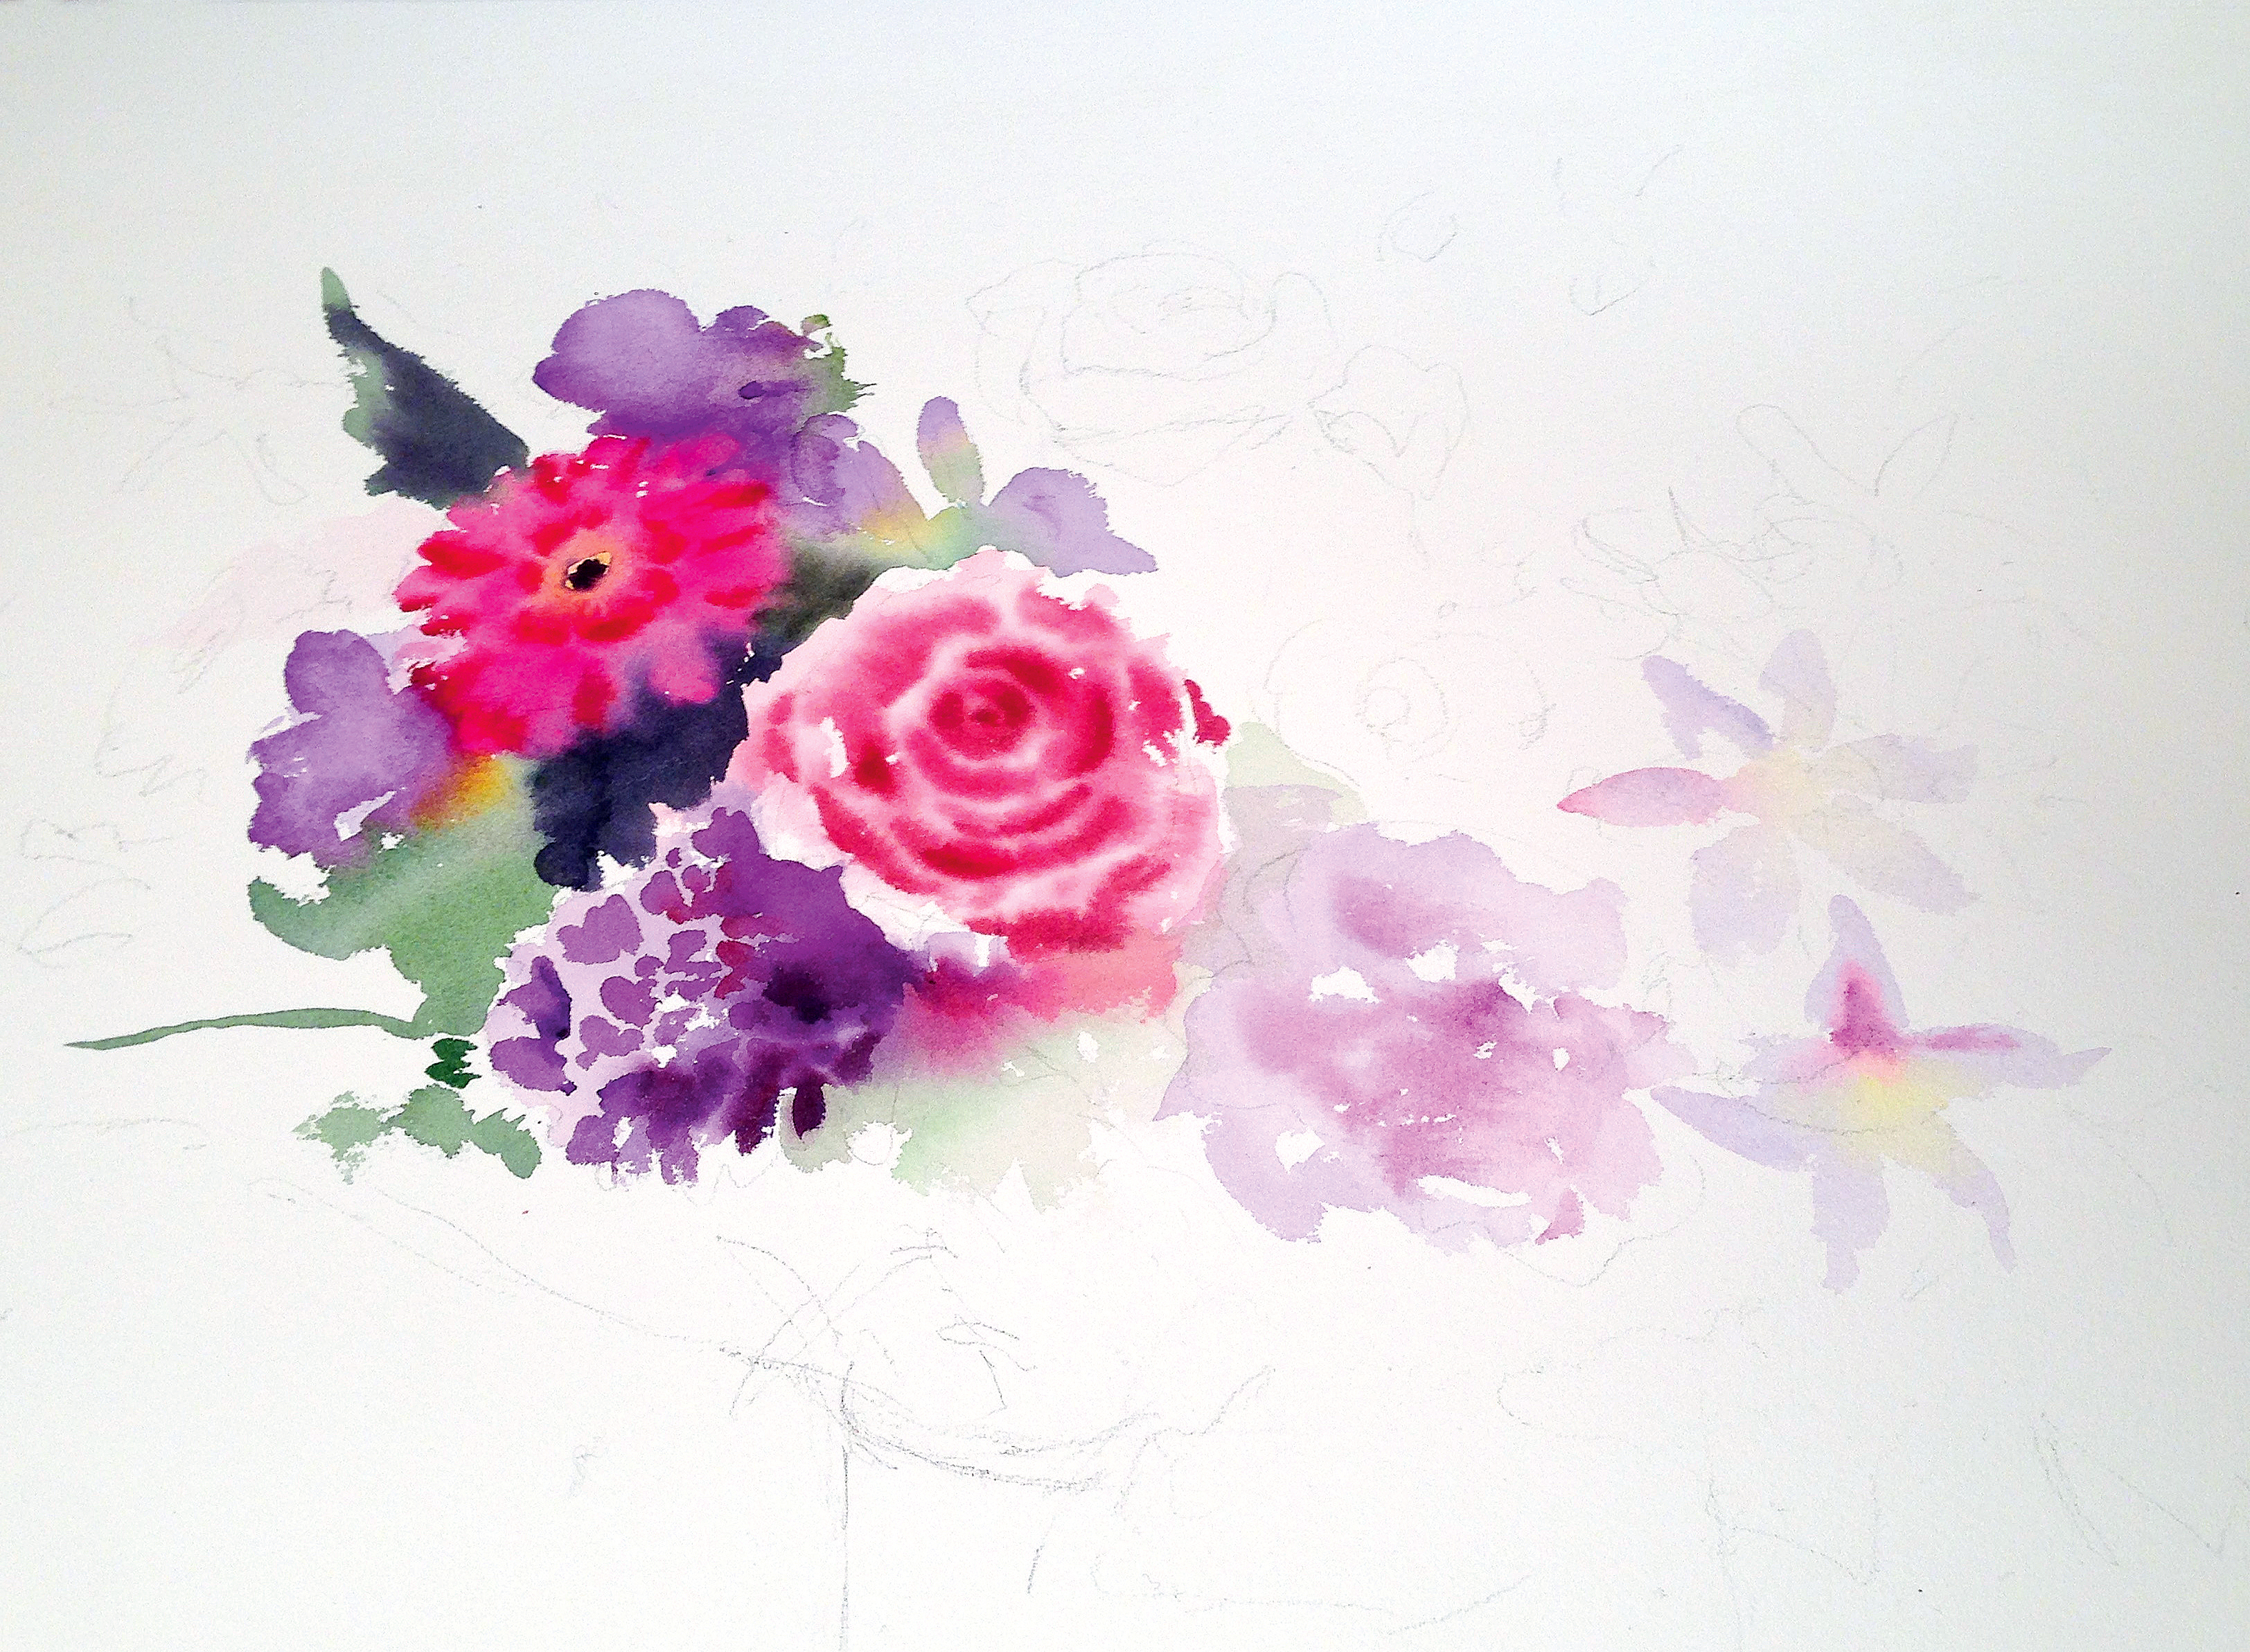
Adjacent flowers are added one by one, with a pale wash first and then more concentrated, drier colour added into the wet wash. I use Opera Rose for the bright pink gerbera, adding the divisions between its radiating petals with short lines, like the spokes of a wheel to the centre of the flower.
Get the Creative Bloq Newsletter
Daily design news, reviews, how-tos and more, as picked by the editors.
04. Balance the flowers with dark foliage
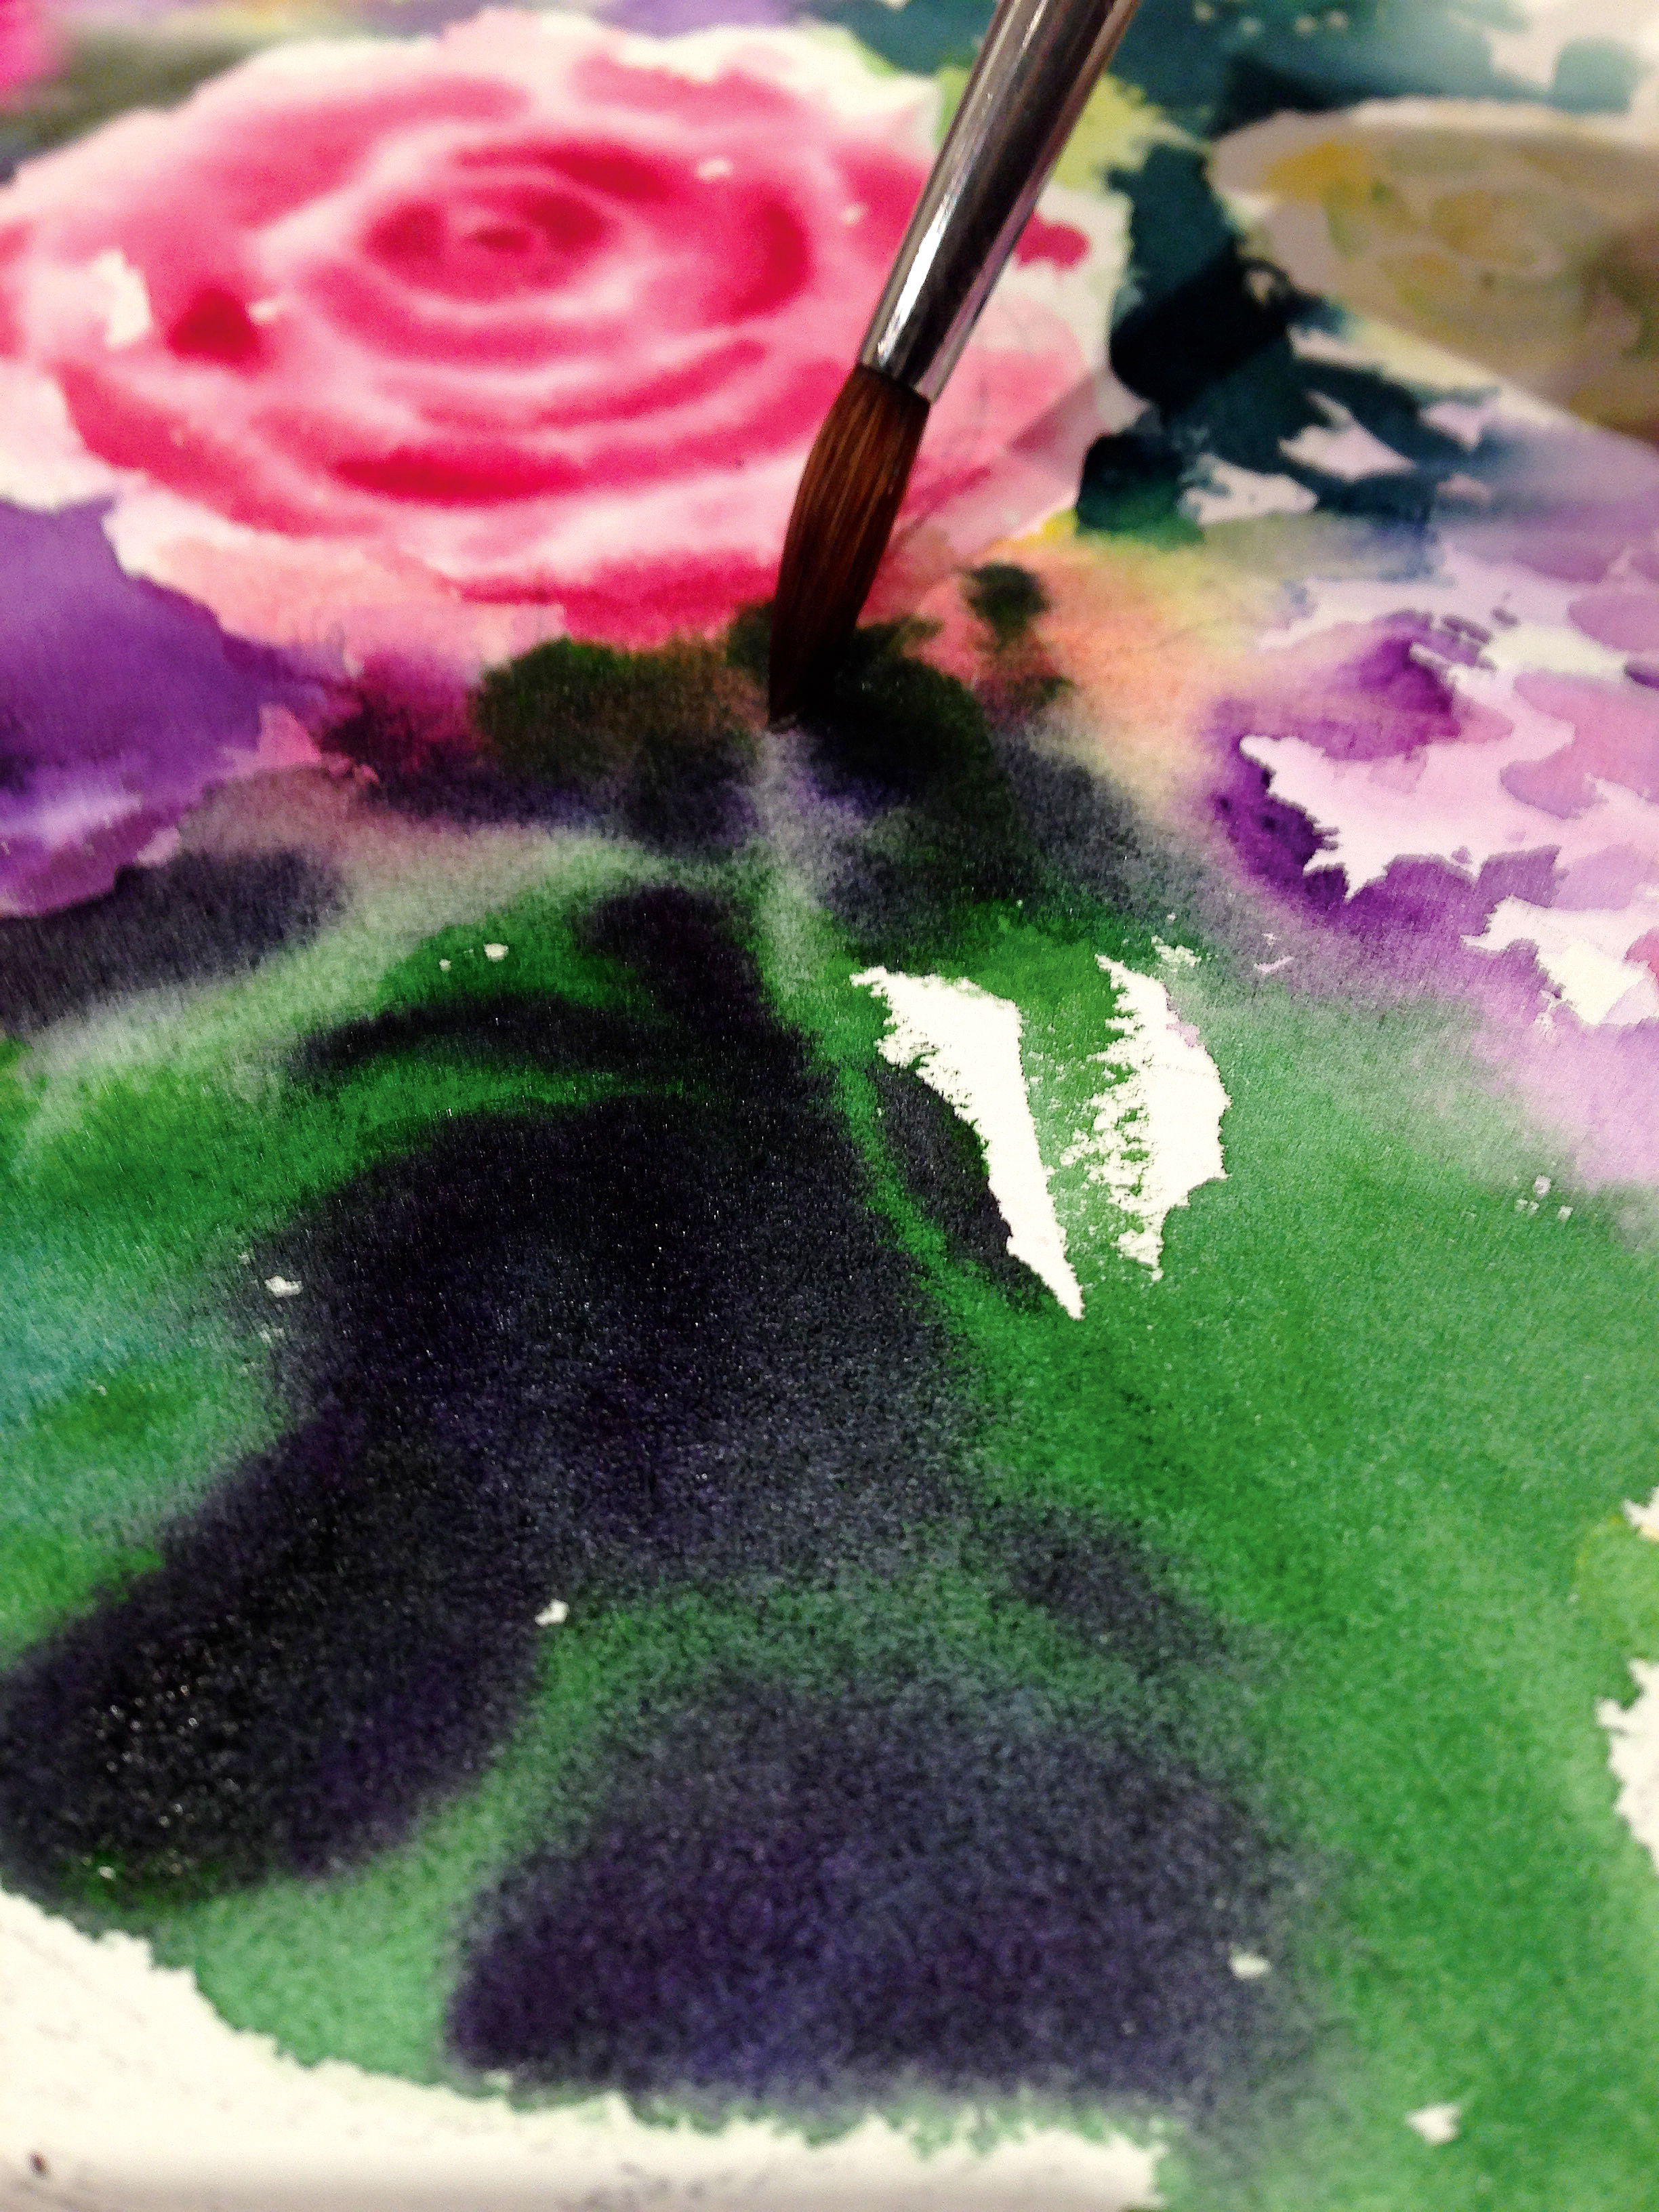
Foliage acts as the darker counterfoil to the brighter flowers. I use pale Permanent Sap Green as the base colour, using sweeping strokes from a large brush. I add a really deep, dark mix of Prussian Blue and mauve into the wet wash and allow it to flow freely. The added colour needs to be much drier than the first wash, as there is already water on the paper. If it is too diluted it will cause a back run (a cauliflower-like drop or smudge).
05. Keep it loose
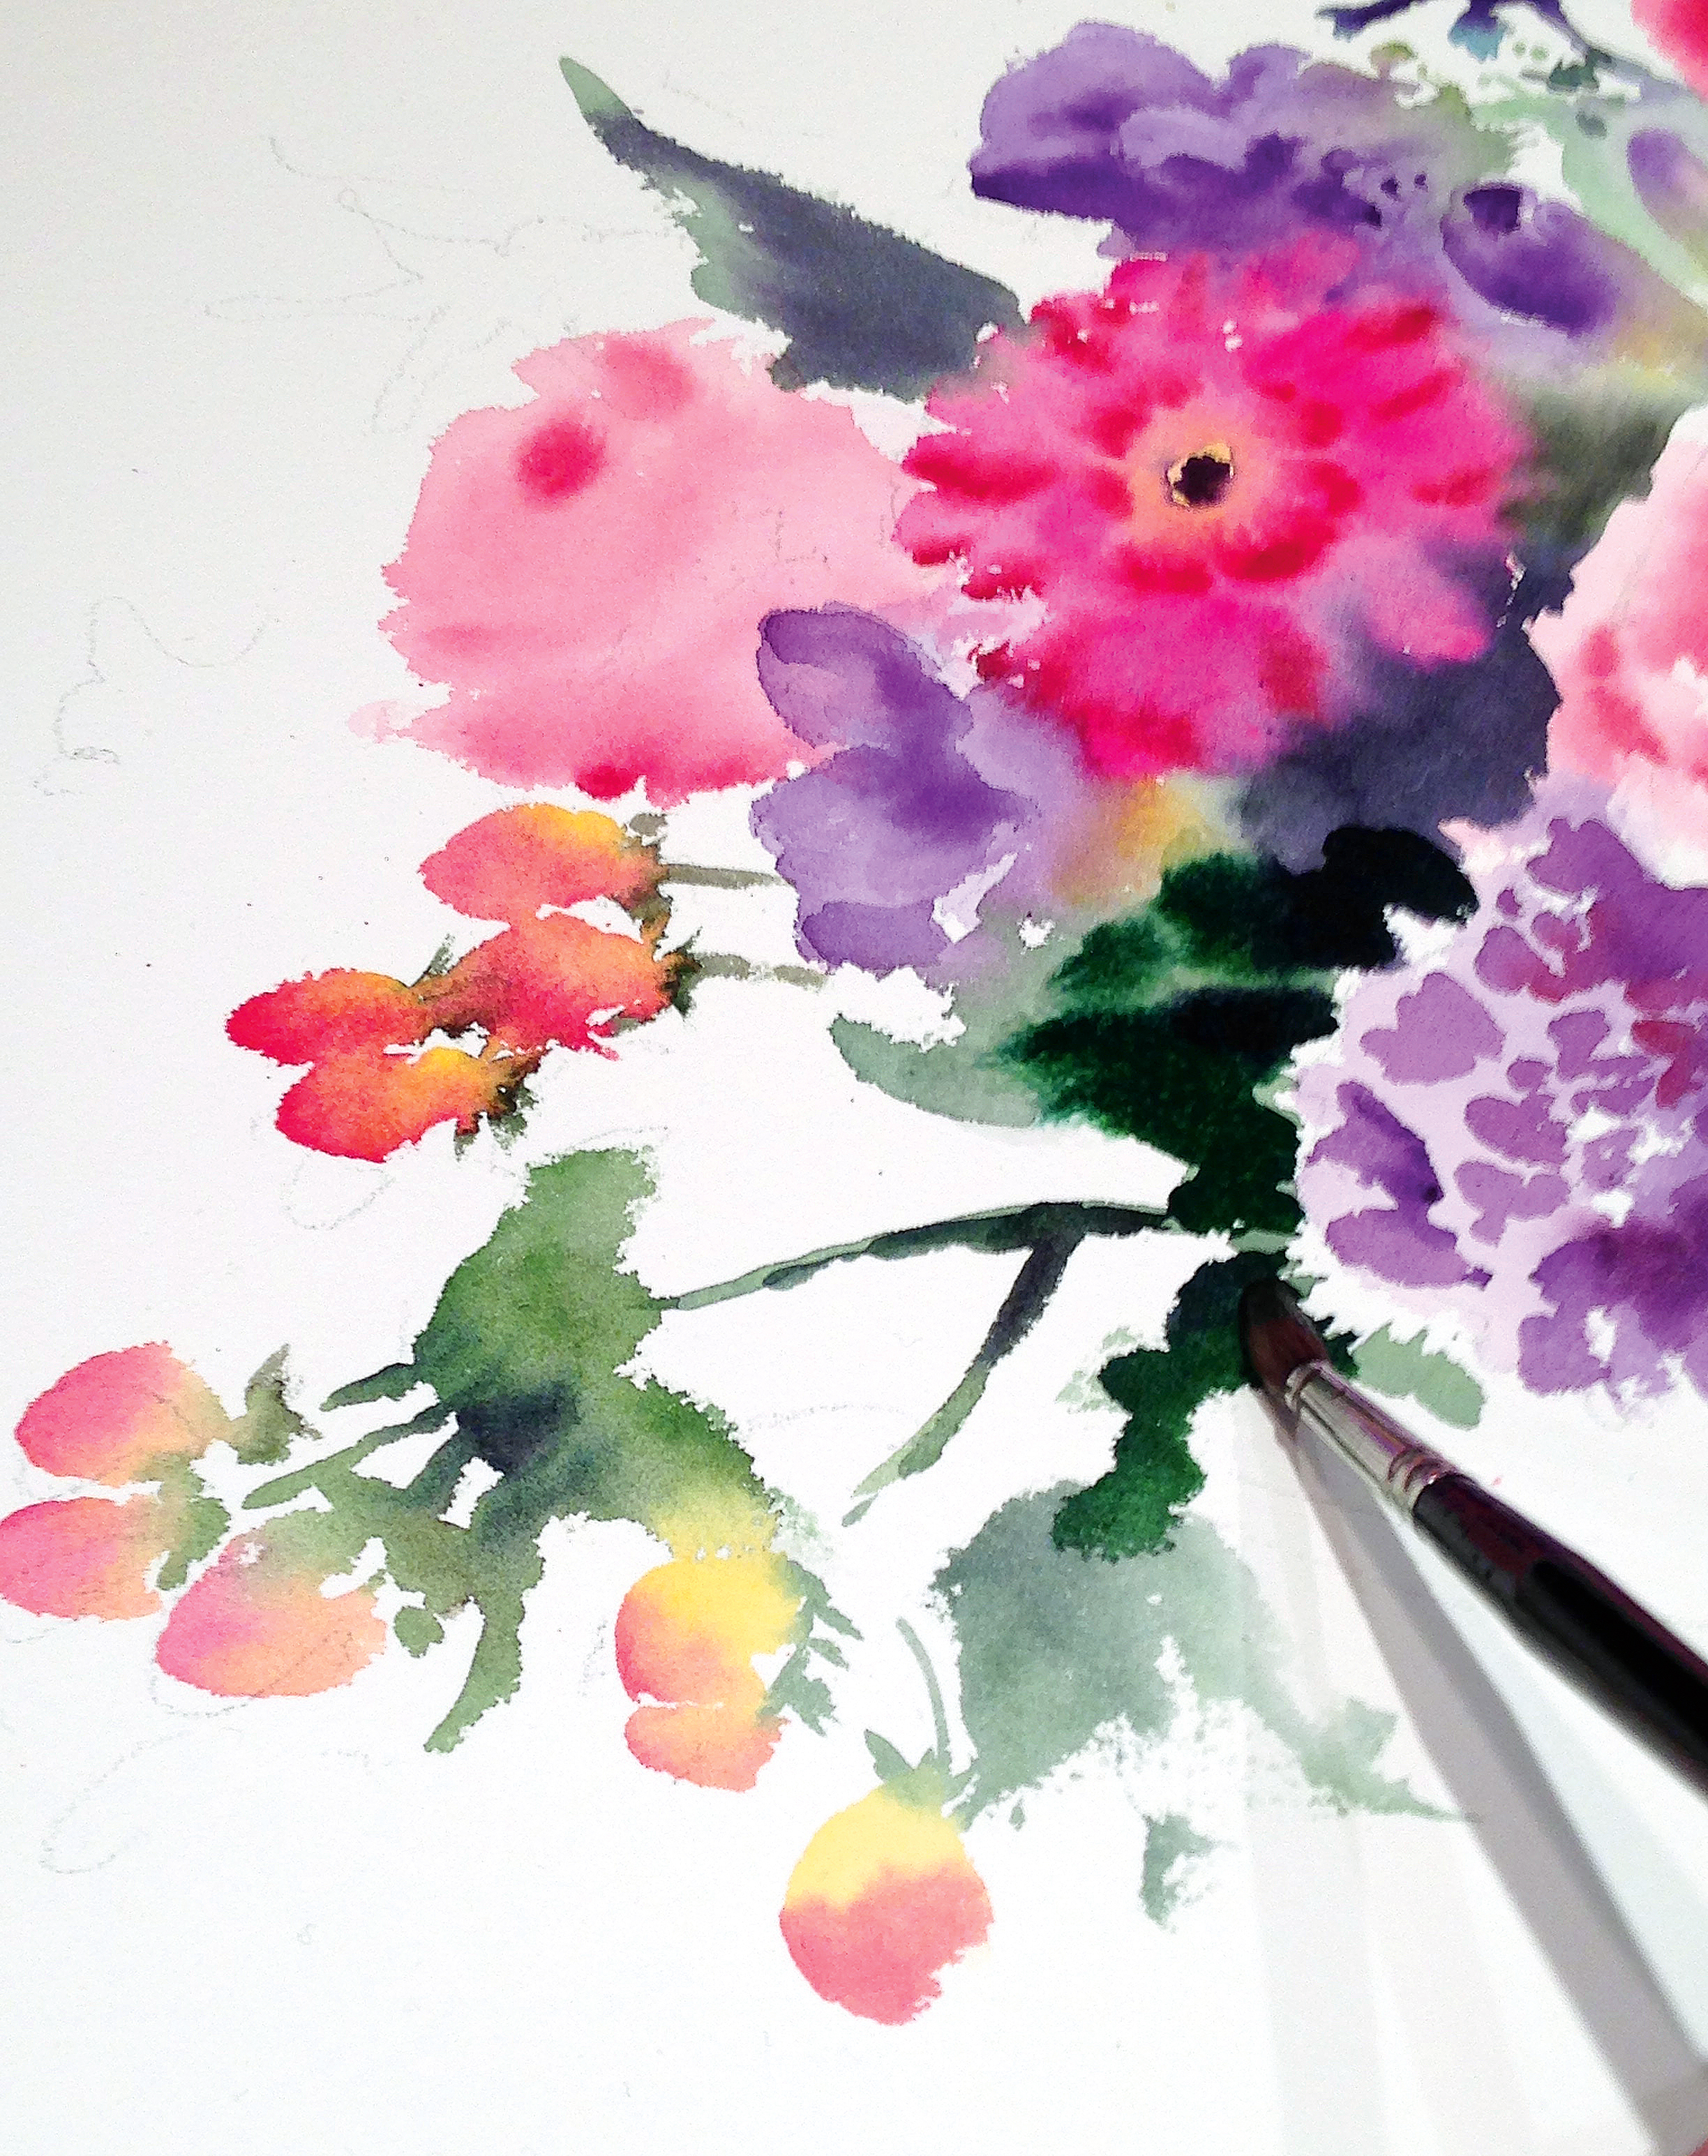
I paint the rose hips with blends of Indian Yellow and Permanent Rose, and add their sepals beside them while they’re still damp, so they blend freely. A few loose strokes for their leaves and stem, and they’re quickly in position.
06. Define the petal shapes
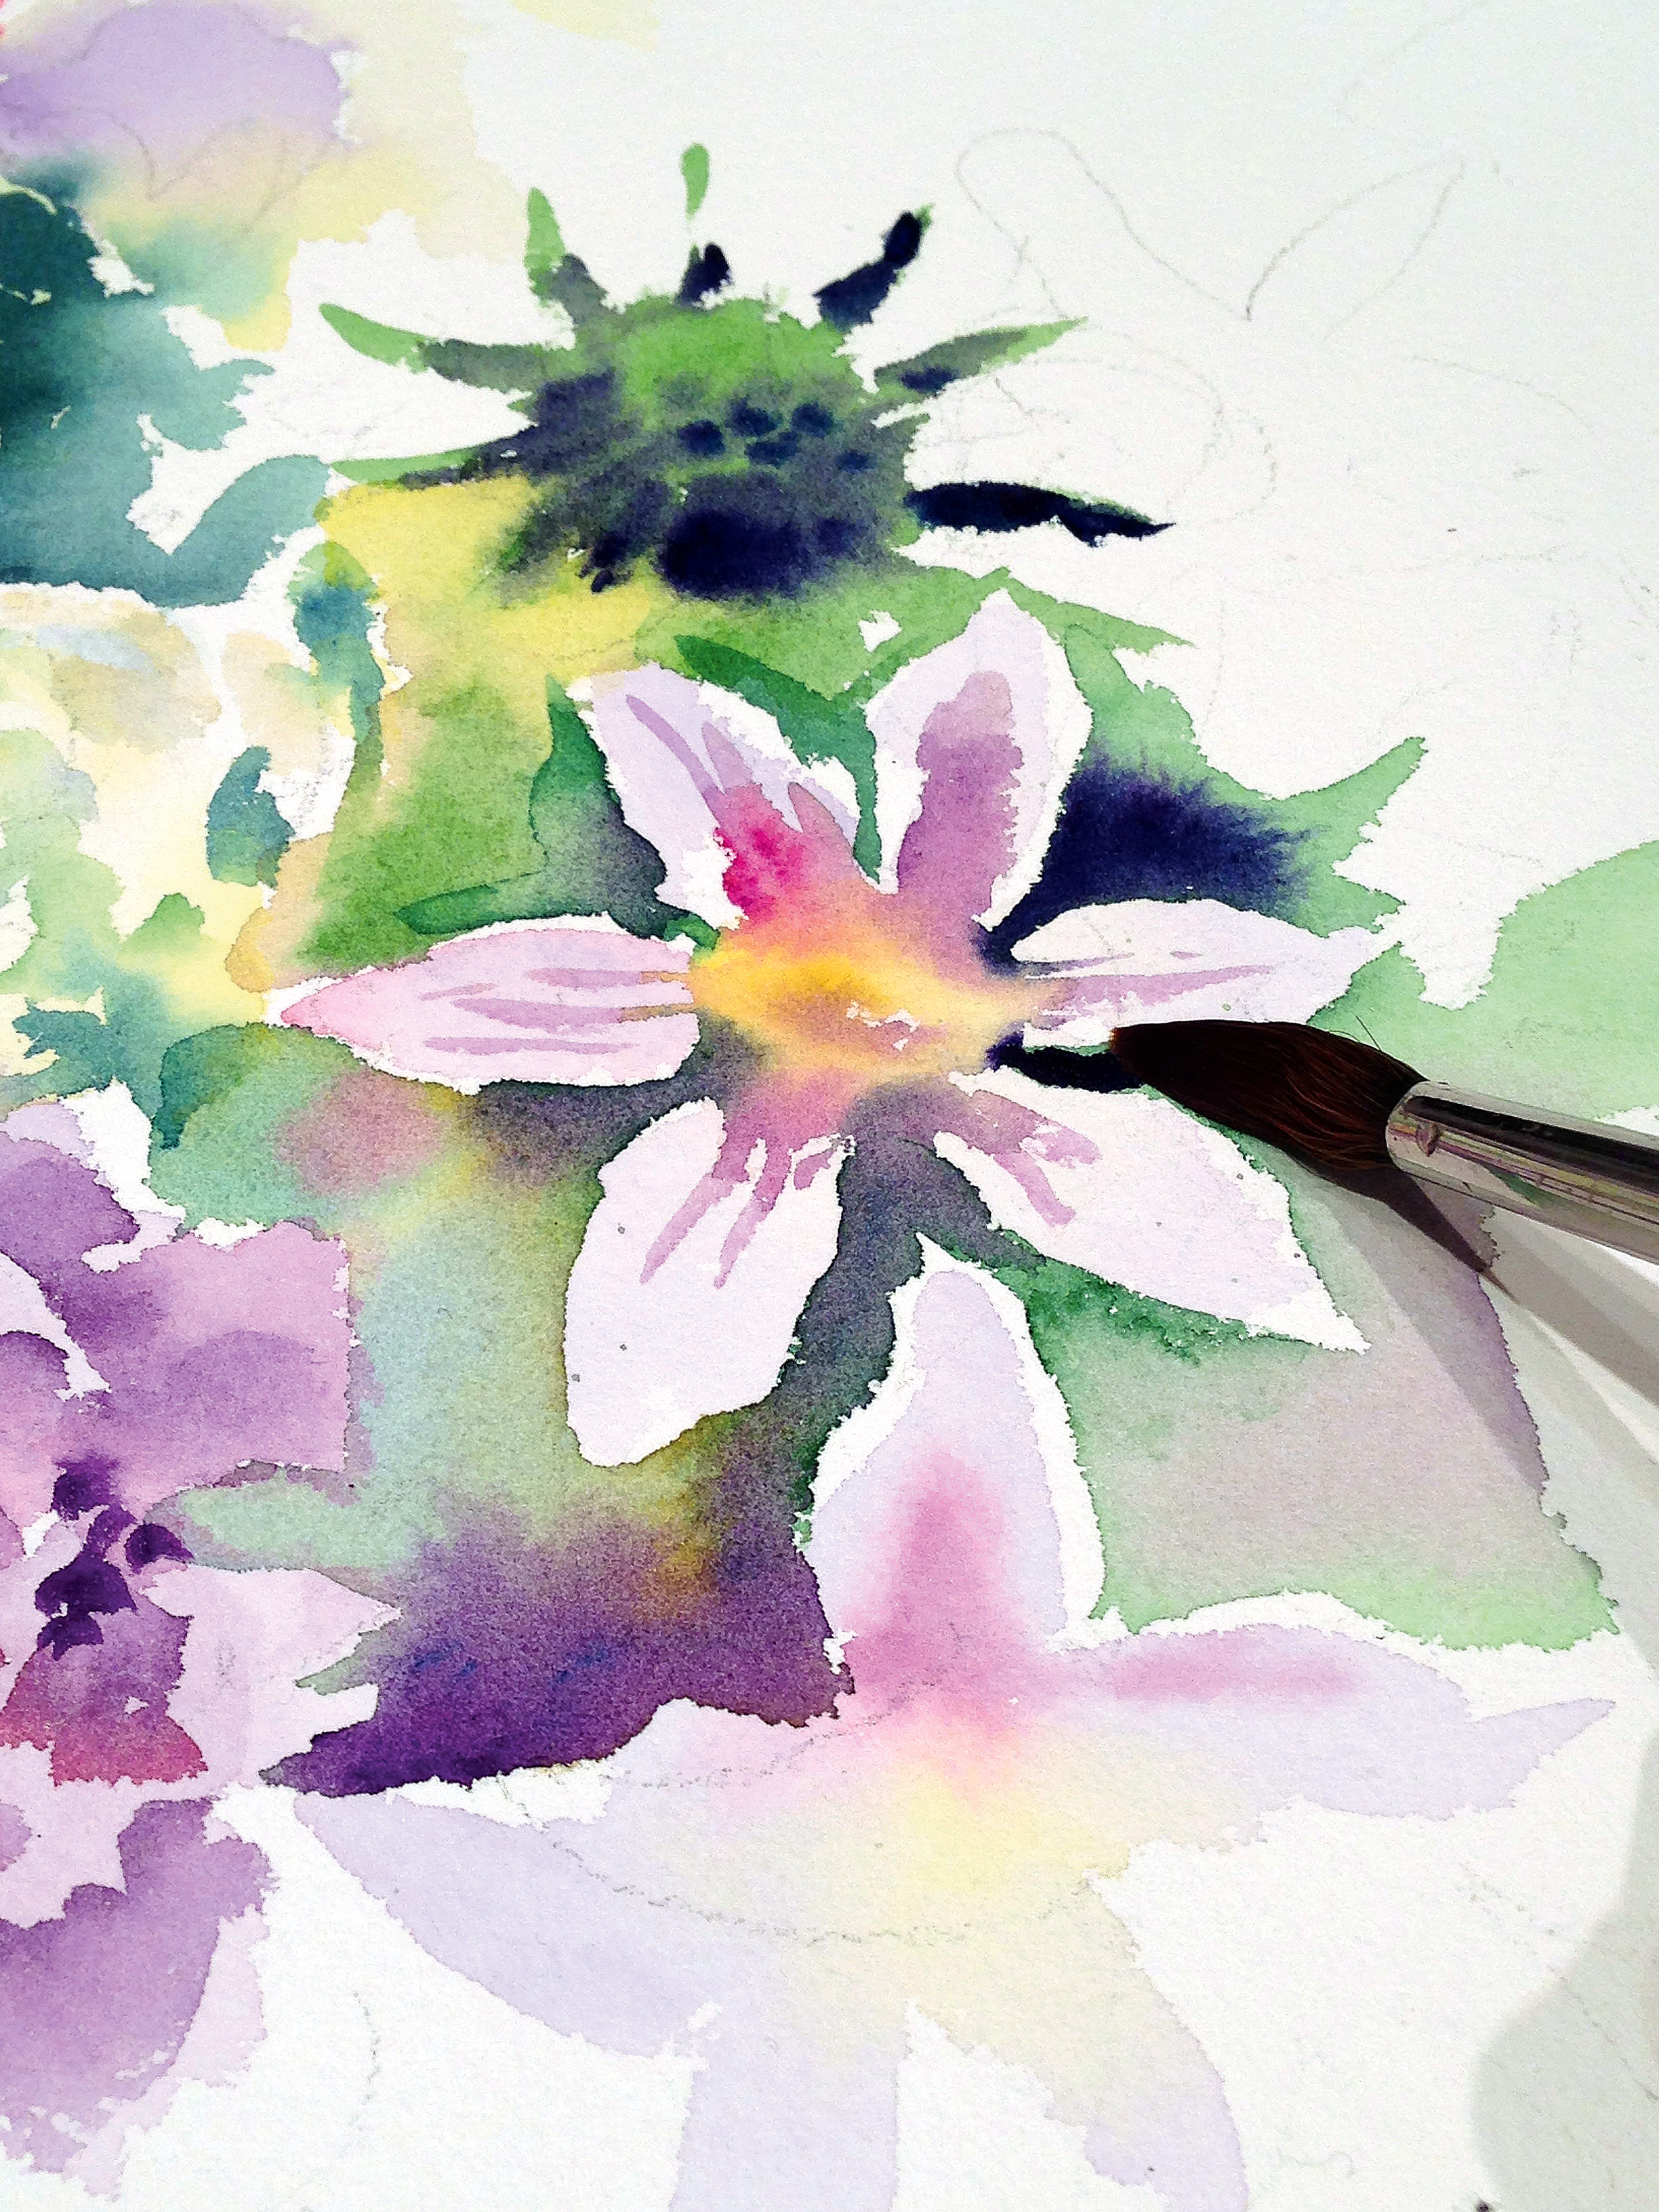
A diluted wash of mauve tints the petals of the flower, then I touch Indian Yellow into the centre, blending wet into wet. I allow the flower to dry before painting the background foliage around the petals with a pale Permanent Sap Green and Aureolin. I then touch the tip of a size 8 brush into the triangular gap between the petals, wet-in-wet, to darken the foliage behind them.
07. Check your progress
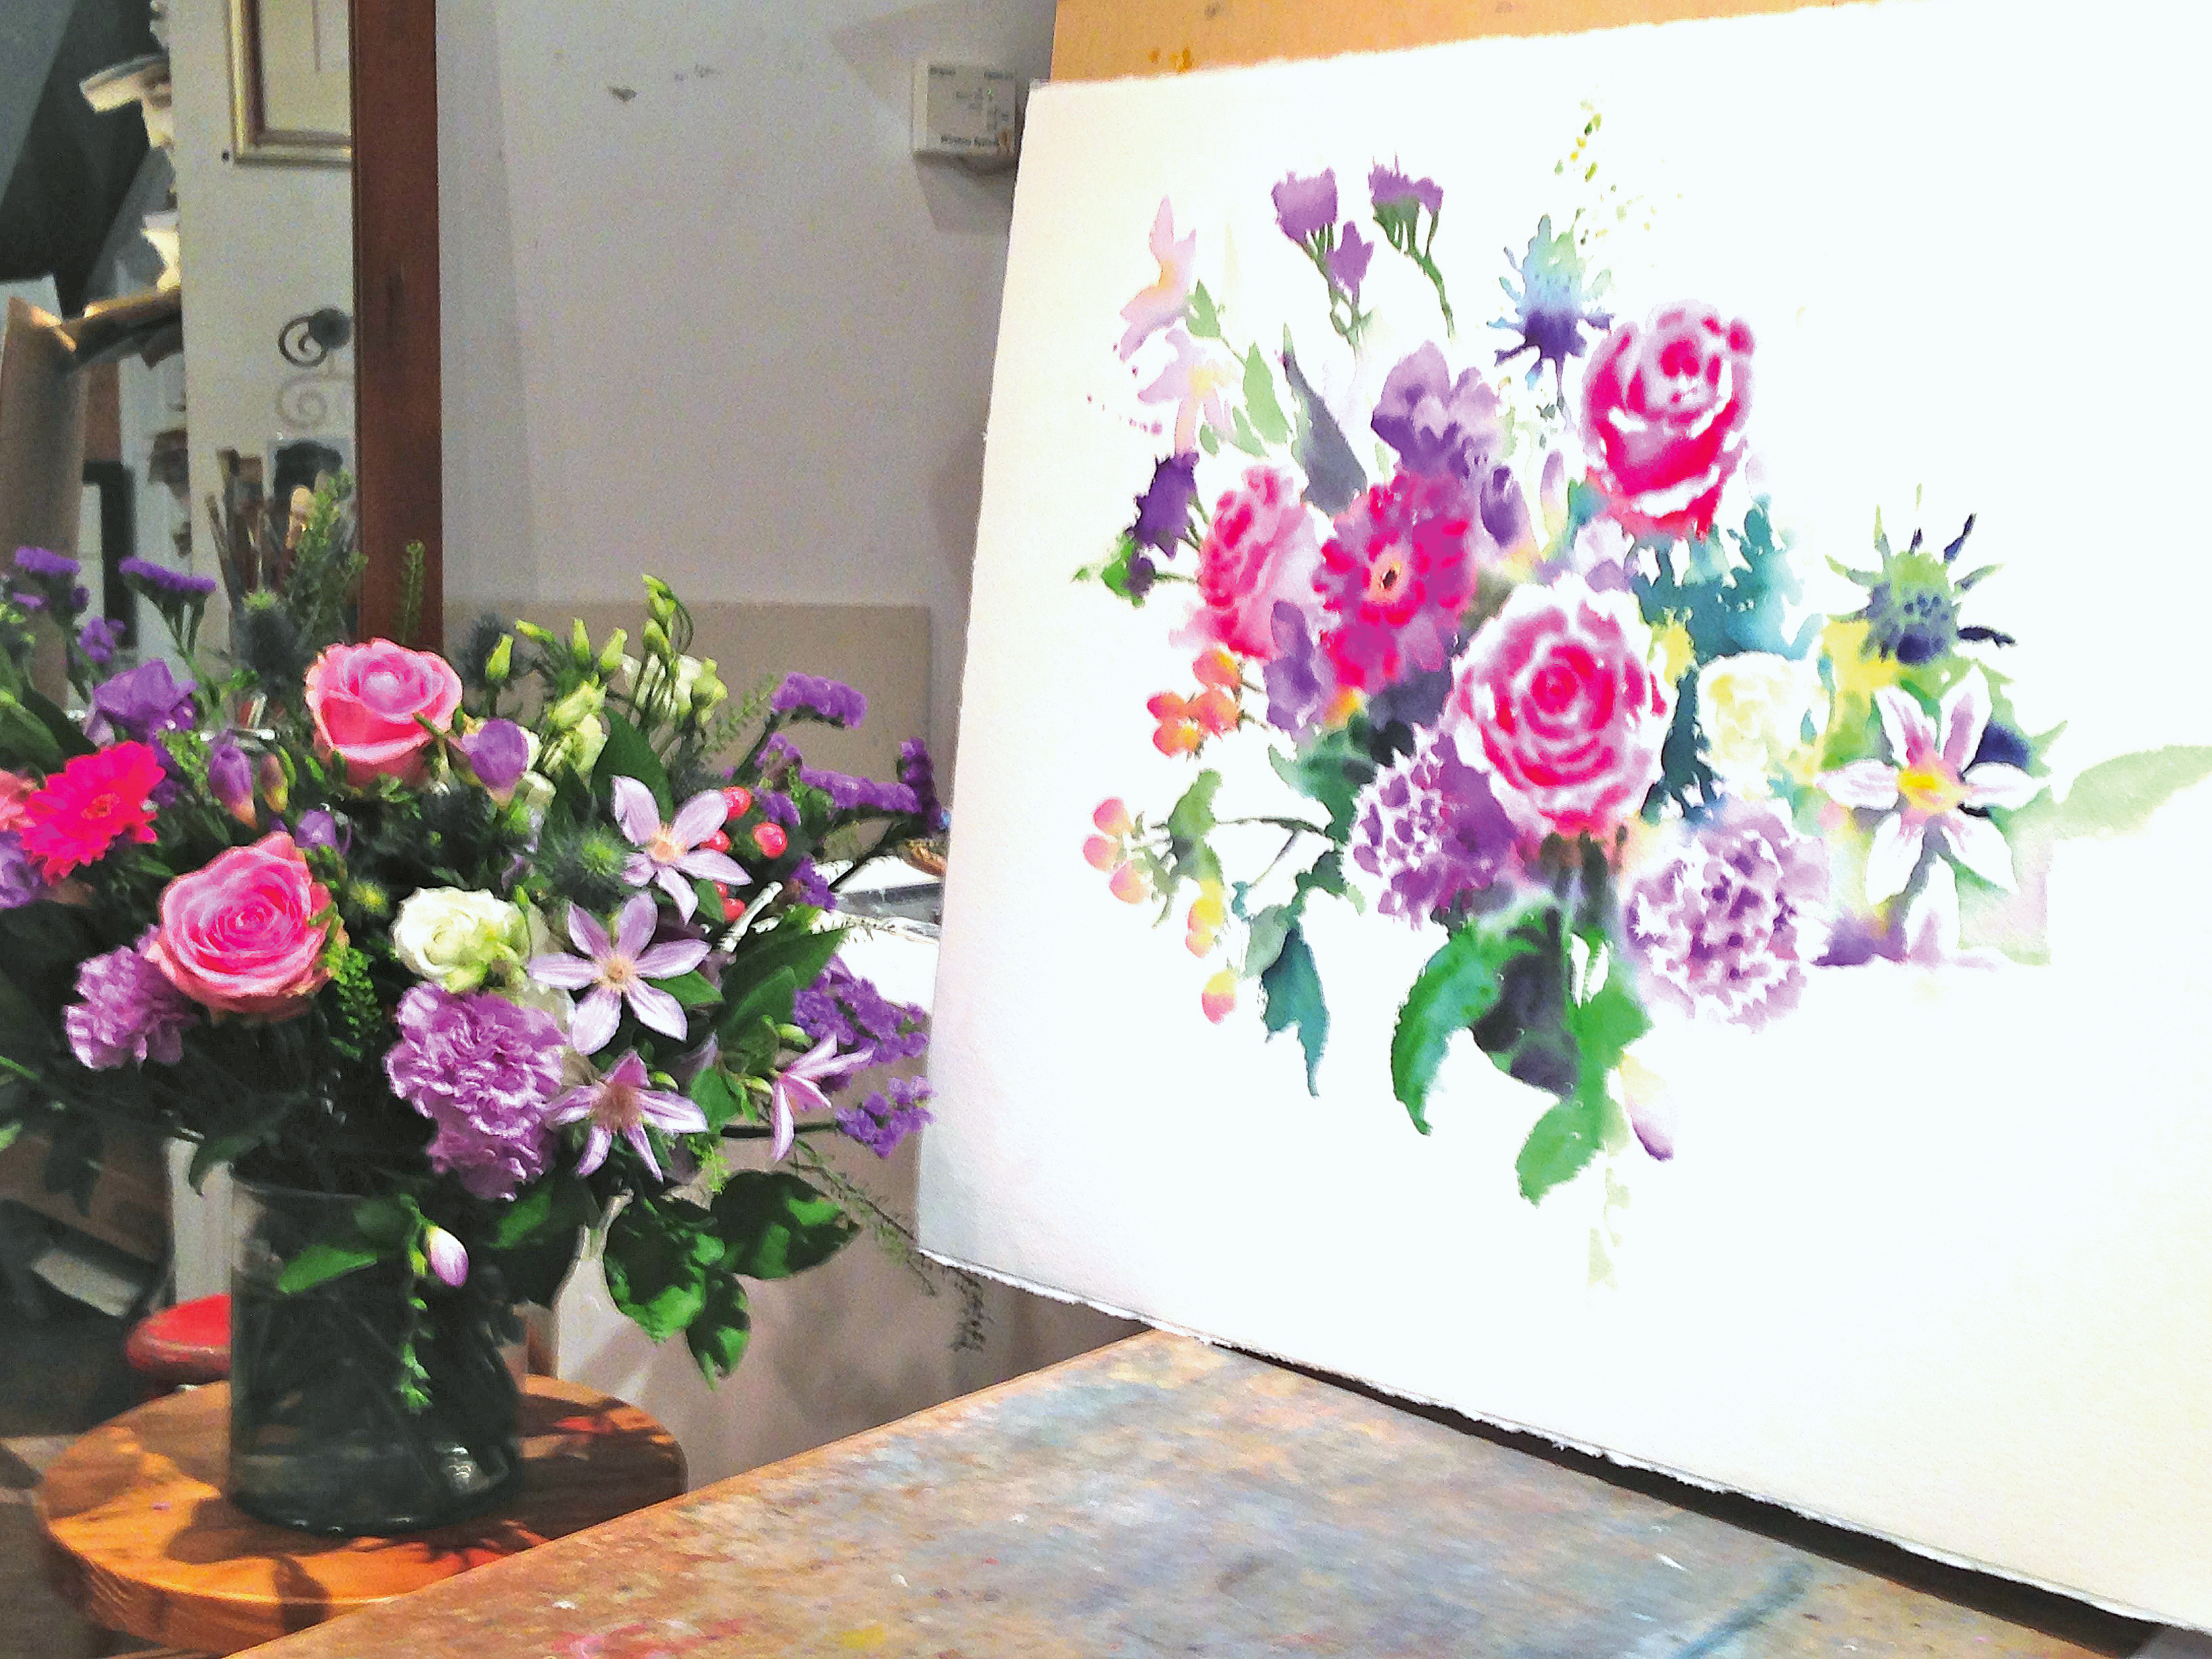
With the bouquet growing flower by flower from the centre of the painting, I finish each bloom as I go along. I work flat so I can control the direction of the flow of the paint as it diffuses into the damp washes. Occasionally, I place the board upright and step back to view my progress.
08. Shape the bud
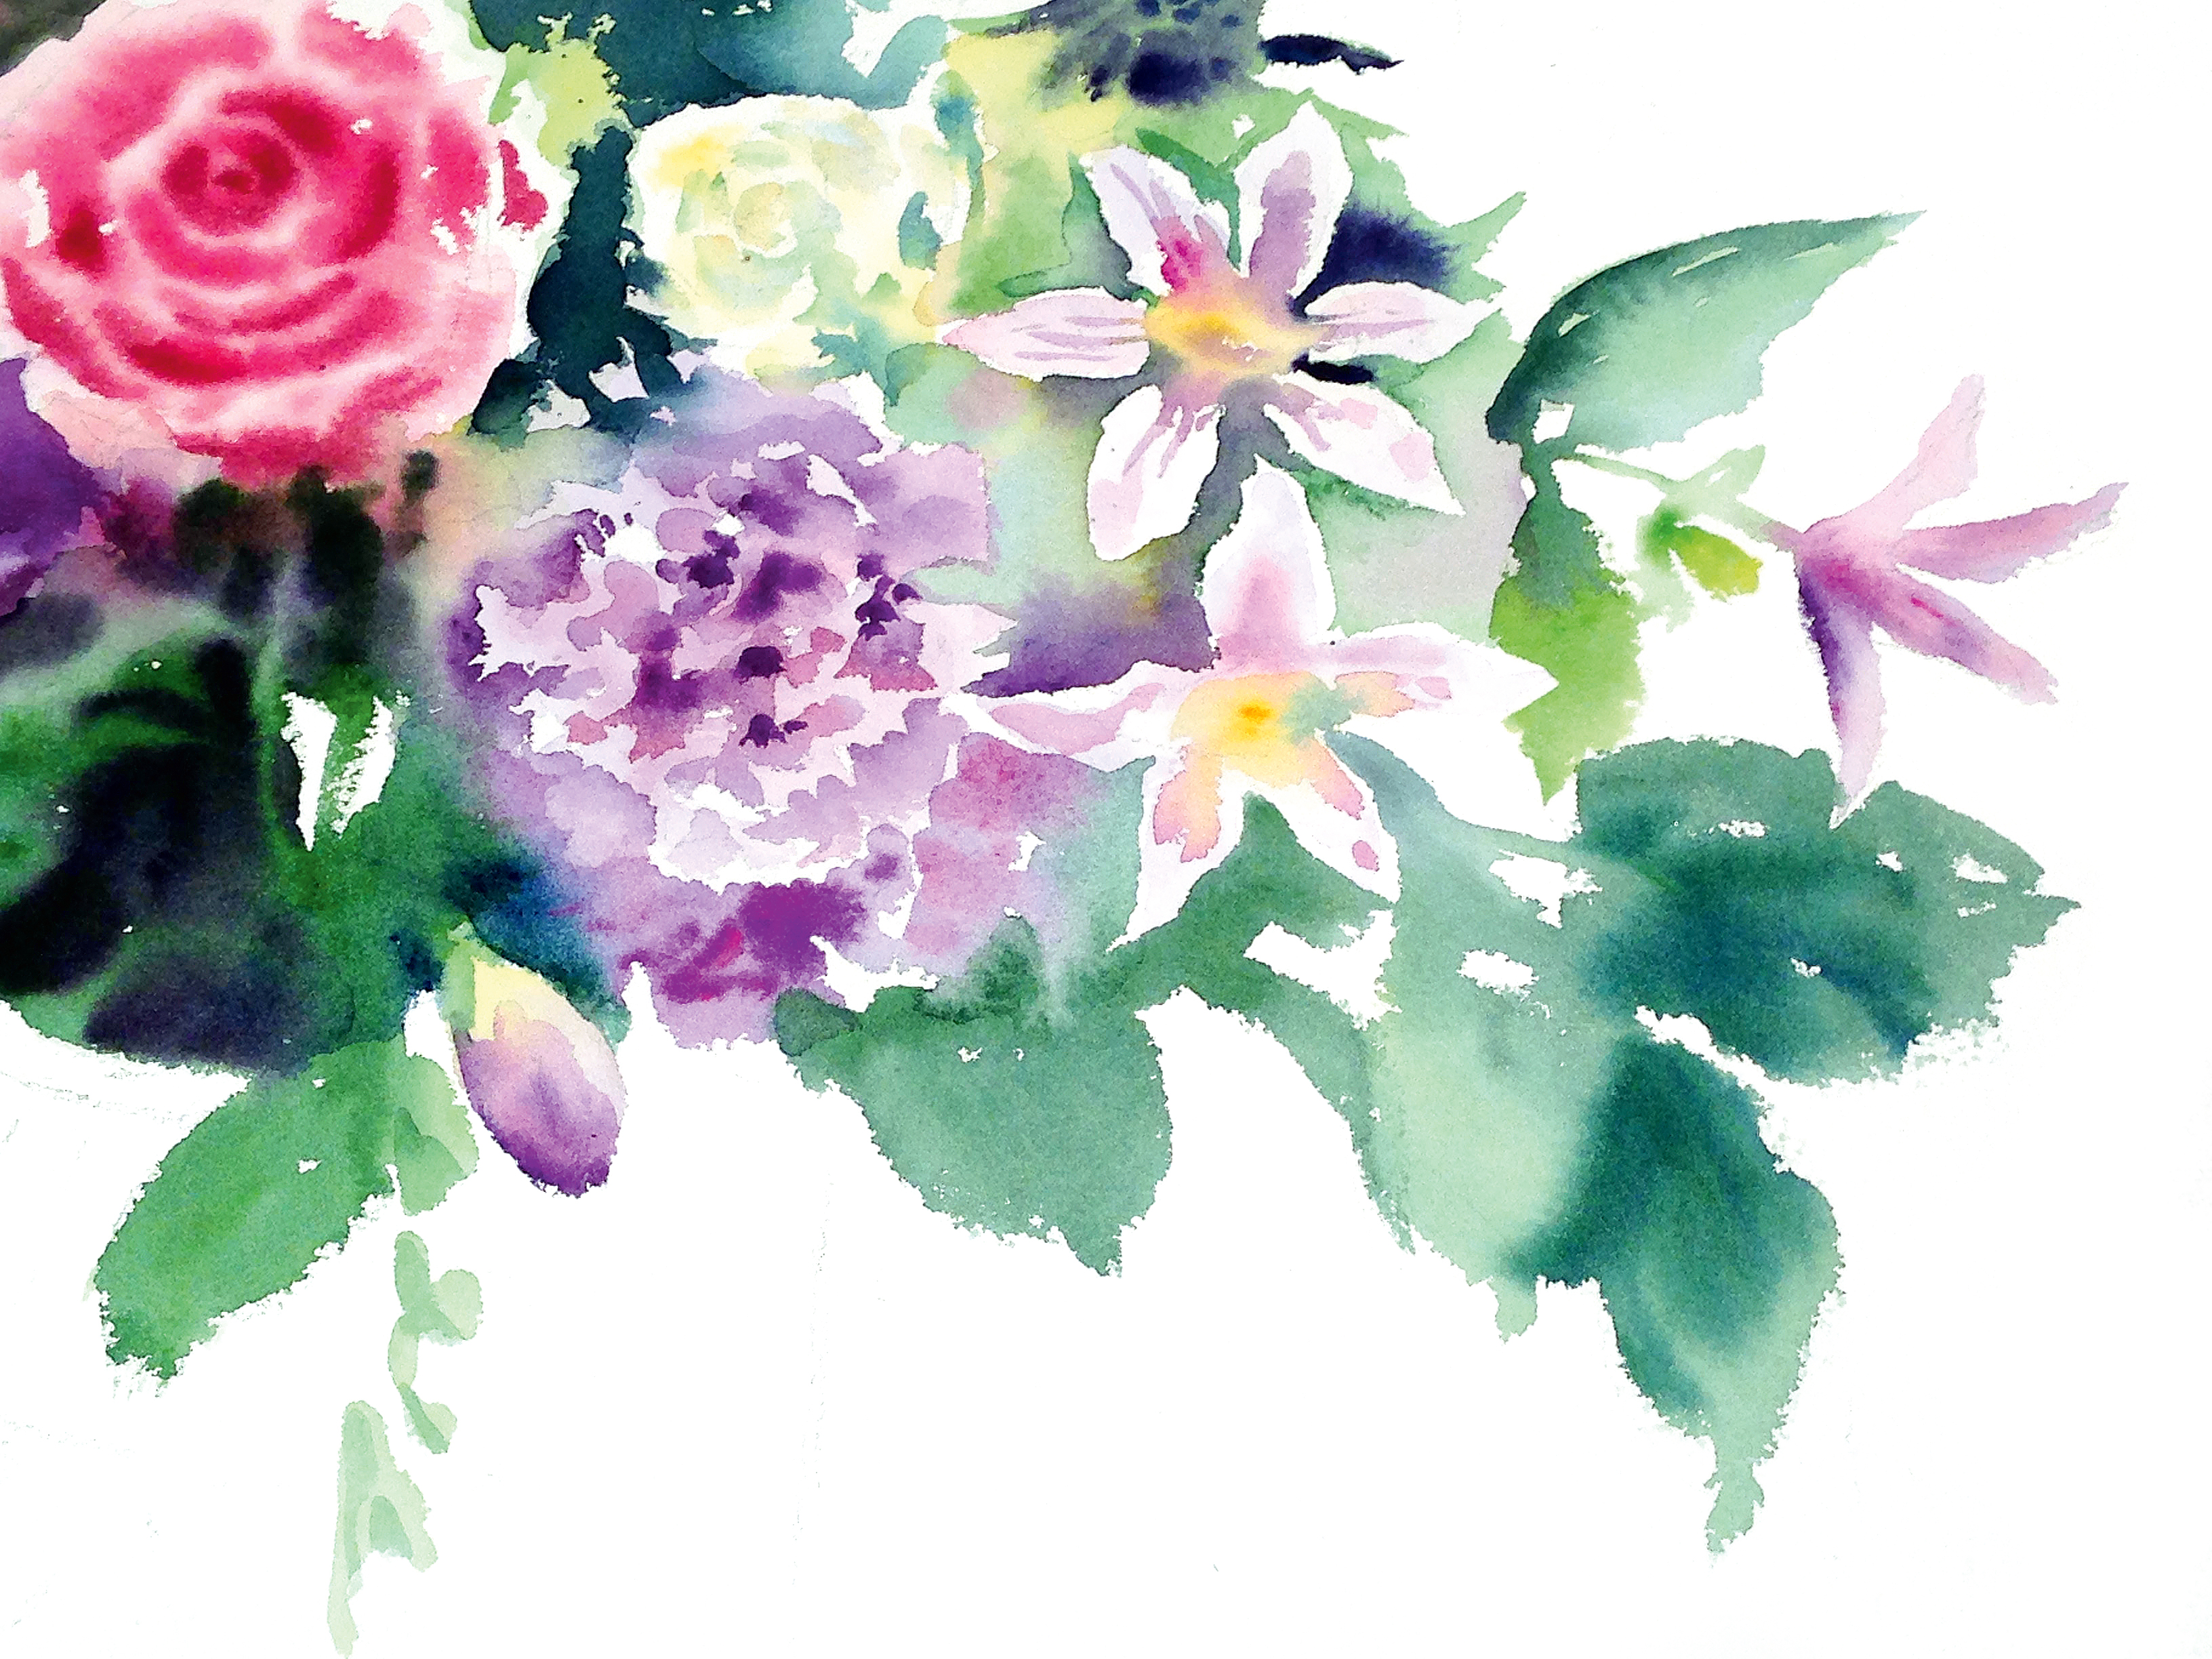
I shape the freesia bud with pale mauve and Aureolin blended together, wet meeting wet. I create the roundness of the form by adding drier colour wet-in-wet on the side that’s in shadow. I then add the sepal while the bud is damp, so the colours blend gently and give the organic appearance of the bud growing from the stem.
09. Use brushstrokes for leaves
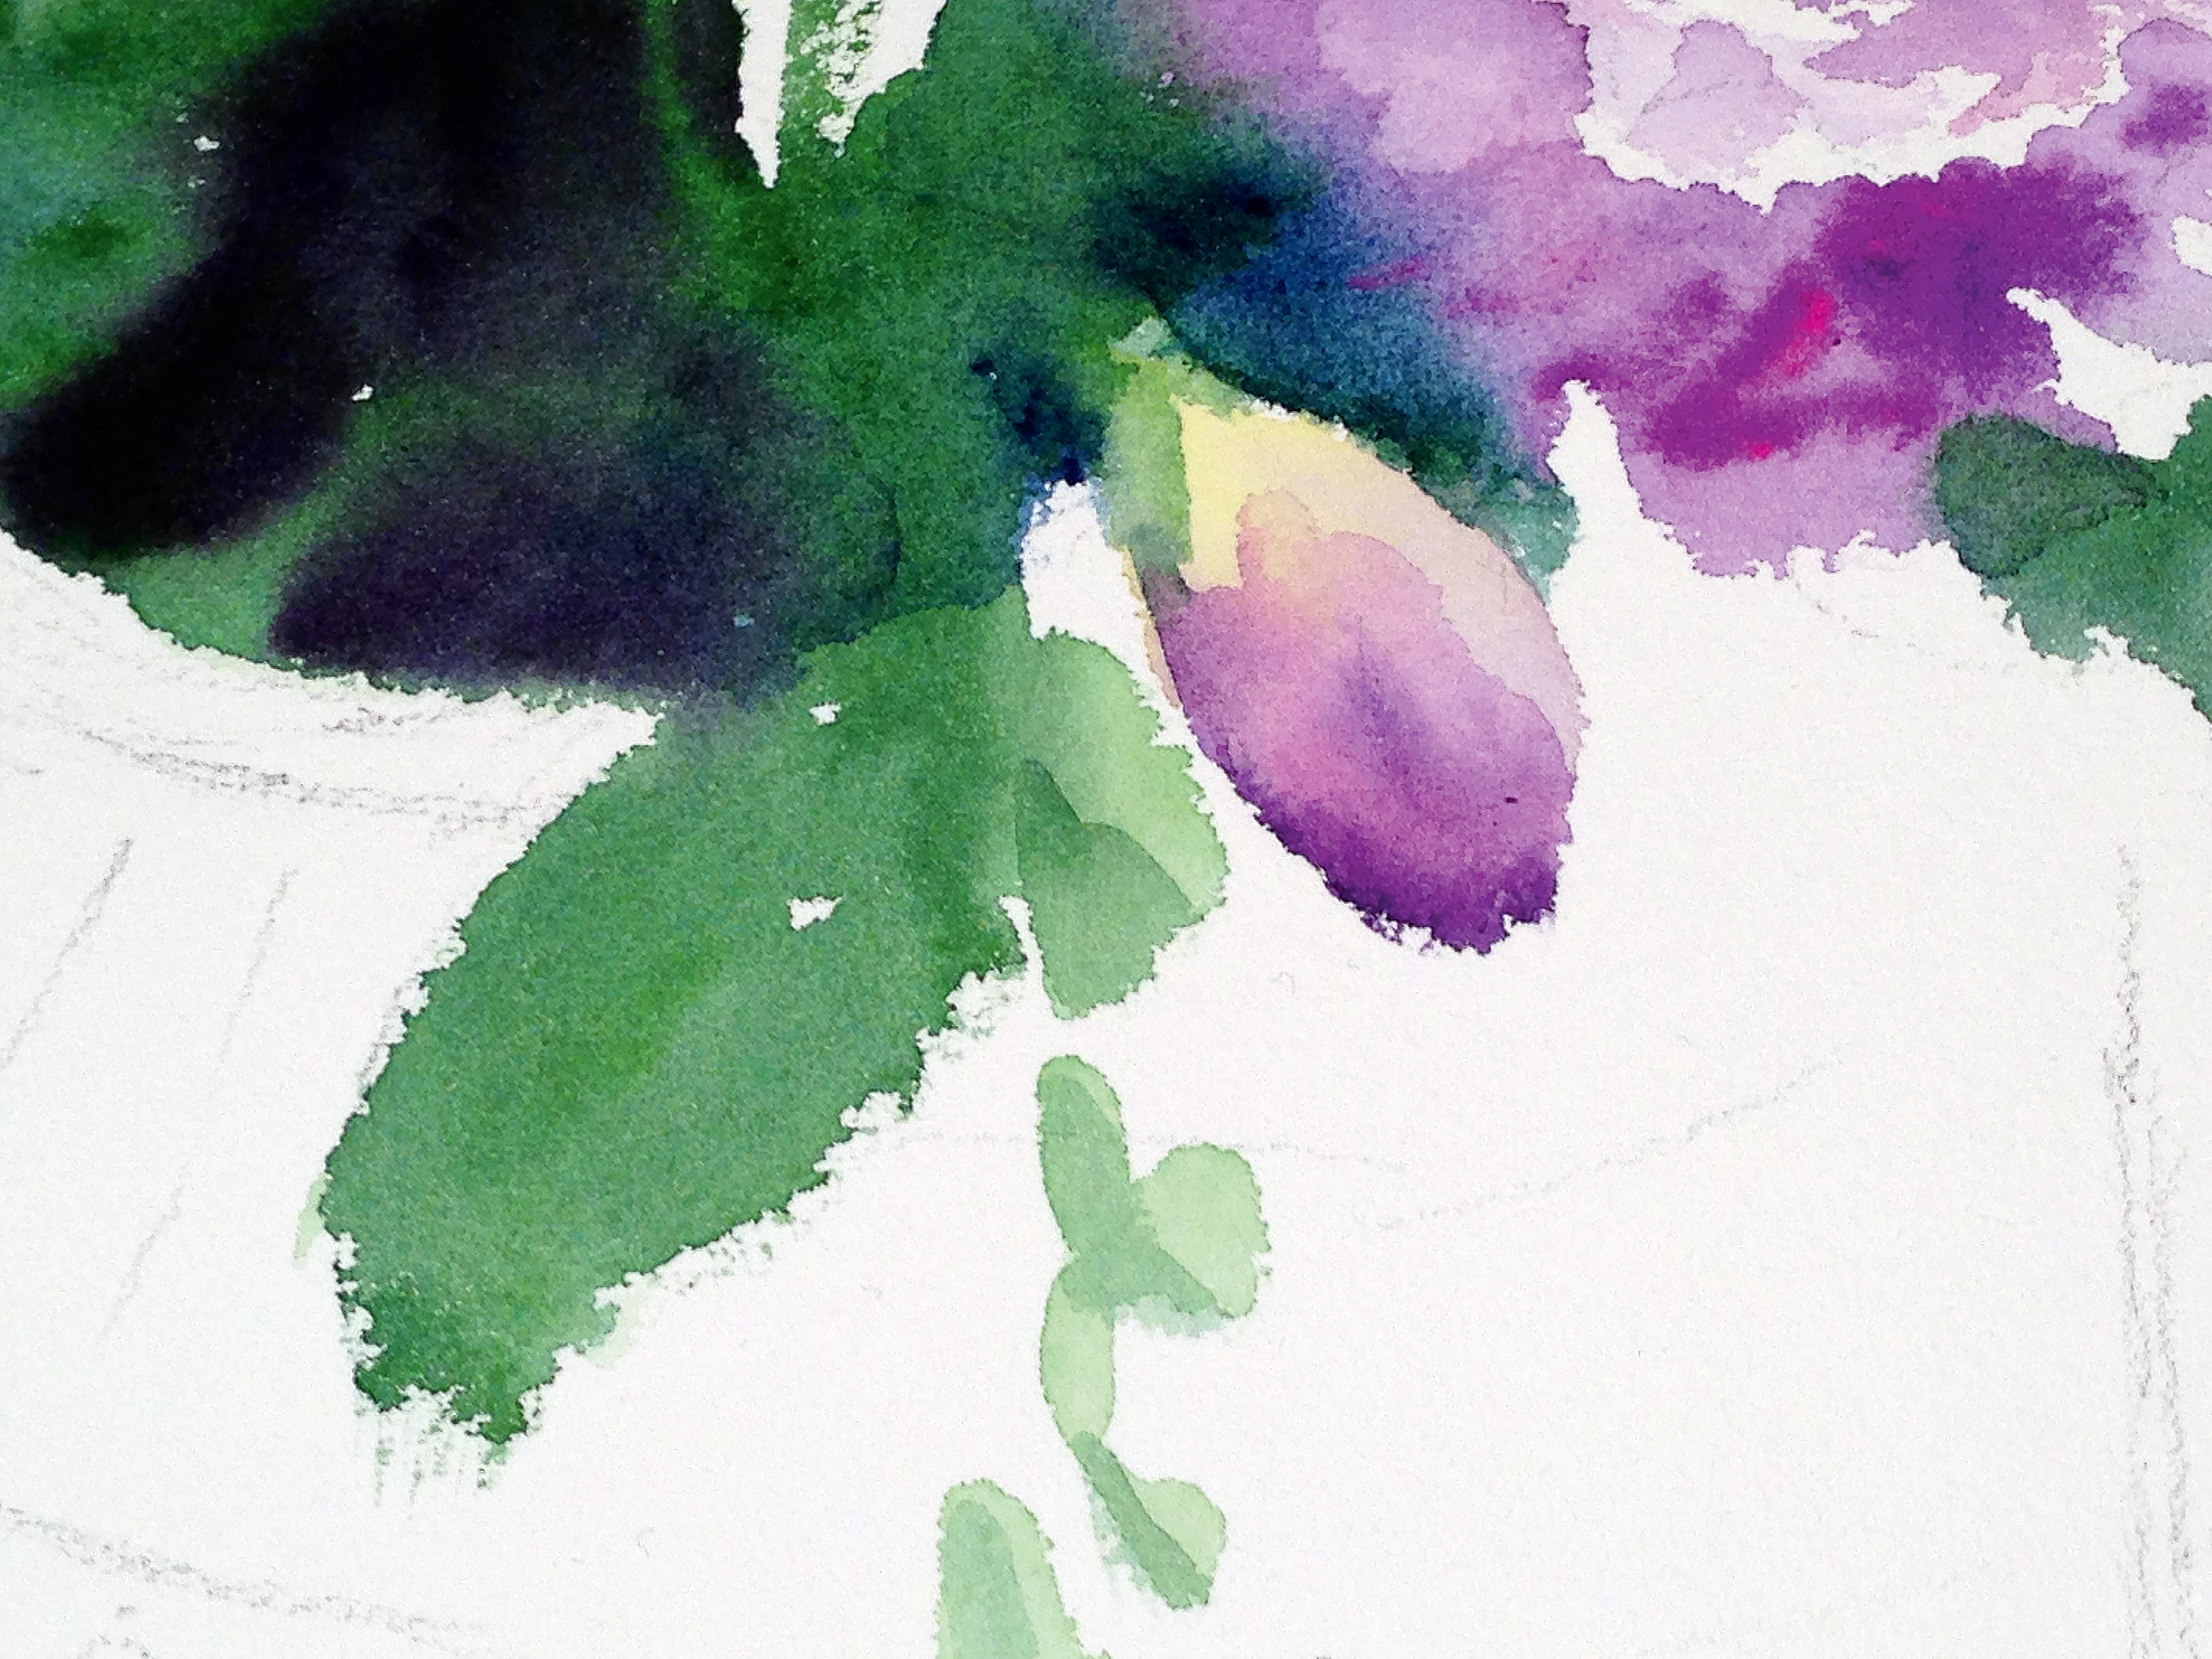
For the lower leaves, I use a big brush to paint broad strokes, and deepen the shaded parts with wet-in-wet colour. By painting darker tones behind lighter tones, the lighter leaves and flowers appear to overlap the darker leaves and create a sense of depth under the bouquet.
10. Harness blending
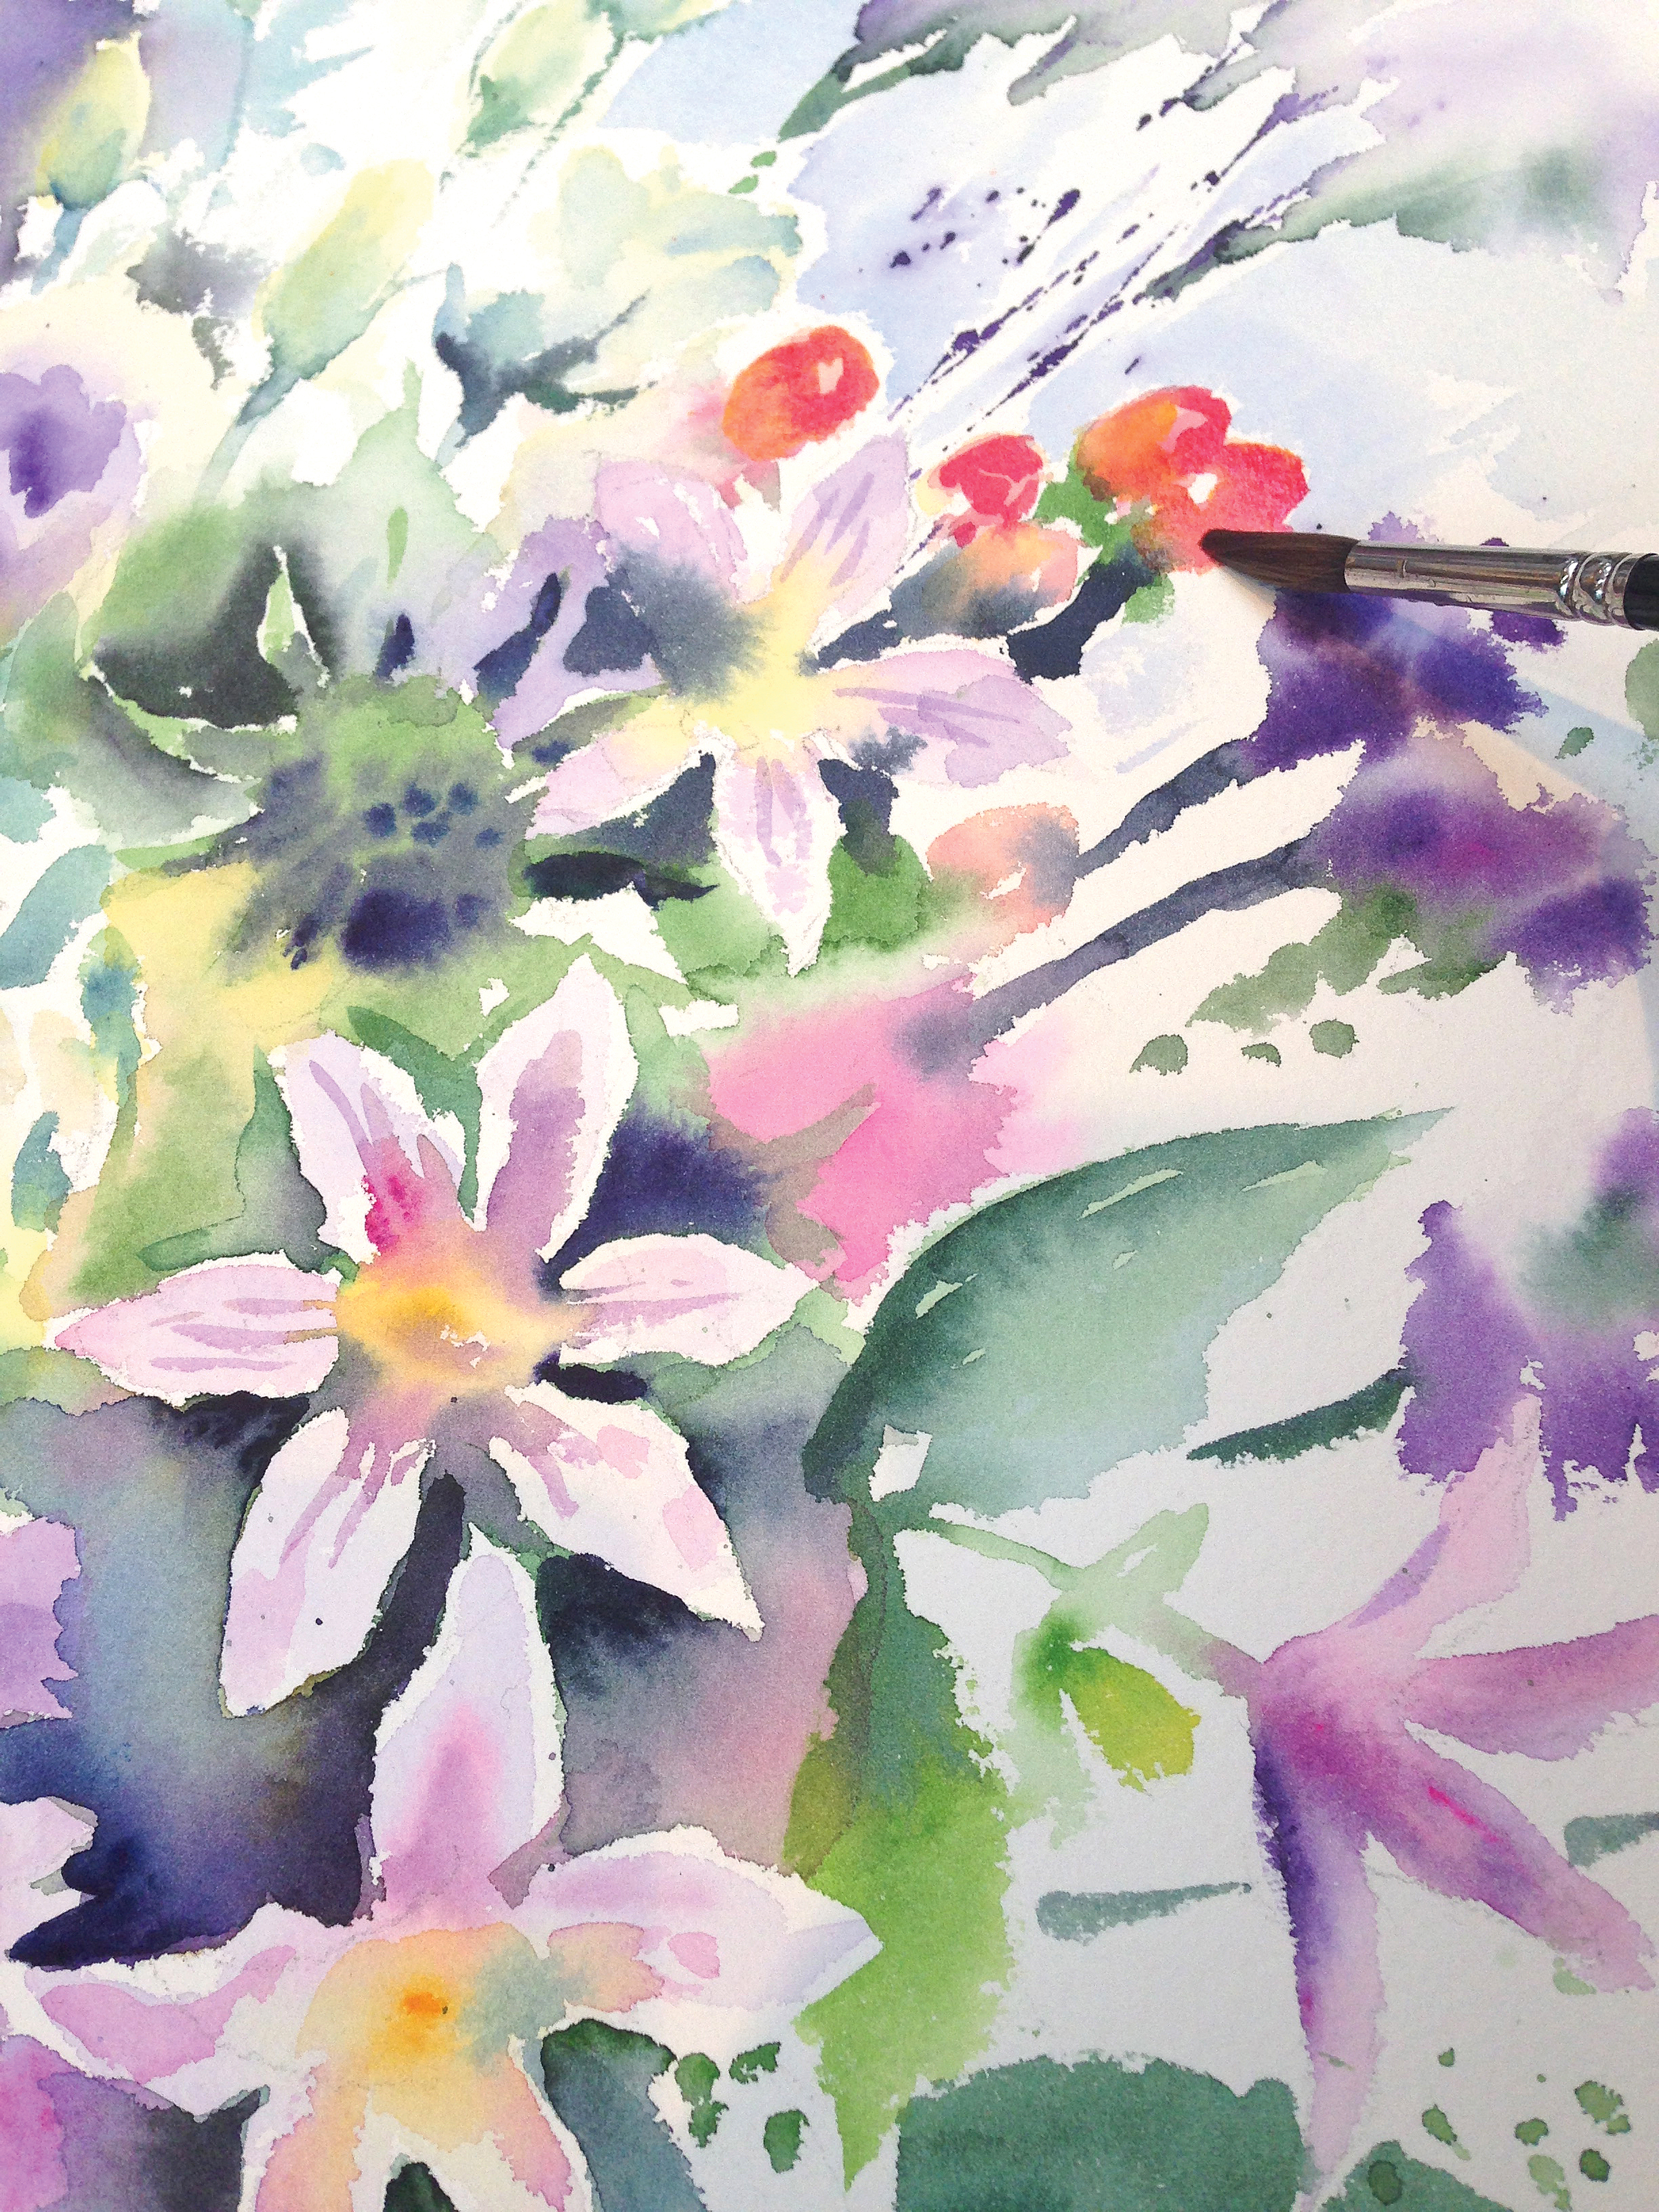
The right-hand side of the bouquet looks quite detailed, but if you look closer you’ll see the three pale flowers anchor the area. The rest is painted very quickly and loosely around them, leading away to the right, with brisk lines, blobs and brushstrokes representing approximate shapes. Such is the nature of the wet-in-wet technique, that blending makes it appear that much more is represented.
11. Spatter paint to represent foliage
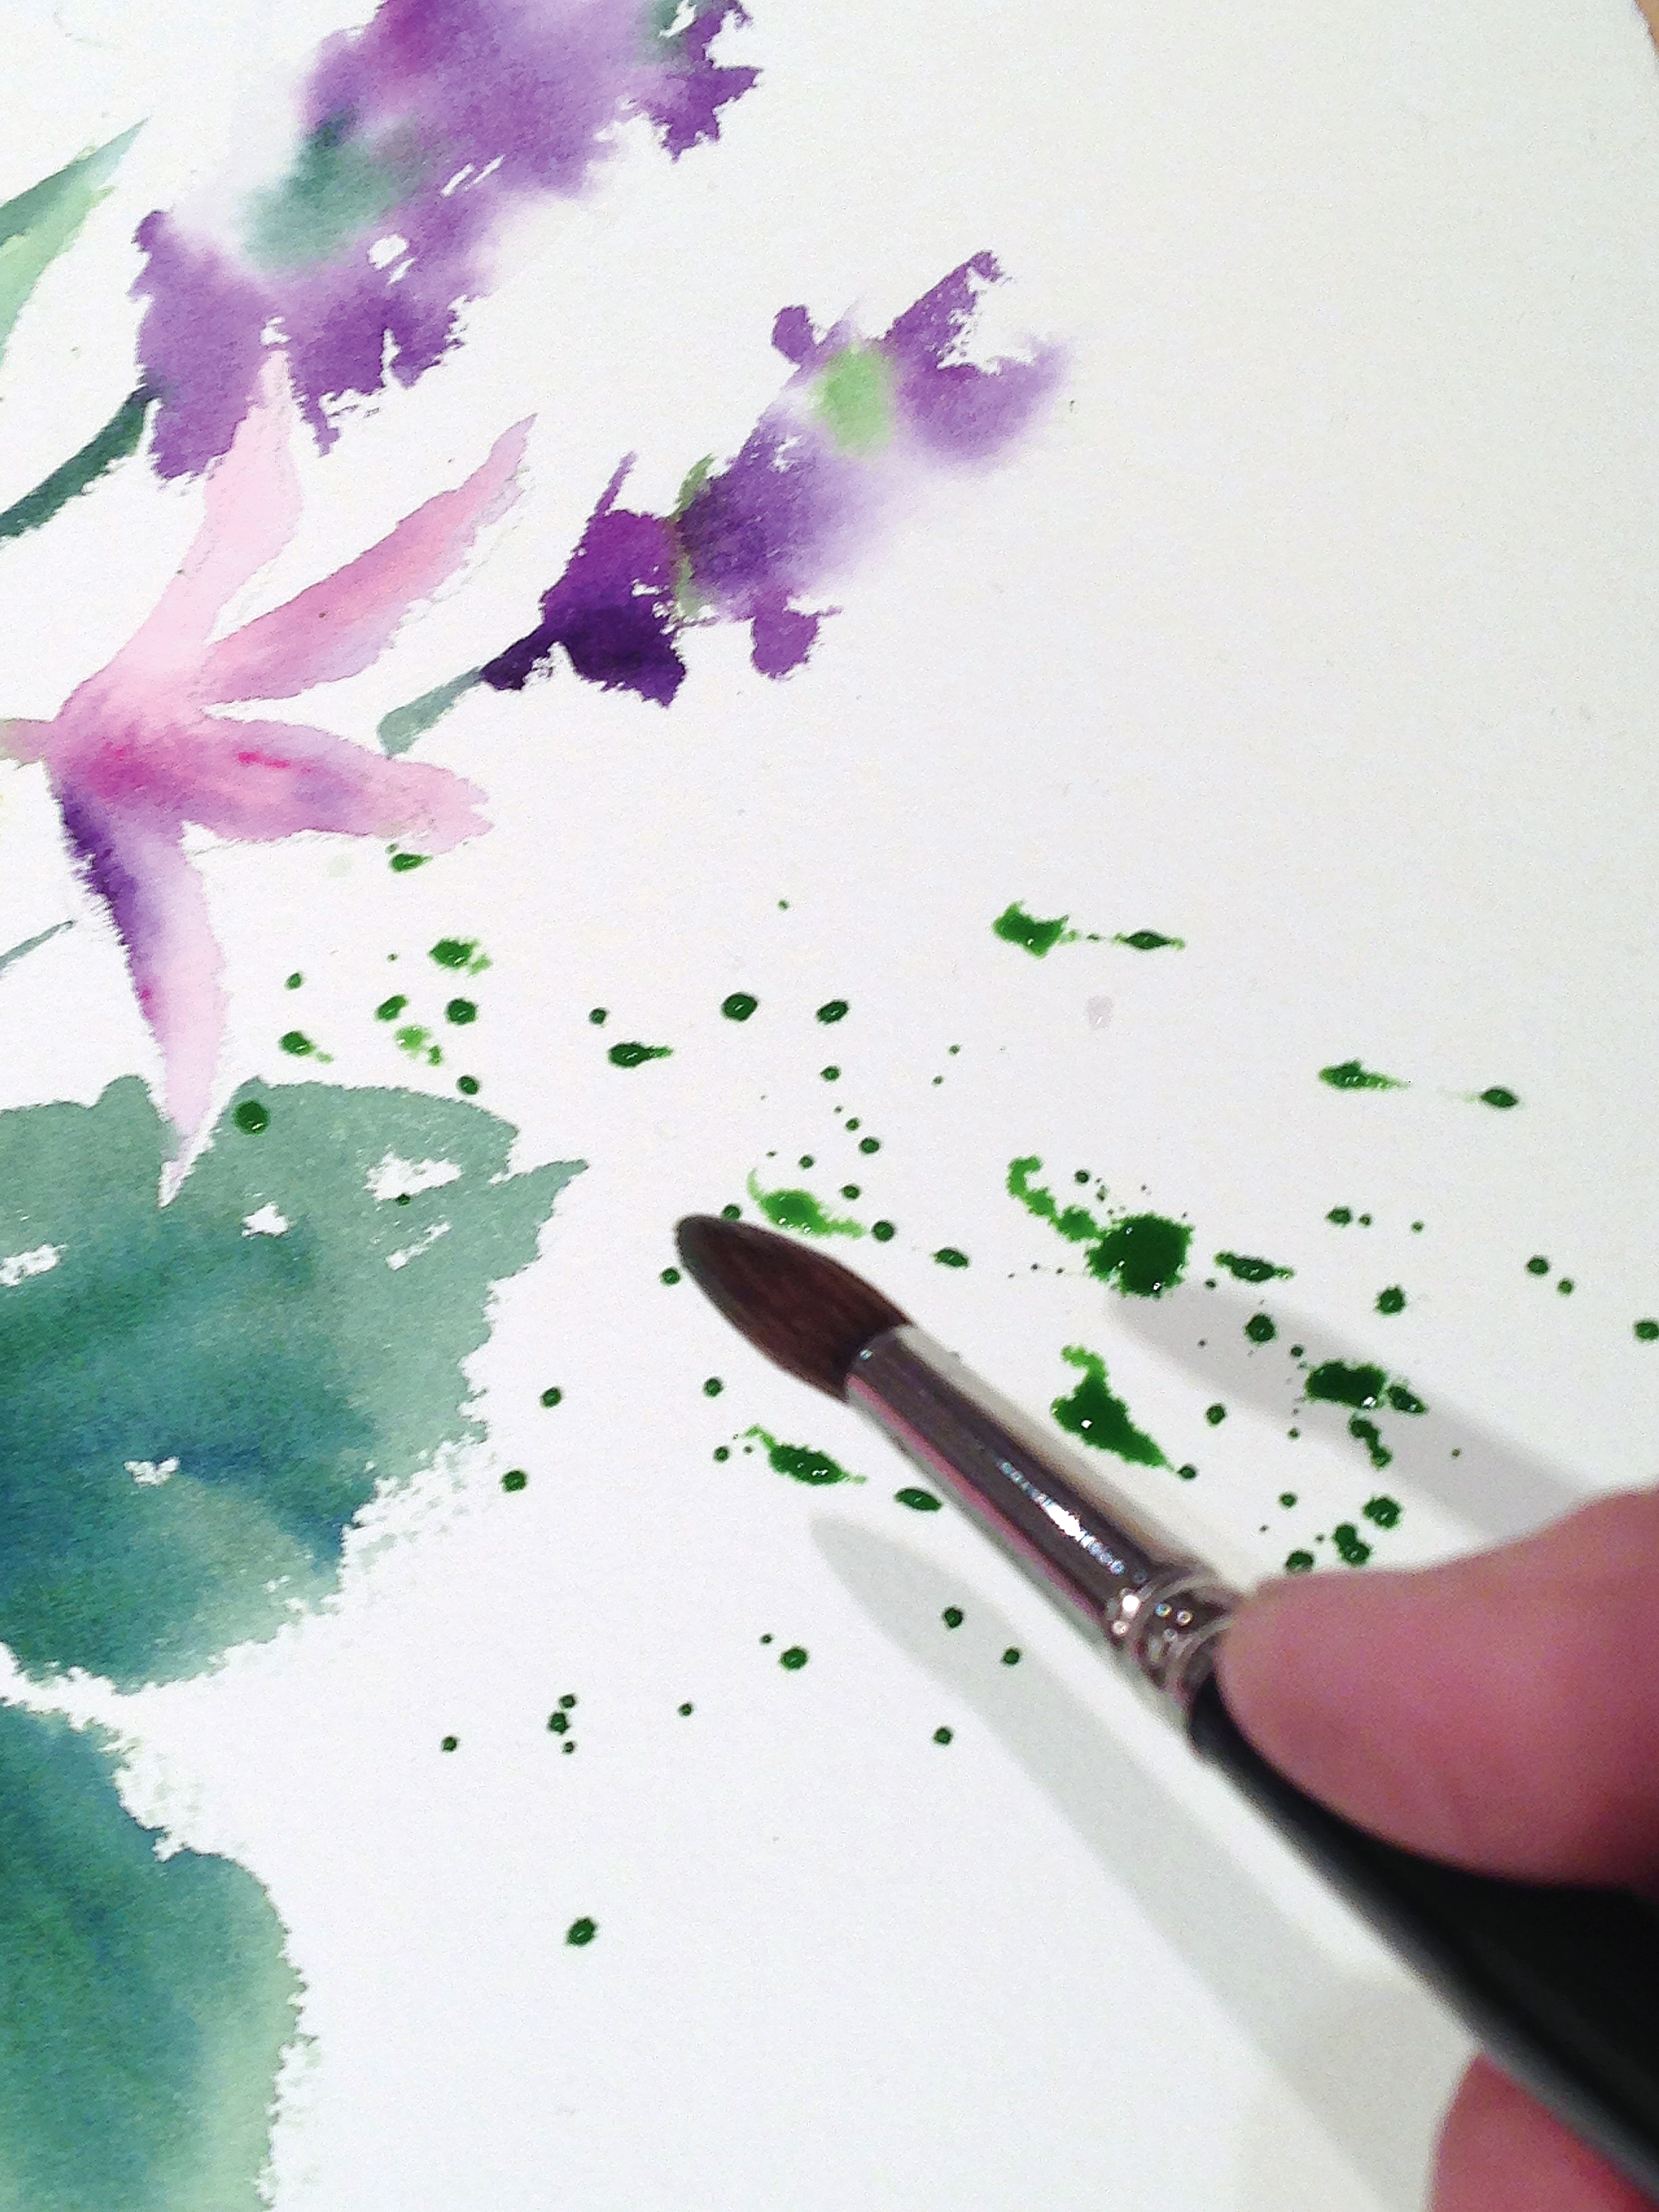
Using fairly wet, diluted paint, I spatter the paper by lightly tapping on the handle above the ferrule (metal part of the brush). This lively spatter of paint aptly represents the feathery green foliage protruding from behind the bunch of flowers, without me having to paint a single mark.
12. Balance the bouquet
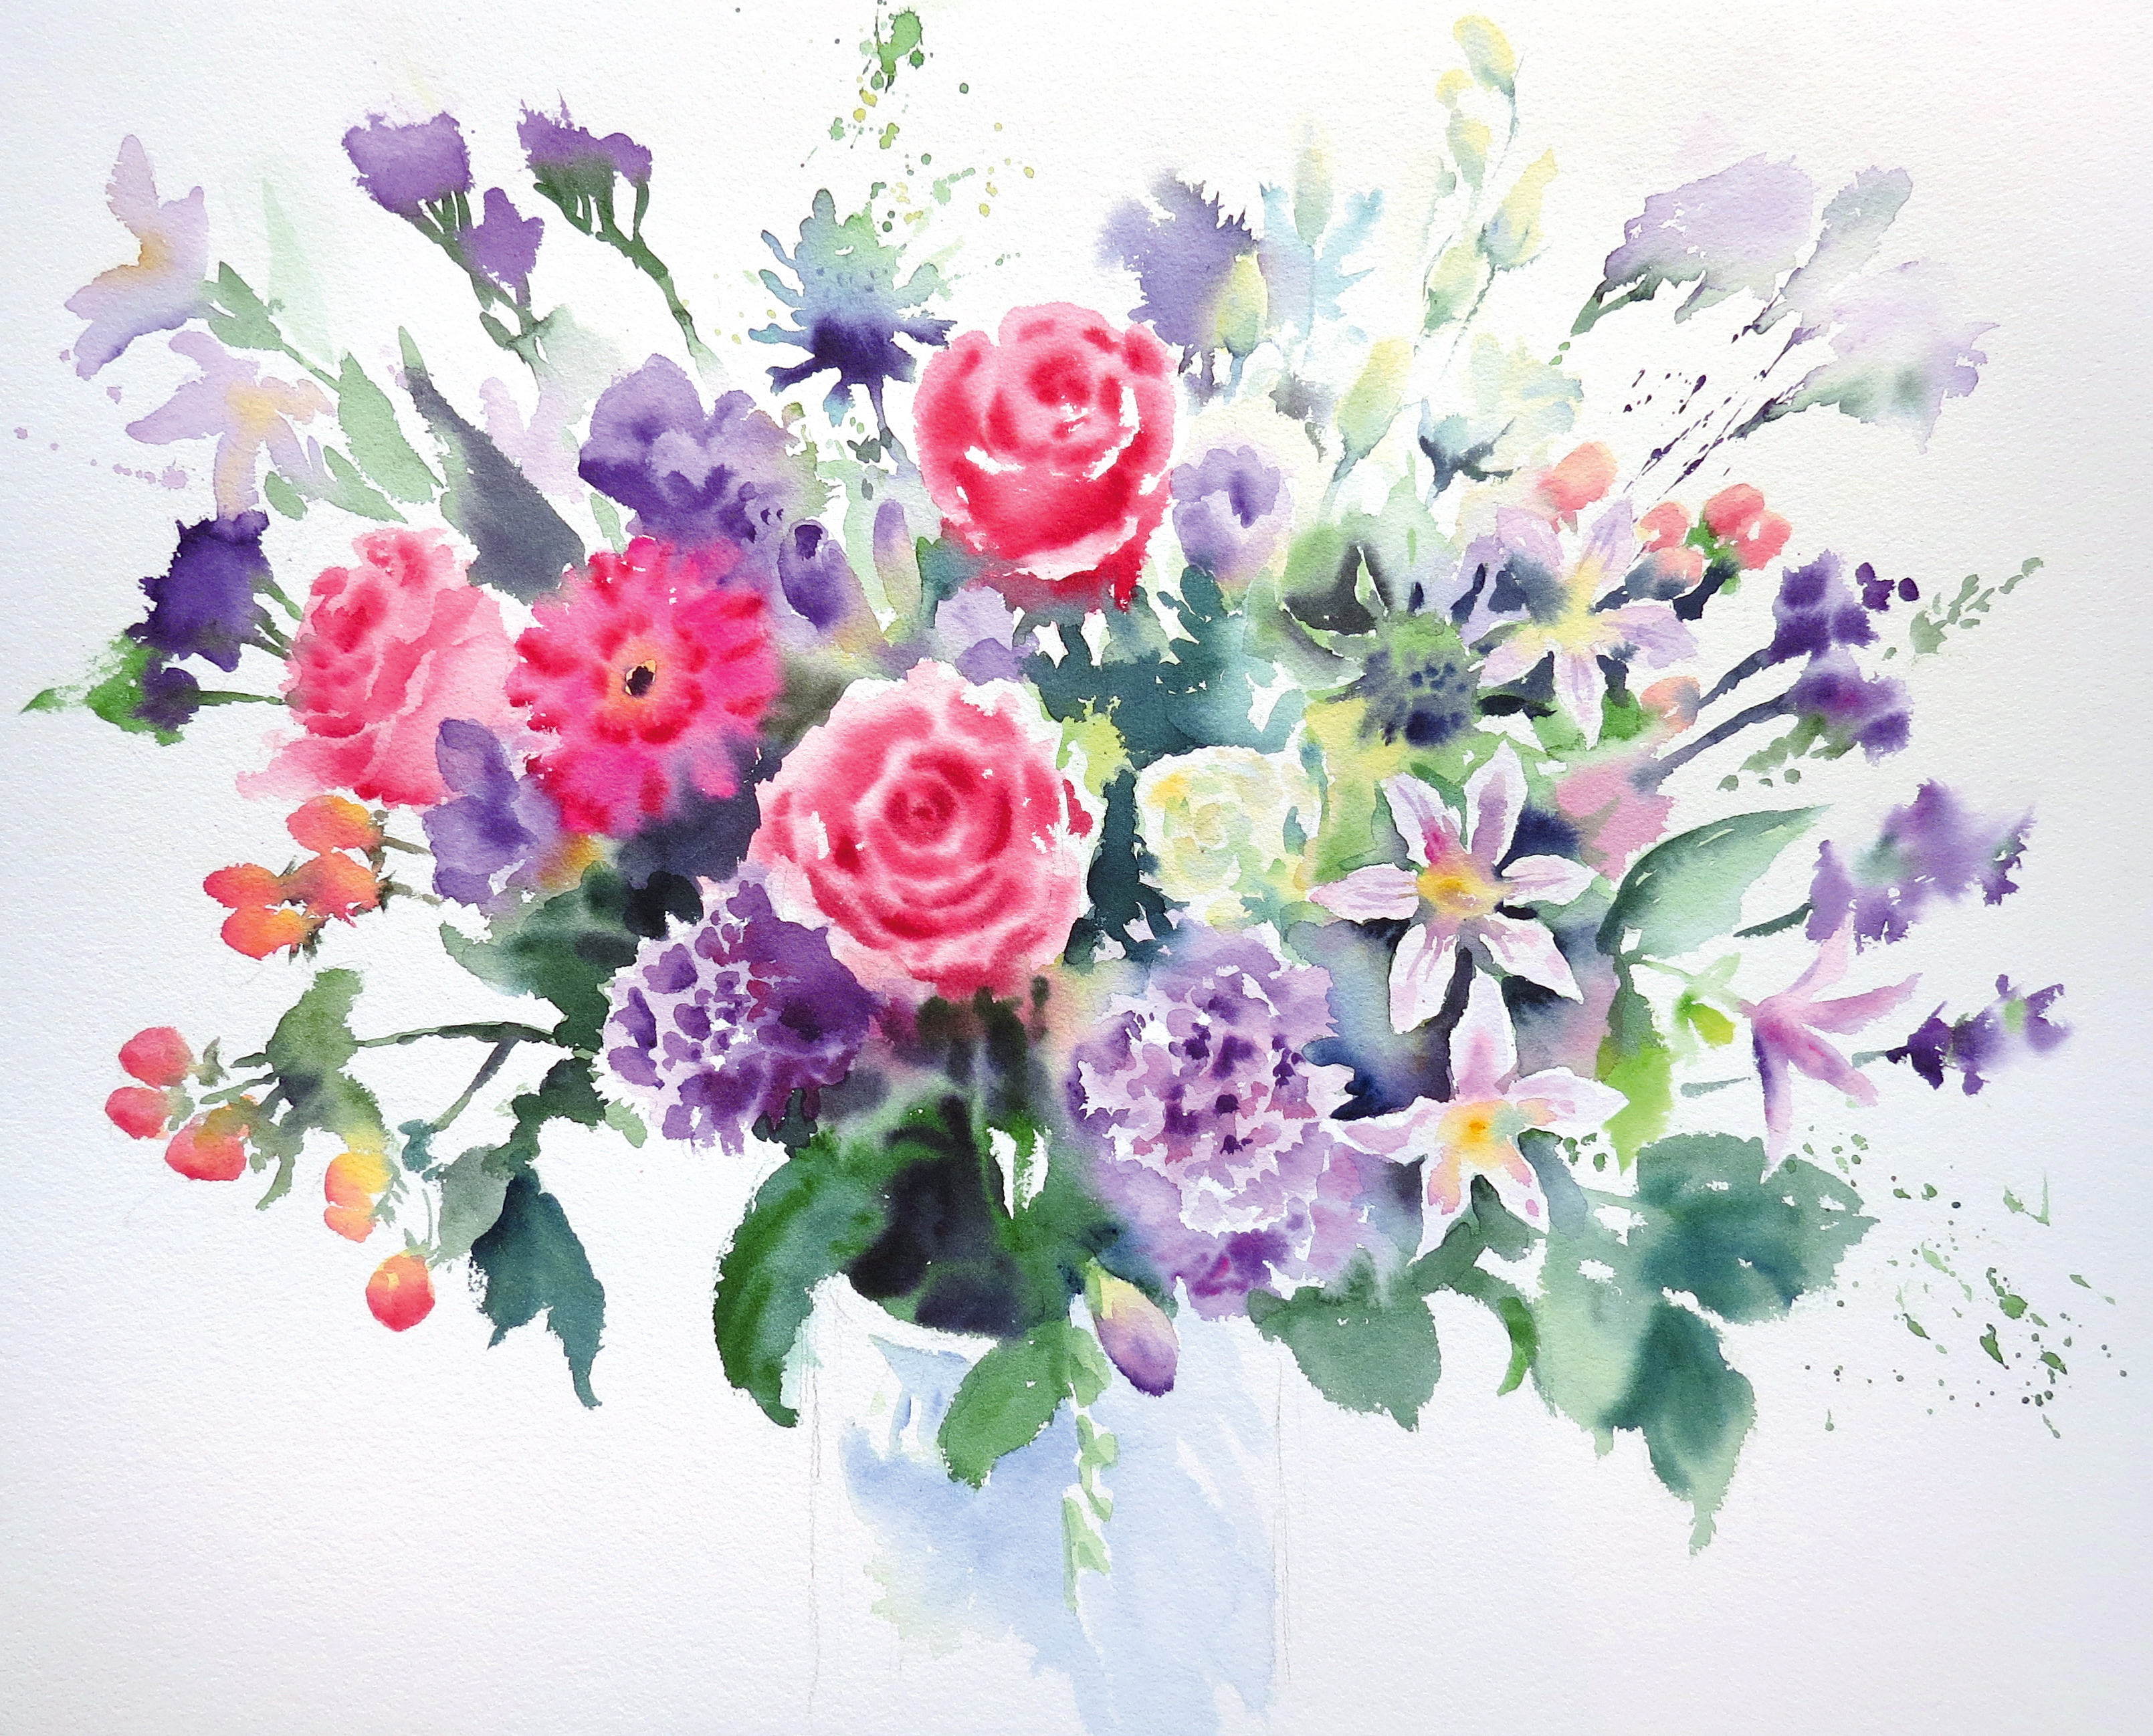
I finish the bouquet with all of the blooms radiating from a central point to ensure they sit in the vase realistically. I am almost tempted to leave it like this with the ghostly impression of a vase that must exist in order to support the flowers, but I also love the angles of the stems below and the dark tones they bring in, so I relent.
13. Paint the stems
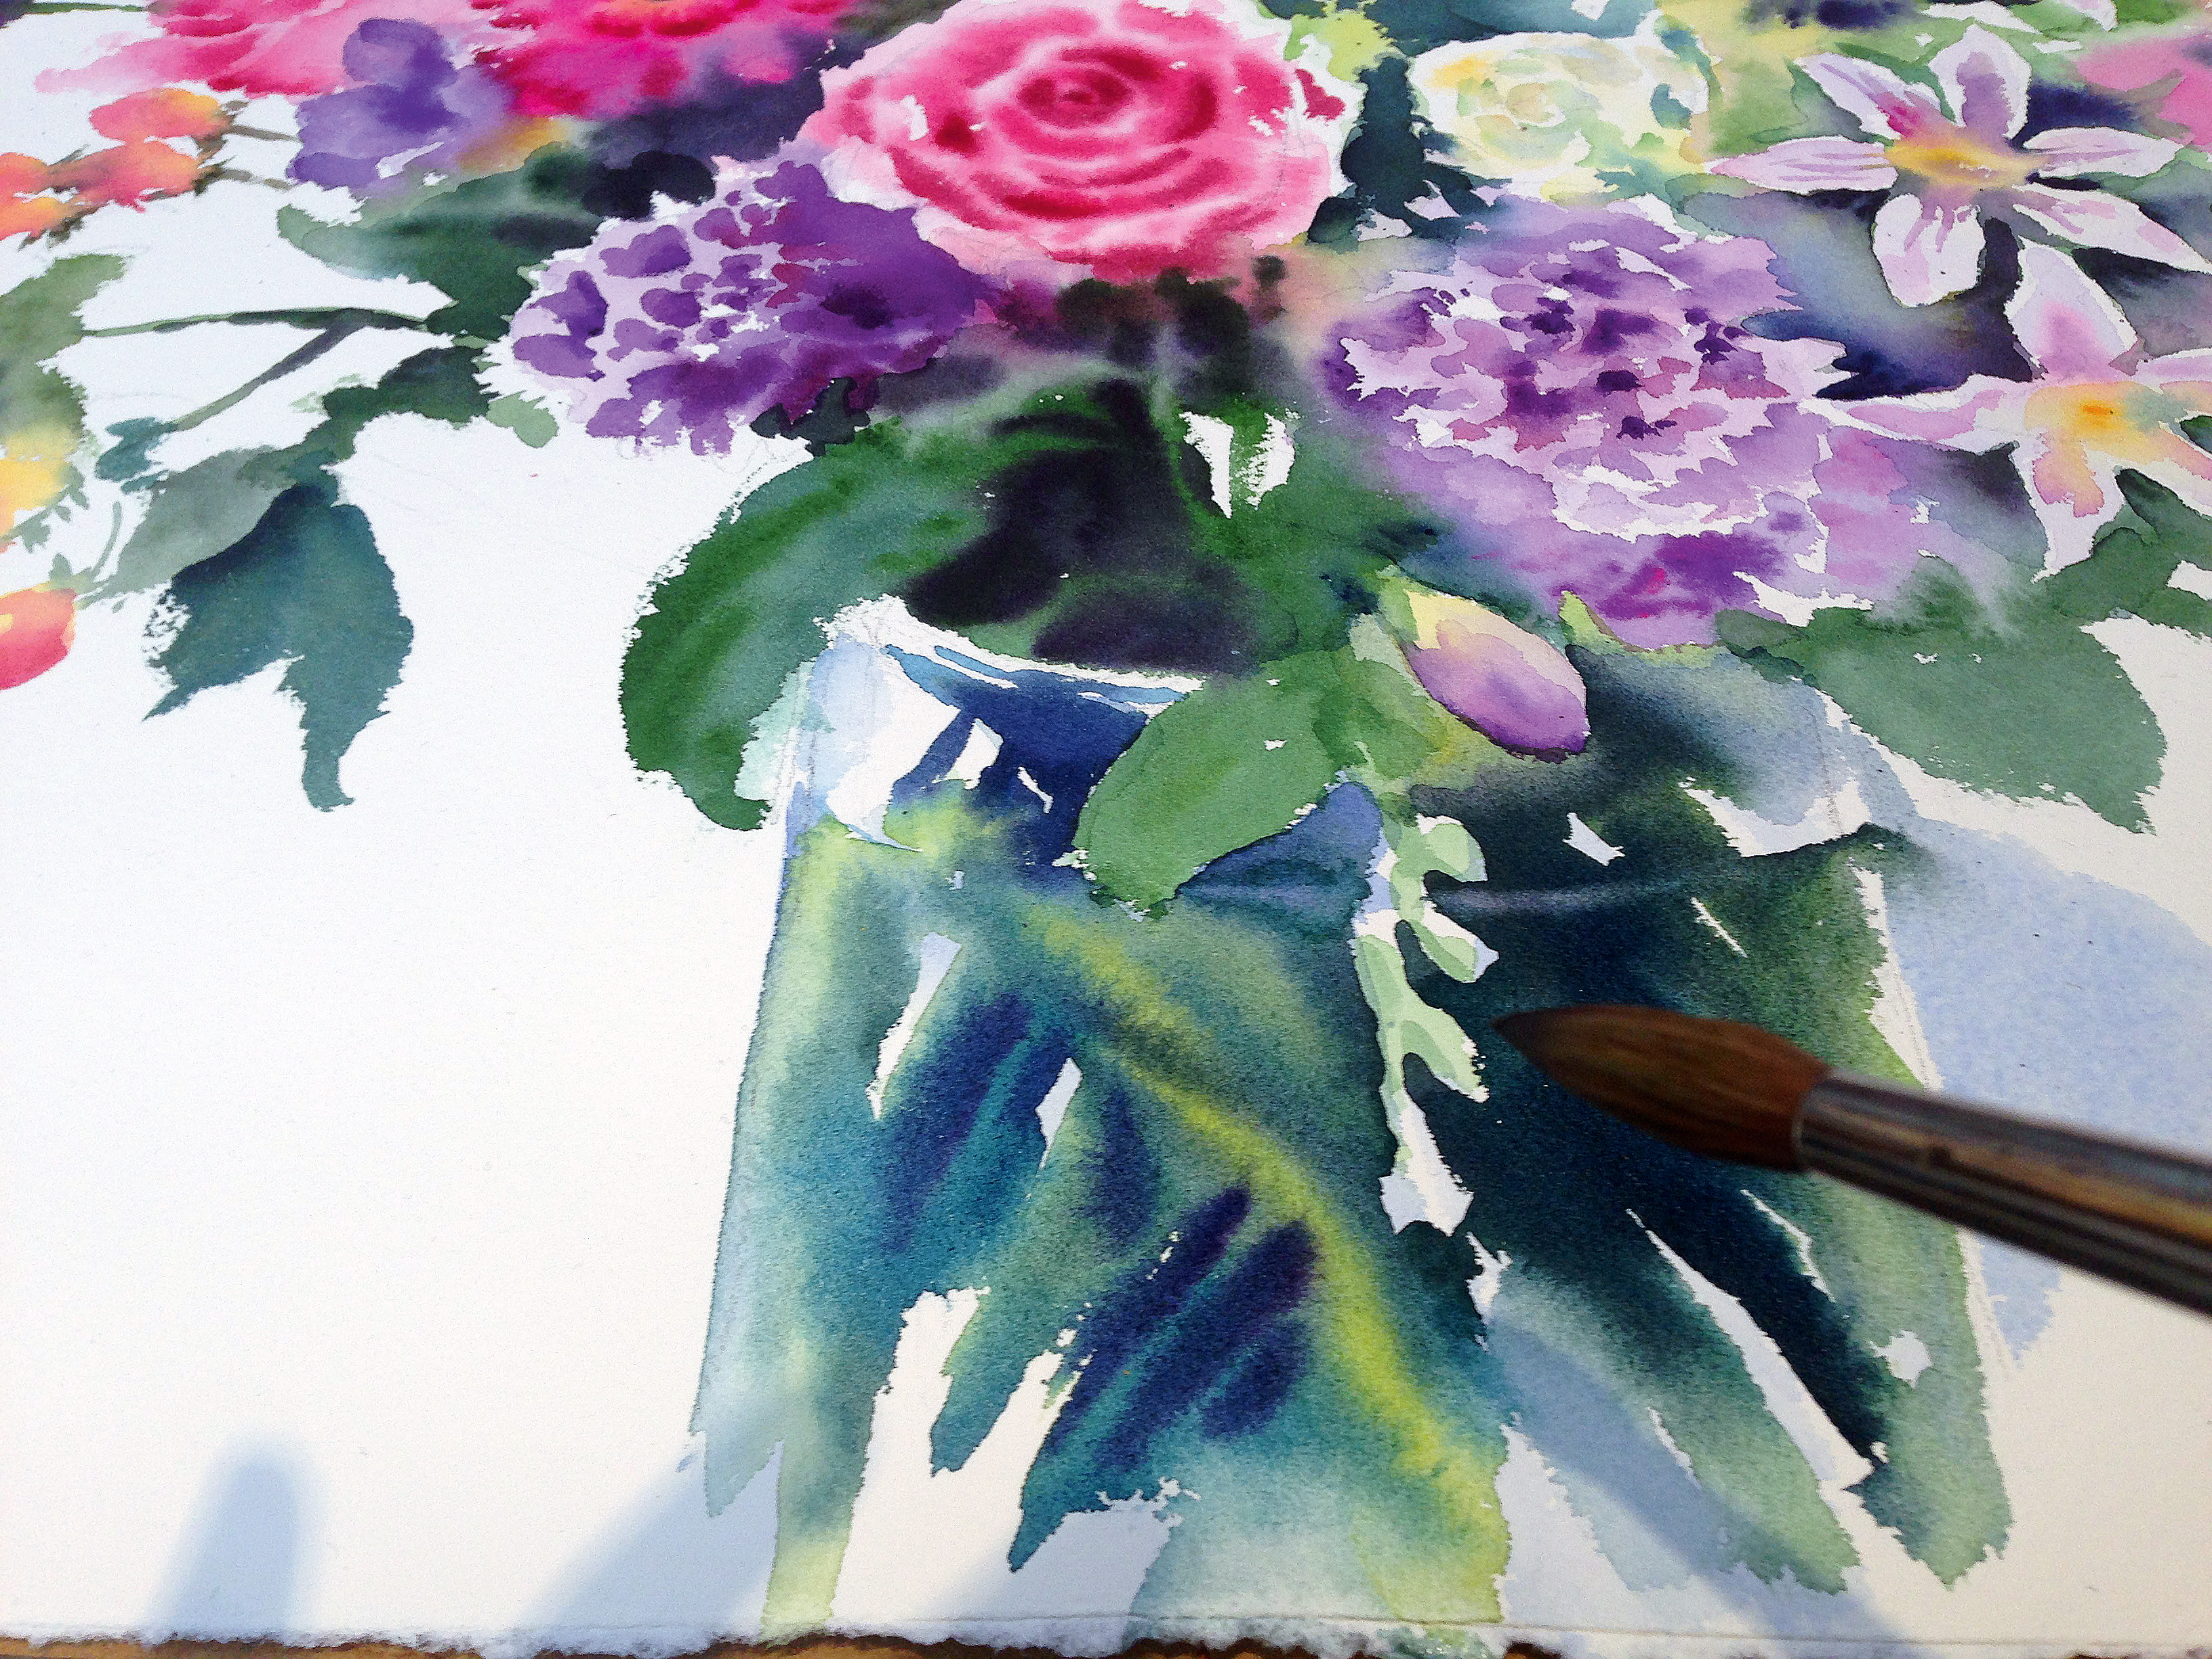
I create the stems in the vase with wet-in-wet washes, starting with the Permanent Sap Green (not too pale). I then add a deeply concentrated colour mix of Prussian Blue and mauve to follow the shadows along the line of each stem, leaving small lozenges of light between the criss-cross of the main ones.
14. Make finishing touches
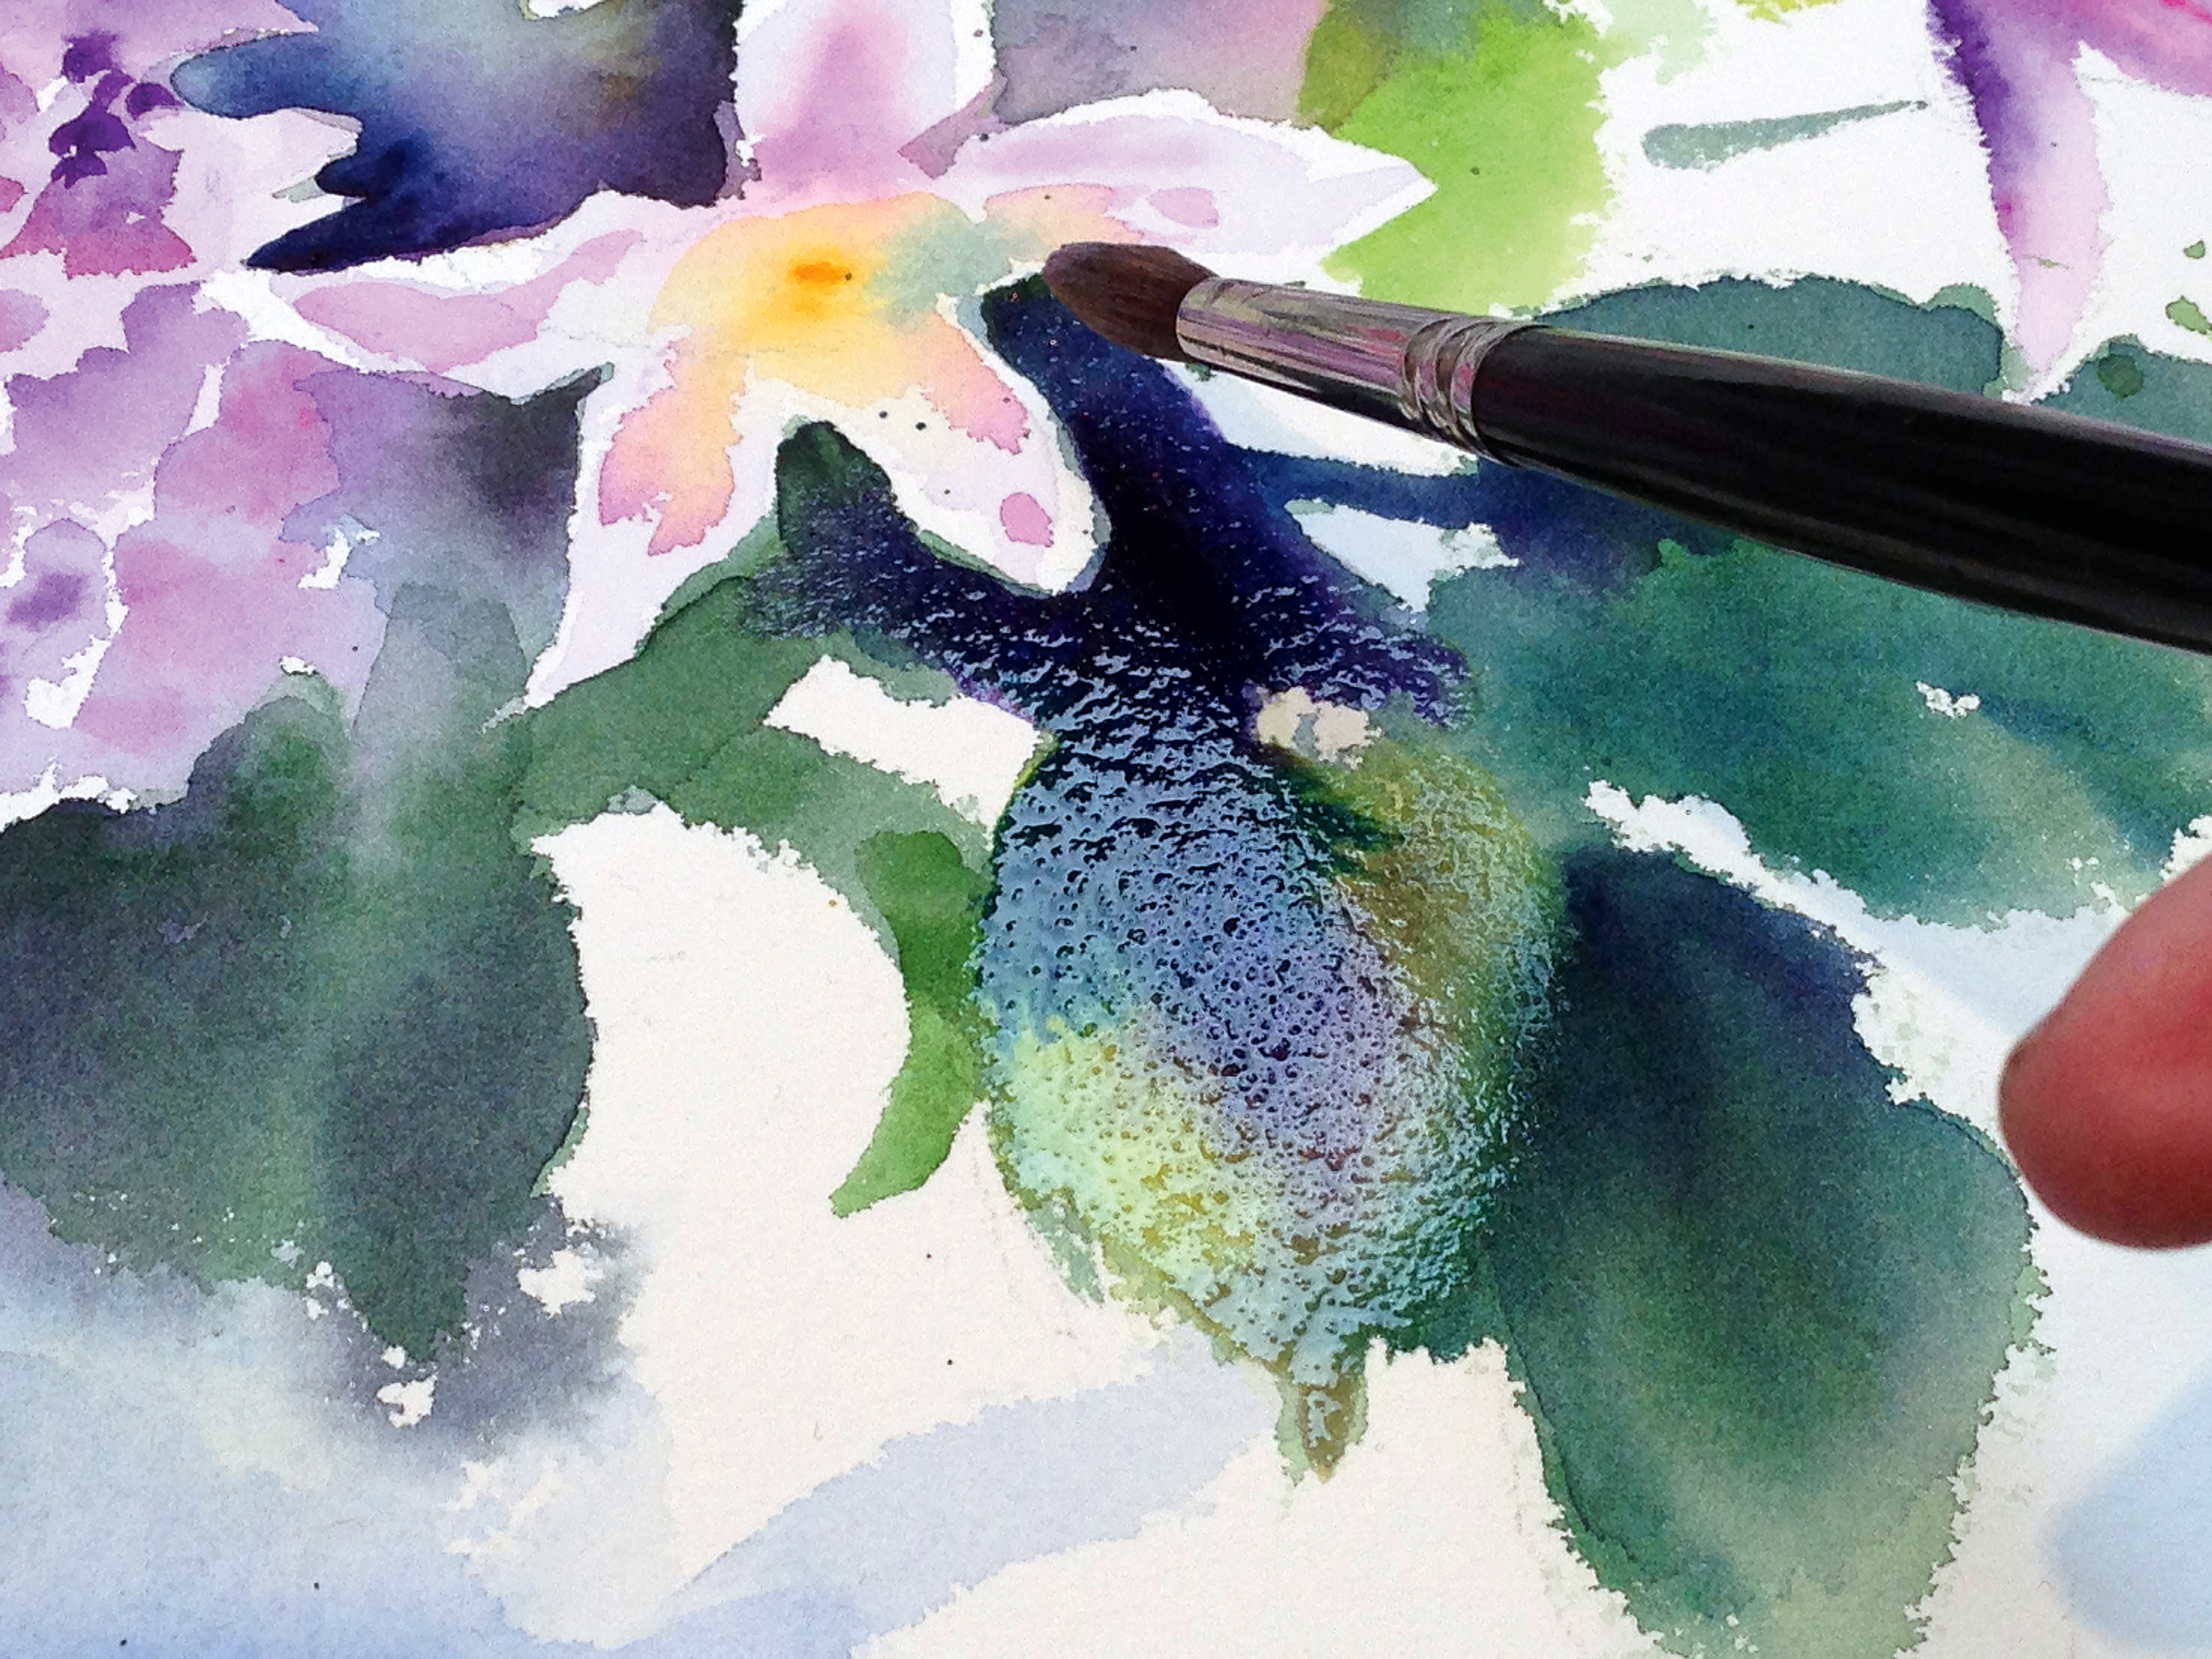
Final touches of deeper tone are needed in some areas of the foliage. To do this, I dampen the area with clean water then add in concentrated colour with the tip of the brush from the point of darkest shadow, allowing it to spread out into the damp wash.
This article was originally published in Paint & Draw magazine issue 4. Buy it here.
Related articles:

Thank you for reading 5 articles this month* Join now for unlimited access
Enjoy your first month for just £1 / $1 / €1
*Read 5 free articles per month without a subscription

Join now for unlimited access
Try first month for just £1 / $1 / €1
