10 top MODO tips and techniques
MODO 10 is one of the most powerful digital content creation apps on the market – here's 10 tips to get you up to speed with the amazing application.
With the latest release of MODO 10.1, The Foundry are starting to really refine MODO into one of the premiere modelling and content creation applications available. Whether you are working in design, VFX or games, MODO comes with a huge range of options to help artist’s of any background create their assets or finished renders in as creative a ways as possible.
In this article I will share some of my favourite tips, which I have learned in my 10 years of using MODO.
01. Popover and Pie Menus
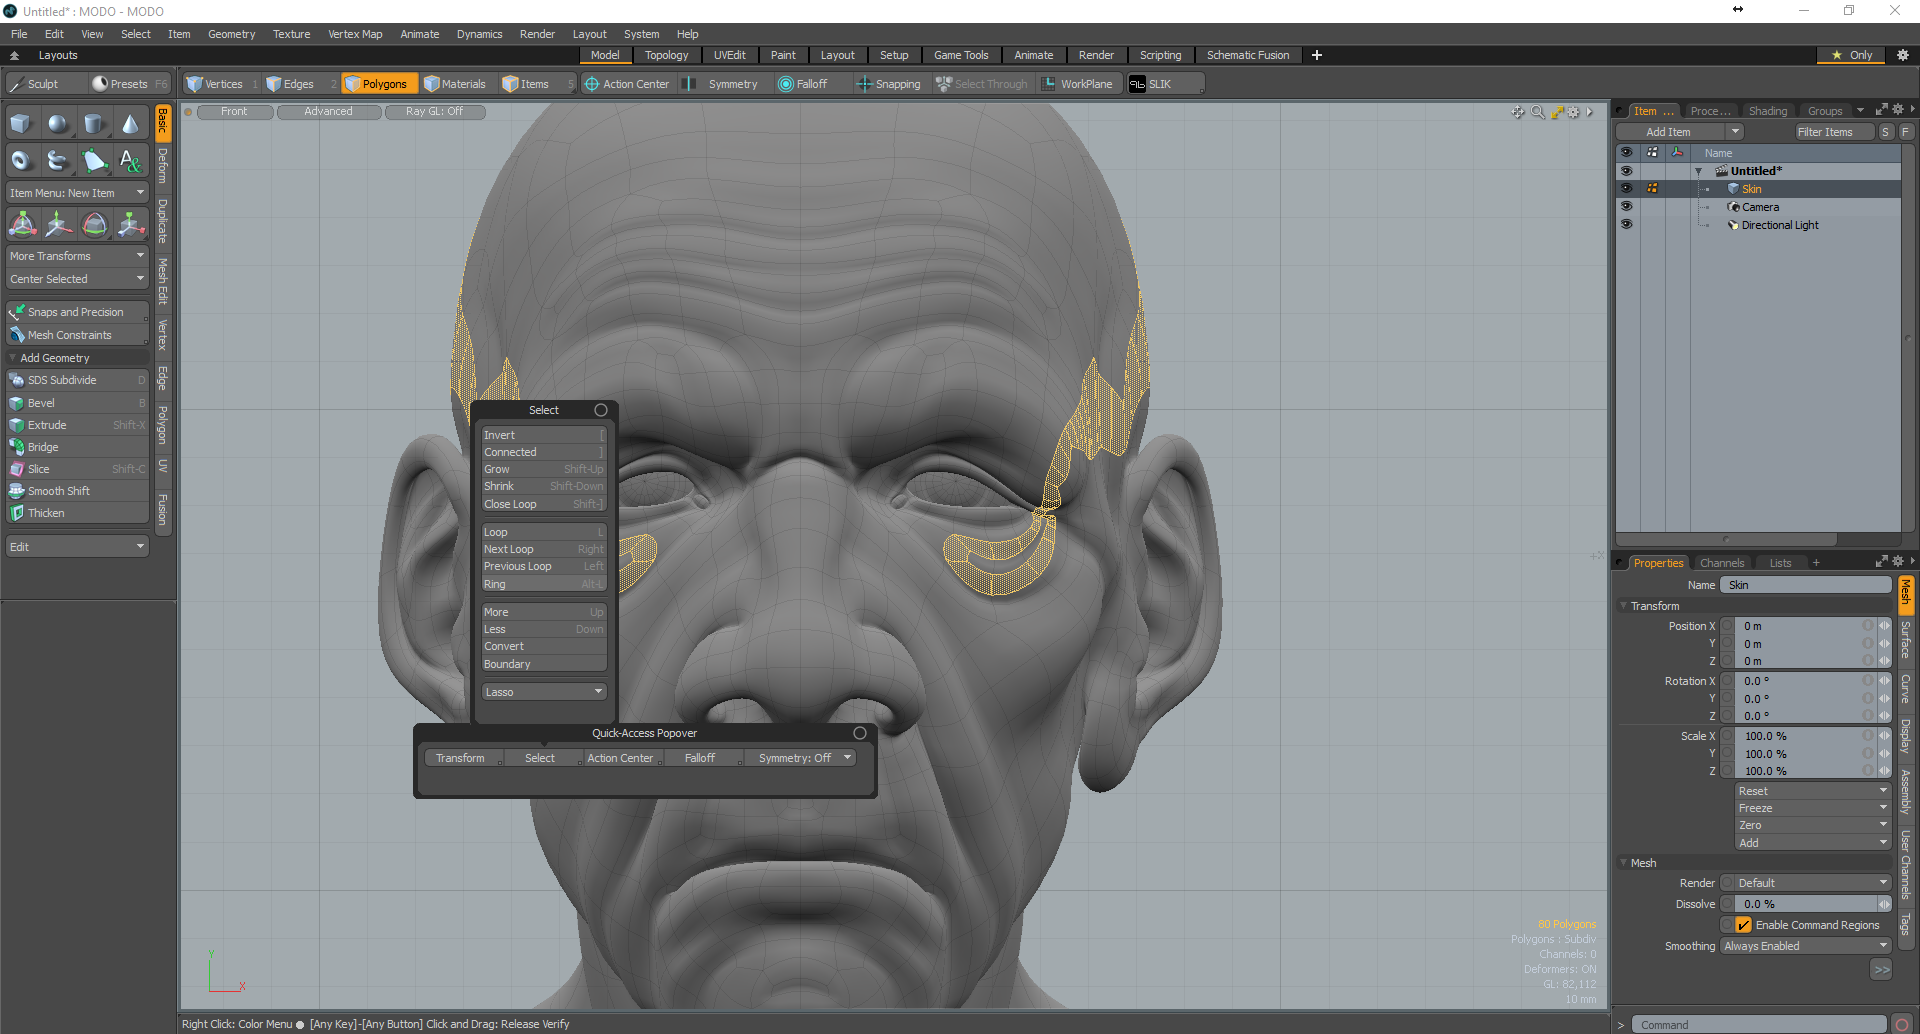
One of the great things about MODO is the way that a lot of the tools are accessible by hot keys, but as we can’t be expected to remember all of the key combinations, use the Quick Access Popover by pressing ALT and the Spacebar to quickly get to a lot of the most common commands in MODO. CTRL and the Space bar brings up the viewport Menu. Like all palettes within MODO both of these can be modified to show what you need them to.
02. Use Projects
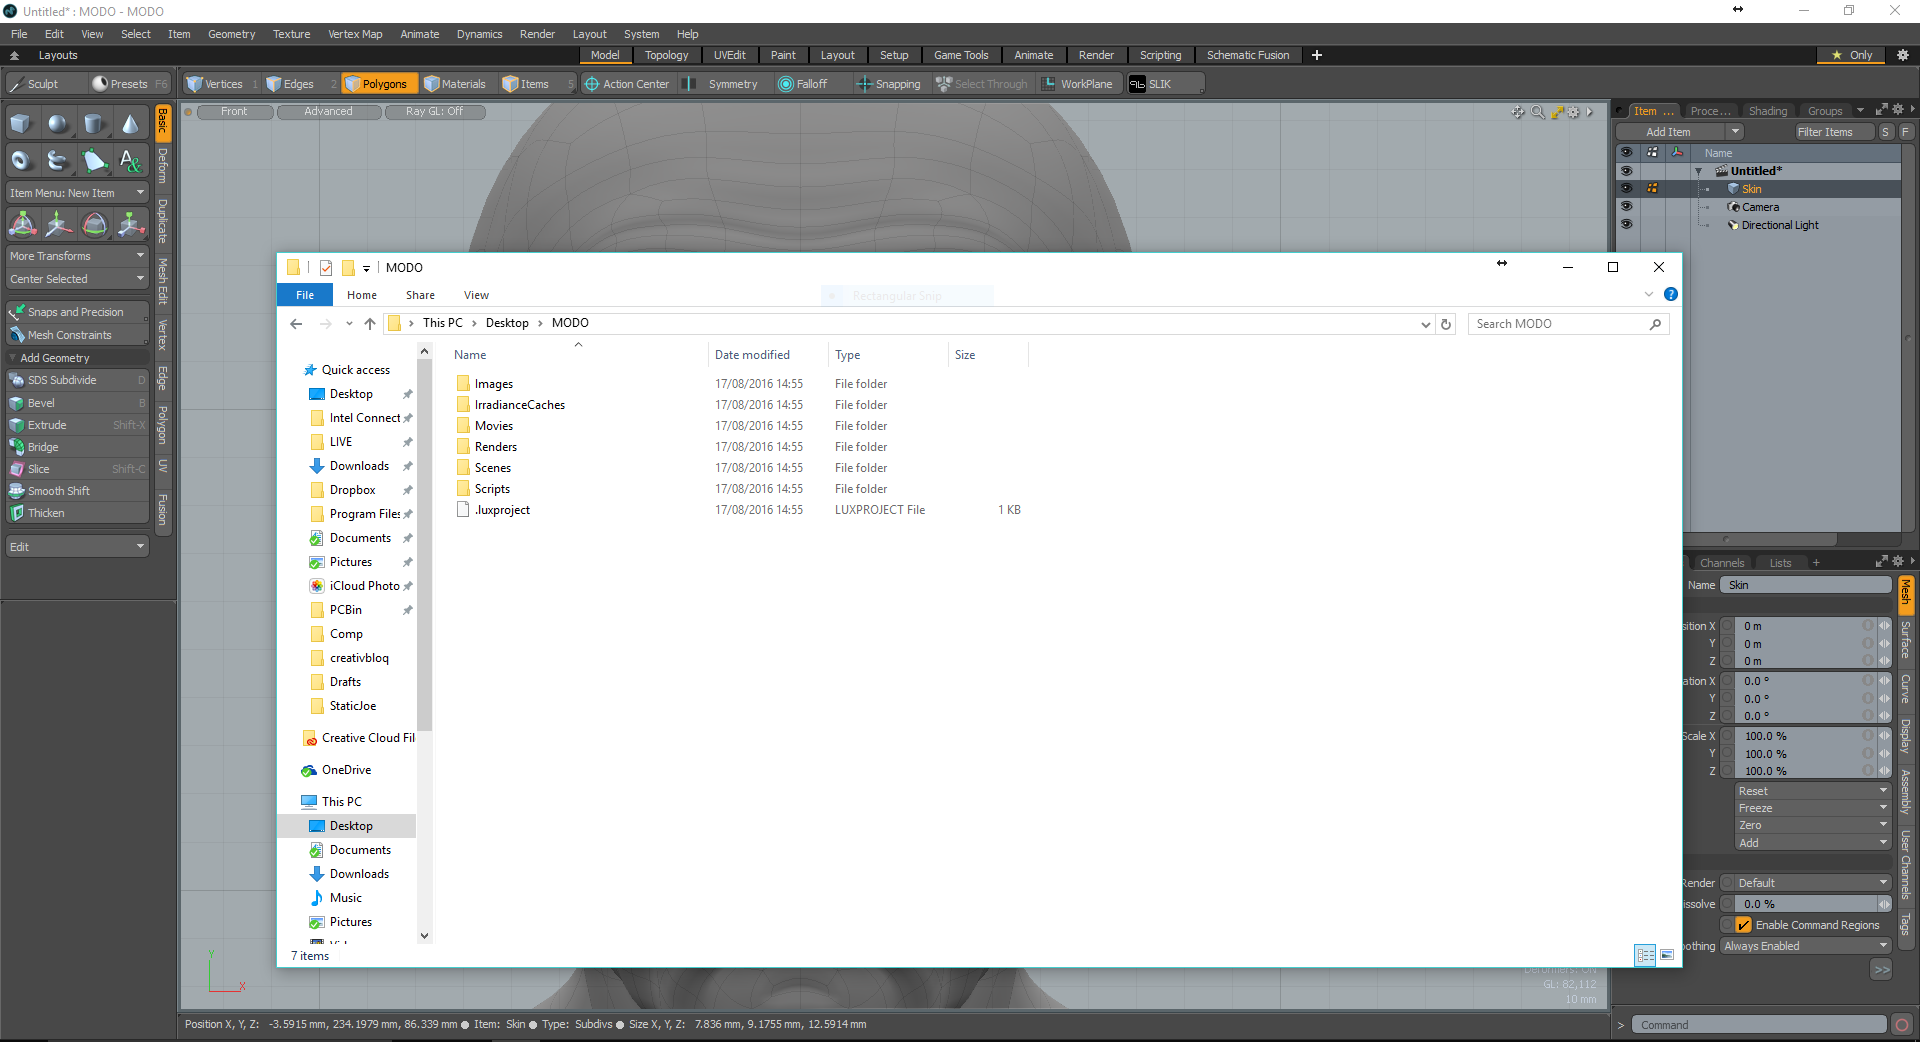
One of the key ways to make sure MODO behaves when working with external references like bitmap images for textures is to create a Project for each new job. When File>New Project… is selected, choose a folder where you want to store the new project and after clicking OK. MODO will create a new project folder structure in the chosen destination. This folder can then be moved about between machines as it keeps all links relative, and any new scene is automatically saved to the projects ‘Scenes’ folder.
03. Change Selection Modes
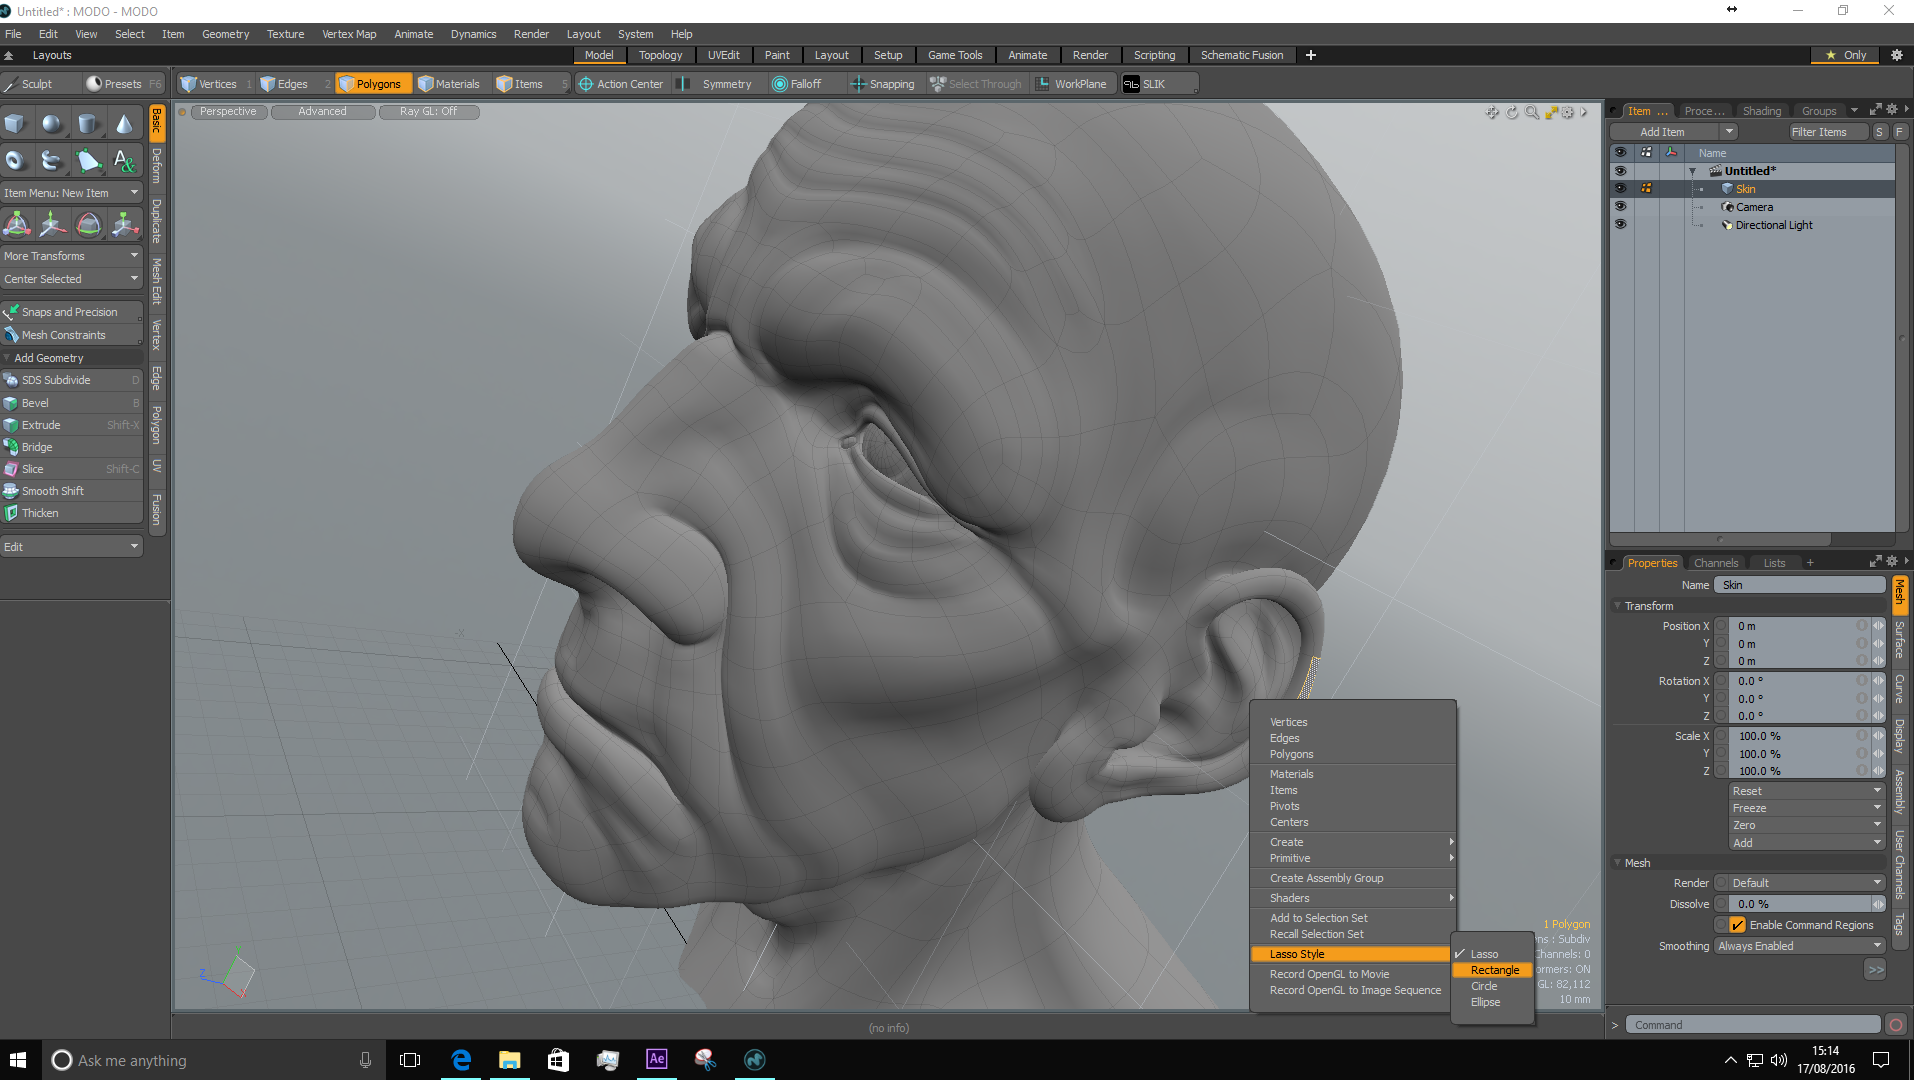
MODO’s Right Click and press selection is very intuitive, and as default it is based on a lasso, which is great for selecting in most situations. However, what to do when you need something ‘less’ flexible.
Naturally MODO does have different selection methods, and they are easily swappable. Instead of Right-Clicking and Pressing to Select just Right Click in the main MOOD viewport and a menu will appear. Towards the bottom of the menu there is the option ‘Lasso Styles’, where as well the Lasso option, Rectangular, Circle and Ellipse methods can be chosen.
04. Selective sequences
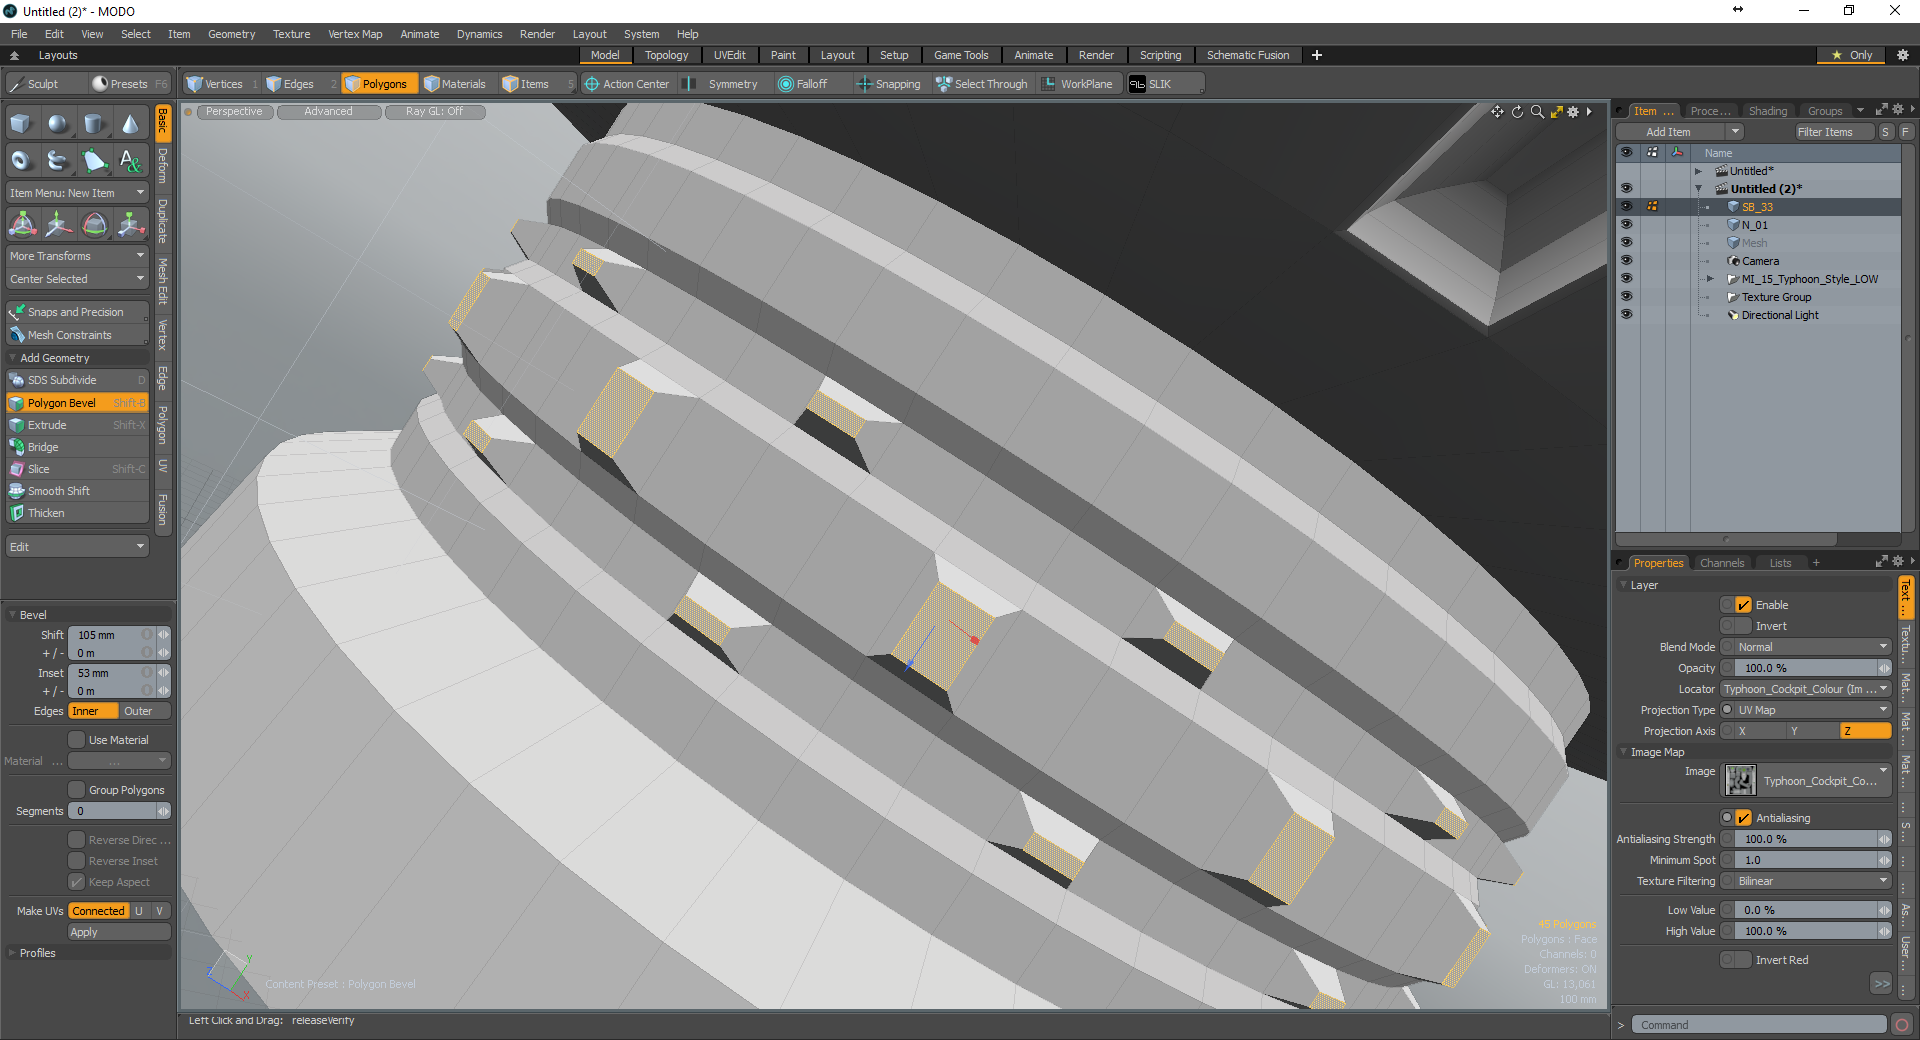
MODO has a fantastic ability to intermittently select Polygons, Edges or Vertices. As an example, select two Polygons, making sure that they are in the same Polygon loop and no matter how big the gap, by pressing the up arrow, MODO chooses the next polygon with the requisite gap. Keep pressing the up arrow to walk the selection round the entire loop, the down arrow walks it back.
Get the Creative Bloq Newsletter
Daily design news, reviews, how-tos and more, as picked by the editors.
05. UV images

It’s strange the items that become so used in one application, that realising that those same features aren’t in another seems like a crime. One of the best MODO examples of this I have found over the years is the UV images. MODO has one of the best UV modelling toolsets available, but this library of images which come with MODO are so handy when trying to figure out UV scale as well as if the model’s topology is working correctly.
06. Model procedurally for basic elements...

The key feature of MODO 10.1 is the new procedural modelling system. This is a whole new paradigm of modelling in MODO, but the great thing about it is that it uses all the existing modelling tools while adding the ability to keep all the elements live in the Procedural stack. To get the most from the system, if possible start by creating a primitive within the procedural system, this allows any parameter within the mesh as you add procedural elements such as bevels to be adjusted.
07. ...then use Procedural Modelling for complex items
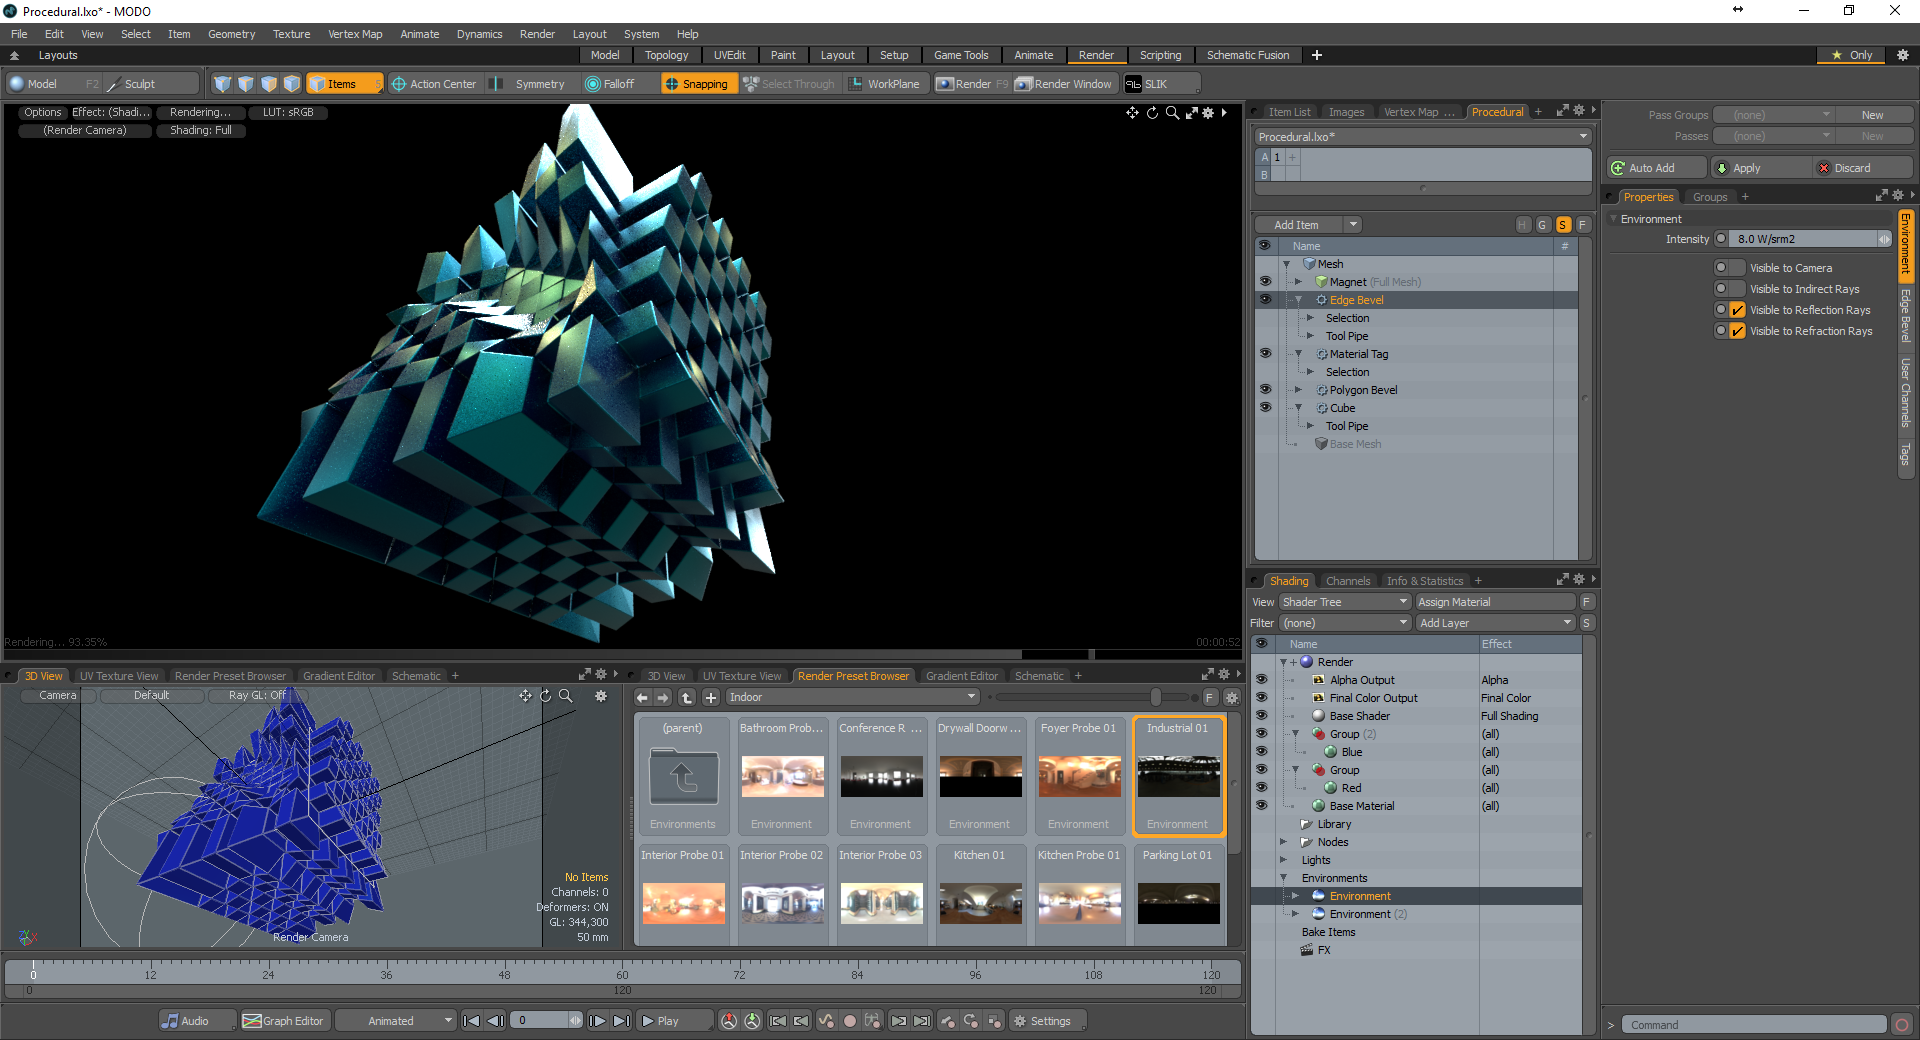
One the great things about the new Procedural system in MODO 10.1 is that it can accept textures to drive model shapes which can be mixed and, naturally, animated. With the inclusion of elements like edge bevelling, material selection, texture driven bevel falloffs, and the addition of deformers, there is raft of complex shapes which can be made in seconds using this new system. My favourite is to add a procedural edge bevel to really help intersection corners look more realistic.
08. Mixing environments
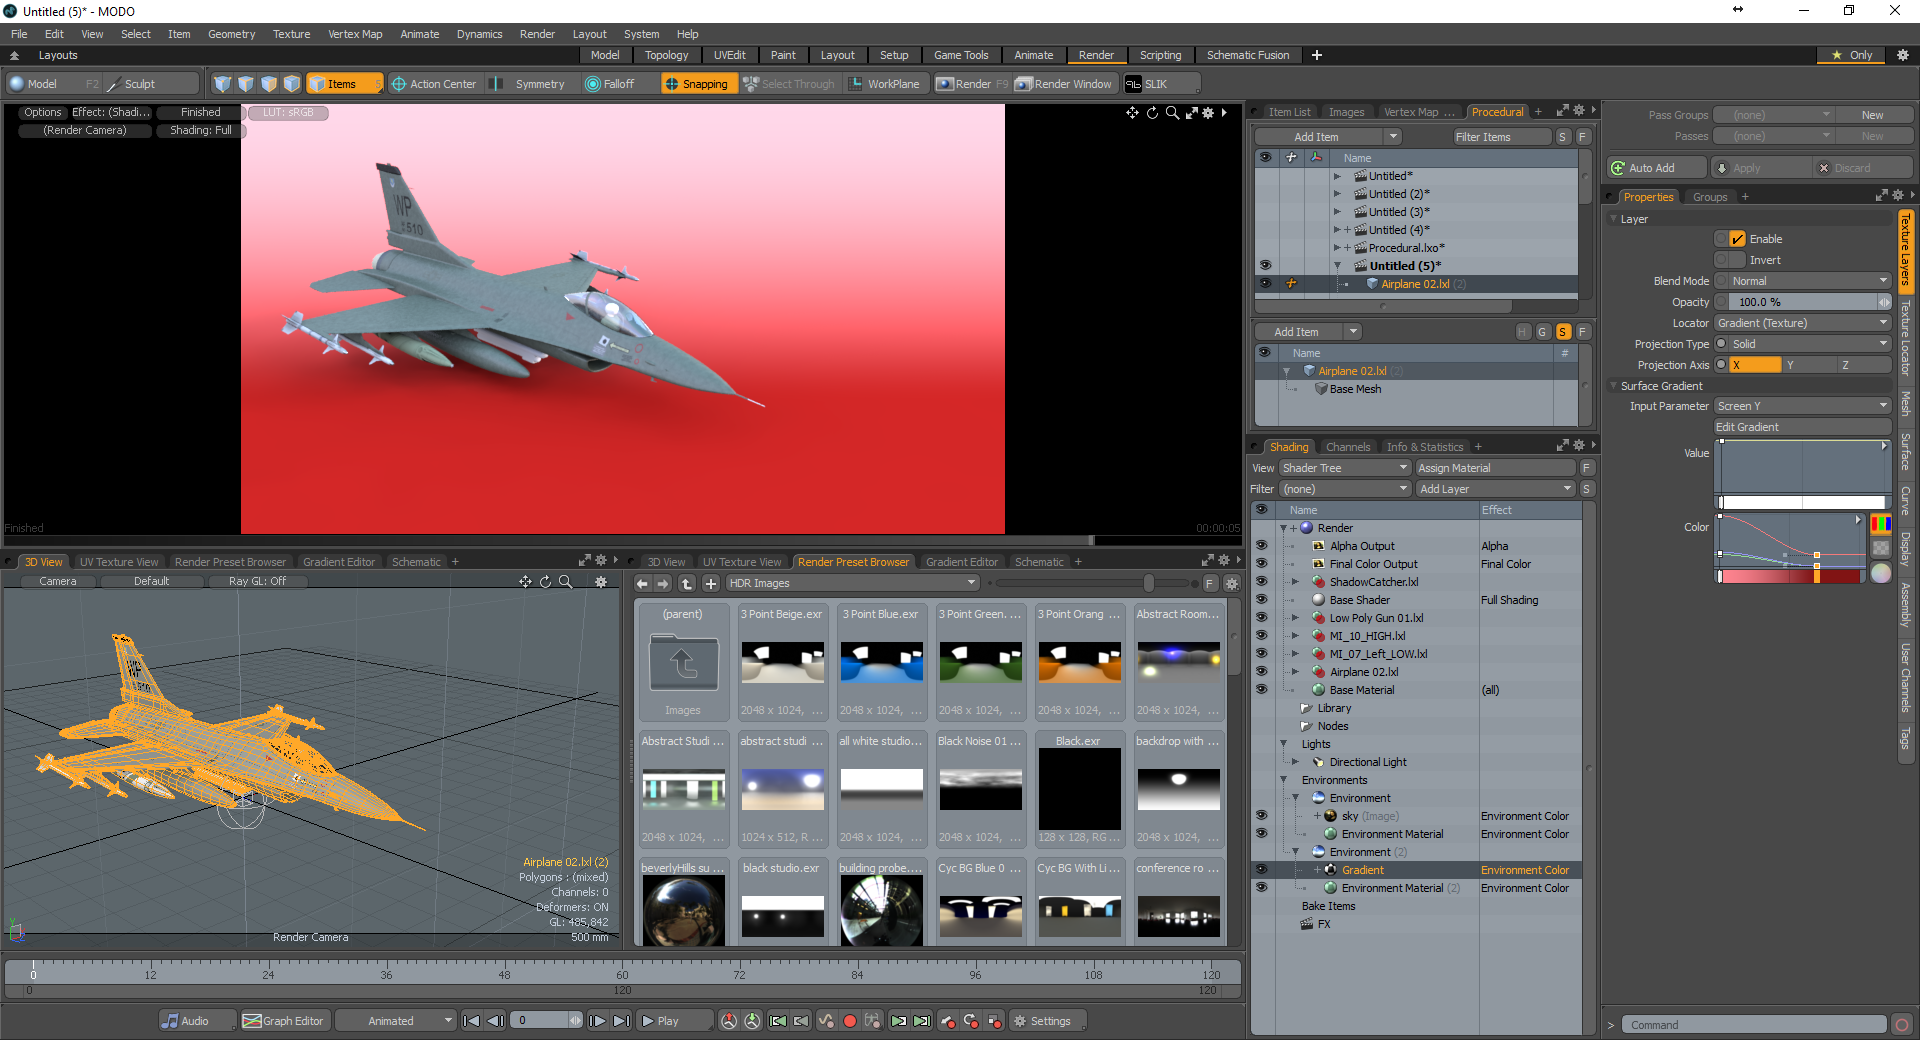
MODO has always been able to mix environments. An environment can be used solely for reflections, or as a backdrop. I use this all the time, where I use a HDR image to create reflections and a sense of place with an objects which I get usually from MODO’s extensive selection. I then create a gradient backdrop and use a shadow catcher to allow the focus to be on the model only.
09. Use the Camera Calibrator
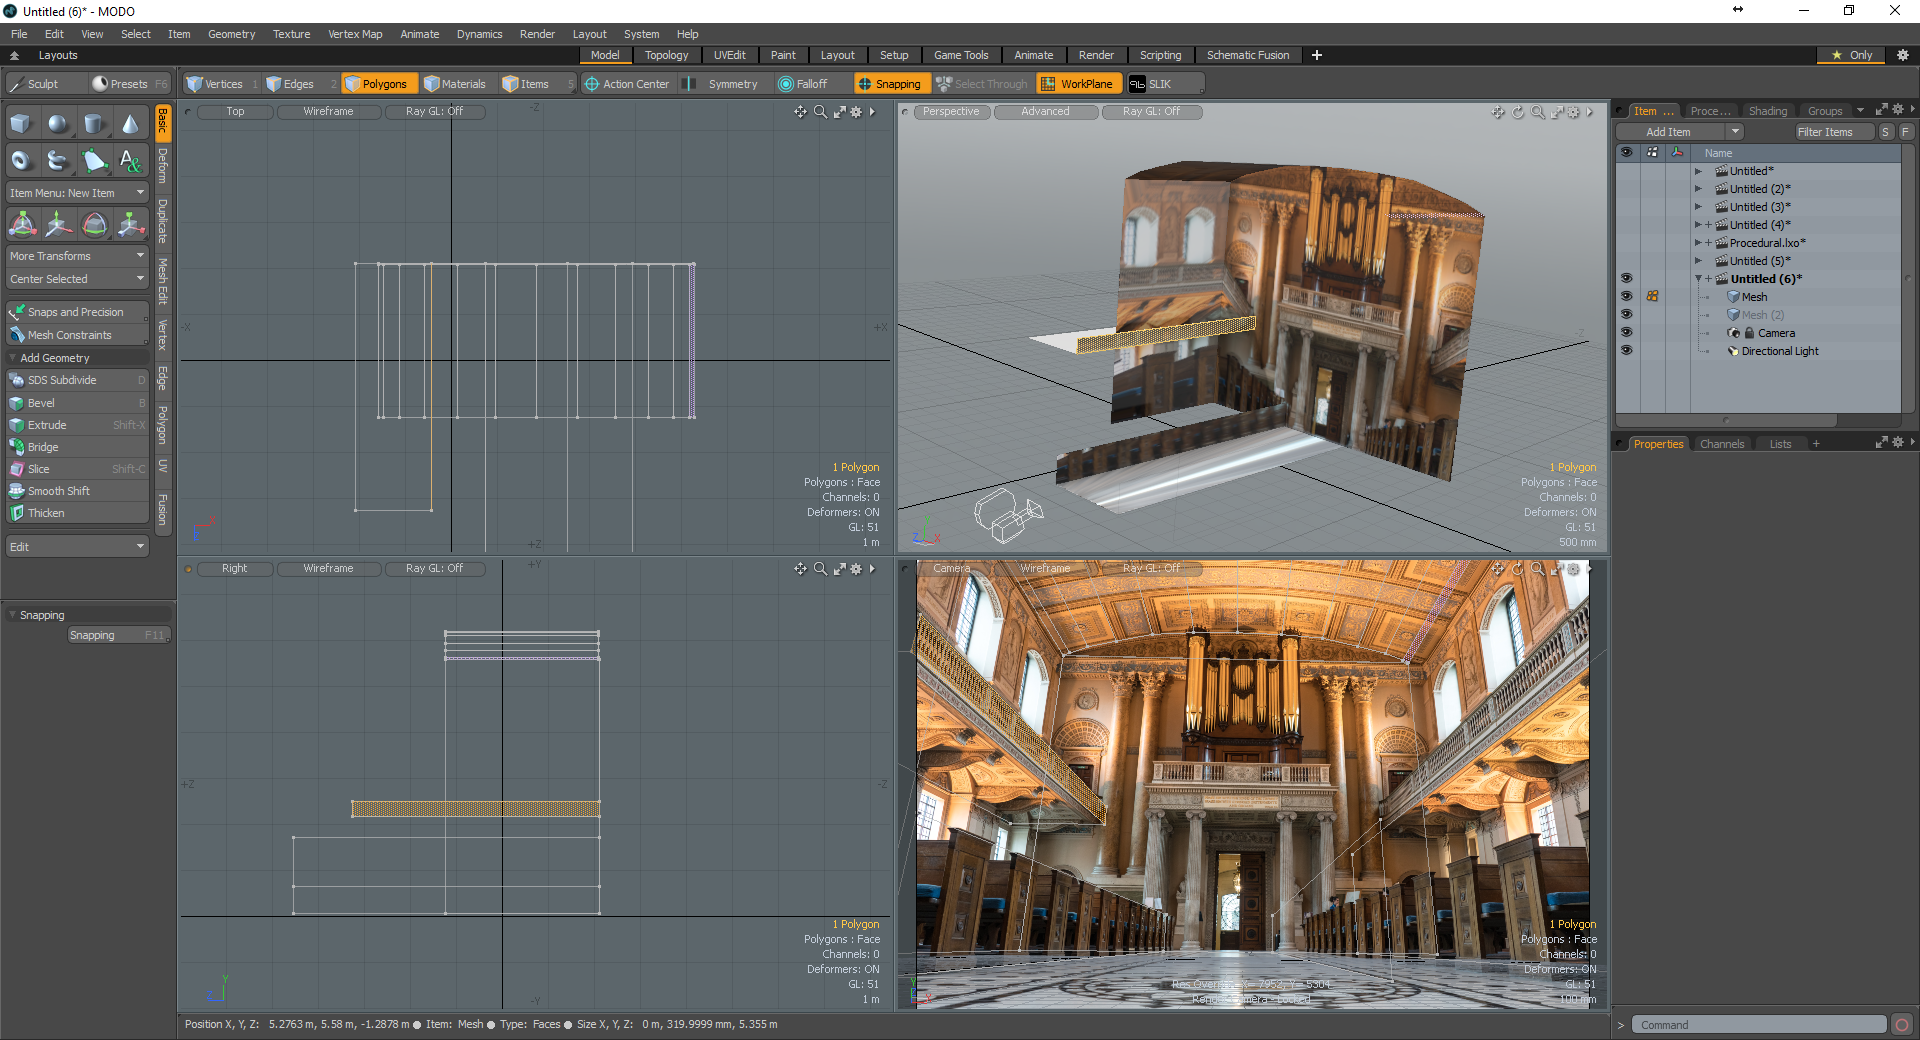
The Camera Calibration tools in Modo work quickly to set an environment for your scene or to use as a basis for Roto Work. I often use the Camera Toolset to create basic geometry which I then create UV’s for and then stamp project the image onto the new geometry. This allows the editing out of any unwanted elements to be done by anyone with access to a 2D painting application like Photoshop.
10. Get SLIK 2
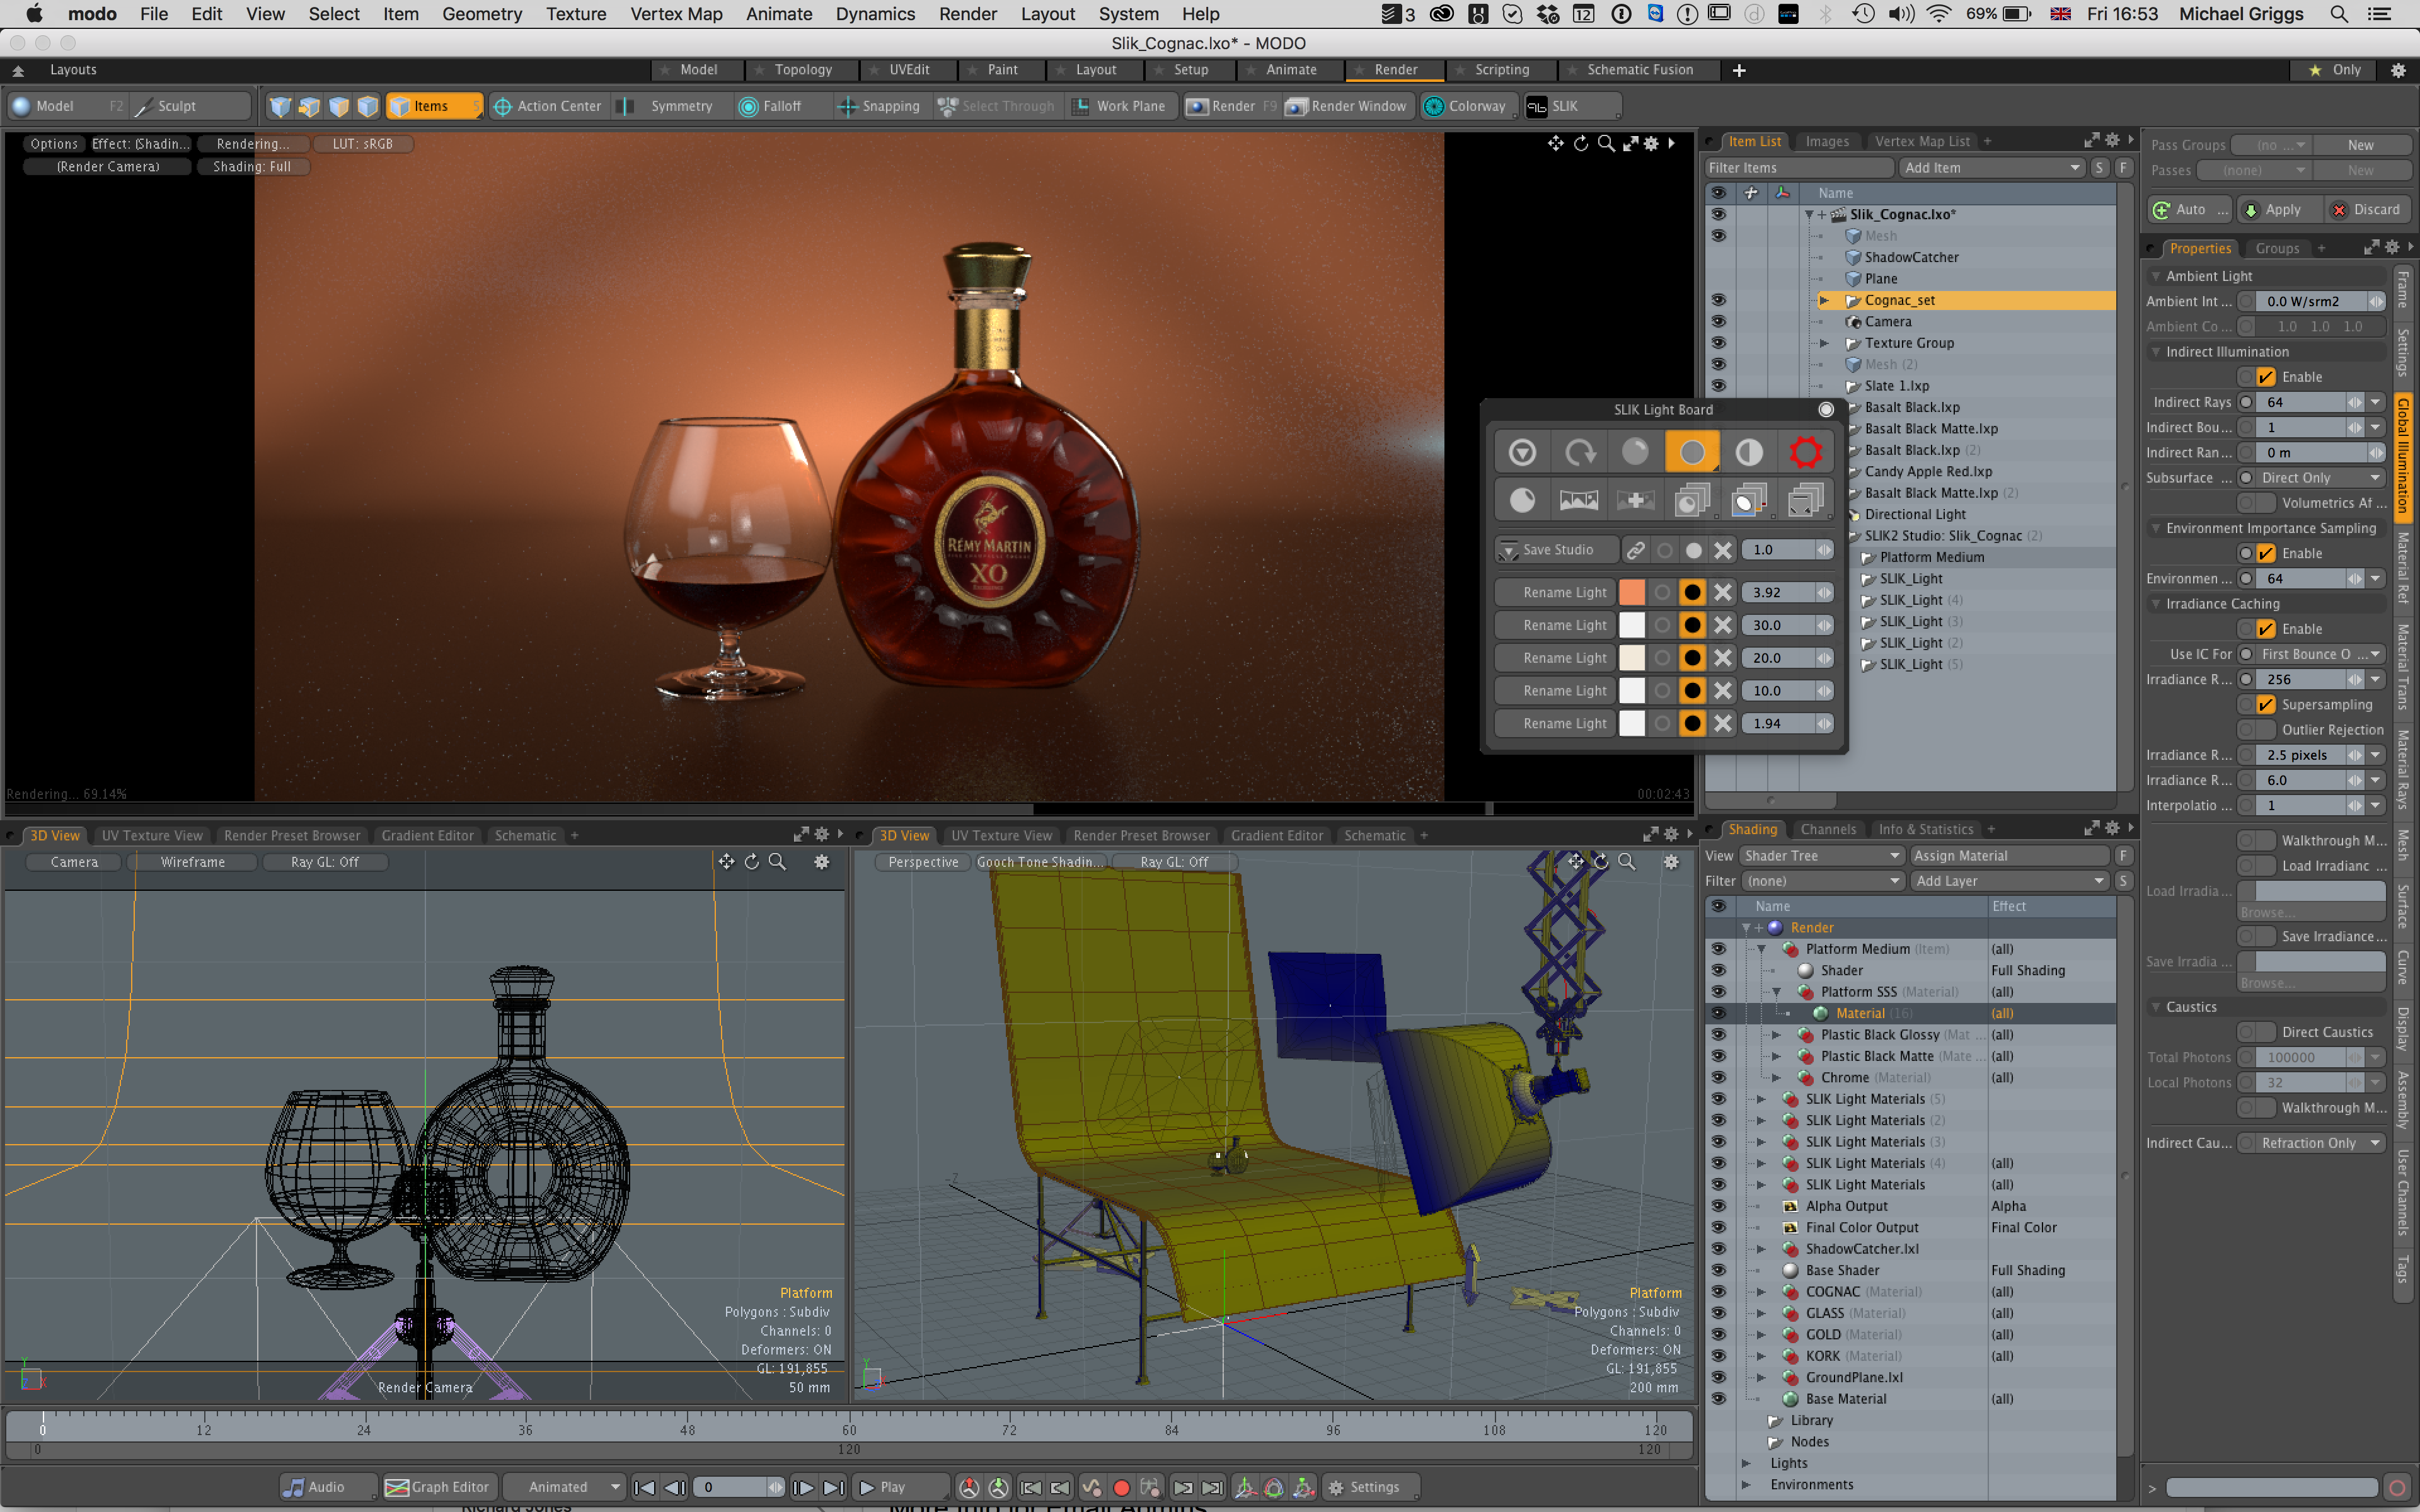
While it is an additional cost over MODO, the addition of the SLIK 2 lighting toolset can transform MODO into a light creation environment, that is hard to match in anything other than specialist applications (which cost more than SLIK 2).
With SLIK 2, complete lighting setups can be created using a range of standard photography paradigms, and there are even models of various studio setups to get new MODO users get acquainted with the setup. I prefer to keep everything at a minimum when I am working with SLIK 2, but with the ability to output HDR’s for other applications, MODO becomes the centre of a look dev pipeline.

Thank you for reading 5 articles this month* Join now for unlimited access
Enjoy your first month for just £1 / $1 / €1
*Read 5 free articles per month without a subscription

Join now for unlimited access
Try first month for just £1 / $1 / €1

Mike Griggs is a veteran digital content creator and technical writer. For nearly 30 years, Mike has been creating digital artwork, animations and VR elements for multi-national companies and world-class museums. Mike has been a writer for 3D World Magazine and Creative Bloq for over 10 years, where he has shared his passion for demystifying the process of digital content creation.
