How to paint realistic sparkling glitter
Watch how Sara Forlenza sprinkles a generous helping of fairy dust on her icy princess.
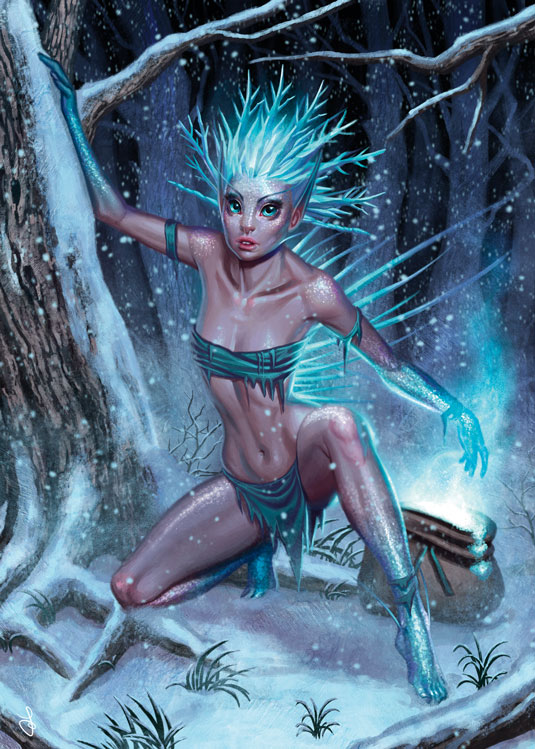
The task of painting glitter can be made easier if you study photo references first. Doing so will reveal that glitter is nothing but a collection of small flat dots made of a polished material. They can have different colours and shapes, and once applied to the skin and clothes they reflect any light that's shined on them. The trick is to bring attention to this visual effect in the image.
For the example I choose to draw a frost fairy princess, which suits the glitter theme down to the ground! Glitter can be added towards the end of the painting process, so I paint the skin of my character and the details as I would normally. To stay true to the icy setting, I choose to represent simple transparent or silver glitter. However, I can easily alter its colour by adding a Color or Overlay layer over it.
I place glitter on the face, arms and legs of my character. I ensure that it follows the shape of the face and body, and increase its brightness when it's hit by light, and make it transparent or dark when in the shadows of the frost fairy princess area. This can be done simply and effectively by using an Overlay layer.
Watch the full tutorial
01. Pick out the highlights
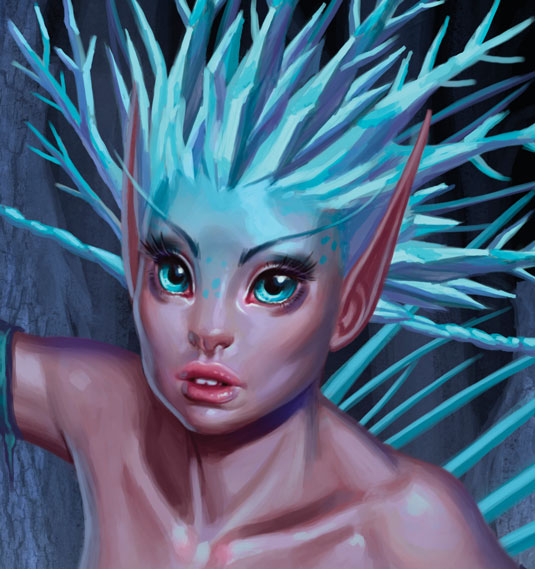
Once I've finished painting my frost fairy princess's skin complexion, I take note of the areas that are affected by the strong light source by her foot and those that are in shadow. I create a new layer just above the skin one and I set it to Overlay.
02. Start scattering
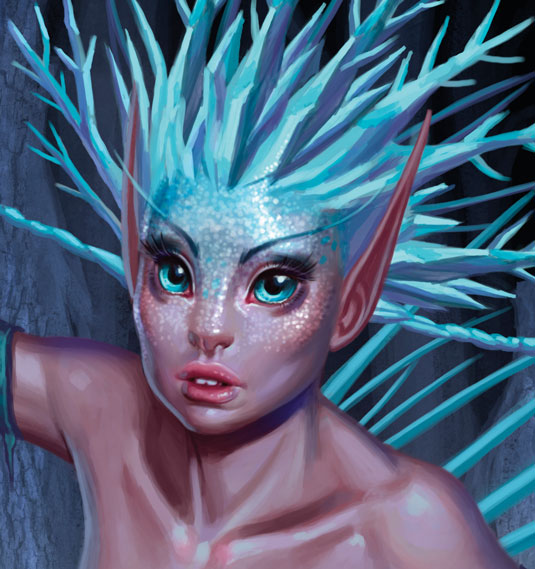
I select a Round brush, set Hardness to 60-70 per cent and the Spacing to 130-140 per cent. I put the Opacity Jitter and Flow Jitter on Pen Pressure and add Scattering. I now start painting glitter with a range of grey shades, depending on the light and shadows of the face.
03. Add the light-reflection
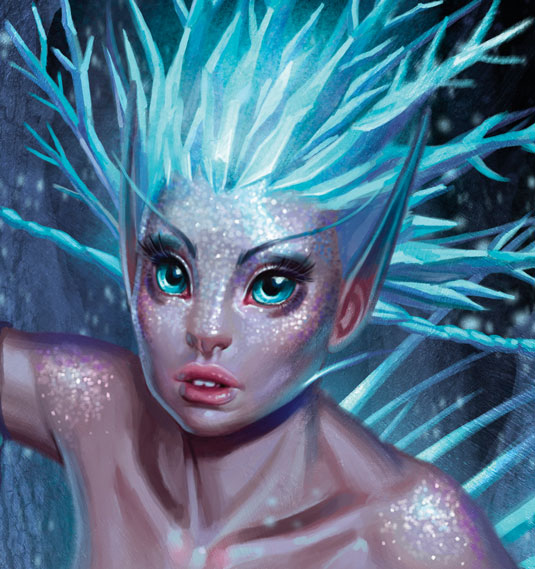
By setting the level to Overlay, greys will interact with the skin of the character, darkening and brightening like typical dots of silver glitter. As a finishing step I select with a Hard-edged brush and add some strong light hits here and there, to emphasise the sparkle.
Words: Sara Forlenza
Sara creates art for book covers, cards and RPGs. After many years with traditional techniques, she was introduced to digital art. It was love at first sight.
Like this? Read these!
- Illustrator tutorials: amazing ideas to try today!
- Check out this collection of top Photoshop tutorials
- Discover the 5 best pencils for artists and designers
- How to choose the right drawing tools
- Download these Adobe Illustrator brushes today

Thank you for reading 5 articles this month* Join now for unlimited access
Enjoy your first month for just £1 / $1 / €1
*Read 5 free articles per month without a subscription

Join now for unlimited access
Try first month for just £1 / $1 / €1
Get the Creative Bloq Newsletter
Daily design news, reviews, how-tos and more, as picked by the editors.

The Creative Bloq team is made up of a group of art and design enthusiasts, and has changed and evolved since Creative Bloq began back in 2012. The current website team consists of eight full-time members of staff: Editor Georgia Coggan, Deputy Editor Rosie Hilder, Ecommerce Editor Beren Neale, Senior News Editor Daniel Piper, Editor, Digital Art and 3D Ian Dean, Tech Reviews Editor Erlingur Einarsson, Ecommerce Writer Beth Nicholls and Staff Writer Natalie Fear, as well as a roster of freelancers from around the world. The ImagineFX magazine team also pitch in, ensuring that content from leading digital art publication ImagineFX is represented on Creative Bloq.
