Rob Redman shows how to create a classic VFX effect in under 15 minutes.
(Image credit: Future)
As with so much in the realm of visual effects, there are a myriad of methods and tools that can be utilised to achieve the same end results. If you’re looking to add atmospheric effects such as lightning to your scenes it can be much too easy to think in 3D and try to add splines with animated paths, set up emitting materials and so on.
Expert tip: Extra drama
If you want to reinforce the impact of your lightning strike, add a little camera shake at that point, then quickly have it tail off.
That’s all well and good, but it can be time-consuming and taxing at render time. There are cases where that’s the best way to go, such as when the lightning needs to illuminate a complex shape or a moving character. That said, for an environment shot or something less complex, doing it in post-production can be a much better way; quicker to set up and faster to render.
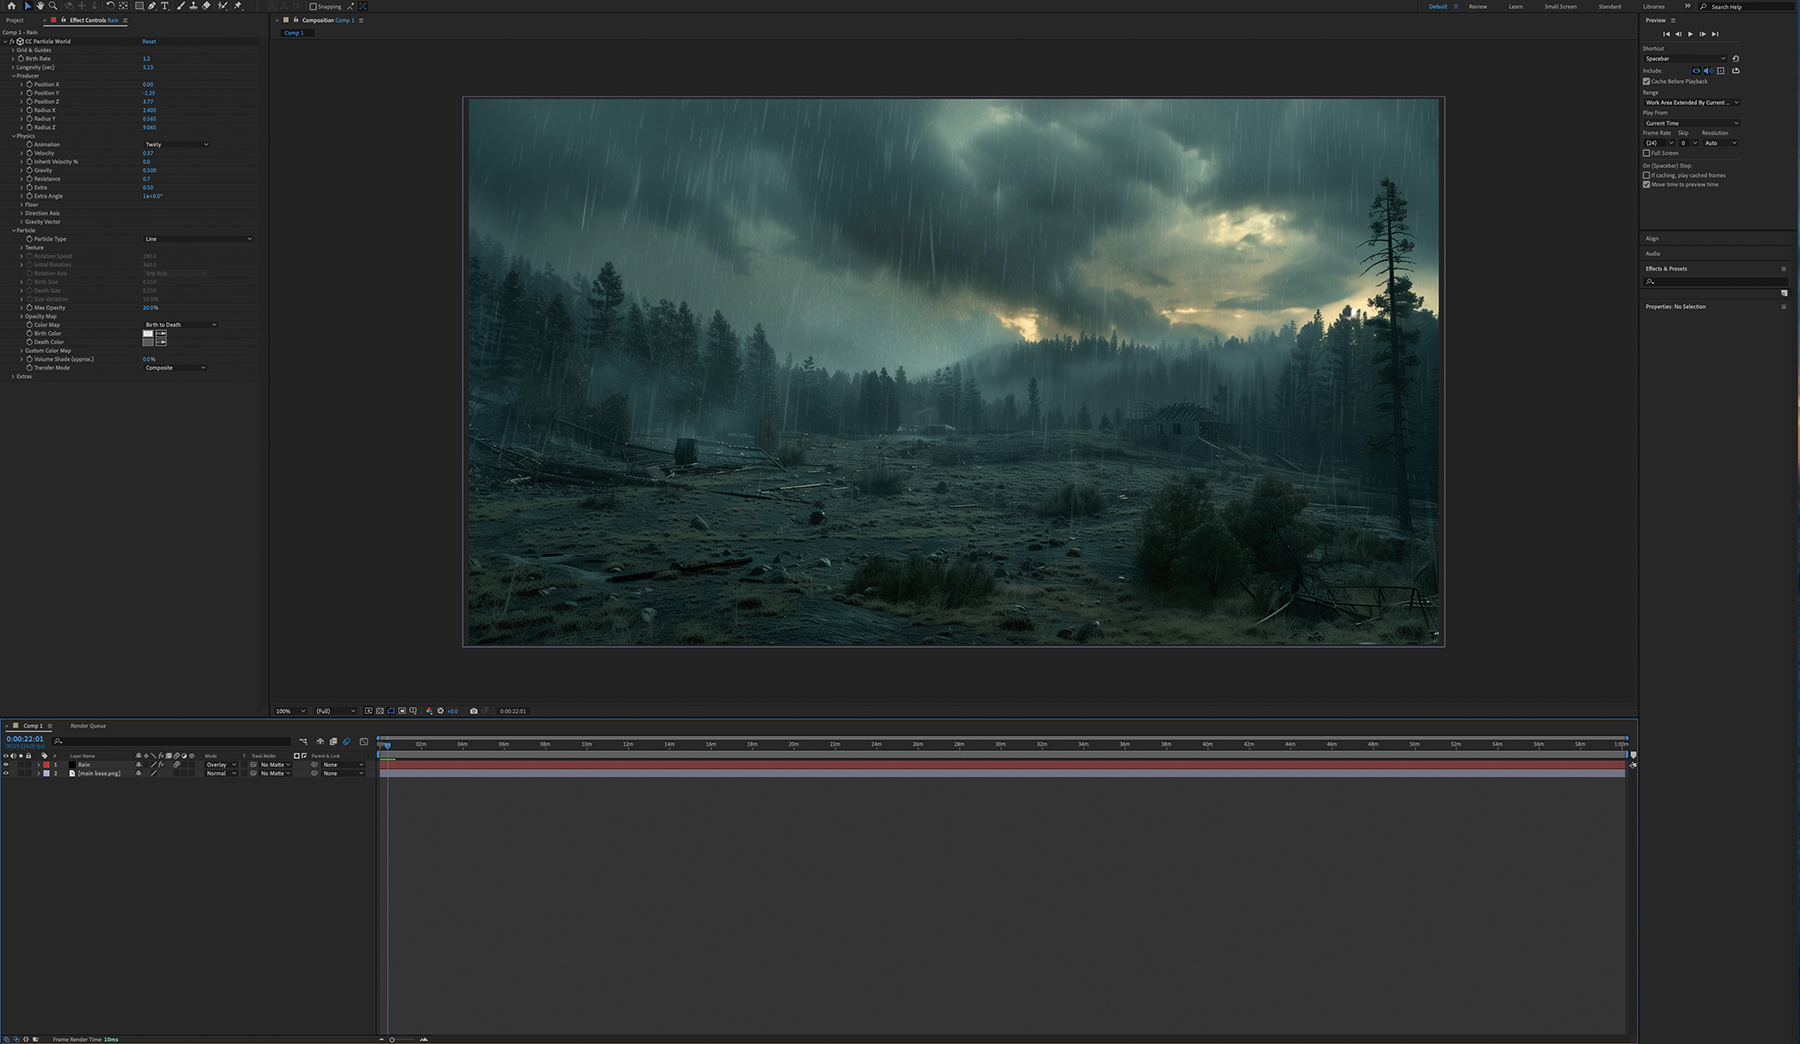
For this example, I’m taking a background plate of an exterior scene and adding lightning to it. This is a quick effect to set up, and the resulting lightning is perfect for the shot. It’s not bad for around 15 minutes of work, especially considering it will only be seen for half a second!
A lot of the final result will be dependent on your background plate, so as you’re following along, keep in mind things like your resolution and frame rate. Read our Adobe After Effects tutorials for motion graphics and visual effects for more helpful tips and advice, and if you need more kit, read our guides to the best drawing tablets and best laptops for animation.
To get started you’ll need to import your background plate. You can drag this directly into the timeline. If a dialog box opens, you can set elements like length and size here, plus give it a name. Use a name to help you stay organised, in case you end up with lots of layers. That said, this is likely to be at the bottom of the stack. This is also a good time to add any other elements: I used particles to add rain.
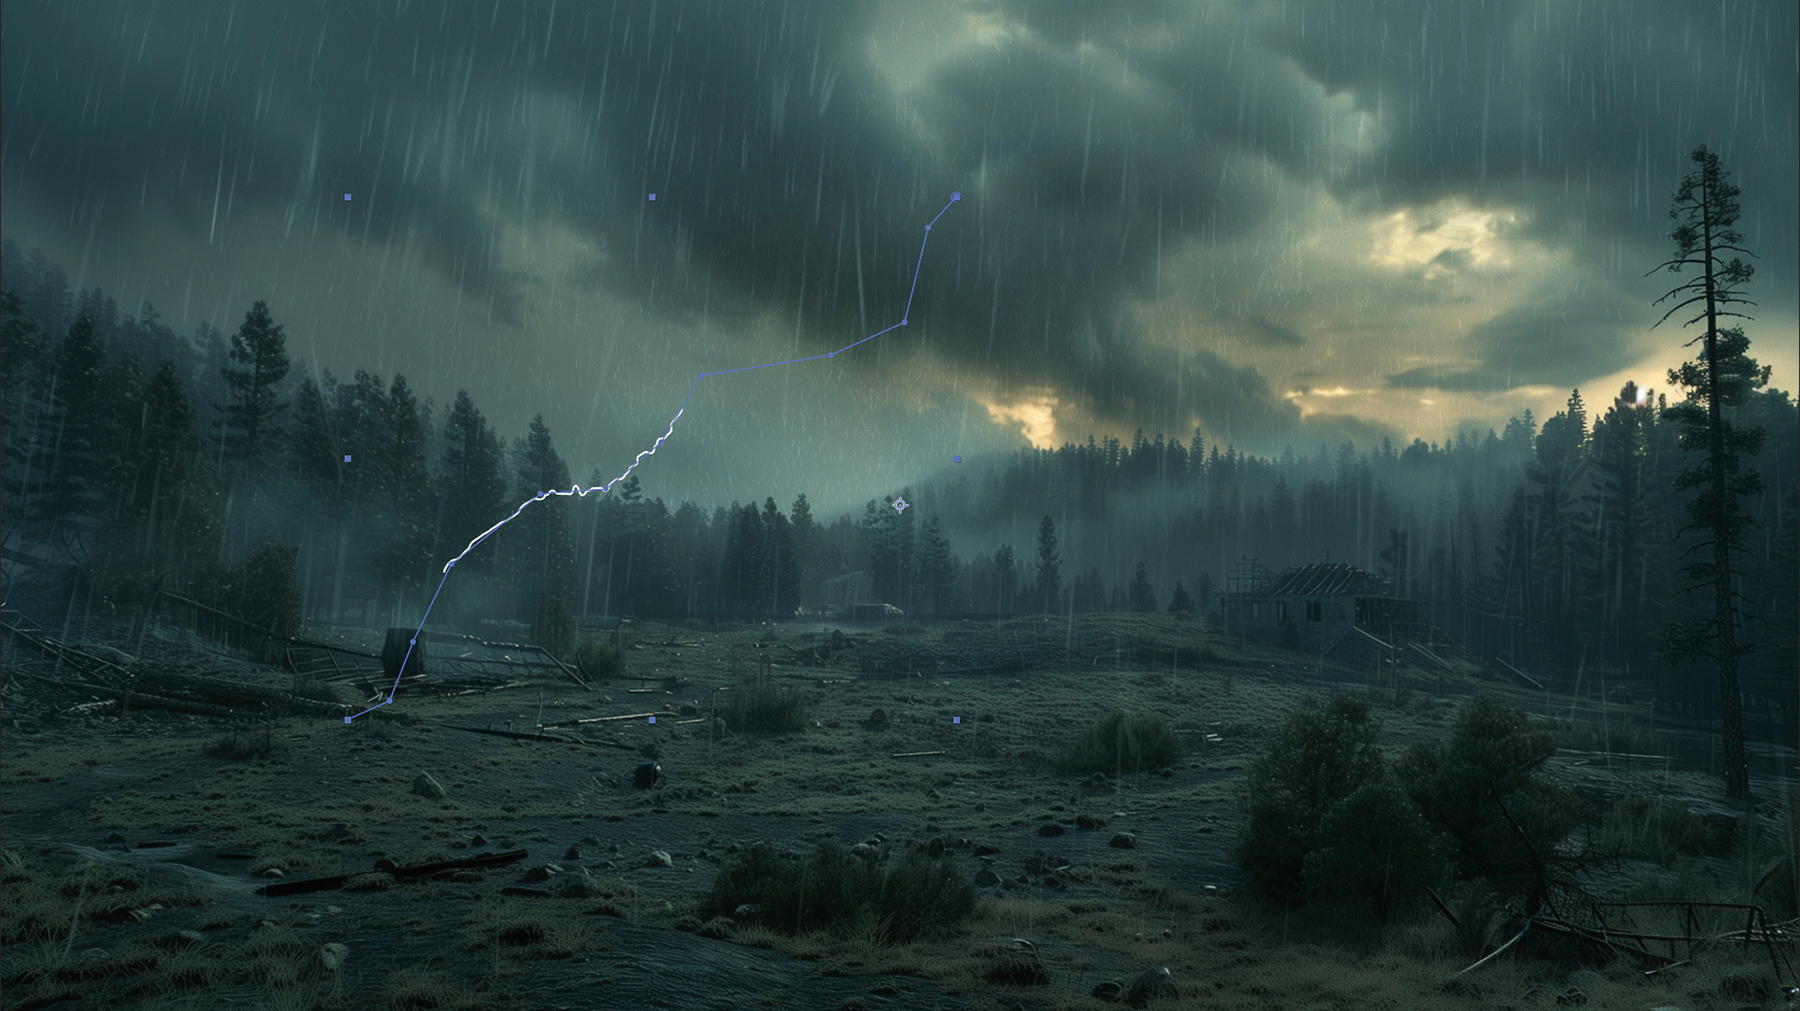
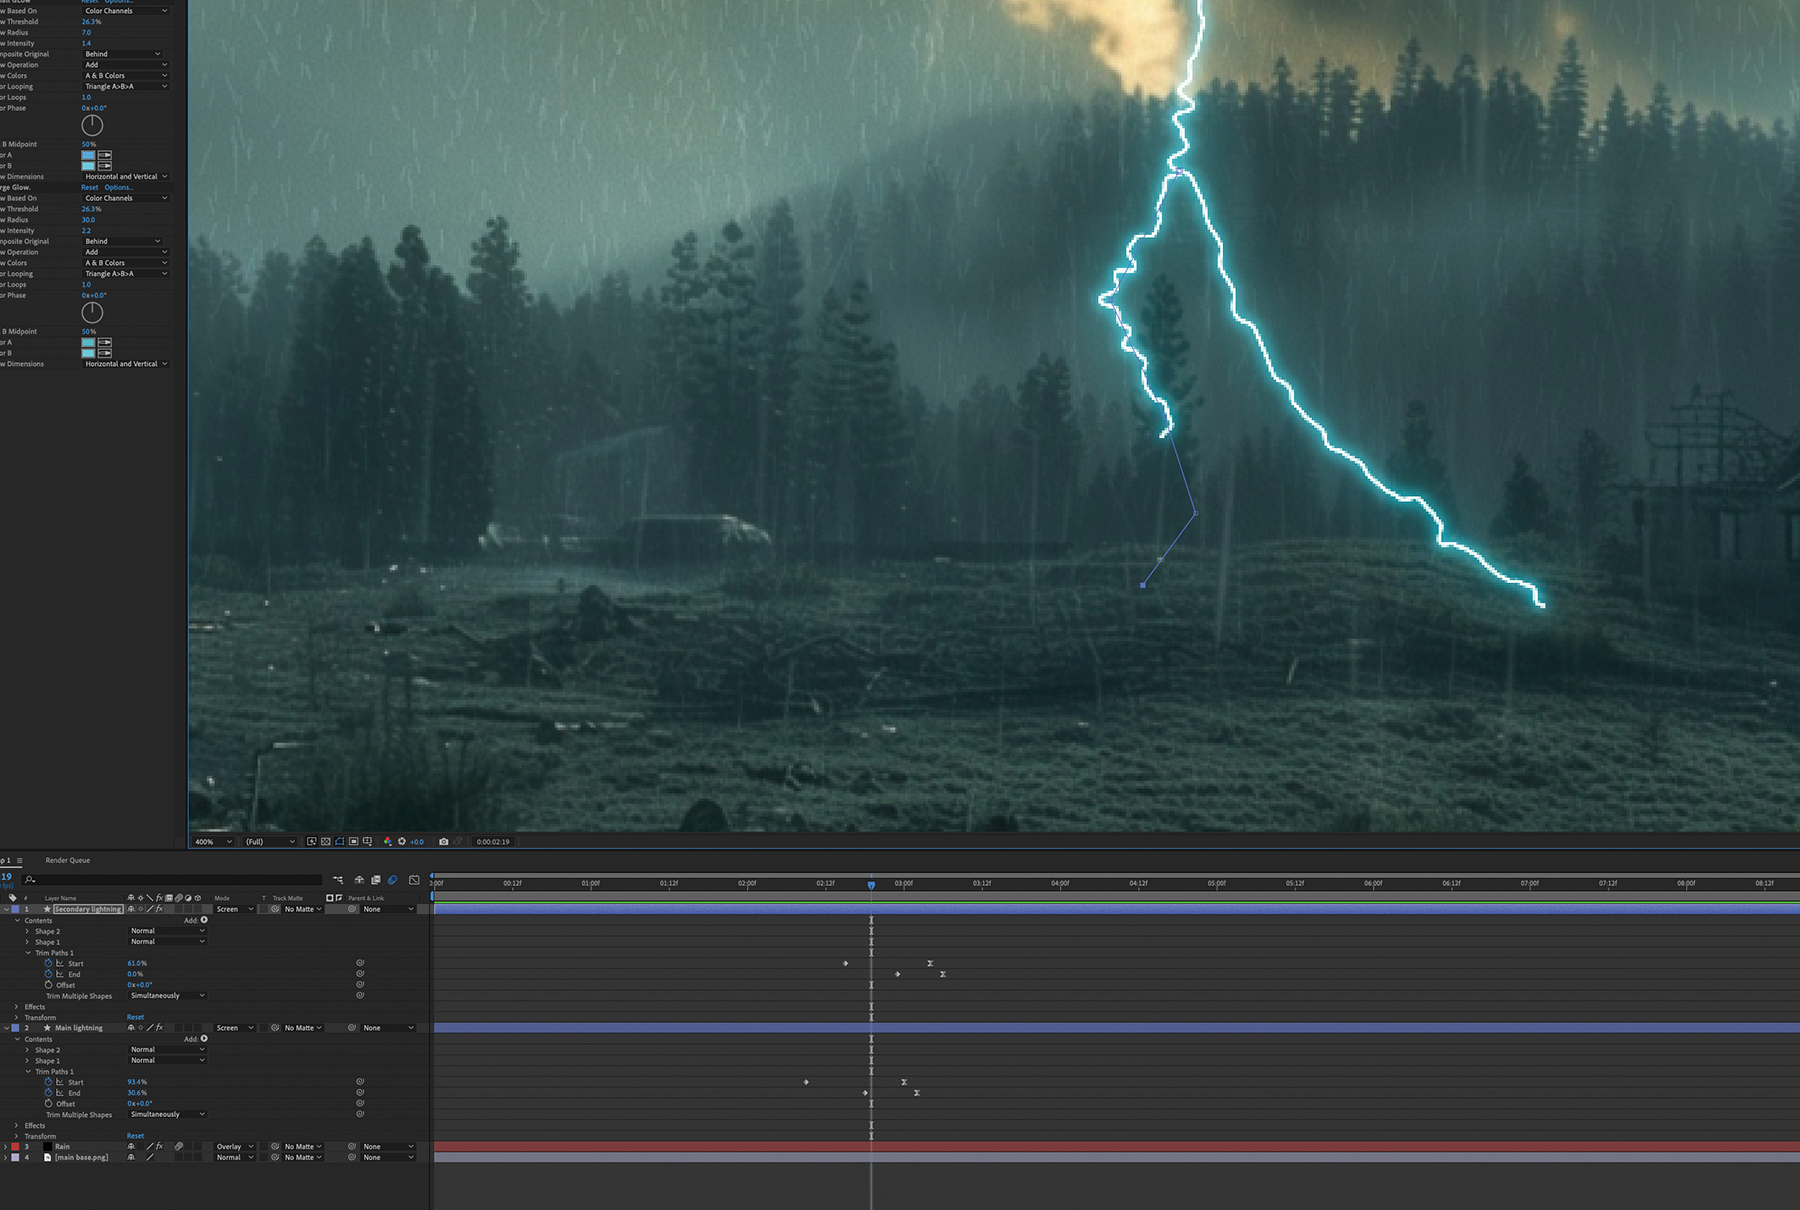
Make sure that nothing is selected, otherwise you’ll create a mask, and then press ‘G’ to begin using the Pen tool. Now draw a rough path for your lightning strike. You can tweak this later on, but for now define a general direction and add a few points to offer some interest. It’s worth you looking up references if you’re going for realism. We’ll add Sub-paths for details later, as lightning rarely has a single bolt, but it’s much easier to duplicate and tweak a finished path. Rename this layer to “lightning”.
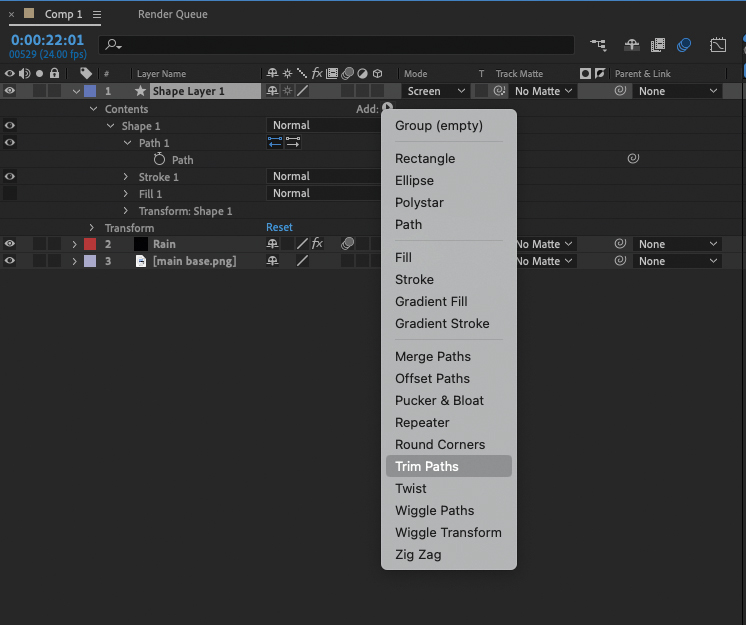
We need to animate the lightning, so select the shape layer and open it up so you can see the path. Click on the Add button to bring in a Trim Path. Here you can add keyframes to the start and end of the lightning. Again, references are useful for this. Often the starting point will need to animate down differently from the end, or you’ll have an odd, disconnected bolt. Easing the end keyframes works well too. To do that, select the frames on the timeline and press F9.
To really fine-tune your keyframes, click the Graph Editor button to get a better view and visualise all your timings in an intuitive manner. It doesn’t take long to get used to this view and it can be a huge help for nailing your animations.
Now we need to add some finer details to the lightning strike. To do this, click the Add button again and select ‘Wiggle Paths’, which will add lots of detail along the path, making it much more realistic. You’ll need to adjust the settings to suit your path and comp dimensions. To keep it close to your original path, reduce the Correlation setting, and to add detail increase the Size and Detail settings. This is all about taste, so experiment until you’re happy.
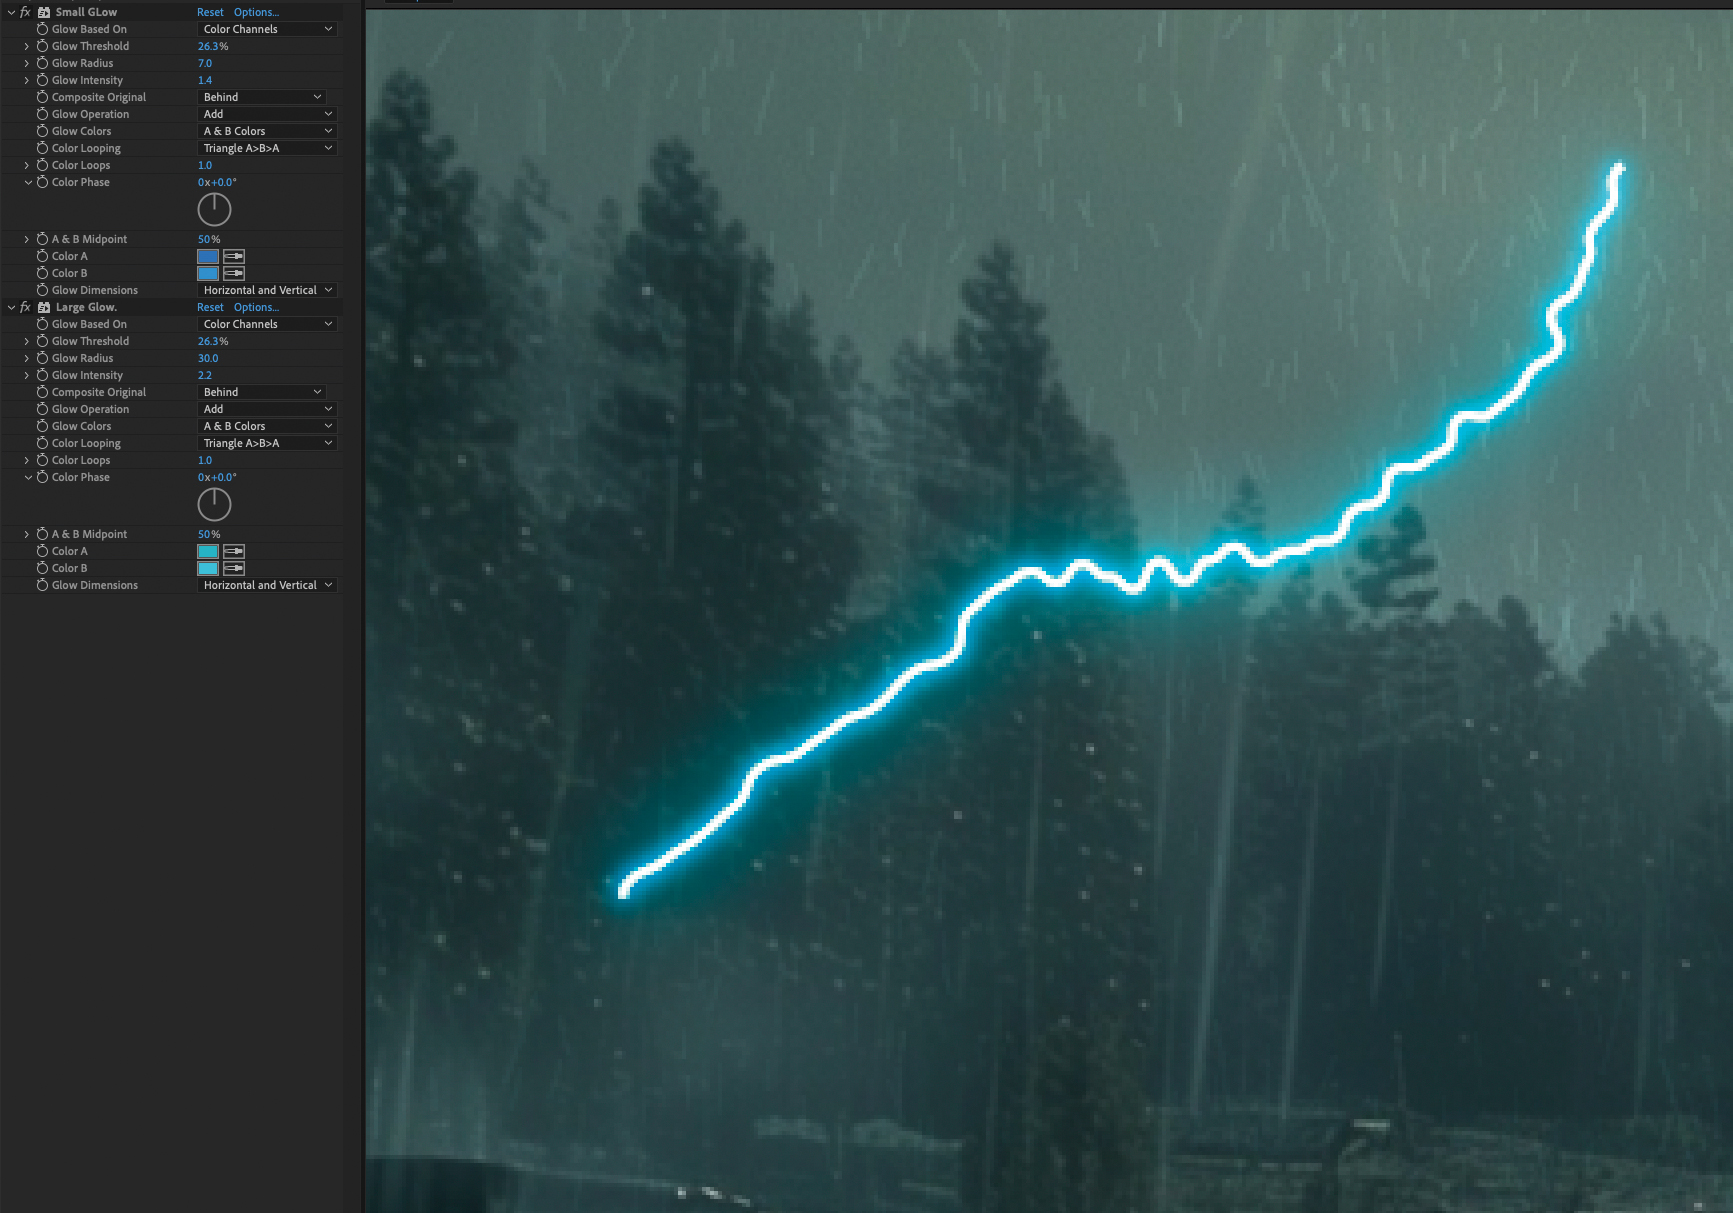
Currently we have a basic white line that doesn’t look very electric. To remedy this, head to Effects and choose Stylize > Glow and adjust the colours to your taste. People tend to associate electricity with blue, so a hint of that might work wonders. I find that a copy of the glow with the size cranked up helps bed it into the scene better. Also rename these to keep track.
You could repeat the process for a secondary path, but it’s easier to select the first shape layer and hit Ctrl + D to duplicate it. Next hit ‘G’ to use the Pen tool, moving the vertices around to their positions as the next path. Be sure to make them join up so you don’t have a floating path. You’ll need to adjust the keyframes too, or you’ll have an odd-looking fork that isn’t timed to split from the original path. A little preview after each change will help you get this just right.
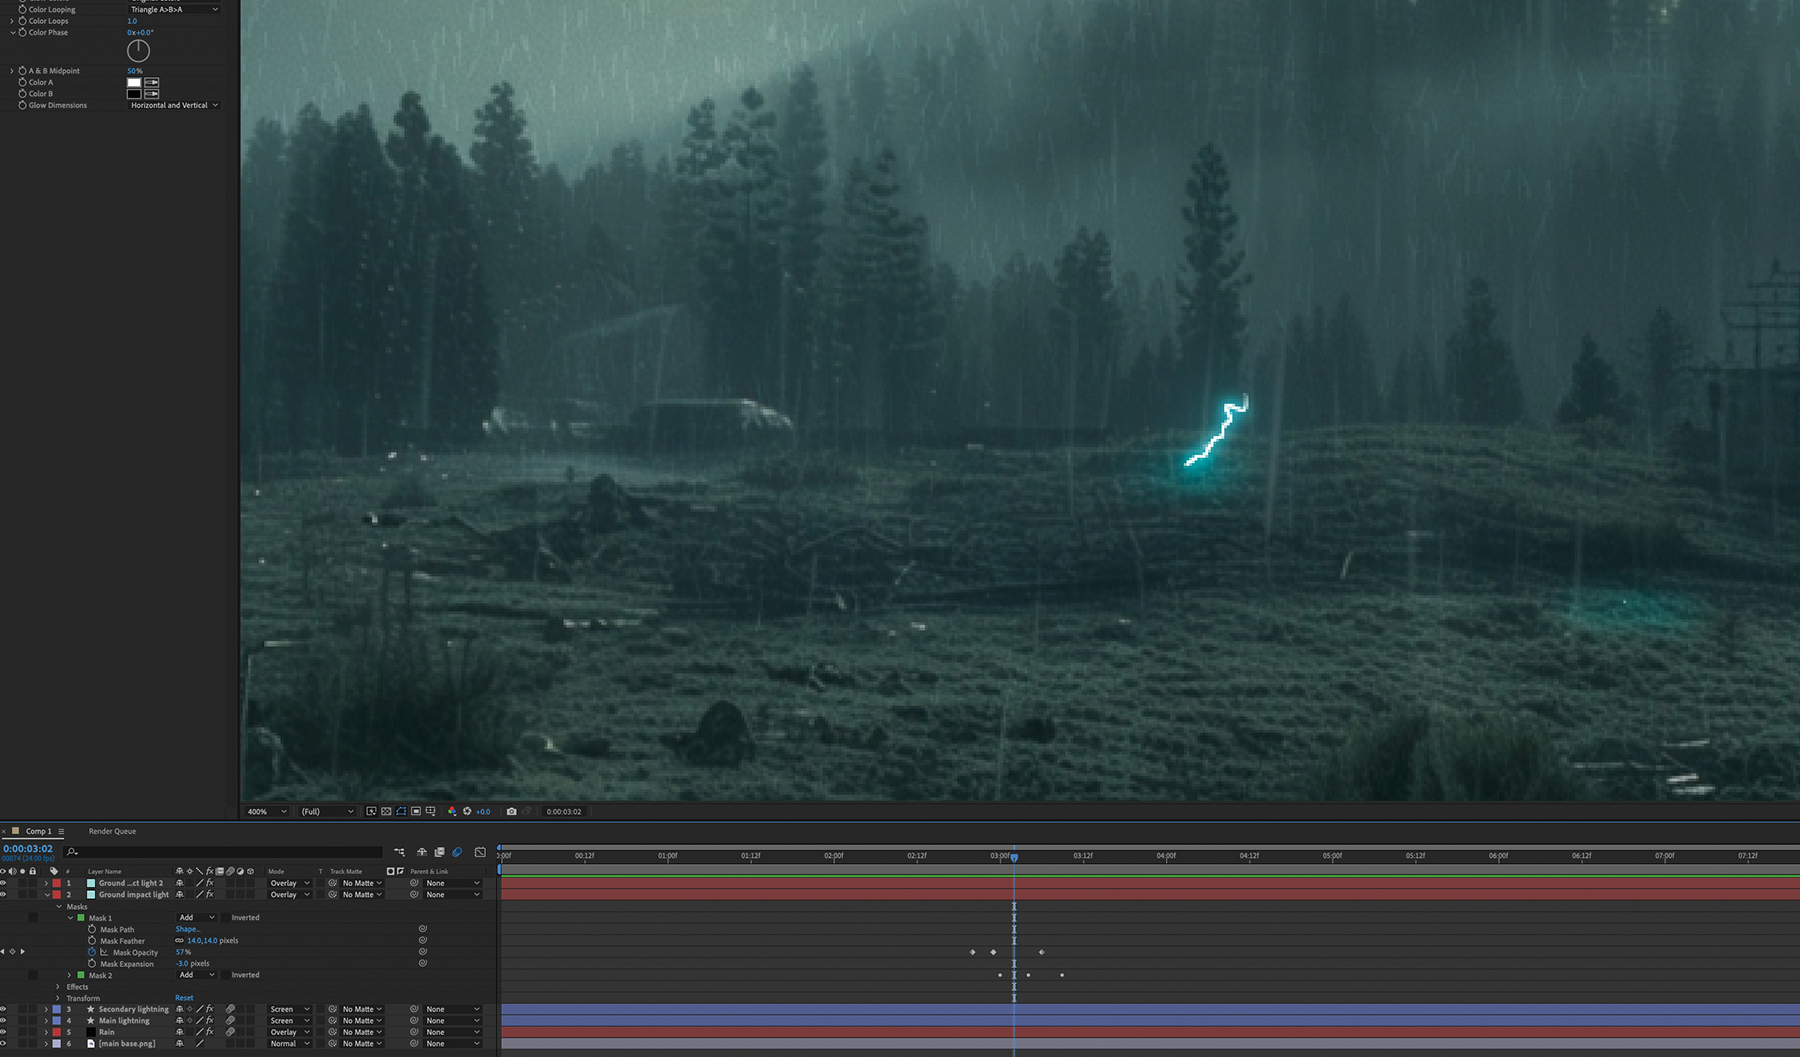
To help the lightning sit better in the scene, you’ll need to add some lighting where it leaves the clouds and hits the floor. There are many ways to do this, but an easy one is to make a Solid with the same colour as the lightning. Add a mask with a roughly oval shape and a large Feather amount, then add a Glow to it. Hit ‘M’ to open up the Mask properties and keyframe the opacity so the light patch is strongest at the moment of impact. I duplicated my layer and tweaked the masks to create a central hotspot.
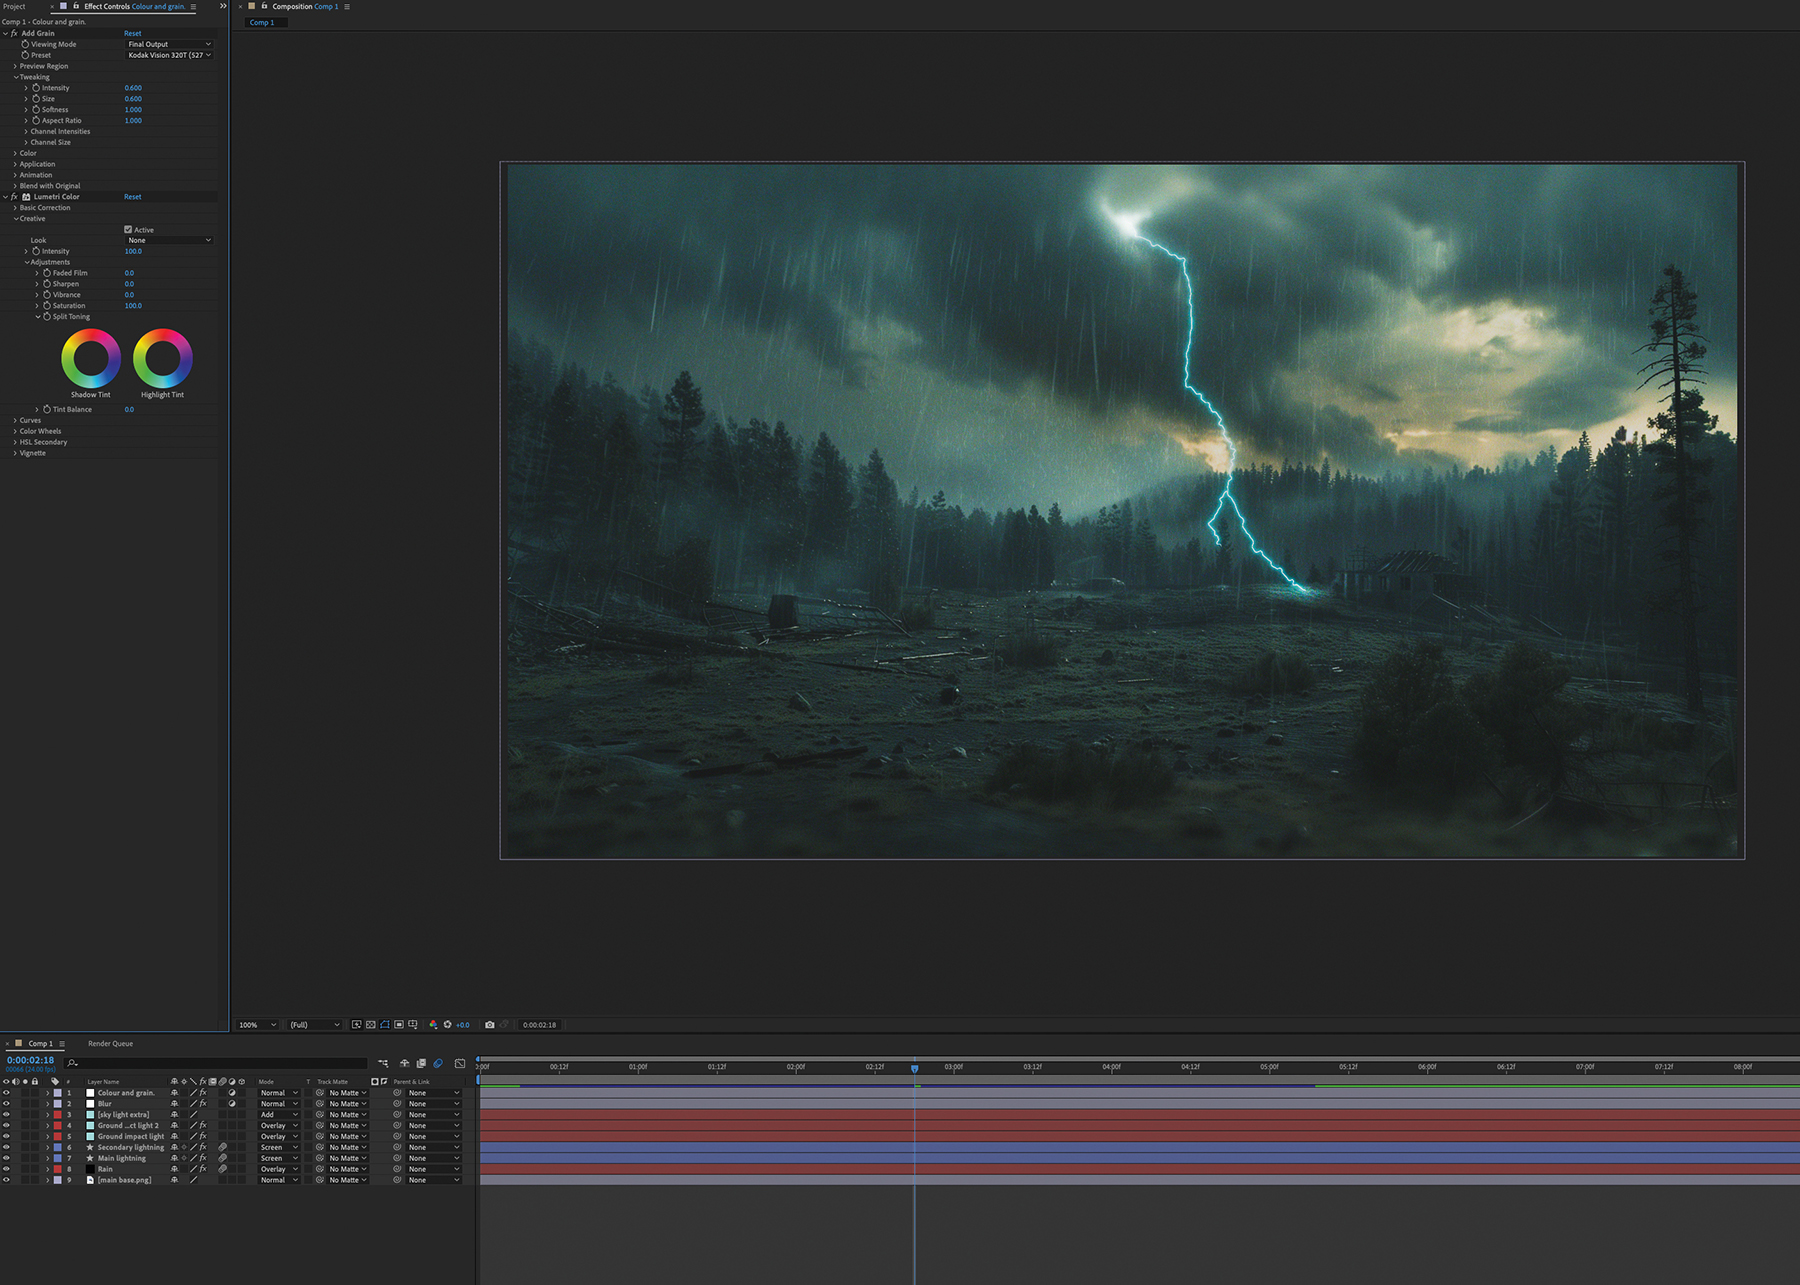
Now the lightning is done, all that’s left is to add a few last effects to bring it all together. Create an adjustment layer and add a Lens Blur. Use a rectangle mask with a high Feather amount to add some foreground blur, which helps keep the eye towards the middle of the scene. Create a second adjustment layer and add a Film Grain to it. The default settings can be a bit much so lower them, then add a Lumetri effect, and using Curves add a gentle S-curve before lowering the highlights and lifting the blacks as you desire. This will depend on your background layer.
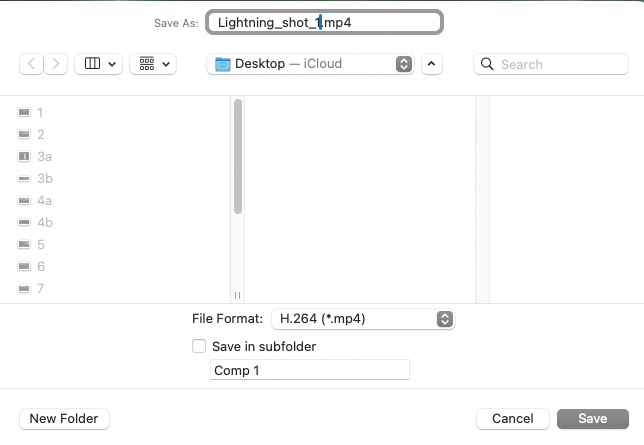
The final step is to double check the timings of your keyframe, then render it out and bask in the glory of a job well done! Go to Composition > Add to Render Queue, then select your output format, name and location, and click on Render. Once this is done, you’ll probably want to tweak timings, as After Effects never seems to quite get the playback at the speed your end results will be. Rinse and repeat and you should be golden. Your shot is finished and can be sent to the edit. Shockingly simple!
If this is the sort of effect you might use regularly, render out a version on a black background and build a library you can easily drop it into as footage for later projects.
Get the Creative Bloq Newsletter
Daily design news, reviews, how-tos and more, as picked by the editors.
Thank you for reading 5 articles this month* Join now for unlimited access
Rob Redman is the editor of ImagineFX magazines and former editor of 3D World magazine. Rob has a background in animation, visual effects, and photography.
You must confirm your public display name before commenting
Please logout and then login again, you will then be prompted to enter your display name.