How to paint fur: A guide
Painting fur is notoriously difficult. This guide will teach you how to paint fur using Photoshop.
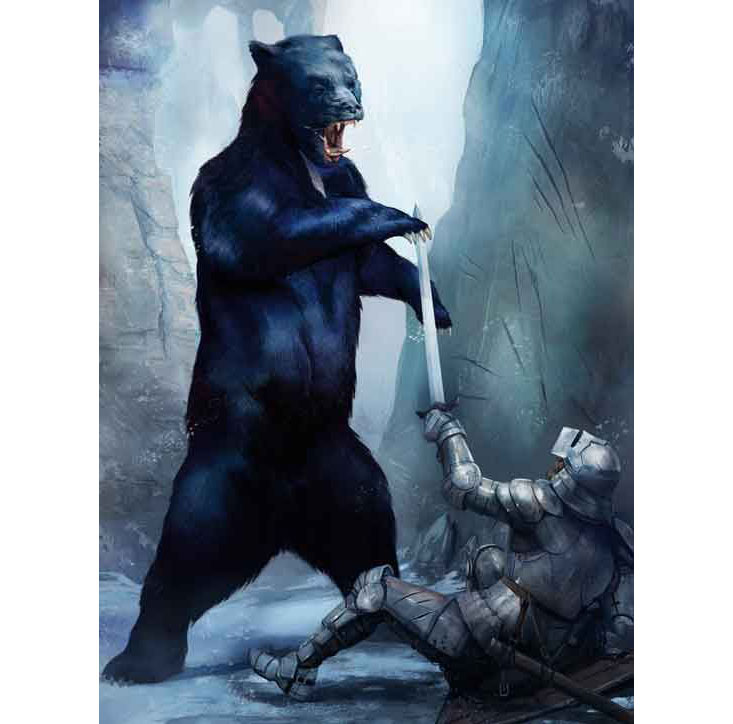
If you want to learn how to paint fur, this guide is for you. Painting fur realistically is notoriously difficult, due to the need for vibrant texture and the way the light hits it. It's also impossible to avoid needing to paint fur for most 2D and 3D artists, because it's a key part of creating realistic portrayals of animals – both real and fantastical.
In this guide, we will be adding fur to a large, black, fantastical beast using Photoshop. To enhance your work, you might want to use some of the best Photoshop brushes. And for more drawing tuts, covering everything from animals to landscapes, see our how to draw post.
Read on for Mikaël Léger's tutorial.
Click on the icon at the top-right to enlarge the images.
01. Prepare your canvas
Using bristle-type brushes, I paint big strokes that follow the volumes and fur direction. Then, without flattening established volumes, I use scattering-type texture brushes to blend elements and give the illusion of fur. Once I'm happy with the overall shape I blend the outer edges with the background using the Mixer Brush tool.
I paint using values and brightness to define volumes. If you colour pick a black fur photo, you'll see that the darks range between two and 30 per cent brightness, and the light areas between 31 and 70 per cent. Highlights could be in the 80 per cent range.
Black fur is colourful, but the colour itself doesn't matter much as long as I'm consistent when keeping the temperature organised: cool colours in the light and warms in the shadows. This could be inverted depending on the overall colour scheme.
I make sure the saturation of each area is consistent with its respective brightness. Saturation will depend on the light situation. I go with a rather saturated fur on mine, but whatever the overall saturation you chose, you should stay consistent. Keep the shadow more saturated than the light. Basically, the darker the area, the more saturated it will be.
02. Start with silhouettes
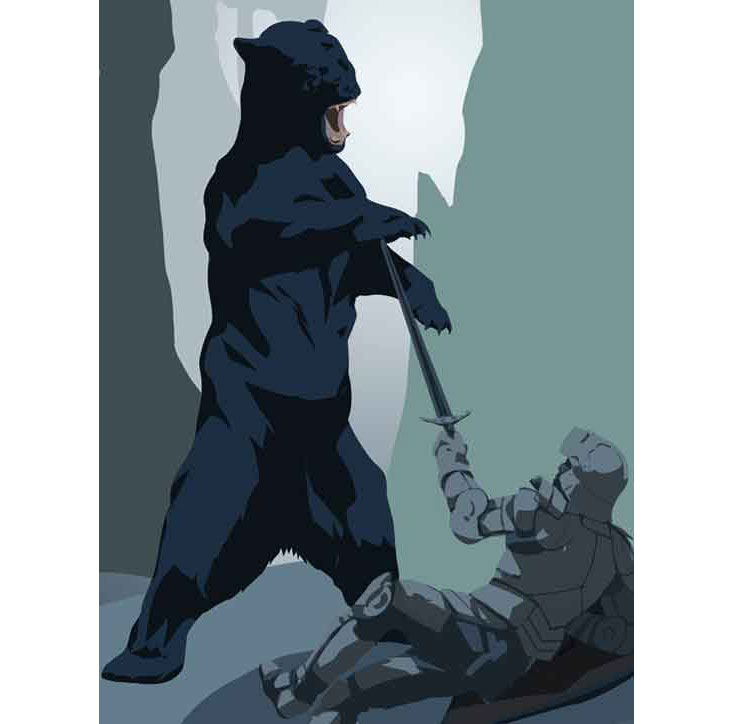
First, draw each element's silhouettes. For the base fur, I use a cool colour at around 60 per cent saturation and 25 per cent brightness. On a new Layer that uses the silhouette layer as a Clipping Mask, I draw the shapes of the shadows. I keep my edges sharp, and think about the light direction and how it falls on the overall volumes and the subject's anatomy.
03. Soften the edges
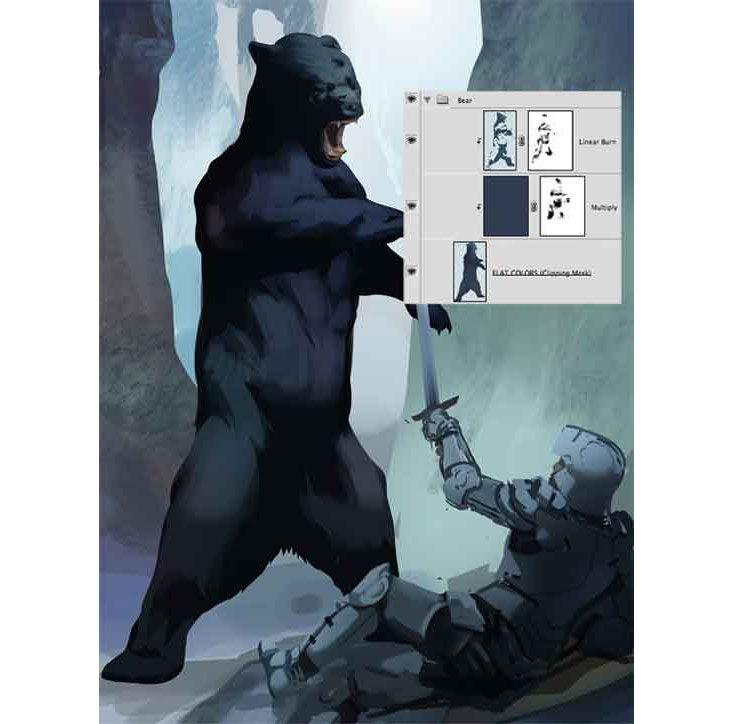
I add some colour variations to the silhouette and then with Photoshop's default Chalk brush I start modelling the volumes and soften the shadow layer's edges. If the edges are created by a cast shadow they'll remain sharp; however, the form shadow's edges will be soft. To avoid losing the initial shadow shape I soften the edges using a Layer Mask.
04. Use the chalk brush
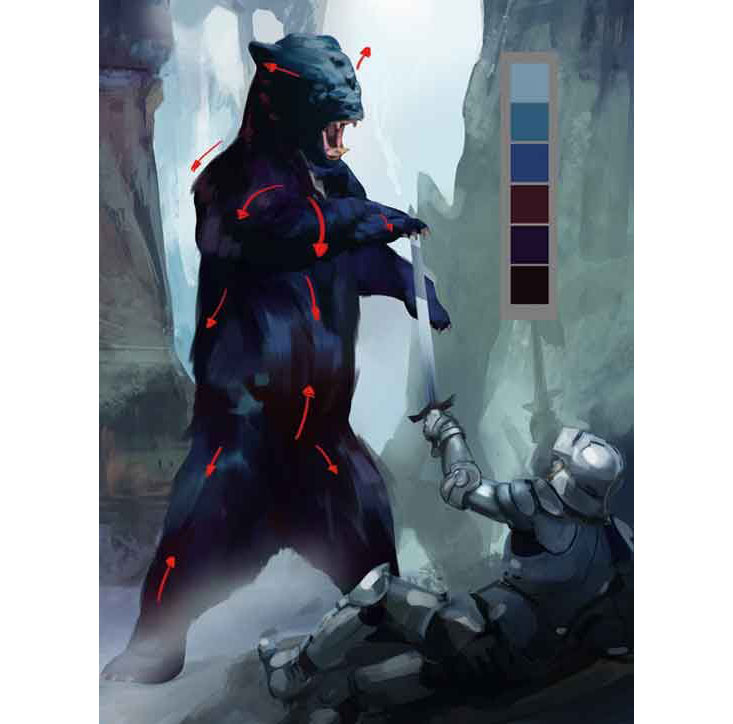
With the big default Chalk brush, I start painting. Ignoring details, I use broad strokes to model the volumes, following the hair's direction. I also refine the silhouette. Because of my overall colour scheme, I use cool colours in the light and warm ones in the shadows. Black fur is actually quite colourful: the darker the colour, the more saturated it'll be. I don't use pure black.
05. Refine the detail
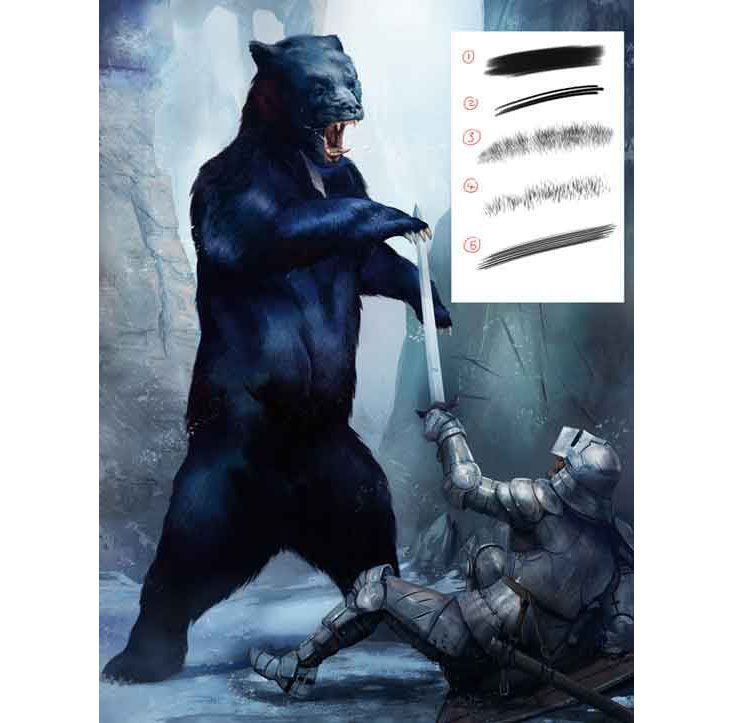
I'm nearly finished, and so take care not to kill established volumes. I use a Chalk brush and a small Bristle brush (1 and 2) to refine details, and some fur texture brushes (3 and 4) to blend things together. With the Mixer Brush Tool and a Fan brush, I blend the silhouette edges with the background. Finally, I use adjustment layers to unify colours and push the contrasts.
How to create a scatter fur brush
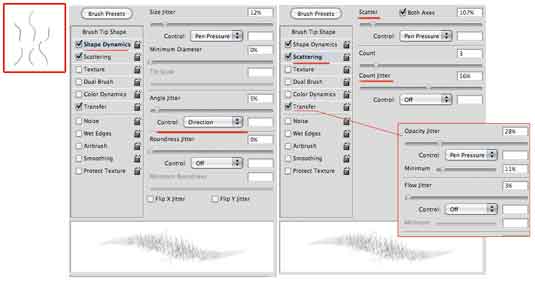
Draw a couple of hairs to use as a brush preset. Define the Size and Opacity, set Scatter to pen pressure and the angle on the Direction setting. Set Count jitter around 50 per cent, Scatter on both axes around 100 per cent, and adjust the Size, Angle and Opacity Jitter.
This article first appeared in ImagineFX magazine. Subscribe here.
Read more:

Thank you for reading 5 articles this month* Join now for unlimited access
Enjoy your first month for just £1 / $1 / €1
*Read 5 free articles per month without a subscription

Join now for unlimited access
Try first month for just £1 / $1 / €1
Get the Creative Bloq Newsletter
Daily design news, reviews, how-tos and more, as picked by the editors.
