How to make manga faces with a touch of realism
5 easy steps to draw a realistic manga portrait in Photoshop.
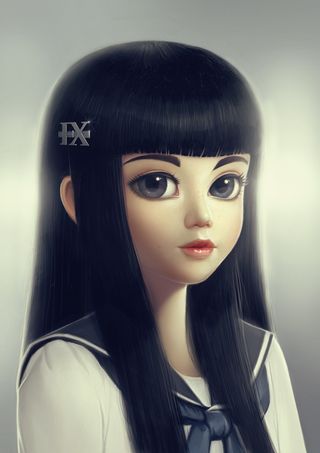
Painting realistic manga art isn't easy when it comes to manga characters, because the volumes aren't logical. For example, the eyes are totally flat. The best approach is to cheat and use more human-like shapes.
Try to find good references such as vinyl figures or dolls, but bear in mind that it doesn't have to be exclusively plastic in nature. Think about your light sources first, which will help you find your palette and define your volumes.
When you have to deal with realism, the most important problem to solve is the contrast. Try to avoid pure white and pure black. To achieve a smooth result, work with the Soft Round brush on a very low opacity.
Apply a lot of very light strokes, use a larger brush for bigger areas and a small one for detailing. Use a new layer for each element of the eyes, nose, month and eyebrows.
For the flesh tones, your palette has to be more complex than a simple gradient. Add a little bit of red on the nose and the cheek bones, a little bit of green on the shadows, and a little bit of blue/cyan under the eyes. The hair is the boring part.
Start with a flat very dark area and paint hair strands individually. It'll take a few hours, but if you want to achieve convincing results, you need to invest the time!
Here we go through five simple steps to paint a realistic manga portrait in Photoshop.
01. False start
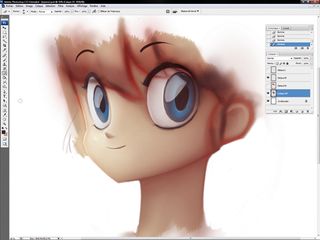
My first attempt to paint a realistic manga head looks more like a vinyl figure. It's impossible to paint logical volumes for the eyes!
02. Sketch it like you stole it
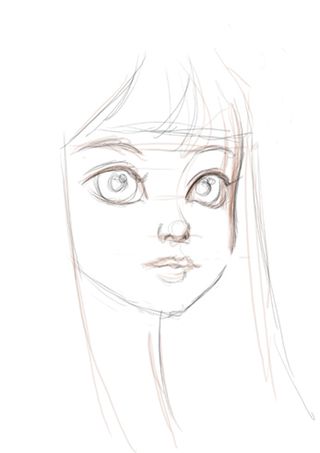
Here's my quick sketch. I don't spend a lot of time on it because when you try to achieve realistic rendering, it's often pointless. It's all about volumes, not lines.
Just try to define the composition and the proportions. Digital painting software gives you a lot of freedom – you can change everything in your picture very easily. Take advantage of it!
03. Use different strokes
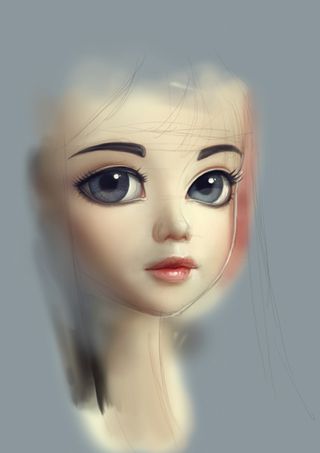
The face is the most time-consuming part of the process. I start with a flesh-toned flat area on a layer, then define the volumes gradually with the Soft Round brush in Photoshop on other layers.
I need to do a lot of strokes. My sketch is still on the top layer, and I increase or decrease its opacity when necessary. By the time I’ve finished, the sketch will no longer be visible.
04. Paint the hair
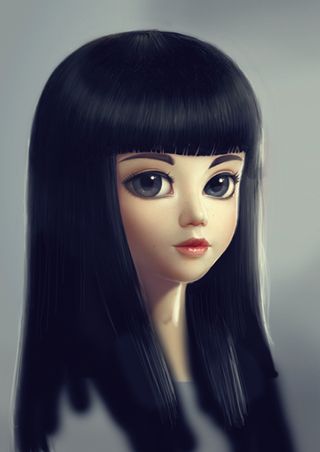
I use the same method for the hair. Straight and dark hair isn't particularly difficult to paint. First I create a very dark-tinted area and then on another layer, I define the global volume.
Then I paint in all the small hairs and I add the reflections using the background colour and white. Once again, I used the Soft Round brush on a very low opacity.
05. Add a realistic skin texture
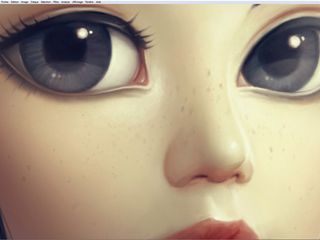
Add skin texture with a textured brush, such as the Drybrush in Photoshop. Apply some freckles with a small Soft Round brush.
Working on a different layer enables you to decrease the opacity of the layer for more efficient image adjustments.
This article originally appeared in ImagineFX magazine issue 95.
Like this? Read these!

Thank you for reading 5 articles this month* Join now for unlimited access
Enjoy your first month for just £1 / $1 / €1
*Read 5 free articles per month without a subscription

Join now for unlimited access
Try first month for just £1 / $1 / €1
Get the Creative Bloq Newsletter
Daily design news, reviews, how-tos and more, as picked by the editors.
