How to create photoreal slime and shine
With simple digital brushes you can create realistic slimy skin, as Paco Torres explains.
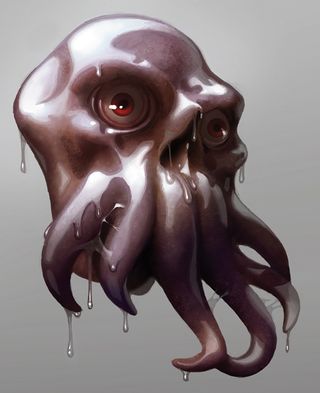
Painting shiny and slimy skin for an octopus, or any other kind of slimy creature, isn't a difficult task – if you spend some time gathering references, that is.
Expand your vector knowledge with these top Illustrator tutorials
A polished and smooth surface causes something called specular reflection. This means that light is reflected and bounces off in the same direction, casting reflections on the surface, just like a mirror.
The skin of a slimy creature isn't exactly like a mirror, but it has a considerable level of specular reflection, so the brightest sources of light, the nearest objects and the surrounding colours should be at least partially reflected.
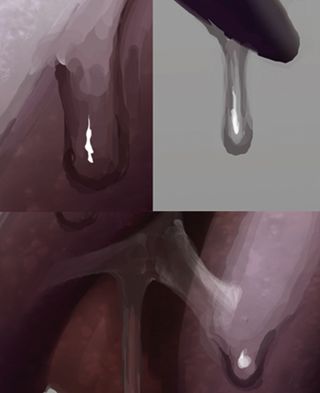
Properly depicting the reflections is the key to success here. It's not too complex a topic, but if you're not used to it then it can be tricky to pull off with a degree of success.
That's why gathering some visual references, such as photos of octopuses, shiny latex and polished statues, can be a great help. Not only to paint a particular image but to increase your painting skills by studying real-life examples.
Other than that, you have to figure out how something is reflected on an irregular shaped surface. Try to imagine the source of light, and place the reflections following some logic.
So for example, if the light source is a light bulb on the left of the octopus, don't paint a window-shaped reflection on the right. Paint them to accommodate the curves and shapes of the creature, and paint them with the right amount of luminous intensity.
01. Form to slime
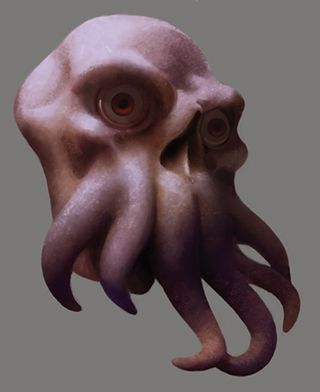
First of all, I paint the slimy creature dry and matte. I simply focus on depicting its shape, colours, texture, illumination and so forth. Then I start to work on the reflections.
I imagine an intense light source on the upper left (like the sun coming through a hole in the ceiling), so the reflections should be bright and more intense on the left.
02. Look to the curves
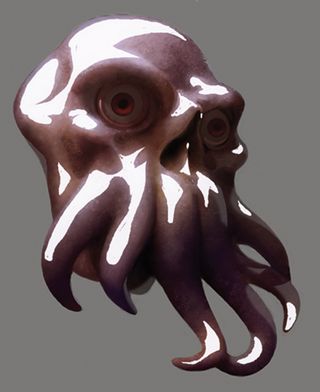
Once I have an idea of what I'm looking for, I start to paint the reflections. I paint them in a separate layer, with a Hard and Opaque brush, because the reflections should have clean and sharp edges.
I bend them following the curvatures of the head, the tentacles, all the while trying to create fluid and coherent shapes on the canvas.
03. Seperate, don't erase
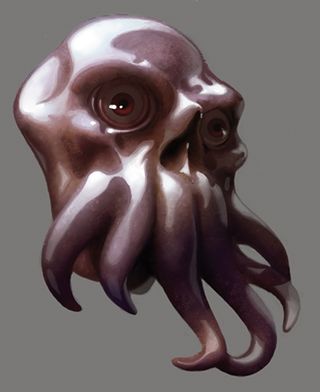
Then I select all those reflections, lower their opacity, and in further layers add more nuances (all inside the selection, to preserve the hard edges).
I try to work using layers in Screen mode, because then I won't hide all the previous work – the skin of the creature – and can correct elements using dark colours, which is easier than applying the Eraser.
04. Different skins, different reflections
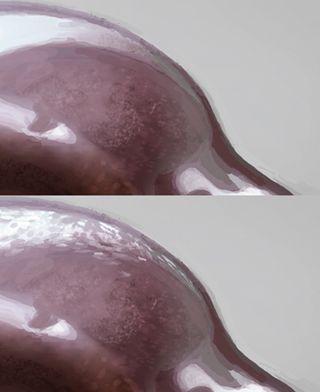
If you're painting a creature with a smooth skin, its reflections should also be smooth. If you want to paint a creature with harsh skin, don't forget to modify the reflections according to the kind of skin that you're painting.
05. Easy when prepared

Painting a slimy, shiny skin is easy if you paint in a clean and organised way, and you gather information and references before you start working.
This article originally appeared in ImagineFX.
Like this? Read these...
- Free Photoshop brushes every creative must have
- Paint amazing scenes by starting out in 3D
- Photoshop tips, tricks and fixes to try today

Thank you for reading 5 articles this month* Join now for unlimited access
Enjoy your first month for just £1 / $1 / €1
*Read 5 free articles per month without a subscription

Join now for unlimited access
Try first month for just £1 / $1 / €1
Get the Creative Bloq Newsletter
Daily design news, reviews, how-tos and more, as picked by the editors.
