3 top tips for creating a concept environment
Mark Molnar explains how to quickly create an interesting environment for concept purposes.

Art directors often ask me to mock up something quick to establish an overall direction for a scene. For this I'll use photos and matte painting techniques to comp a scene together. It's much faster than simply painting everything from scratch.
Hone your Illustrator skills with these top tutorials
The most important task is to find the best source material, so I usually spend half my allotted time gathering the exact reference photos I want to work with. I then create some rough scribbles of the overall composition; these help me to visualise my idea. I then try to find a base image that roughly matches my composition and has a similar mood or lighting setup.
After this I collect extra 'key' and 'enhancer' images. The enhancers can help to push the base image further, while the key photos can either make the final art look unique or add extra story elements.
It's crucial to match the lighting, colours and values of the different source materials, which then creates a unified look. I do this using layer adjustment options such as Color Balance, Curves and Selective Color. I also use the Match Color option (Image>Adjustment>Match Color...), which can match the colour and value structure of two layers containing different objects.
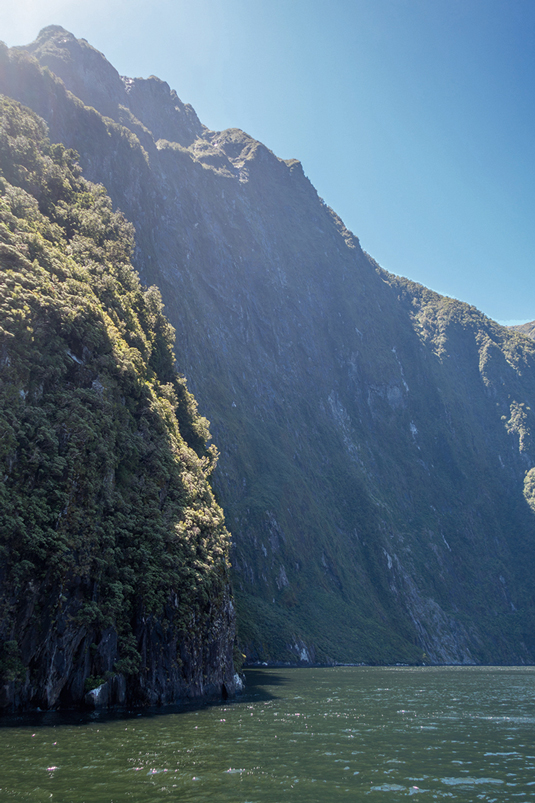
01. Pick a base image

I pick a base image that's close to my imagined composition and lighting scheme. This gives me a foundation to build on, and a reference palette that I can match the colours of the other source materials to. Here I'm using an image from Noah Bradley's free New Zealand reference pack.
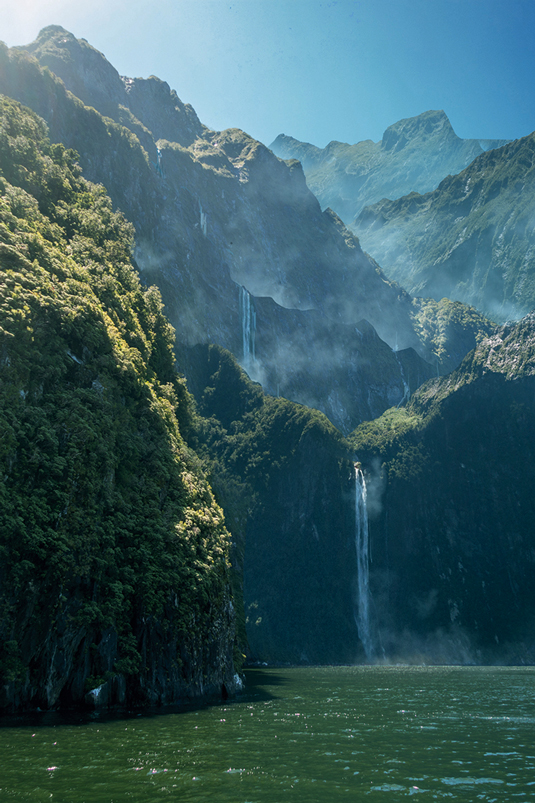
02. Add a splash of paint

After some colour adjustments I comp more photos into the scene and paint in some parts, using colours that are present in the photos. I want to add more depth and detail to the image, and achieve this by layering the mountain ranges and adding more low clouds, fog and haze between them.
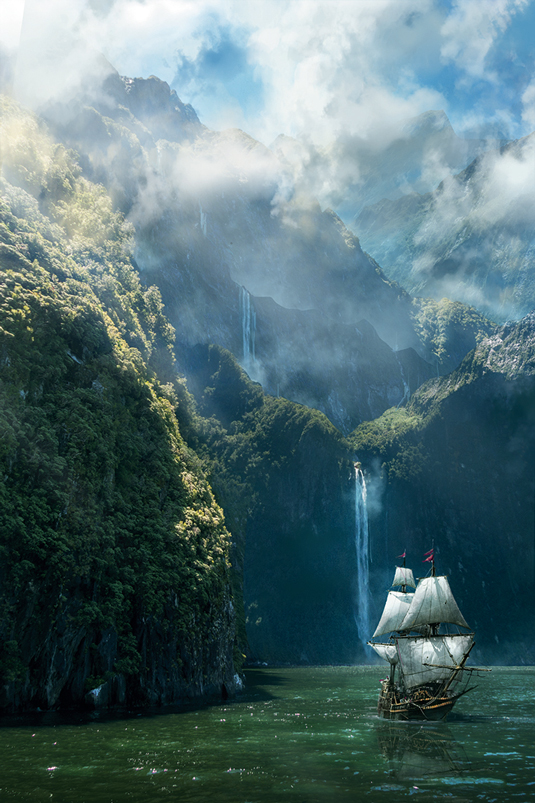
03. Give it a story

I want to create a cinematic fantasy image, so introduce more clouds – some painted, some from images using various layer blending modes. I add the classic pirate ship as my main focal point and repaint the lighting to guide the viewer towards that area, for better storytelling purposes.
Words: Mark Molnar
Mark works as a concept and visual development artist in the entertainment industry, creating artwork for international film, game and animation companies. This article originally appeared in ImagineFX magazine issue 121.
Like this? Read these!
- How to create great fantasy art every time
- How to capture a story in your fantasy art
- Free Photoshop brushes every creative must have

Thank you for reading 5 articles this month* Join now for unlimited access
Enjoy your first month for just £1 / $1 / €1
*Read 5 free articles per month without a subscription

Join now for unlimited access
Try first month for just £1 / $1 / €1
Get the Creative Bloq Newsletter
Daily design news, reviews, how-tos and more, as picked by the editors.

The Creative Bloq team is made up of a group of design fans, and has changed and evolved since Creative Bloq began back in 2012. The current website team consists of eight full-time members of staff: Editor Georgia Coggan, Deputy Editor Rosie Hilder, Ecommerce Editor Beren Neale, Senior News Editor Daniel Piper, Editor, Digital Art and 3D Ian Dean, Tech Reviews Editor Erlingur Einarsson, Ecommerce Writer Beth Nicholls and Staff Writer Natalie Fear, as well as a roster of freelancers from around the world. The ImagineFX magazine team also pitch in, ensuring that content from leading digital art publication ImagineFX is represented on Creative Bloq.
