8 essential Fireworks tips for web design
Save yourself from doing the same thing over and over again. Use Adobe Fireworks to speed up your workflow with these time-saving tips, compiled by Jonathan Snook
Are you a Photoshop die-hard and wondered why you’d ever use Fireworks? Have you been using Fireworks for years and looking to improve your workflow? Save yourself from doing the same thing over and over again. We’ll explore a bunch of features of Adobe Fireworks to speed up design time and put the rapid back into rapid prototyping with these time-saving tips.
In programming circles, there’s a concept called DRY: Don’t Repeat Yourself. Optimise your workflow by reducing repetitive design steps using Adobe Fireworks:
1. Using States for more than animated GIFs
For many, their introduction to Fireworks comes through having to make animated GIFs. If you’ve done so, you’ll likely be very familiar with the States panel. Websites are very dynamic creatures with plenty of interactivity, though. Hover (or mouseover) states are a prime example of simple interactivity that can and should be accurately represented in your design.
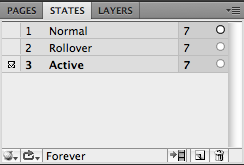
Head over to the States pane, create a few states and then double-click on the default state name to rename it to something more relevant. These names will be listed in the States drop-down available from the bottom of the Layers panel. Not everything in your design is going to have multiple states, though. Thankfully, you can set a layer to be shared across all states by right-clicking on the layer in the Layers panel and selecting Share Layer to States.
2. Editable menu items using Button Symbols
Symbols are like a Fireworks file inside a Fireworks file. They’re a handy way to group a bunch of elements together in a reusable object. To create a symbol, select the layers that you want to be part of your symbol. Right-click and select Convert to Symbol or select it from the Modify > Symbol menu. There are different types of symbols: Graphic, Animation, and Button. For this tip, choose Button. Once you’ve created your symbol, you can edit it by double-clicking on the symbol on the canvas.
Button symbols have two handy properties:
1. It automatically creates four states for you: Up, Over, Down, and Over While Down. If you have multiple states defined at the document level, switching within the second, third, or fourth states will also switch to view the respective state within the button.
2. Go to the Properties panel with the symbol selected. You’ll notice that you can specify a text property. The lowest text layer in the symbol will be editable from this panel. This way, you can duplicate a button in the document (for example, for navigation) and edit the text for each menu item. Editing the symbol will update all instances of the symbol.
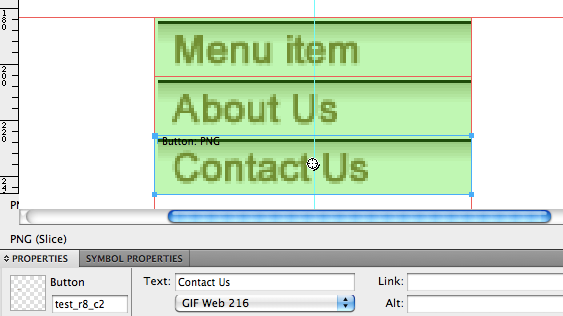
Creating a button symbol also creates a web slice layer to go along with it. When exporting the slice, you can elect to have it export all states for you.
3. Super-powered Editable Symbols
If you thought editing text was handy, you’ll love what you can do when you can edit multiple properties of a symbol like colour or any number of text layers. The steps are a little particular but well worth the effort.
Like in the last tip, select a bunch of layers that you wish to turn into a symbol. For any layer that you wish to have an editable property, give the layer a unique name in the Layers panel. Then, select your layers and convert into a graphic symbol. This time, be sure to check the box that says “Save to Common Library”.
Select Create Symbol Script from the Commands menu. Click on the ellipsis in the dialog to choose the symbol you just saved. Click on the plus button to add a new editable property. If you’ve done the previous steps correctly, you should be able to choose a layer name from the Element Name column. Choose the attribute that you wish to be editable. Assign a property name and an initial value.
Once you’re ready, save your changes.
Get the Creative Bloq Newsletter
Daily design news, reviews, how-tos and more, as picked by the editors.
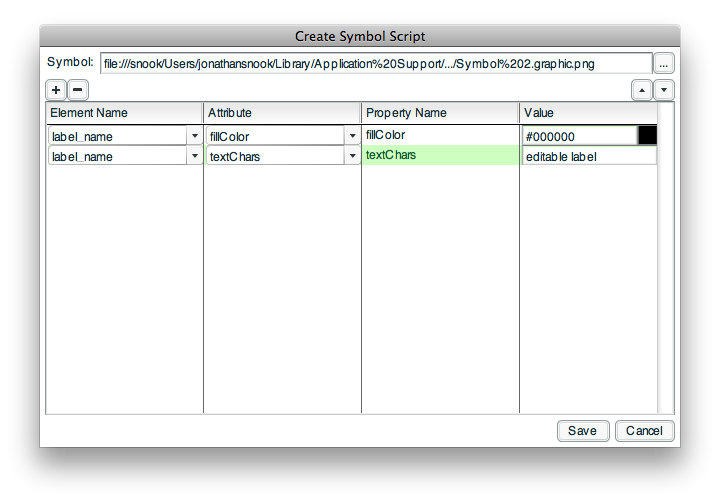
Drag the symbol from the Common Library into your document. Open the Symbol Properties panel and you should see the declared values listed in the panel.

4. Use the Style panel
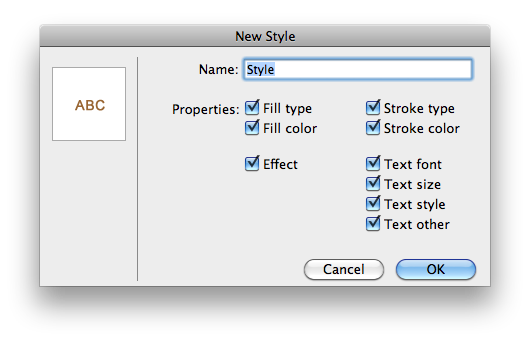
Every project should have some consistency such as a certain colour scheme or a set of common font sizes. Select the layer that contains the styles you wish to save. Click on the new style button in the Styles panel. Turn off any features that you don’t want to save and then click OK. Anytime you wish to apply this style to another layer, select that layer and then click on the style from the Style panel. Alternatively, you can select the style by its name from the Style drop-down menu in the Properties panel.
5. Quick Styling
Saving a style to the Style panel is a little much when you just want to quickly take the styles from one layer and apply it to another. To quickly copy styles, select the layer that has the styles that you want to copy and then choose Edit > Copy. Select the layer that you wish to style and then choose Edit > Paste Attributes. You can also use the keyboard shortcut, Command-Option-Shift-V (on OS X).
6. Minimise clutter using Pages
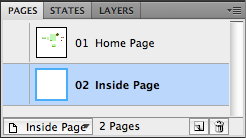
If you find yourself creating home.png and inside.png and cart.png, then check out the Pages panel. The Pages panel is very similar to the States panel. You can create multiple pages and store each page variation on its own. Once again, you can set layers to be shared across all pages, saving you from having to duplicate layers and editing multiple versions of the same thing (for example, site header) each time a change needs to be made. From the Layers panel, right-click a layer and select Set Layer to All Pages.
7. Replay History
Find yourself doing the same handful of sequences over and over again? If you just need to redo the last step, you can hit Cmd-Y (on OS X). For more complicated revisions, head to the History panel.
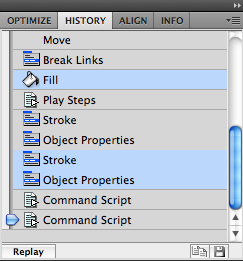
Select the steps that you wish to repeat. You can hit Replay to run the selected steps or you can hit the save button and provide a name for this batch of commands. You can run this batch from the bottom of the Commands menu.
8. Quick Prototyping
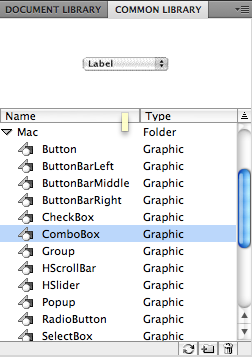
You’ve already seen how to save time by creating your own symbols but there are plenty of great symbols already in the Common Library panel. Quickly prototype a form using the Mac or Win(dows) controls. Just drag the elements you need from the panel onto your document. Check out the Symbol Properties panel to customise the controls.
What are your favourite Fireworks tips and tricks? Let us know in the comments!

Thank you for reading 5 articles this month* Join now for unlimited access
Enjoy your first month for just £1 / $1 / €1
*Read 5 free articles per month without a subscription

Join now for unlimited access
Try first month for just £1 / $1 / €1

The Creative Bloq team is made up of a group of art and design enthusiasts, and has changed and evolved since Creative Bloq began back in 2012. The current website team consists of eight full-time members of staff: Editor Georgia Coggan, Deputy Editor Rosie Hilder, Ecommerce Editor Beren Neale, Senior News Editor Daniel Piper, Editor, Digital Art and 3D Ian Dean, Tech Reviews Editor Erlingur Einarsson, Ecommerce Writer Beth Nicholls and Staff Writer Natalie Fear, as well as a roster of freelancers from around the world. The ImagineFX magazine team also pitch in, ensuring that content from leading digital art publication ImagineFX is represented on Creative Bloq.
