How to create a fantasy beast
Fantasy creature design is essentially breaking down real animal forms and combining them to make something new.
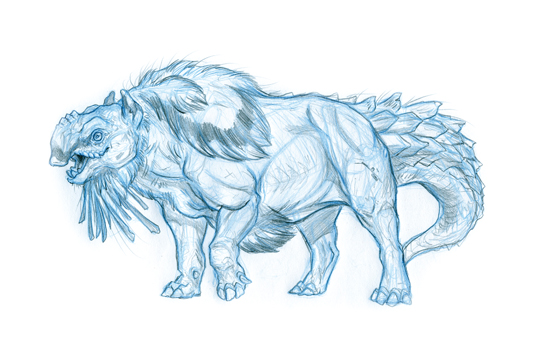
Creature design is built on the foundation of understanding real-life animals. Even when we design fantastical creatures like dragons or demons, pulling from nature can help make it more believable.
Learning how to draw real-world animals, like how to draw a bear, can go a long way when tackling fantasy creatures. Below Brynn Metheney shares her process for creating fantasy creature designs, using real world references to make the concept more believable.
If you want to learn more, Brynn will be speaking Vertex 2024 is our returning live art event being held at London's Business Design Centre on 19 April. Come and learn from professional artists working in film, games and VFX, including speakers from Pixar, nDreams and Maxon. Tickets for Vertex 2024 are on sale now.

How to create a fantasy beast: step-by-step
First, I explore the animals themselves. Drawing each species helps me get to know their anatomy. I take note of certain traits, proportions, markings and shapes as I draw.
Then I find a shape inspired by one of the animals, which acts as a foundation for where I'd like to go. With my best pencils to hand, I use a harder pencil lead to keep things light and workable. I'm only concerned with getting down big shapes, like the shape of the head and general body and tail.
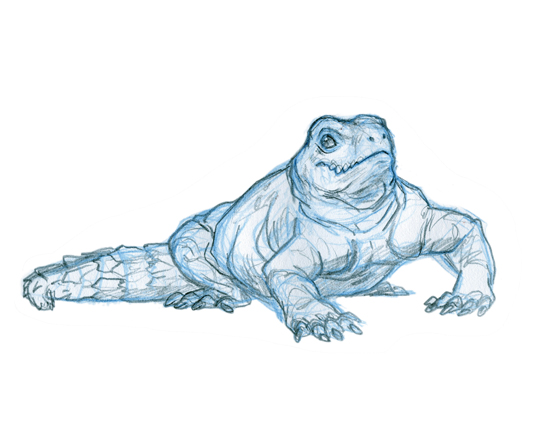
Studying how certain animals carry themselves will help you pose your creature. I'm looking to the tapir and spiny tailed lizard. I find a stance between these two animals and tweak it to make sure it looks natural. I sketch out the rest of the animal to find the landmarks, such as the shoulders, knees and the rib cage, using boxes and planar shapes to help flesh out the creature.
Now I add detail and other shapes, looking at the secretary bird. Claws, spikes, scales, fur and feathers help to flesh out its silhouette. It's important to make it iconic. Having too much detail or "stuff" happening on your creature could dilute the effectiveness of your design.
Materials you will need...
- Blue Col-Erase pencil
- HB Caran D'ache Graffwood pencil
- Staedtler rubber eraser
- Acid-free sketchbook paper
01. Find the general shape
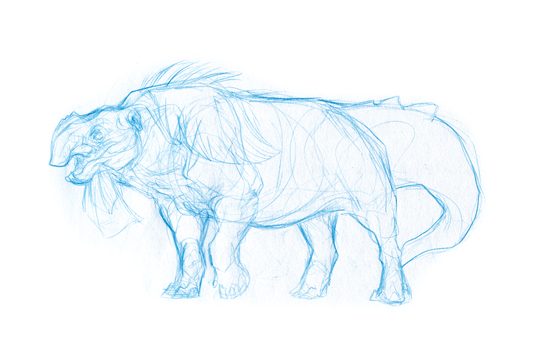
As usual, I start light, and keep in mind the characteristics I want to combine. I'm always asking myself questions. What does this creature eat? How big is this creature? What is its general attitude? Is it male or female? Addressing these areas can help direct your design.
02. Build up forms
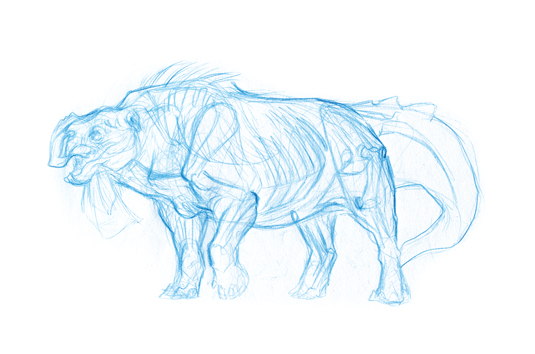
Next, I begin to lie in big forms. I want to find the anatomy of this creature. Because my beast has a skeleton, I'm careful to take note of where certain bones and landmarks are.
I indicate key elements like the shoulder blades, the pelvis and the rib cage. These large forms will help me indicate where the muscles lie and help build a more believable creature. Remember to keep it light! We want to build on top of this drawing as we go.
03. Nail the muscles
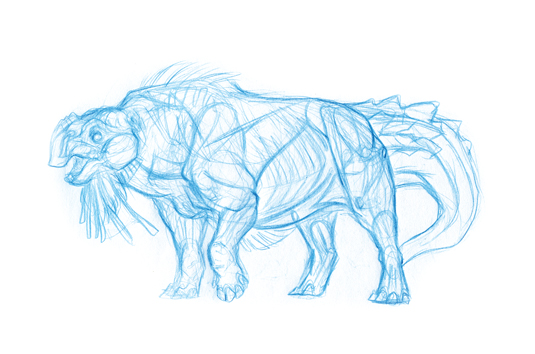
From here, I begin to define muscle groups, being sure to understand where certain muscles are connecting. This is vital and is informed by producing lots of animal drawing.
It's important to know where muscles lie on your creatures for animation and modelling. Being able to show and tell where and how your creature moves is crucial when creating a grounded creature design. Keep the shapes big and light at this point. Think about where the muscles would attach to the bone.
04. Look at those details
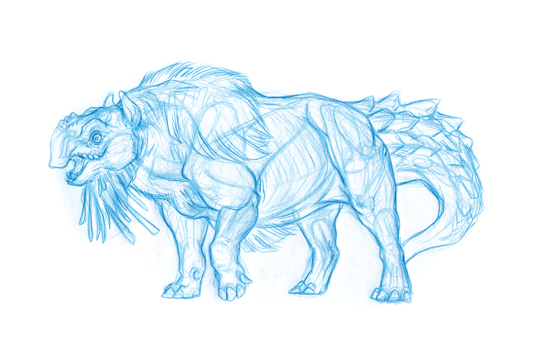
Next, I begin to define certain details and shapes, always being careful to look at my reference. Here I'll begin to look at the tapir for the bulk of the body and the feet.
The spiny tailed lizard helps with the tail, head and texture of the creature. I also look to the secretary bird for ideas about feather placement, eye placement and eventually colour. When I draw in a new body feature, I'm careful to start with a lighter touch. As I build up my creature, I push down harder on my lead.
Tip: Take advantage of the Col-Erase pencil
Because it's waxy, it takes a while to solidify forms, and this lends itself to exploration.
05. Now, really look at those details!

As you draw those tapirs, you notice that each toe has a different shape and that the front legs have more toes. You'll notice the shape of the secretary bird's eyelids and the way the skim folds on the face.
These small details can really push your creature design into the realm of believability.
Tip: Rubber erasers
These are slightly more effective than a kneaded eraser and will do a better job of removing the Col-Erase lines that you put down. You can cut them with a sharp knife to create a nice corner for precision erasing.
Brynn specialises in creature design, fantasy illustration and visual development. This article originally appeared in ImagineFX magazine issue 128.

Thank you for reading 5 articles this month* Join now for unlimited access
Enjoy your first month for just £1 / $1 / €1
*Read 5 free articles per month without a subscription

Join now for unlimited access
Try first month for just £1 / $1 / €1
Get the Creative Bloq Newsletter
Daily design news, reviews, how-tos and more, as picked by the editors.

Brynn Metheney specialises in creature design, fantasy illustration and visual development for film, games and publishing. She lives and works in Oakland, California.
