Speedy tips to create beautifully photoreal archviz using 3ds Max and Corona
Visualisation veteran Alireza Khoshpayam shares his top tips for crafting an accomplished composition in your next project.

Architectural visualisation stands at the crossover of artistry and technical precision, offering architects a hugely powerful tool to bring their designs to life long before real-world construction begins. The best CAD laptops can help you get the results you need, as can the best 3D software, but more than ever an artist's eye is needed to ensure the project looks as good as you, and the client, want.
The draw of these architectural renders comes not only from their ability to depict physical spaces realistically, but also in their ability to evoke emotions and convey a design’s intent. Visual appeal is achieved through meticulous attention to detail, using realistic lighting and seamless integration of textures and materials. Each element, from the play of light and shadow to the texture of surfaces, contributes to a visual narrative.
Colour plays a pivotal role too, influencing the mood, perception of the space, and overall aesthetic impact. Certain colours can evoke warmth, tranquility or dynamism, depending on the design goals. Architects use colour theory to create atmospheres that match up with a project’s aims and complement the architecture.
The composition of the camera angles is also crucial in presenting architectural design effectively. Art theory and techniques such as the rule of thirds or the golden ratio guide the placement of elements within the frame, enhancing the visual balance and drawing the viewer’s attention to key features.
01. Light up the sky
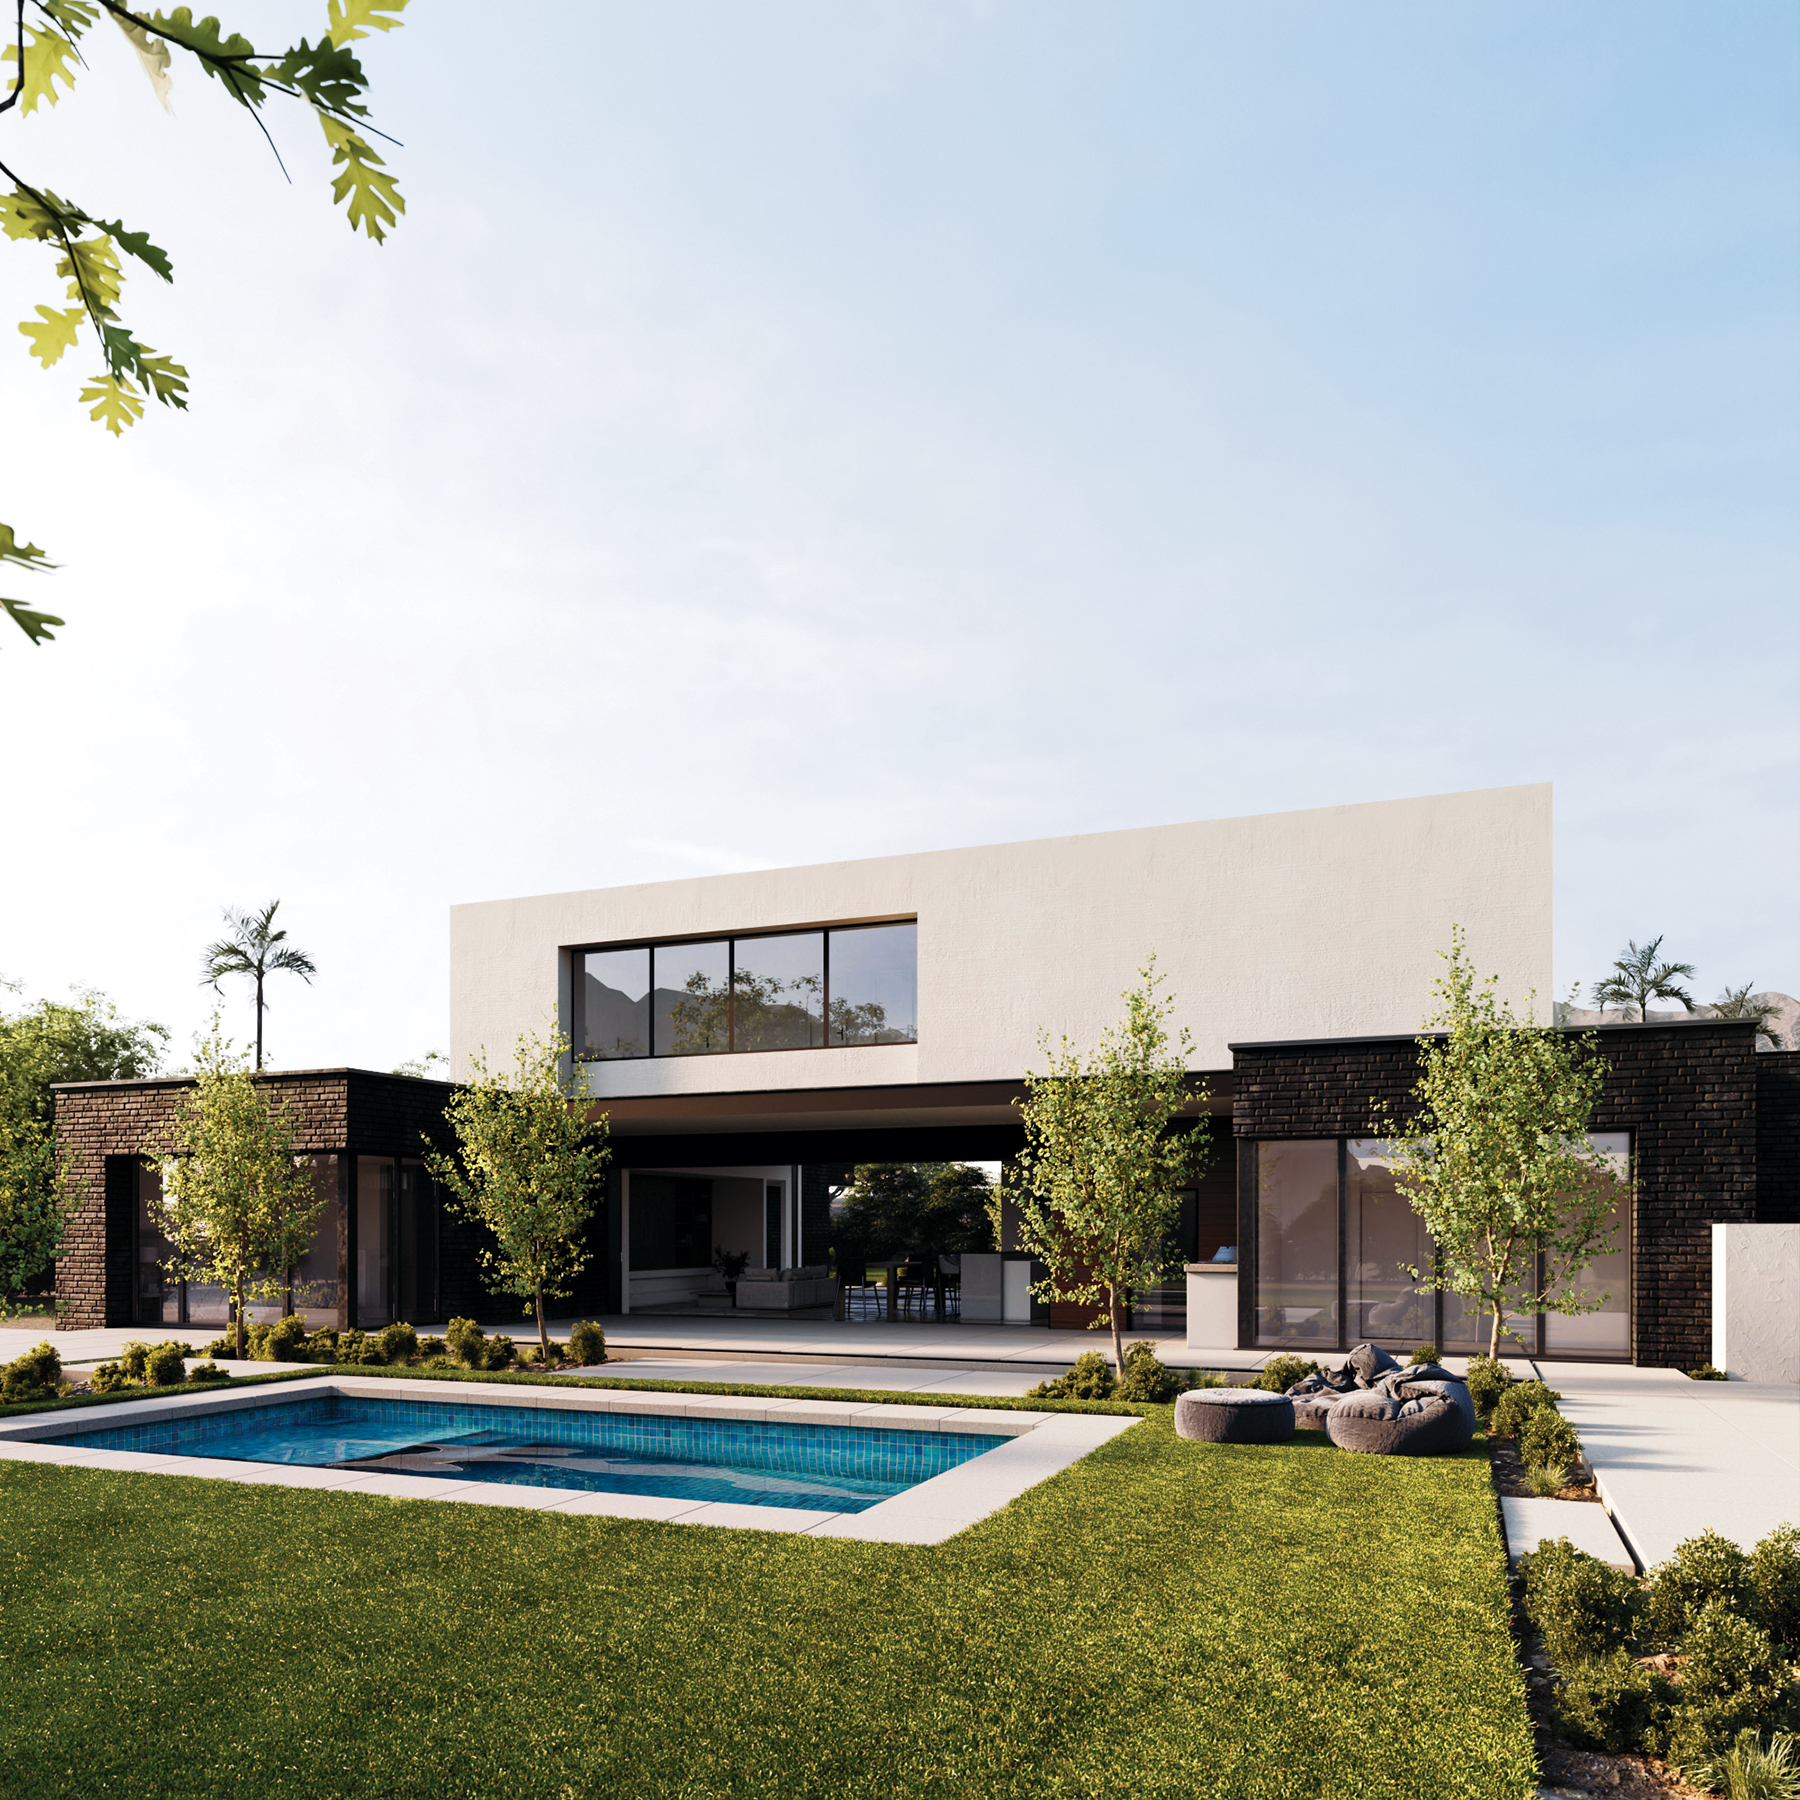
In my opinion, the most effective and optimised approach for exterior lighting is Corona Sky. This method is fully physical and based on real-world principles, which ensures highly realistic and accurate lighting results.
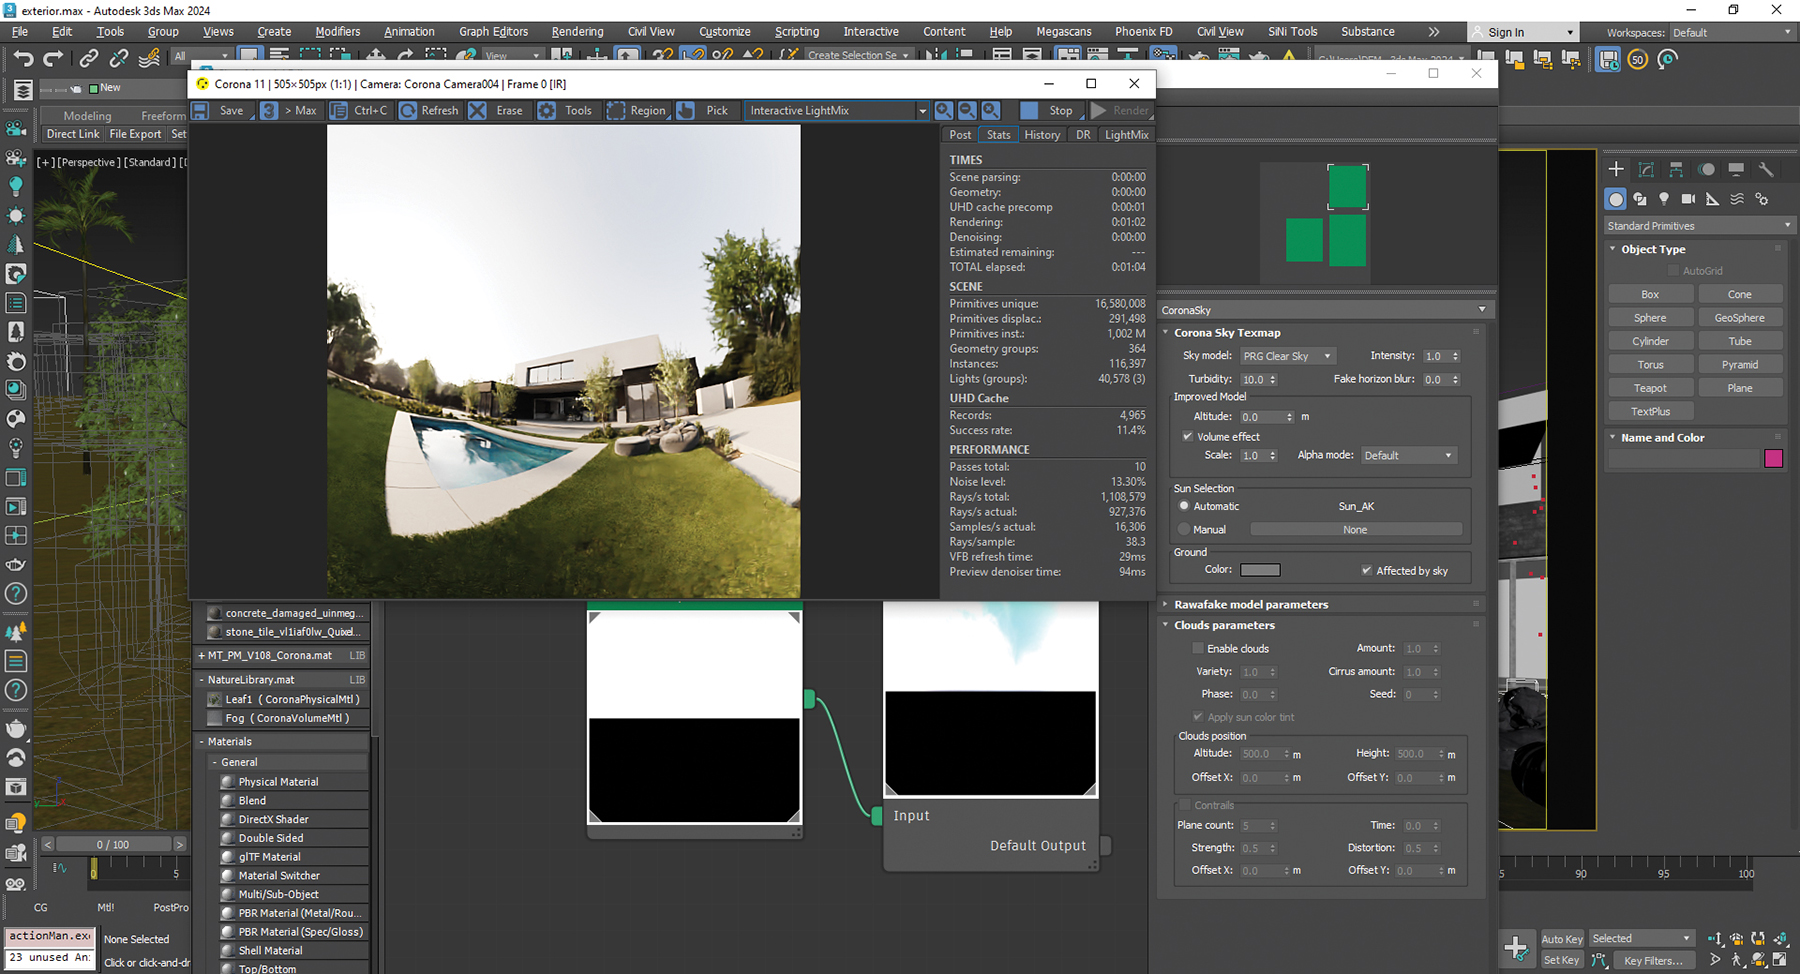
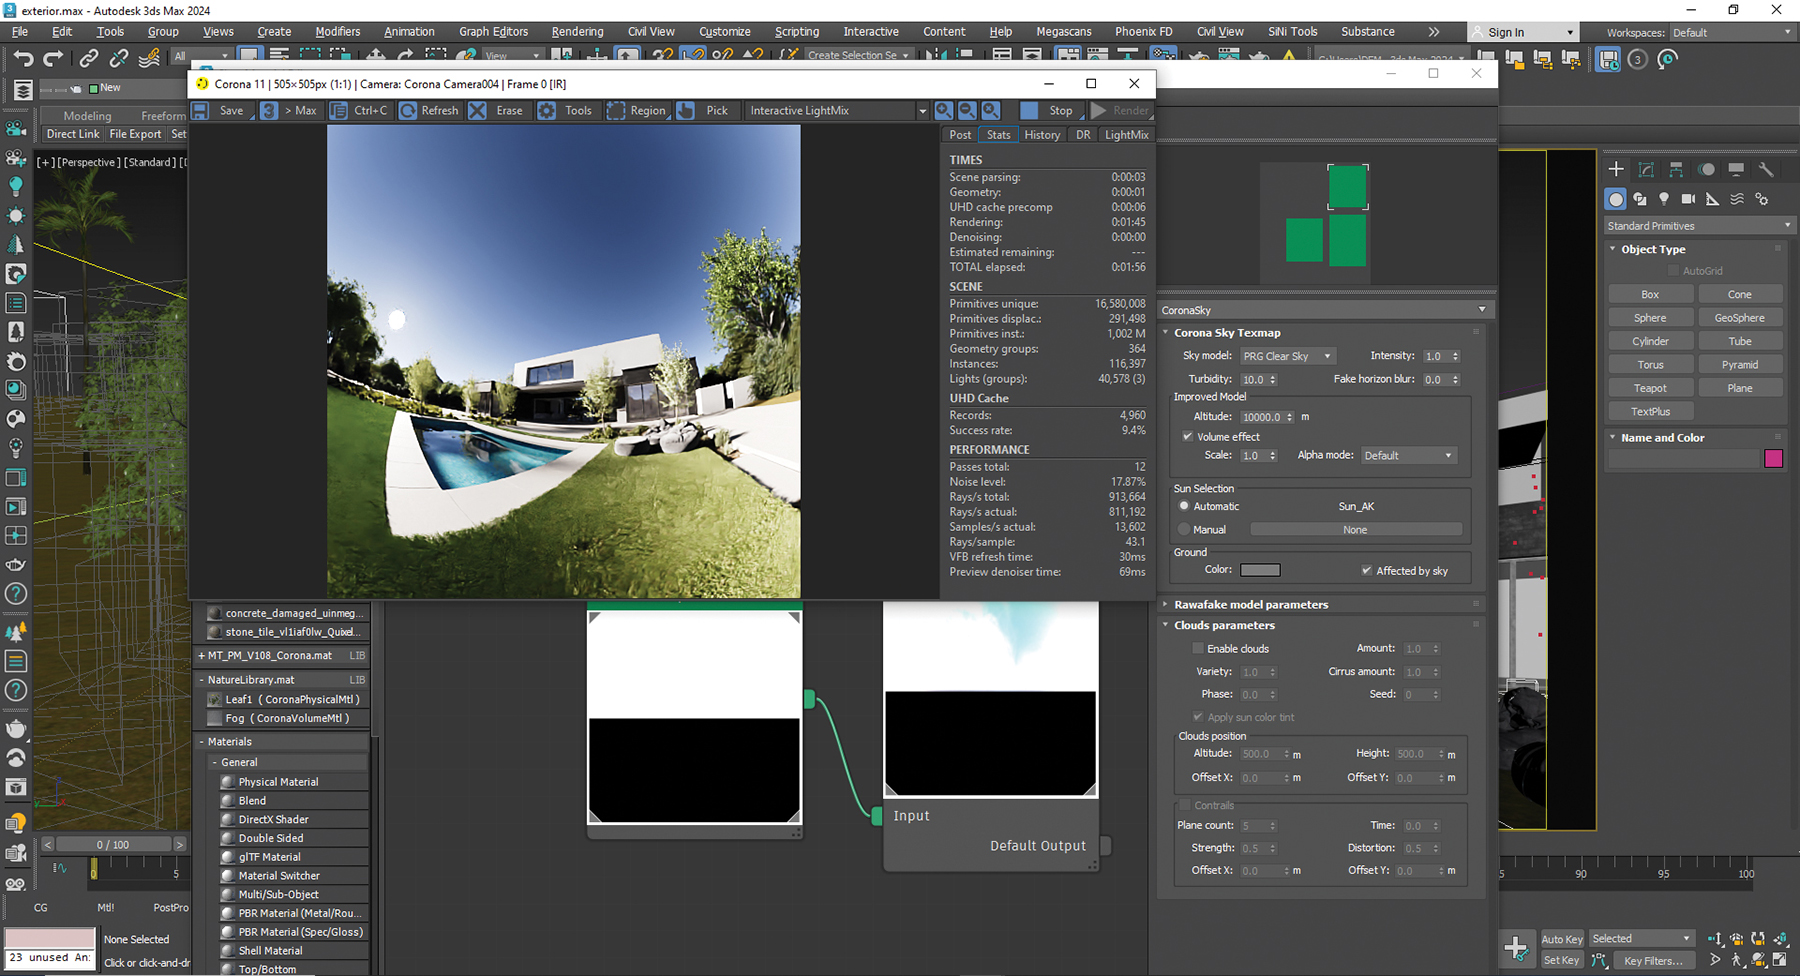
It’s crucial to be familiar with the parameters of this map to get the best outcomes. I use the PRG Clear Sky system, as it delivers the best results for me. Always set the Intensity to 1 and avoid changing it. If the lighting is too dim or too bright, adjust the camera settings to control the light intensity rather than altering this parameter.
The Altitude parameter is vital as it defines your elevation above the horizon. The higher the value the cleaner the sky will be, and the lower the value the less intense the blue colour of the sky becomes. To better understand this, test it out with values of 0 and 10,000 and see what happens.
02. Realistic lighting
When lighting this scene, I didn’t use clouds because I wanted the sunlight to be stronger, so there’s just a simple sky and sun. I always enable the Volume Effect parameter in my scenes. In the real world, there’s always a slight amount of dust or haze, so for realism it’s great to use this feature and adjust the value throughout rendering.
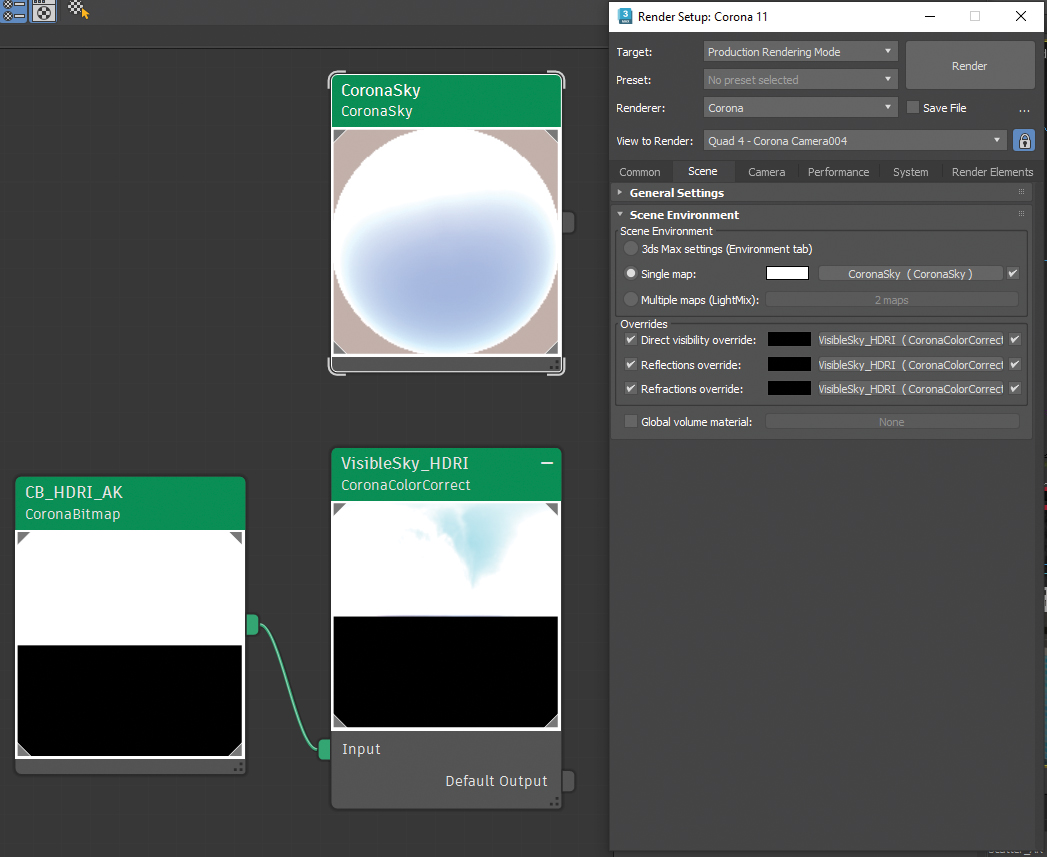
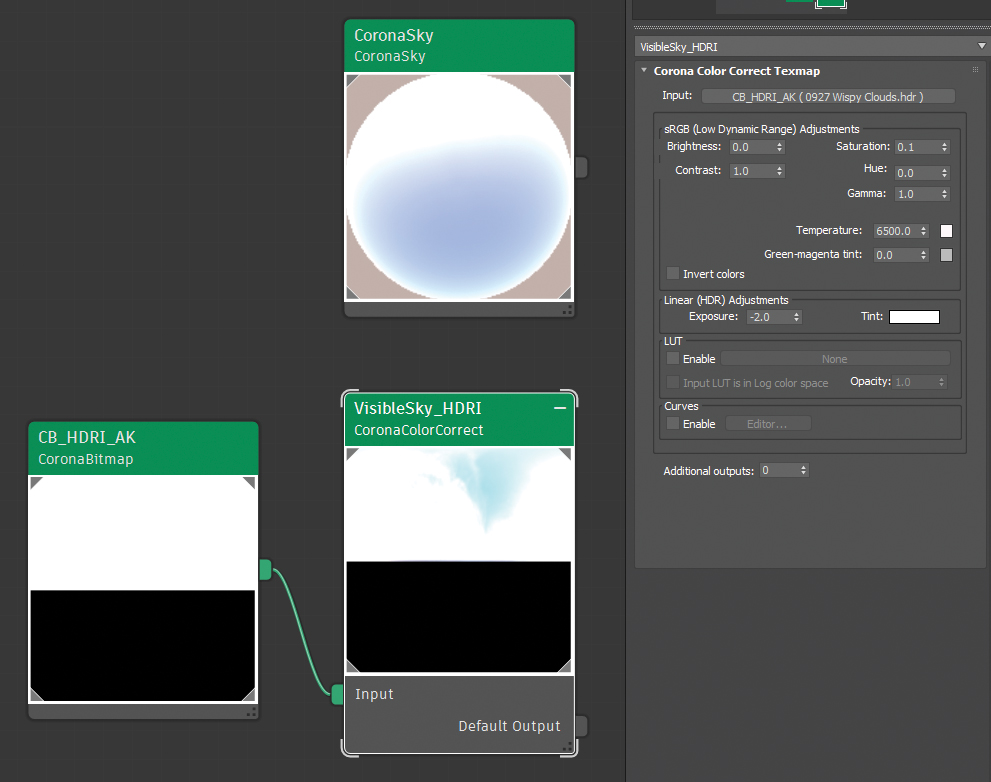
To boost the visual appeal of my renders, I often use HDRI maps, though not for lighting. Instead, I connect my Corona Sky map to the single map in the scene environment and use the HDRI for direct visibility, and in the reflections and refraction overrides. Note that I connect the same HDRI map to all three options; this way, my scene’s lighting is provided by the optimised Corona Sky, but the visible sky is from the HDRI, which tends to look better and be more physically accurate.
To get better control over the HDRI map, connect a Corona Color Correction map to it for full control over the intensity and colour. Finally, it’s crucial to align the direction of the HDRI with the real sun in your scene to ensure your render looks realistic.
03. Scatter objects
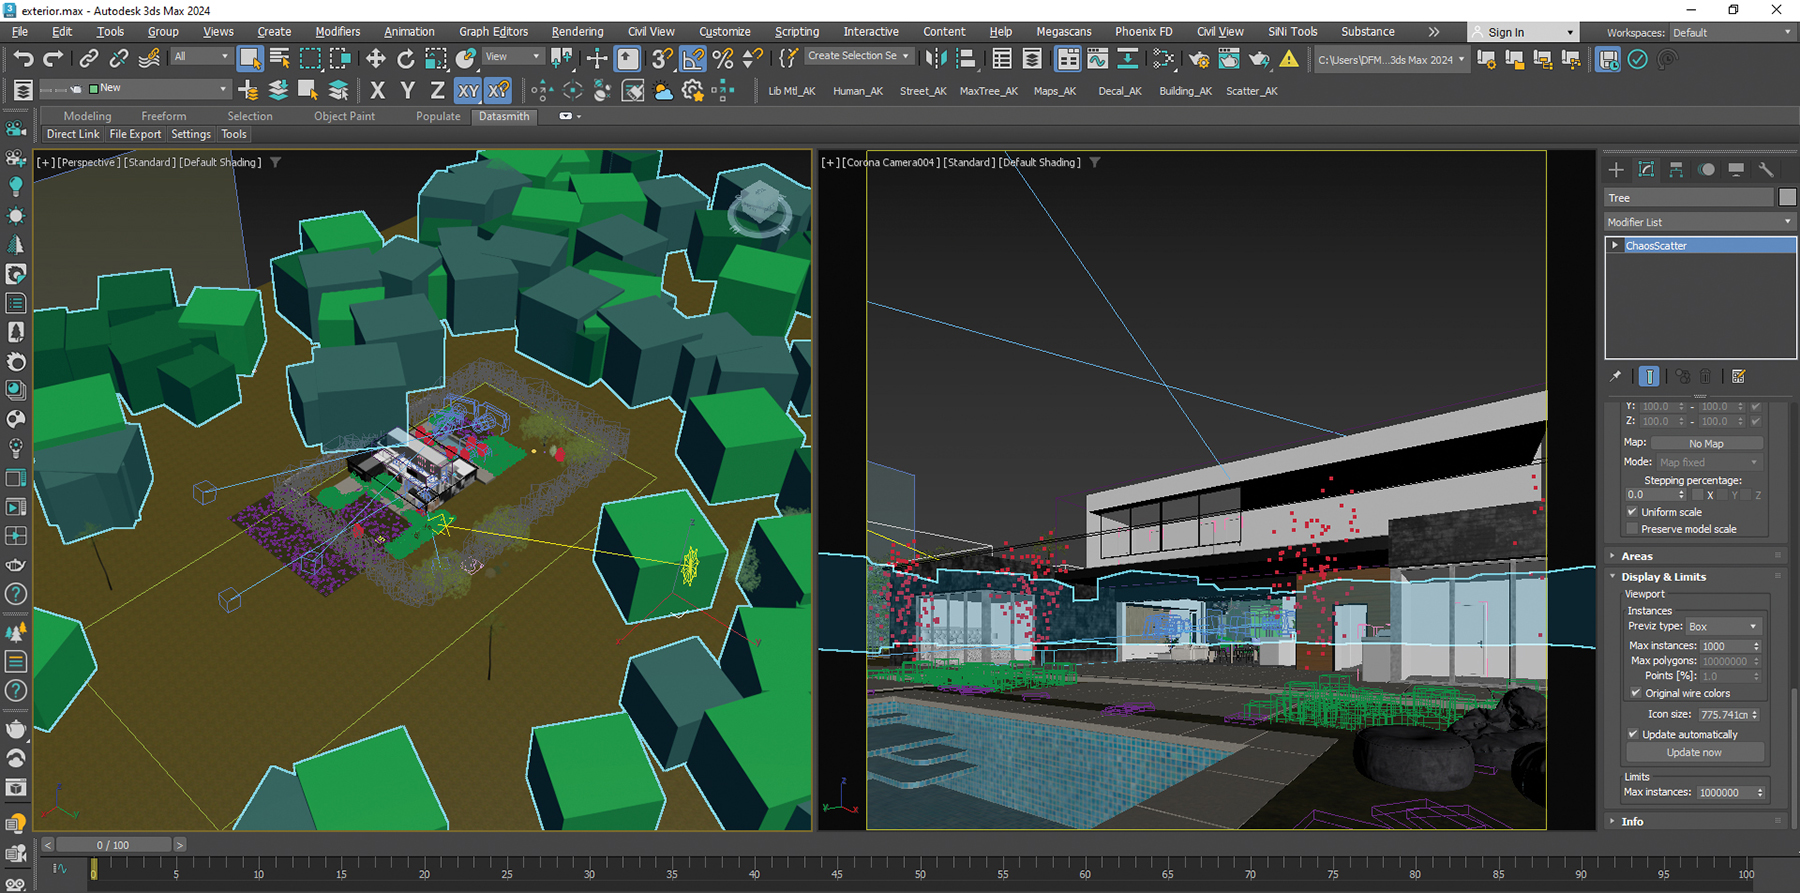
The best and most efficient way to scatter in your scene is with Chaos Scatter, which is becoming more powerful with each update. It’s straightforward and doesn’t require an extensive explanation, but there are some key points to remember that will make your workflow easier.
The object to be scattered should be a group – for example, the stem and leaves of a plant shouldn’t be separate entities – so ensure that all parts of the object are attached together. Also assign a unique wireframe colour to each object that will be scattered to easily identify them. For instance, I assign a purple wireframe colour to grass.
04. Add variety
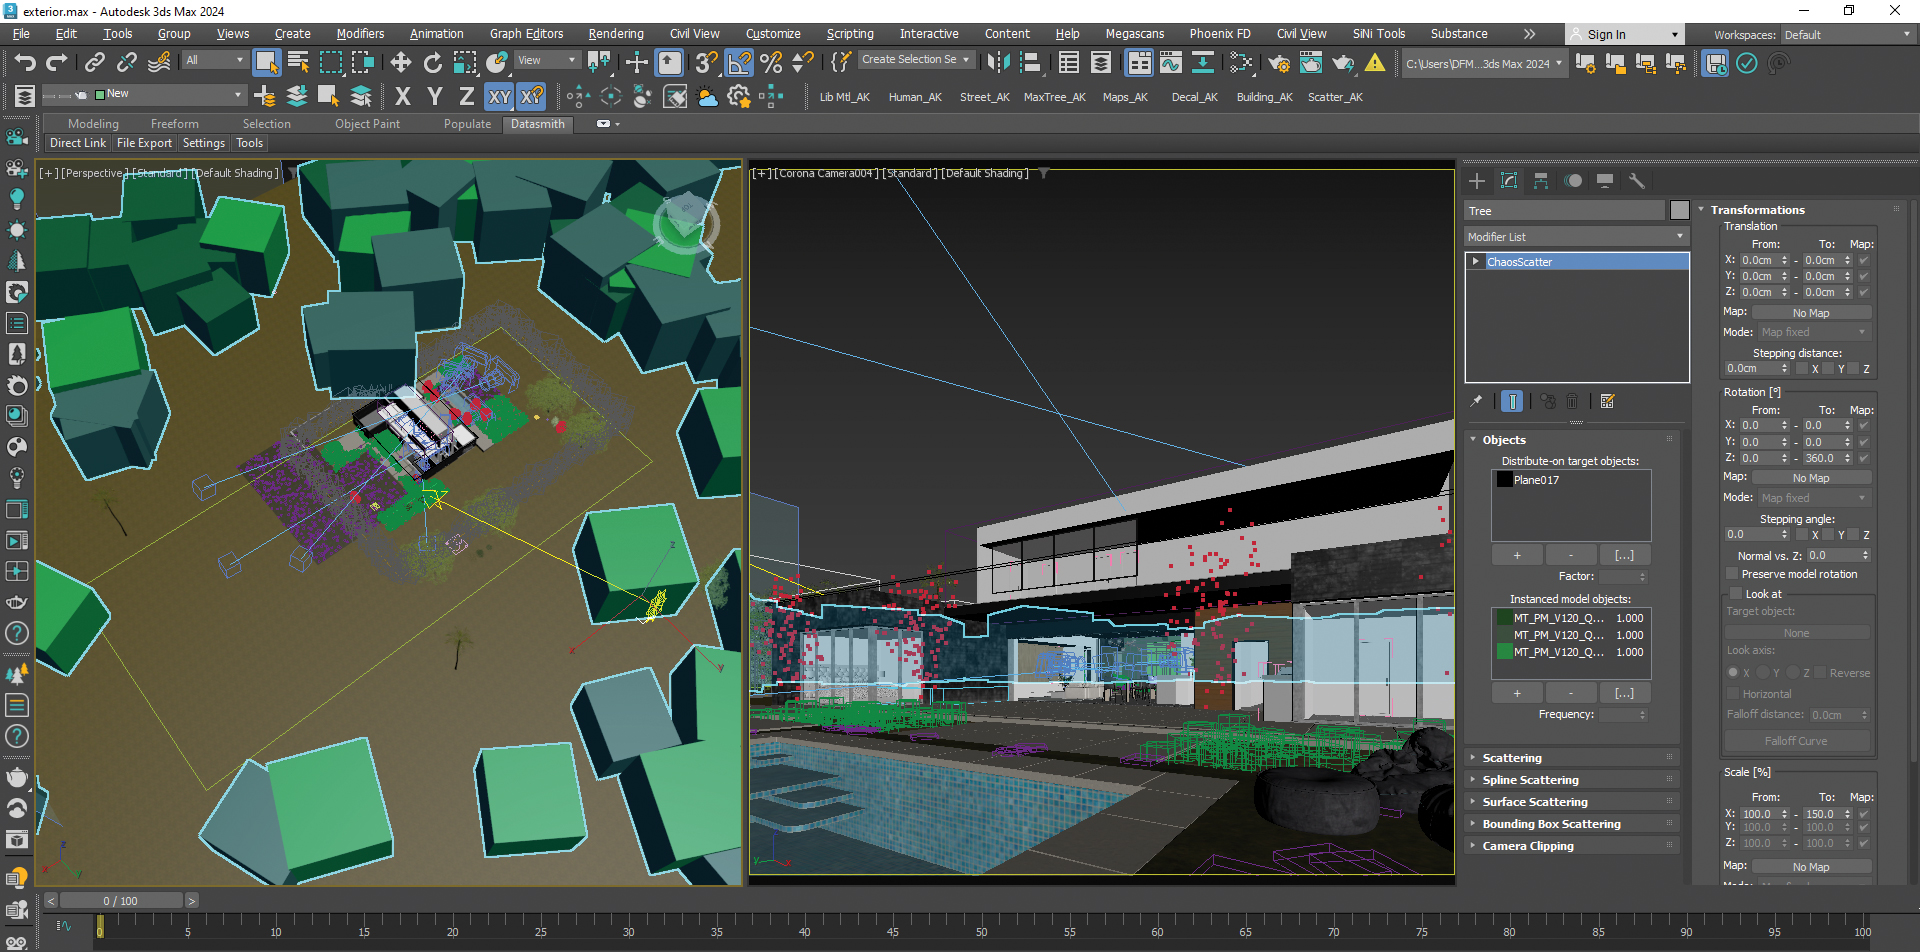
To make your work look more realistic, always introduce variations in the size and rotation of scattered models. By default, Corona Scatter applies random rotation around the Z-axis, which is great and usually doesn’t need any adjustment. For size variation, go to the Transformations section and define the minimum and maximum values for the scale.
The exact values depend on your preference and the dimensions of your model. For instance, when I’m scattering trees, I typically use a minimum value of 100% and a maximum value of 150%.
05. Exclude areas from scattering

I selected the ground surface for the scattering of my trees, but didn’t want them to appear in the house or pool. To solve this issue, we simply define a boundary with shape-drawing tools. In Corona Scatter, go to the Areas>Spline Excludes section and add your shape. By doing this, trees will scatter across the surface except within the boundaries set. You can draw as many lines as needed and add them to Spline Excludes for cleaner, more precise scattering.
One way to avoid scattering confusion is to create conventions, for example defining trees as boxes. To do this, set the Previs Type to Box in the ‘Display & Limits’ rollout. You could use Wire Box for grass and small plants, and Point Cloud for objects with key details.

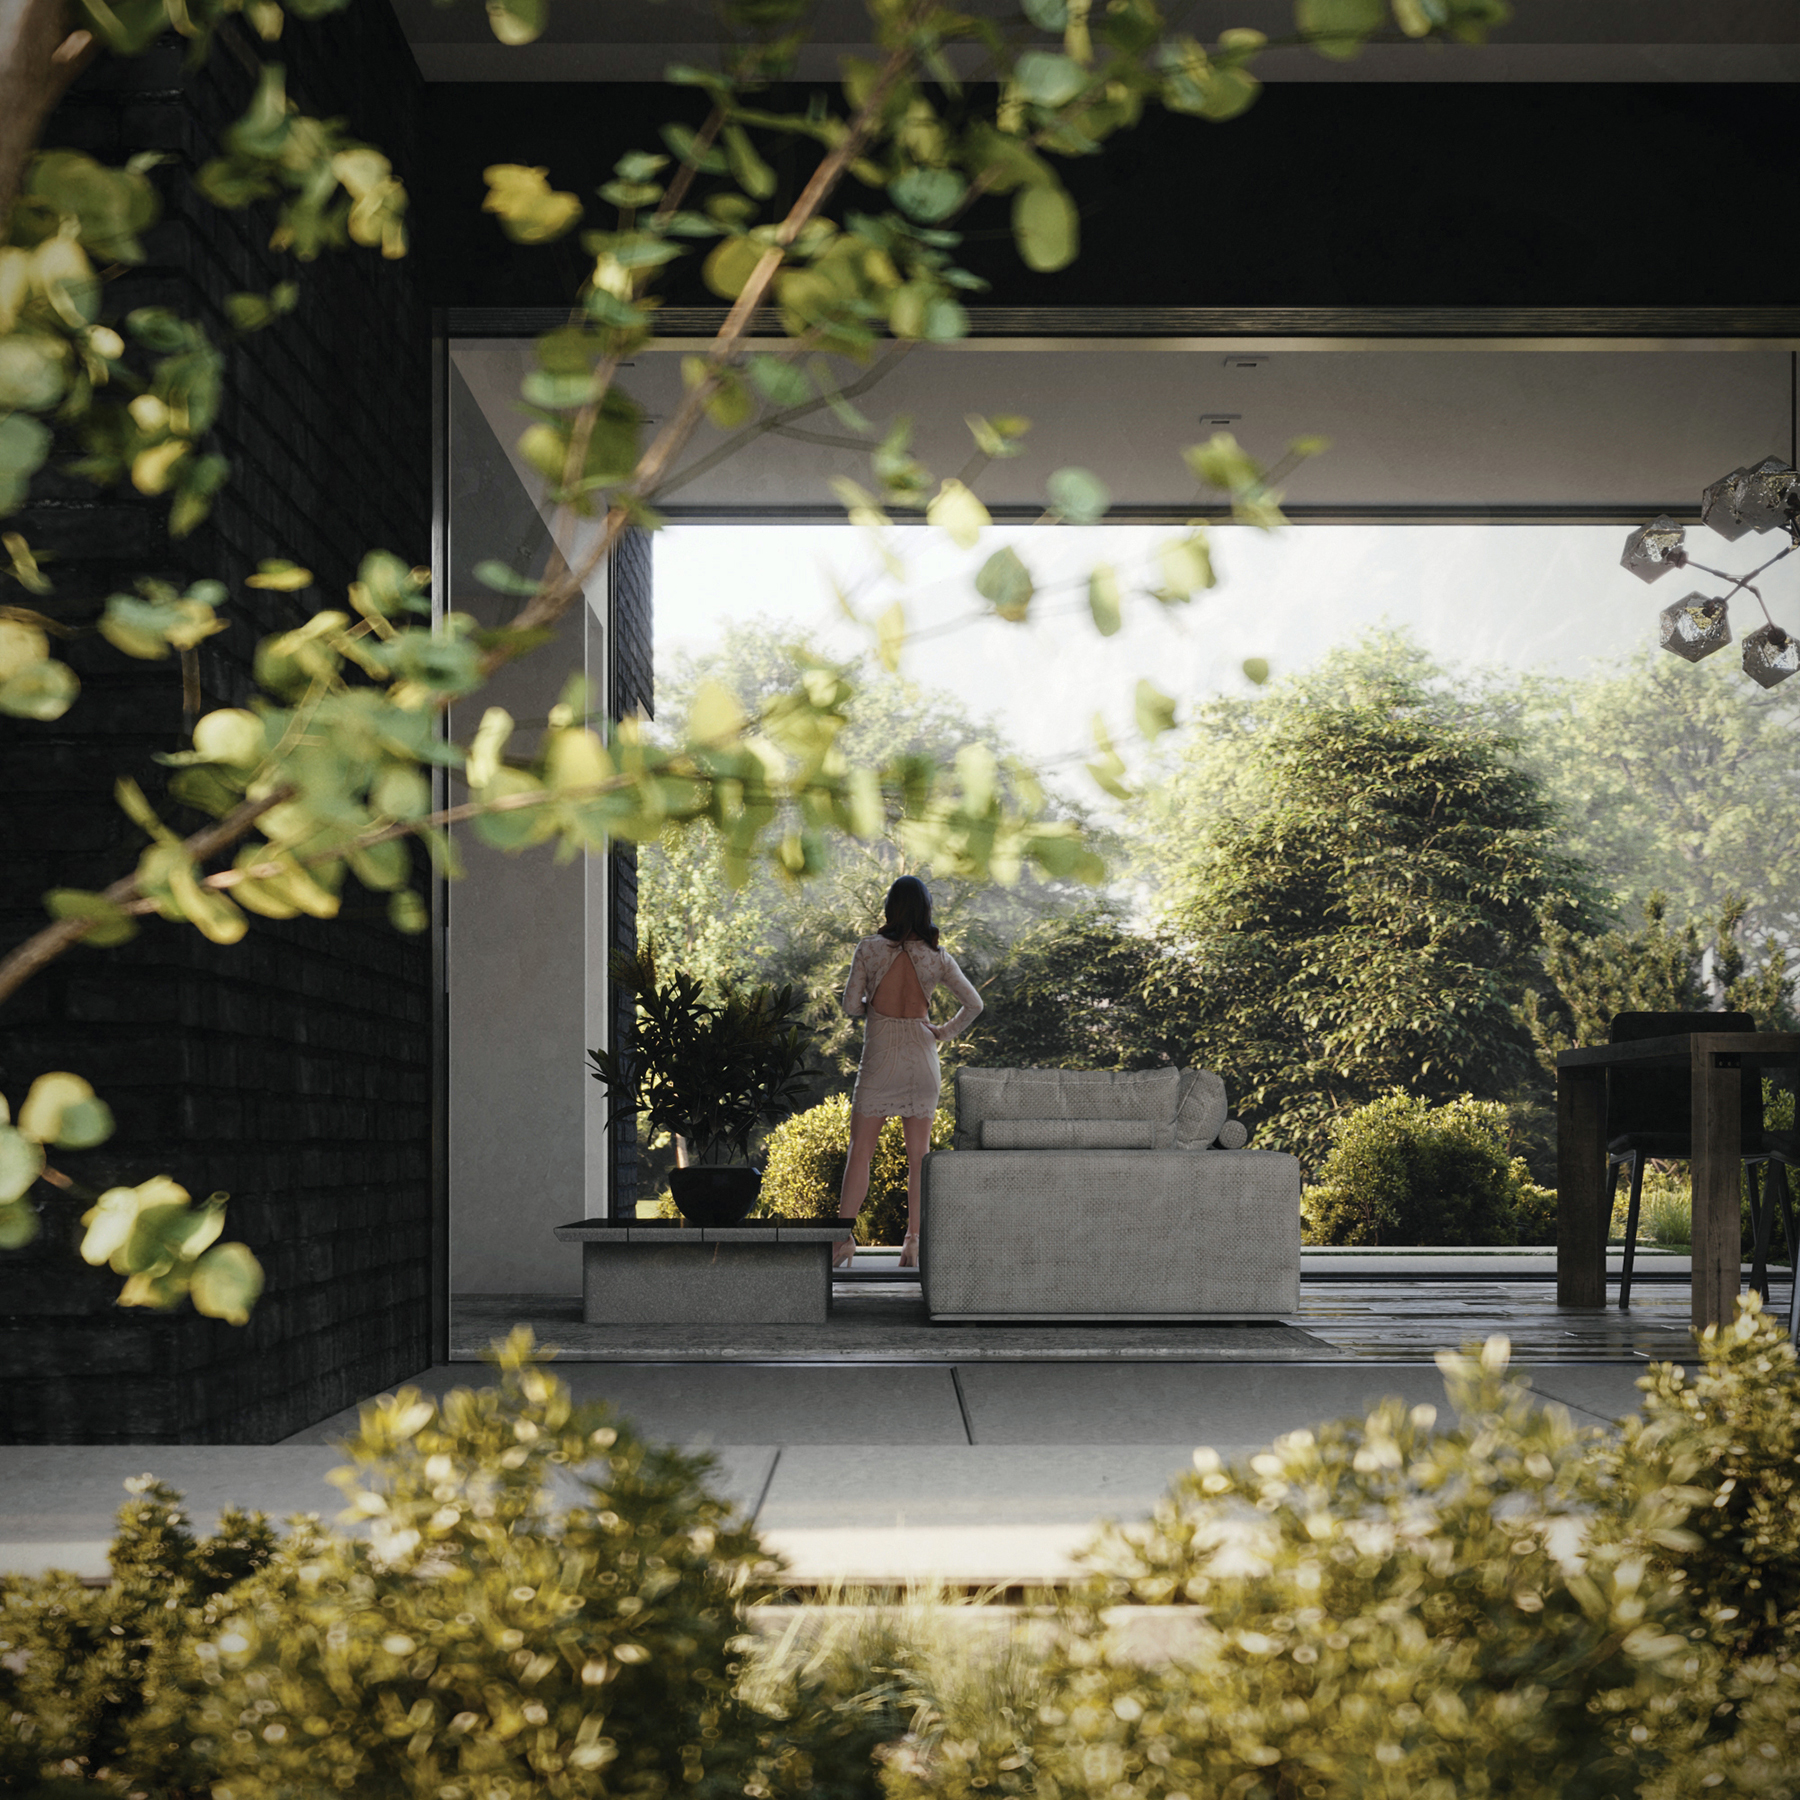
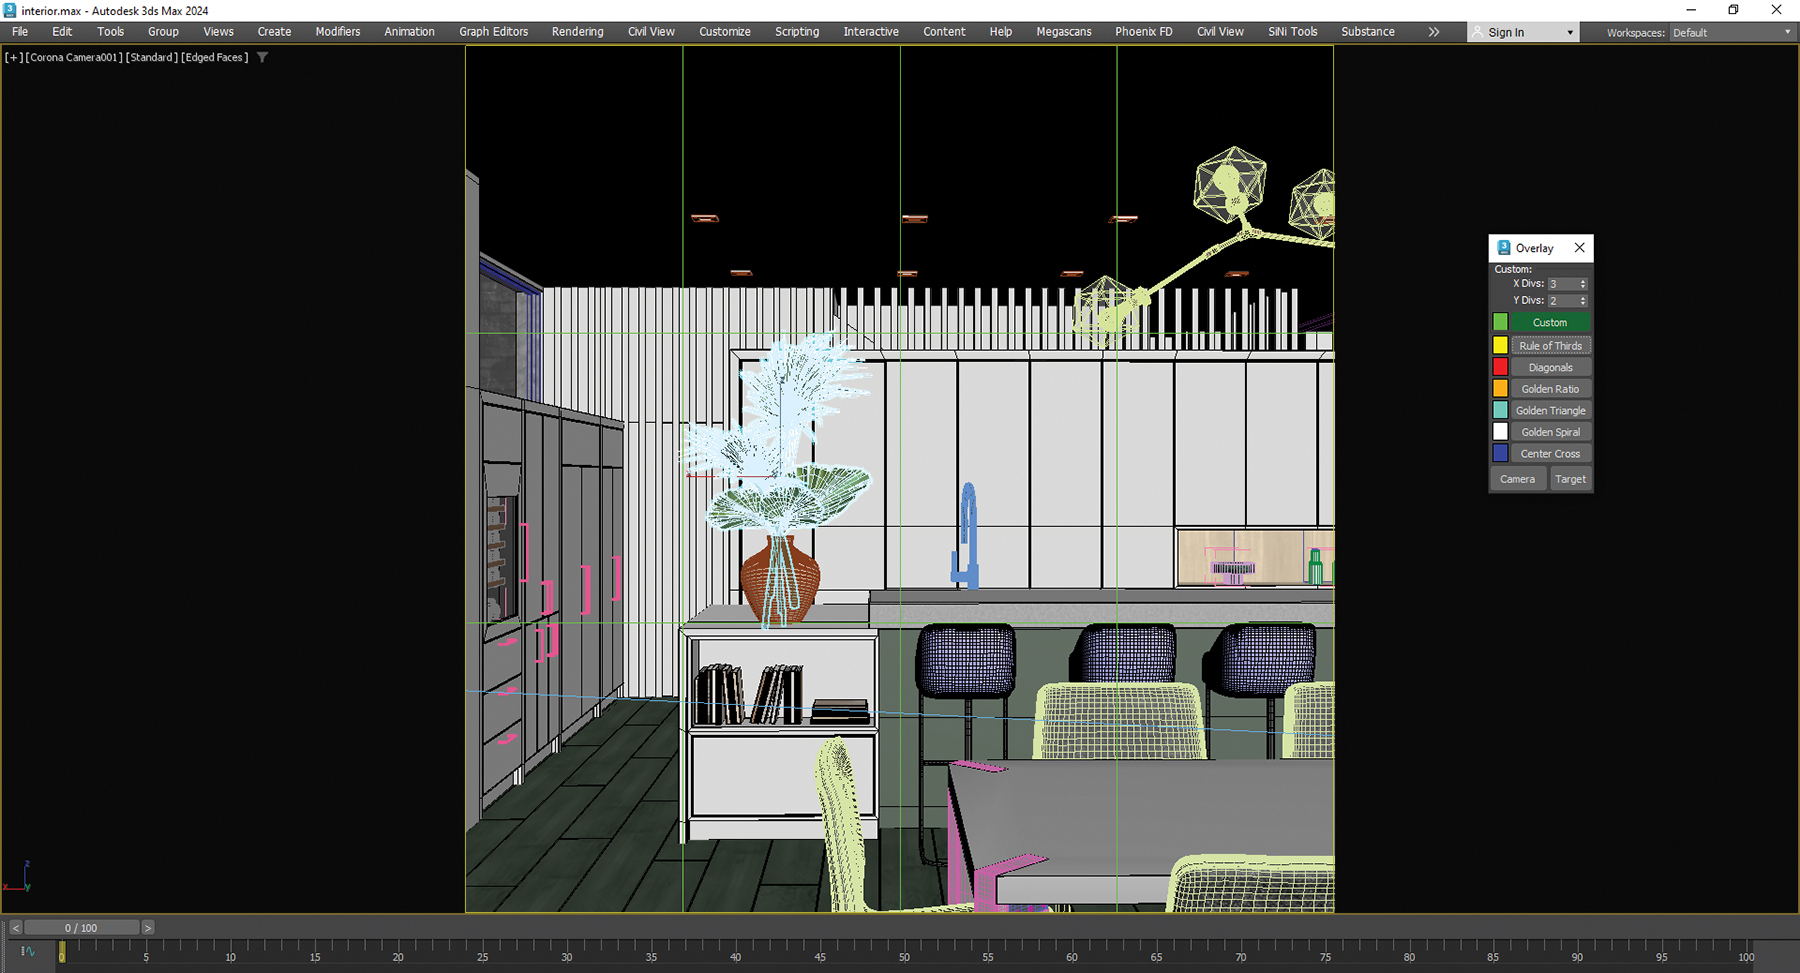
06. Create a pro composition
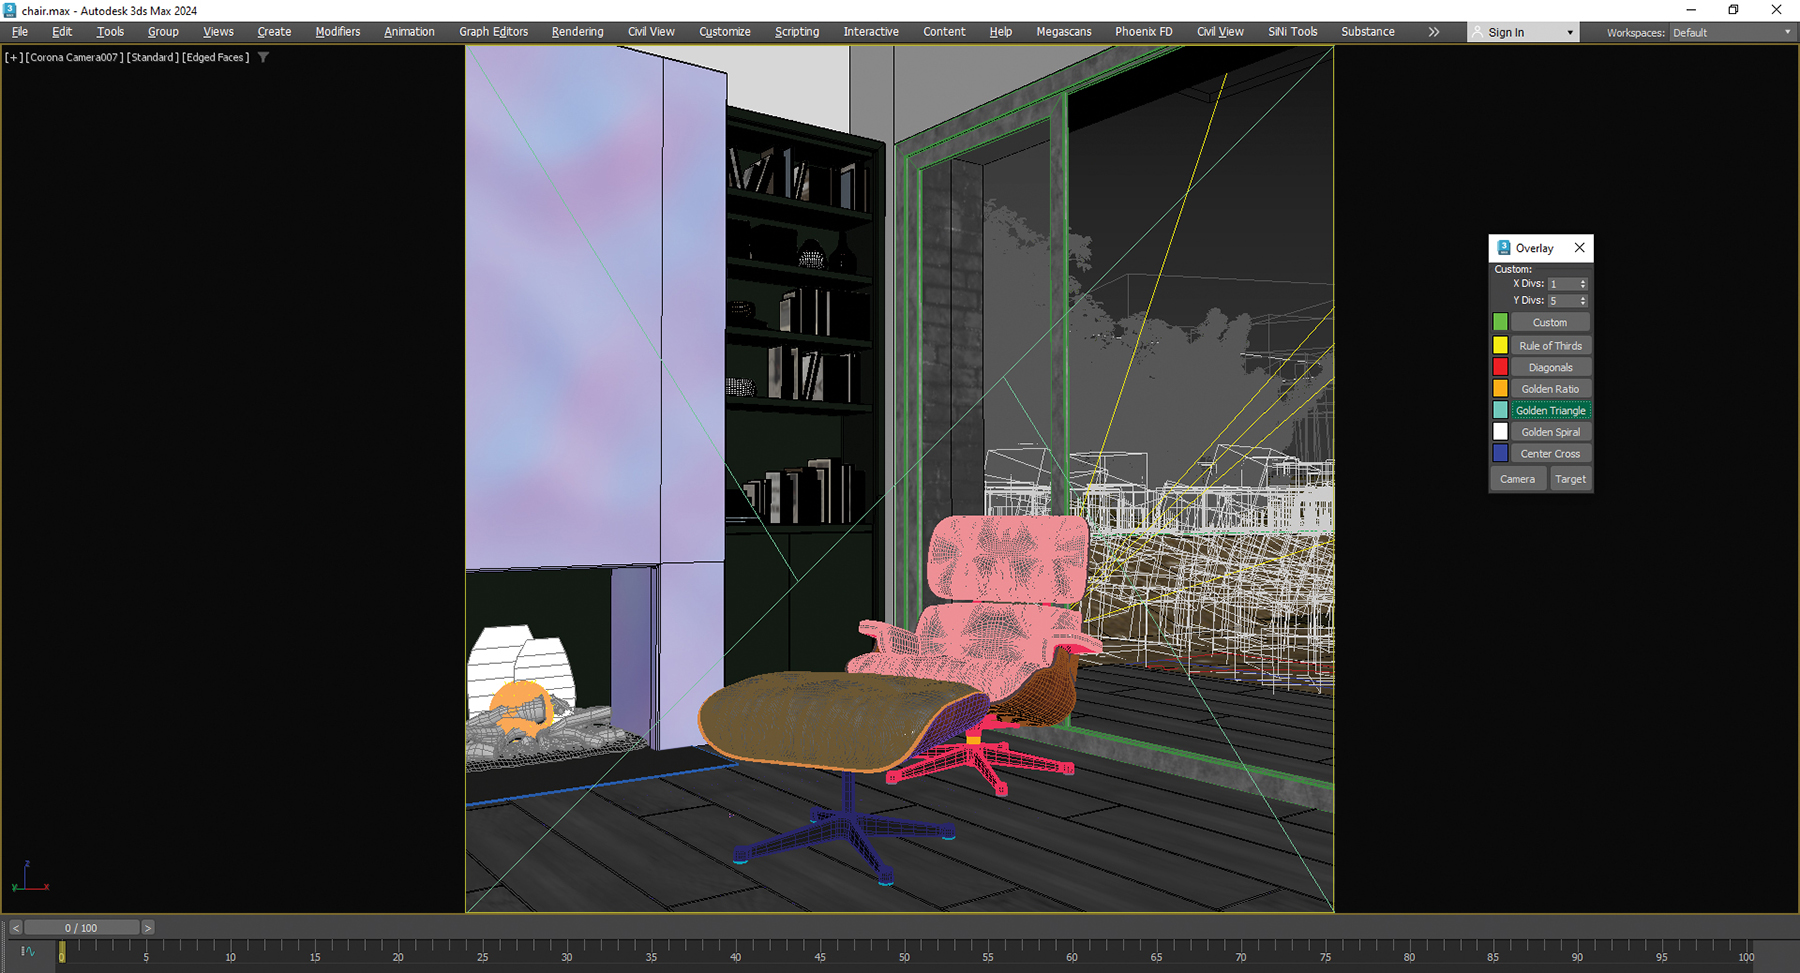
Building up a good composition requires a blend of personal taste and fundamental principles that are drawn from the basics of photography, such as the rule of thirds and golden ratio. The rule of thirds helps place elements so the horizontal and vertical lines of the image are divided into thirds, guiding the viewer’s eye to important points of interest. Meanwhile, using the golden ratio – approximately 1.618:1 – in the length and width of the image or its various sections can naturally enhance the aesthetic appeal and balance of a composition.


07. Fisheye Lens
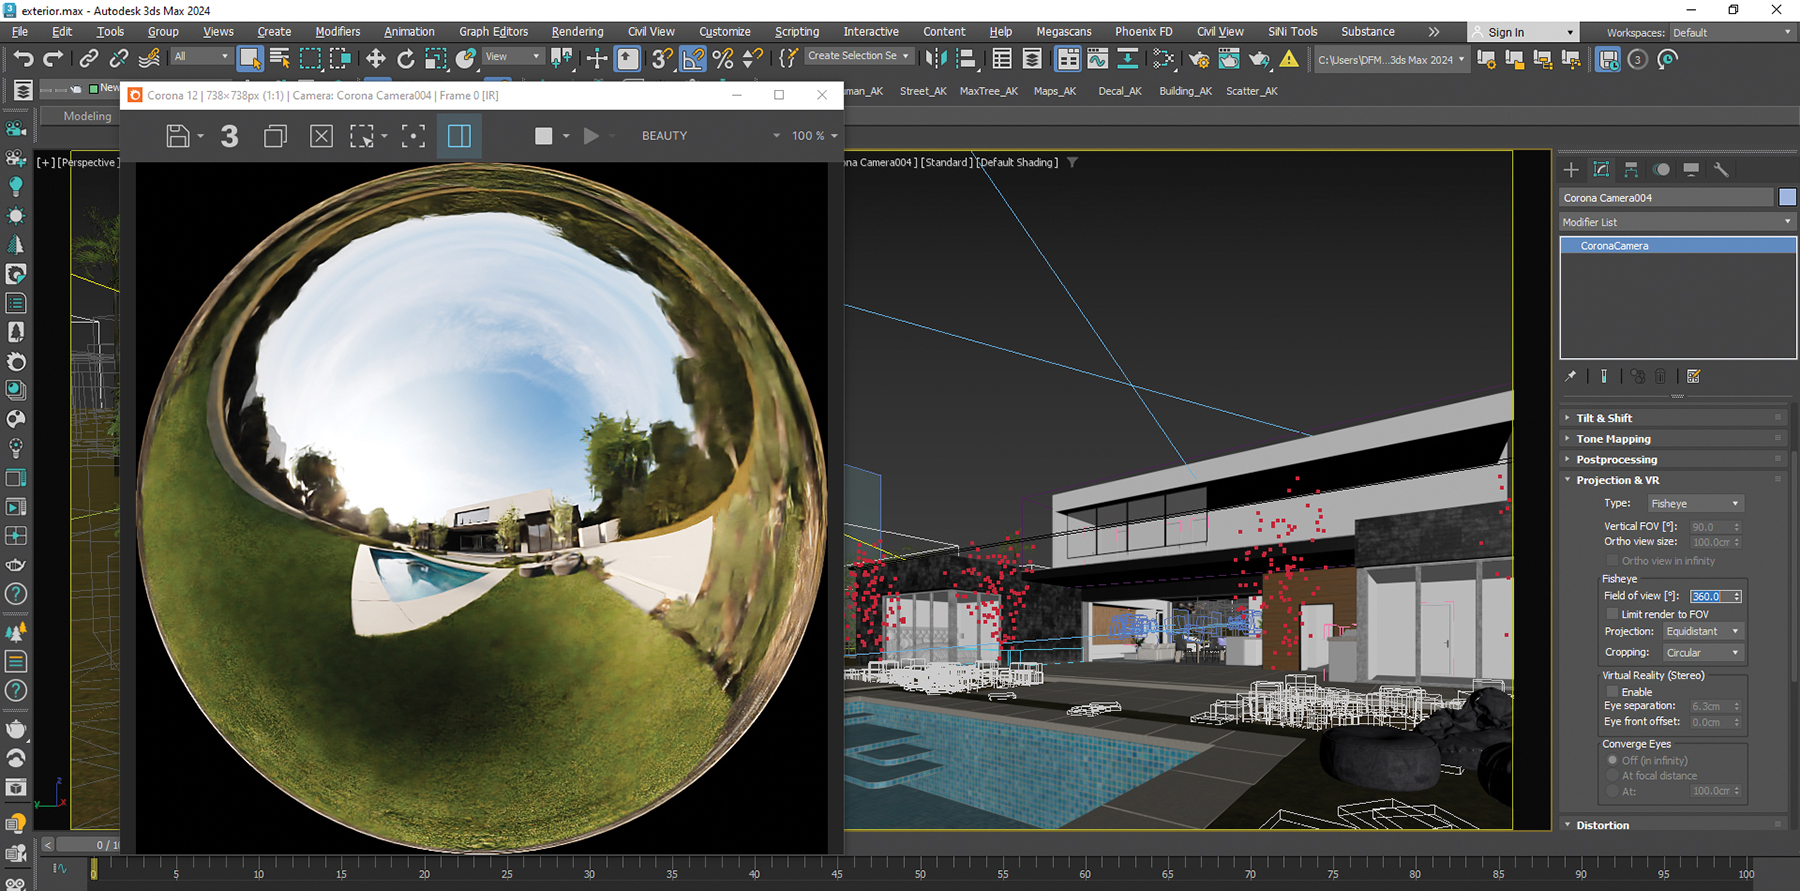
I really enjoy using this lens. It’s great for capturing a wide portion of the scene, and I prefer it over a wide lens. Of course, this is entirely a matter of personal preference. To add the fisheye lens, use the fantastic Corona Camera under the ‘Projection & VR’ rollout. The only important point you must remember is to use an appropriate Field of View (FOV). The higher this parameter, the wider the area visible in your render. I chose 180 degrees, which is a reasonable setting for a fisheye lens in exterior renders.

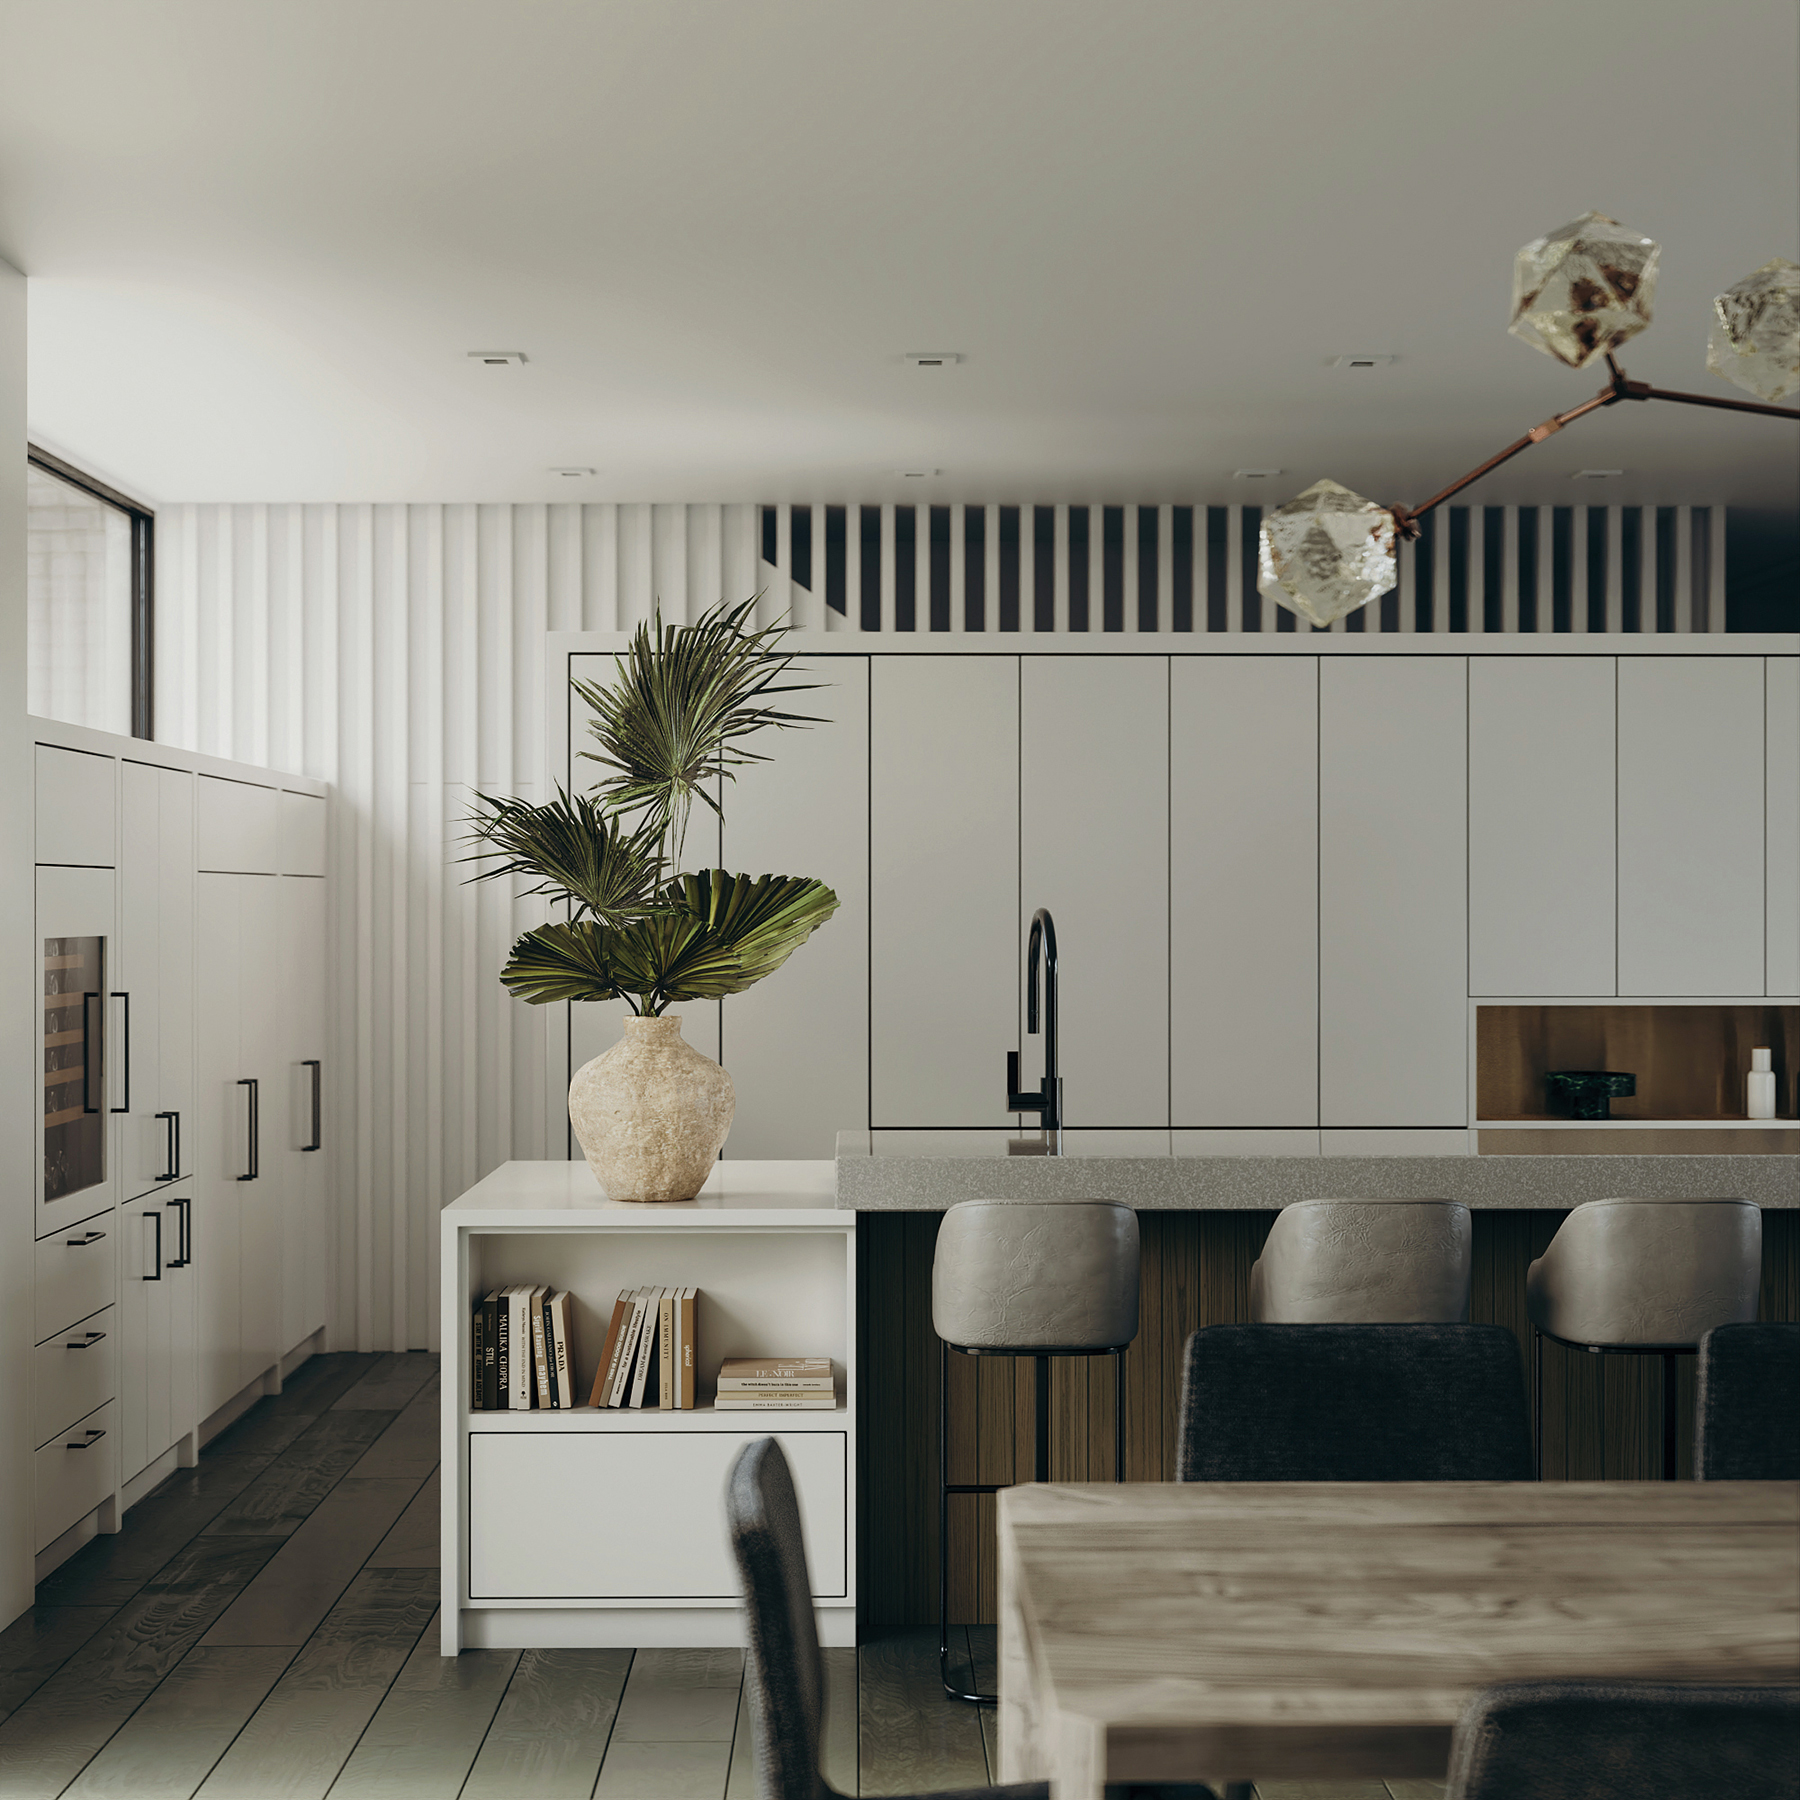
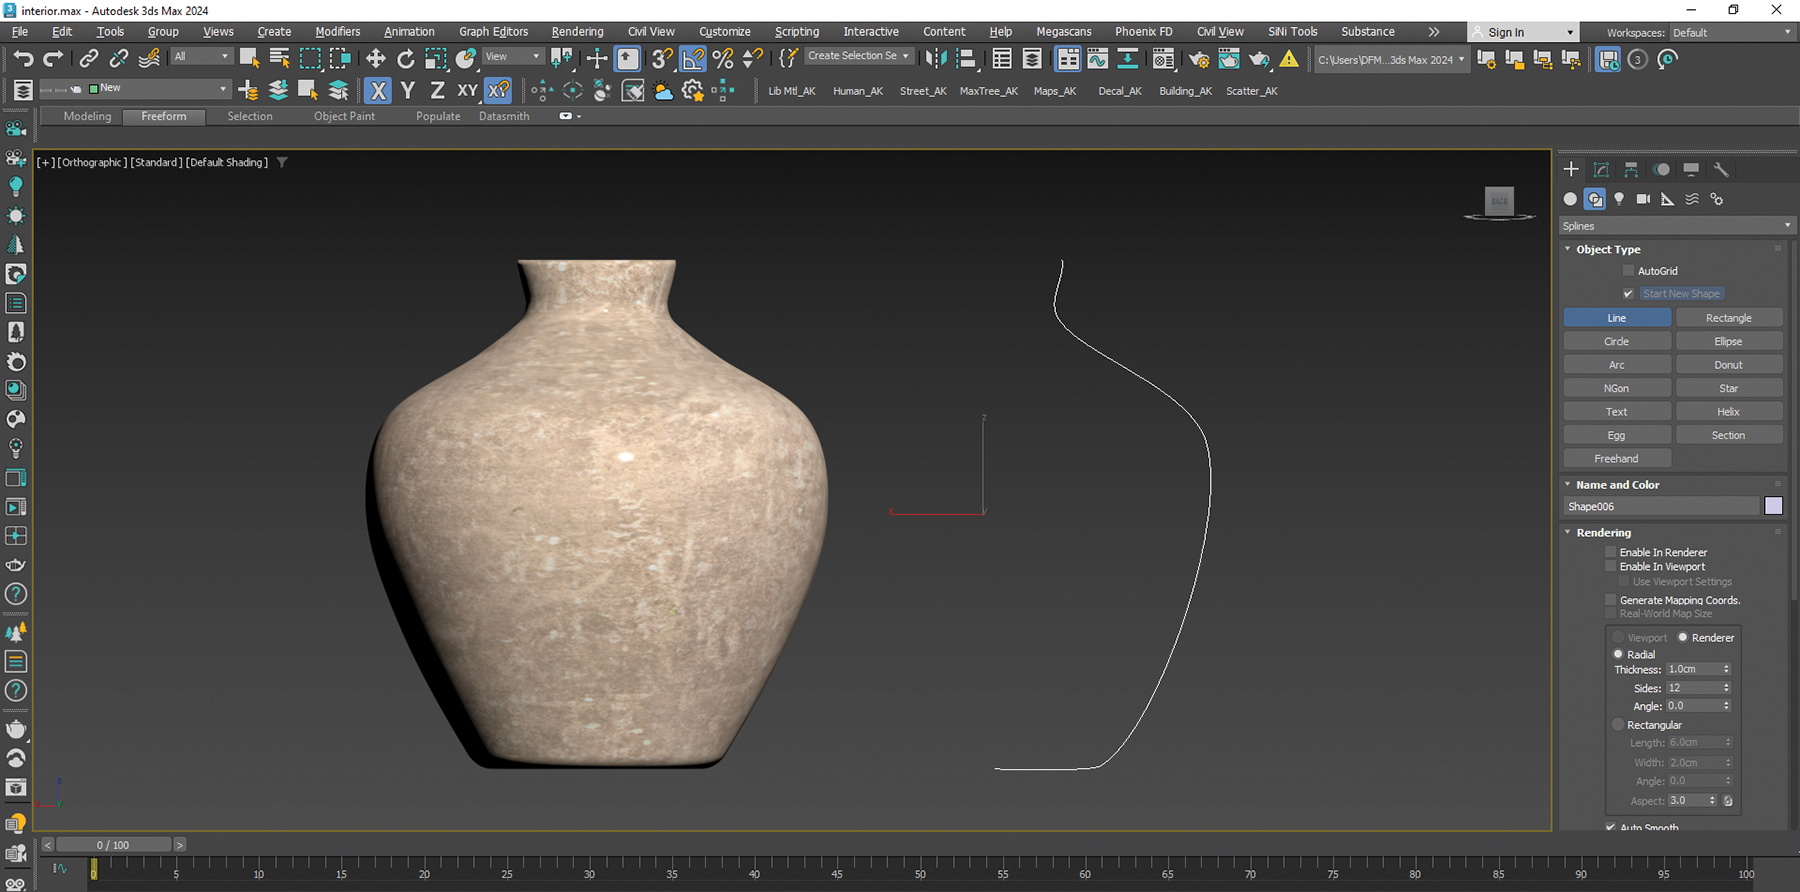
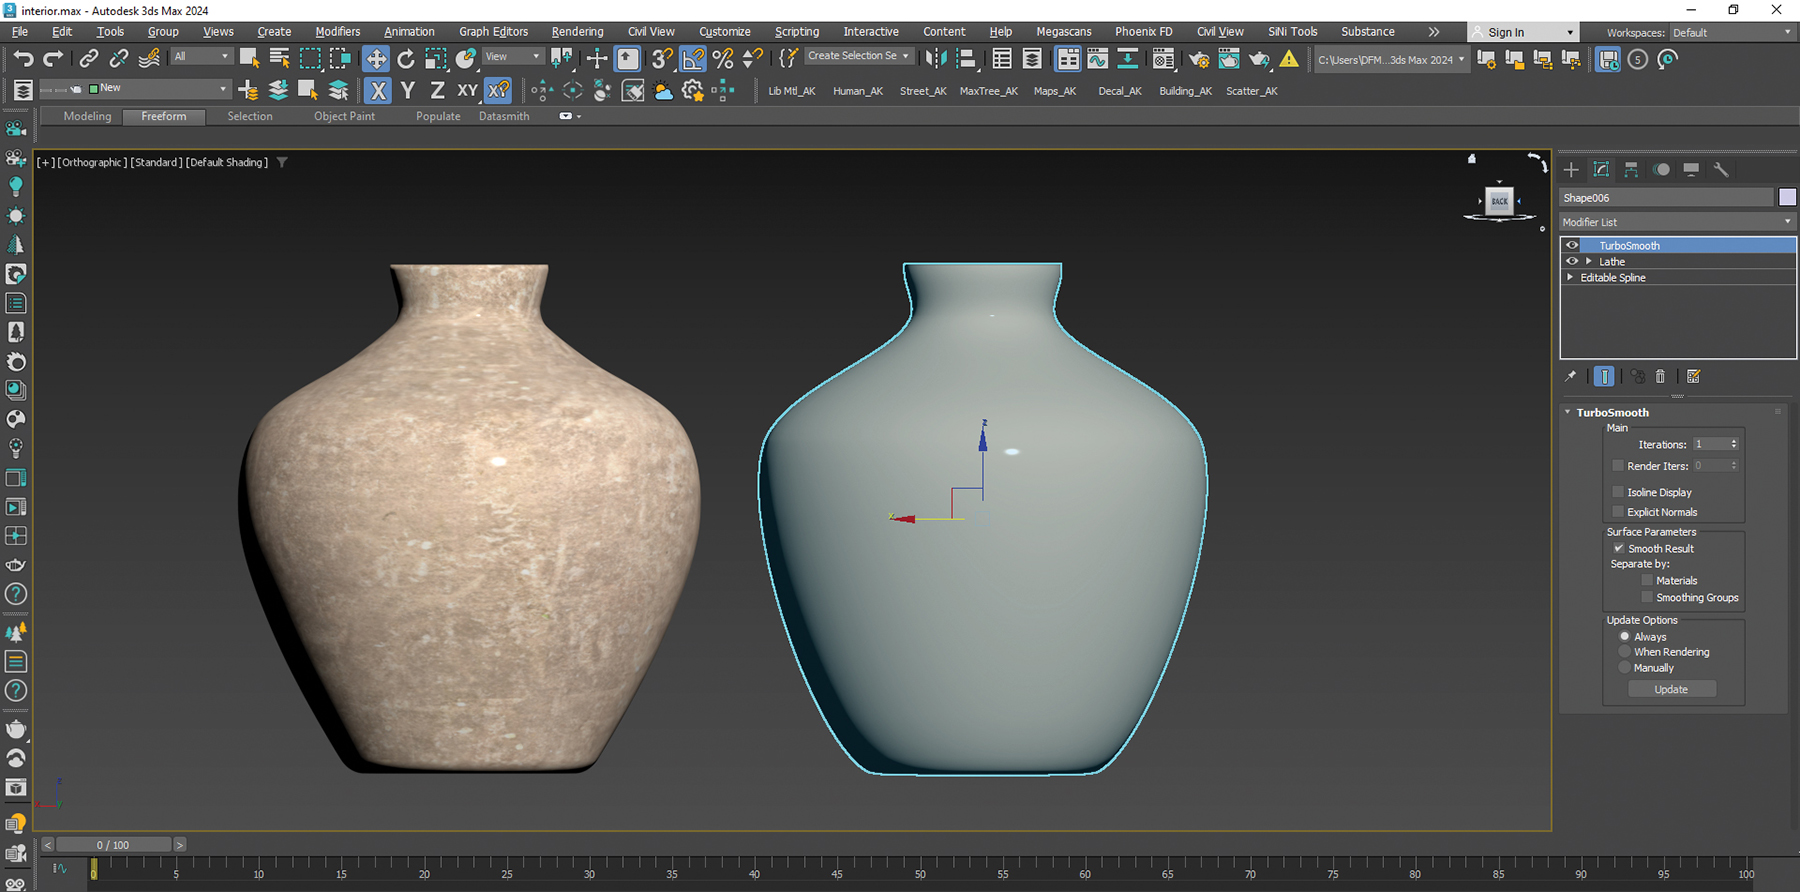
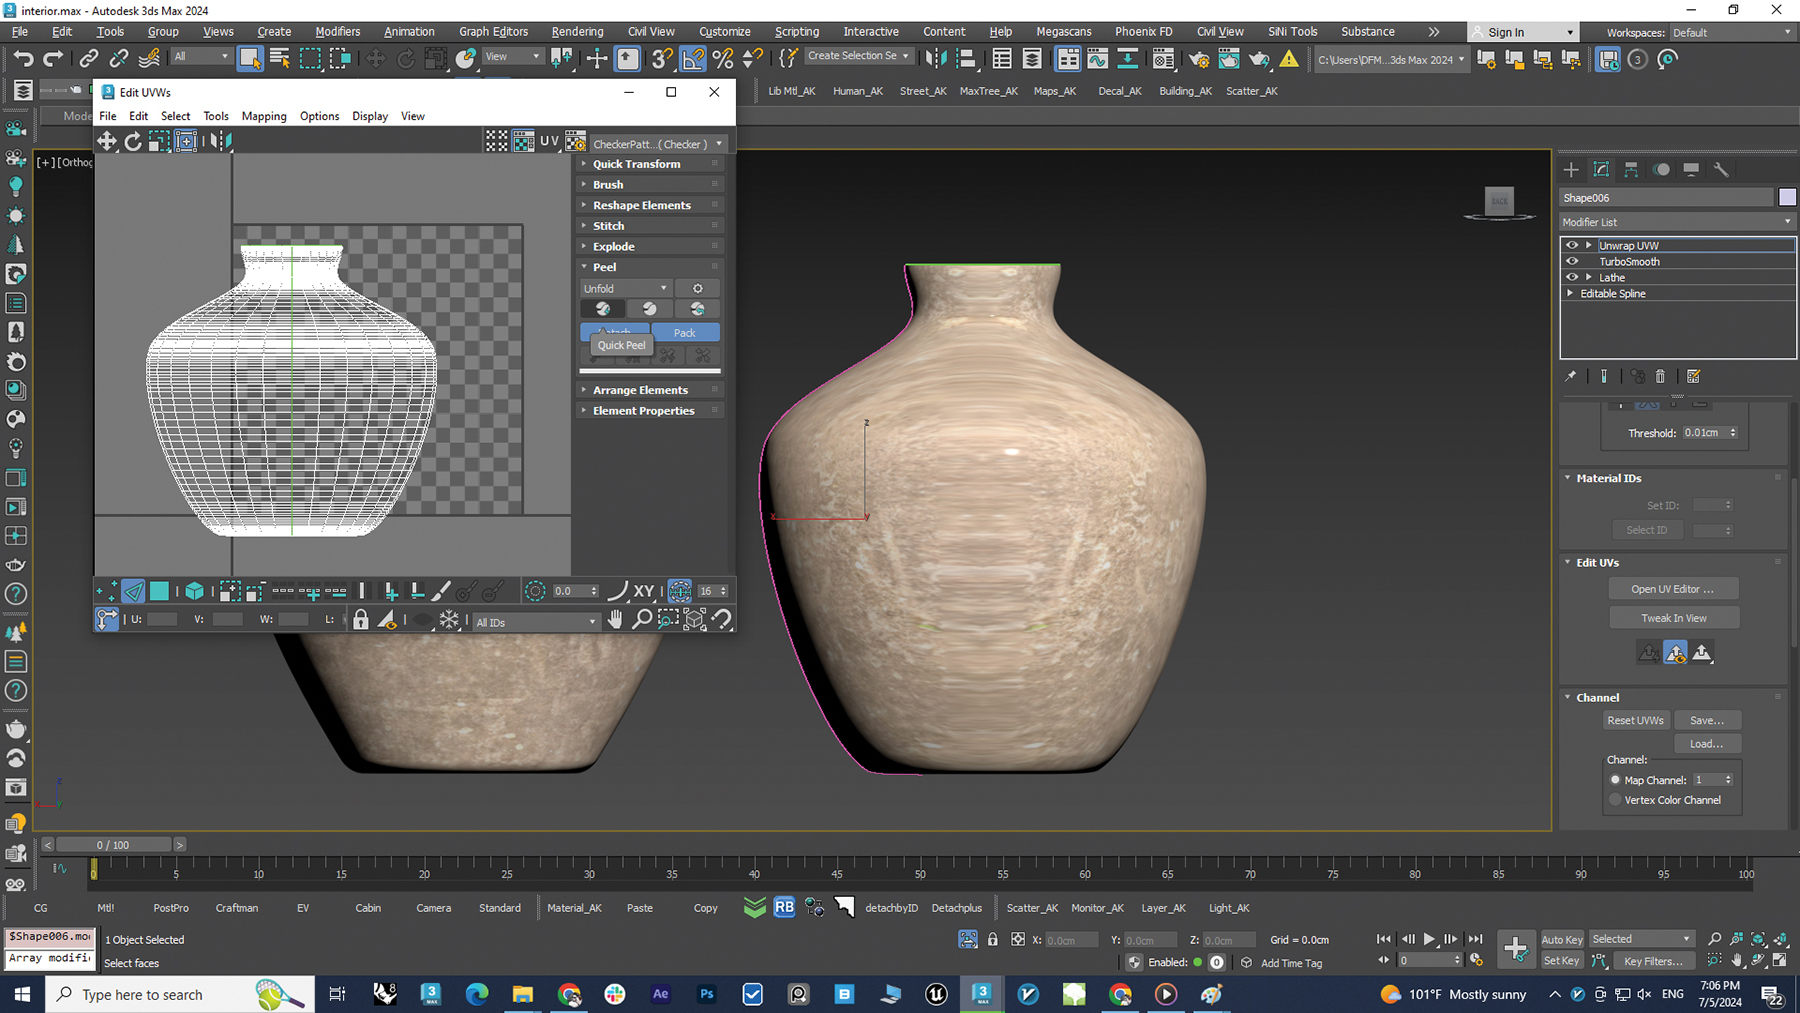
08. How to model and unwrap a vase
Sometimes you can’t find ready-made objects you need for a scene, and that’s why it’s essential for you to learn how to model them yourself! To create a vase, start by drawing a simple line from the Shape section, representing half of its form. After this apply the Lathe modifier to this line. I chose not to increase the number of segments from the default value of 16, which was sufficient. Using the TurboSmooth modifier, meanwhile, makes the vase smoother and more detailed.
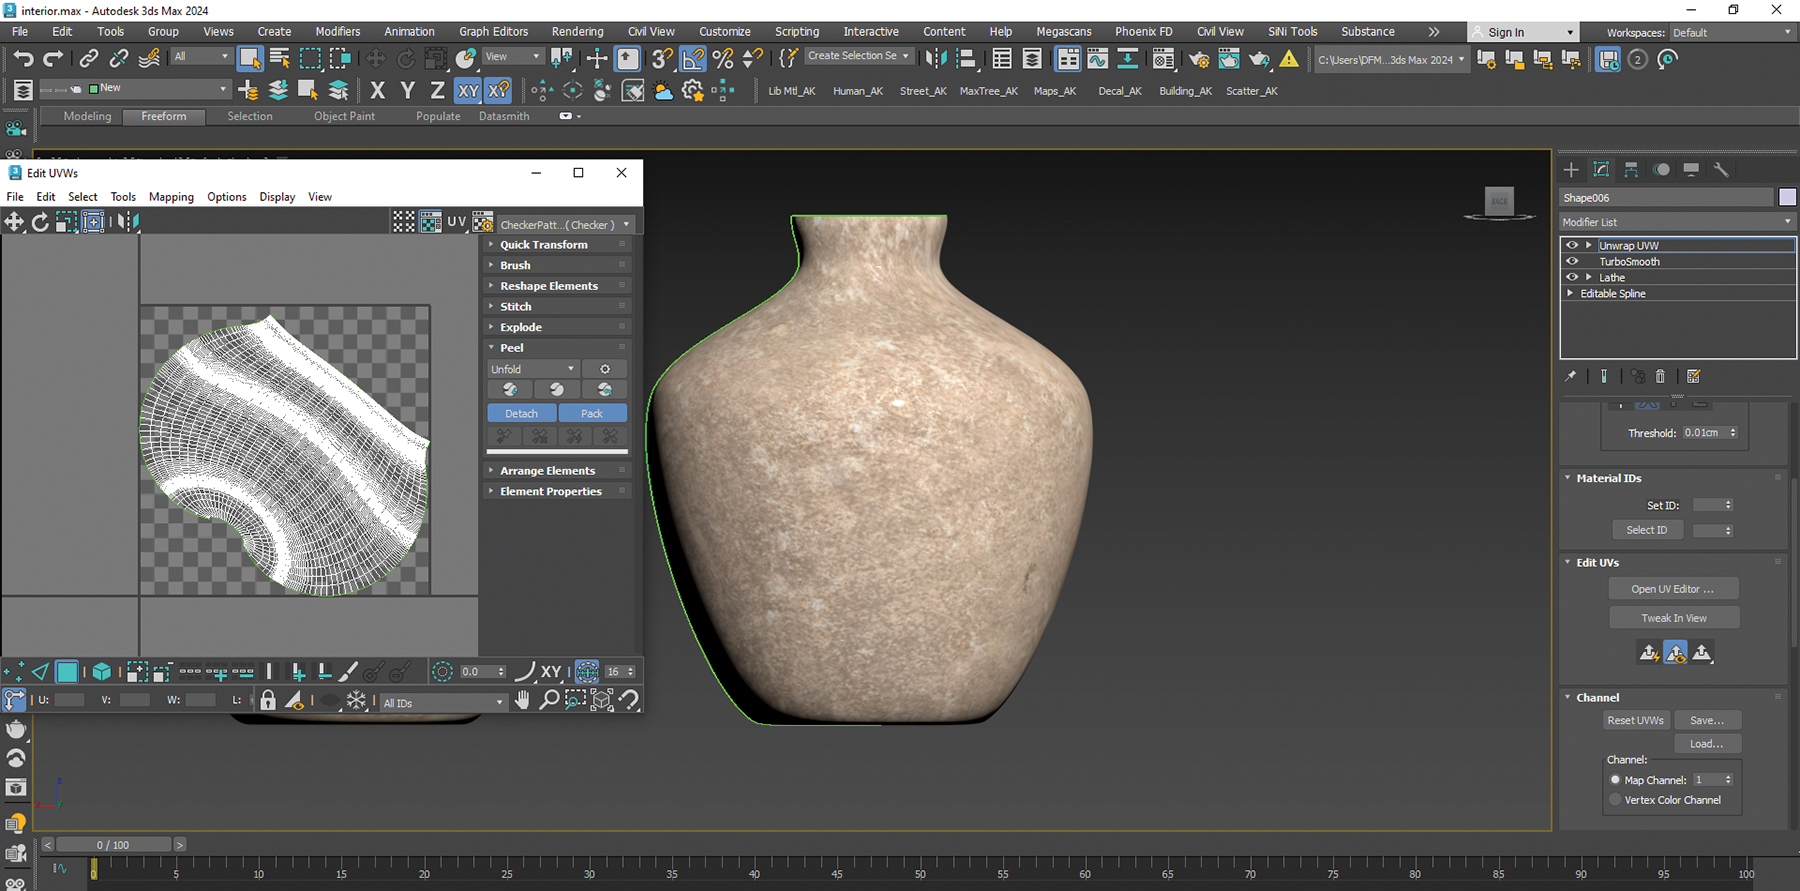
The second part of the process is unwrapping the model, which is essential because it requires material that can’t be displayed properly without unwrapping. To start off, we need to apply the Unwrap UVW modifier and open the UV Editor window.
There are many methods for unwrapping, but for vases and similar objects the best approach is to choose a vertical line for an edge. By double-clicking a vertical edge, all the lines in that edge will be selected. Next, click on the Break option to create a seam in the unwrap, as if cutting along that line with scissors. Now we need to flatten the UV layout, which can be easily accomplished by going to the Peel section and clicking Quick Peel.


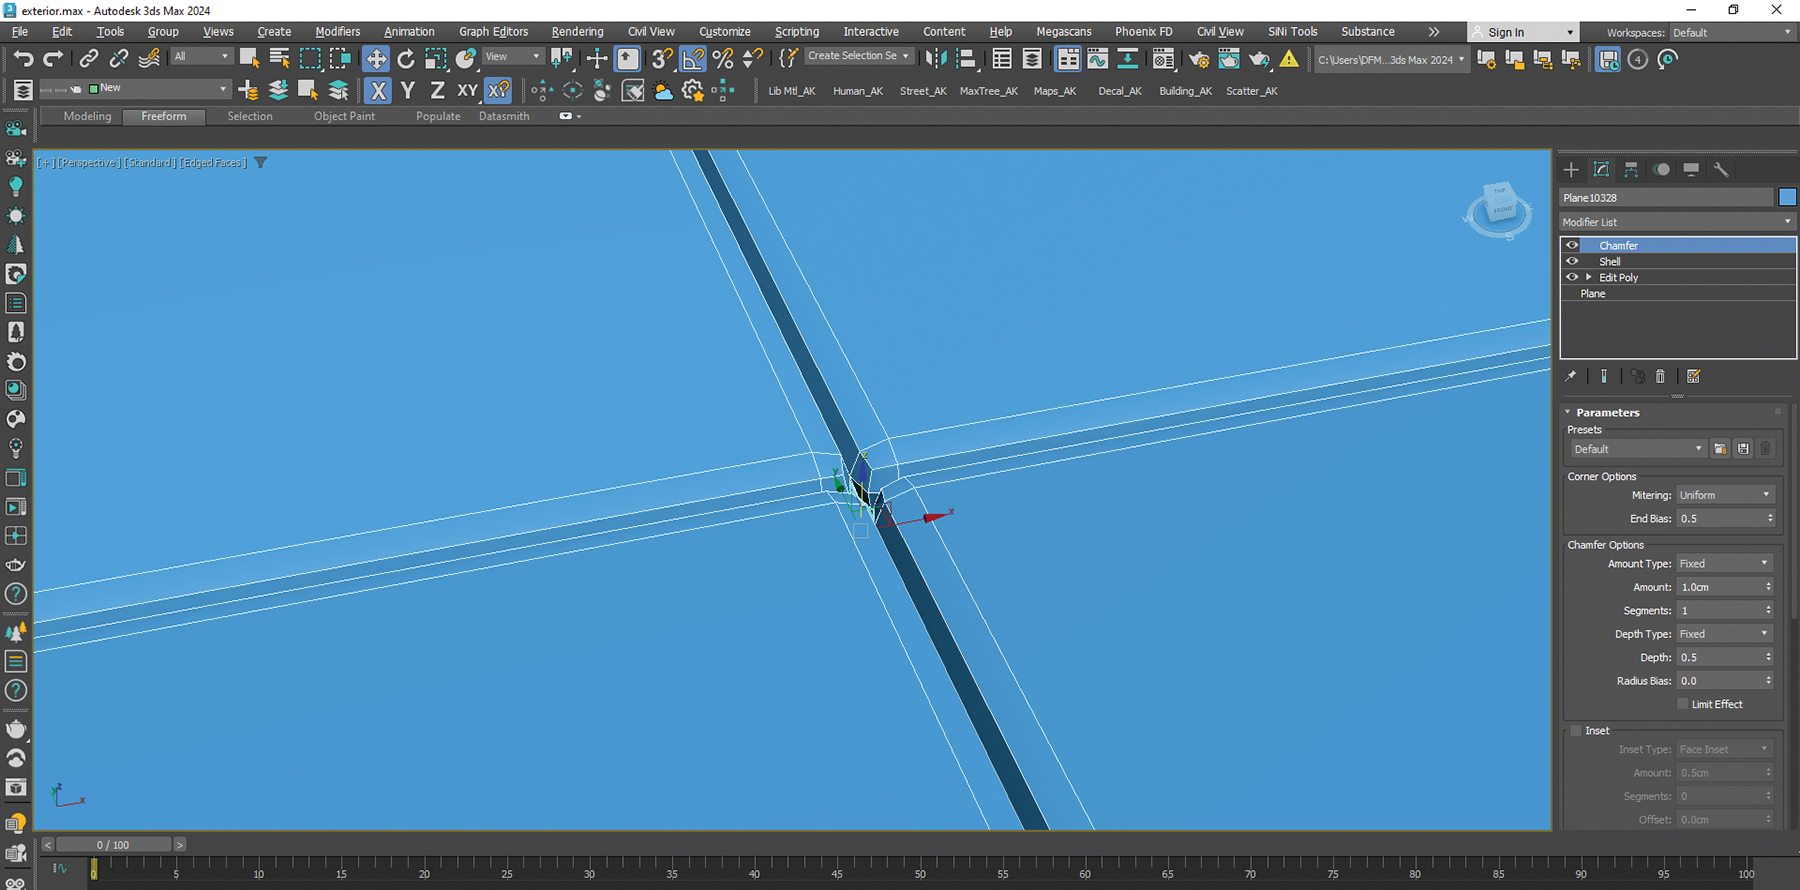
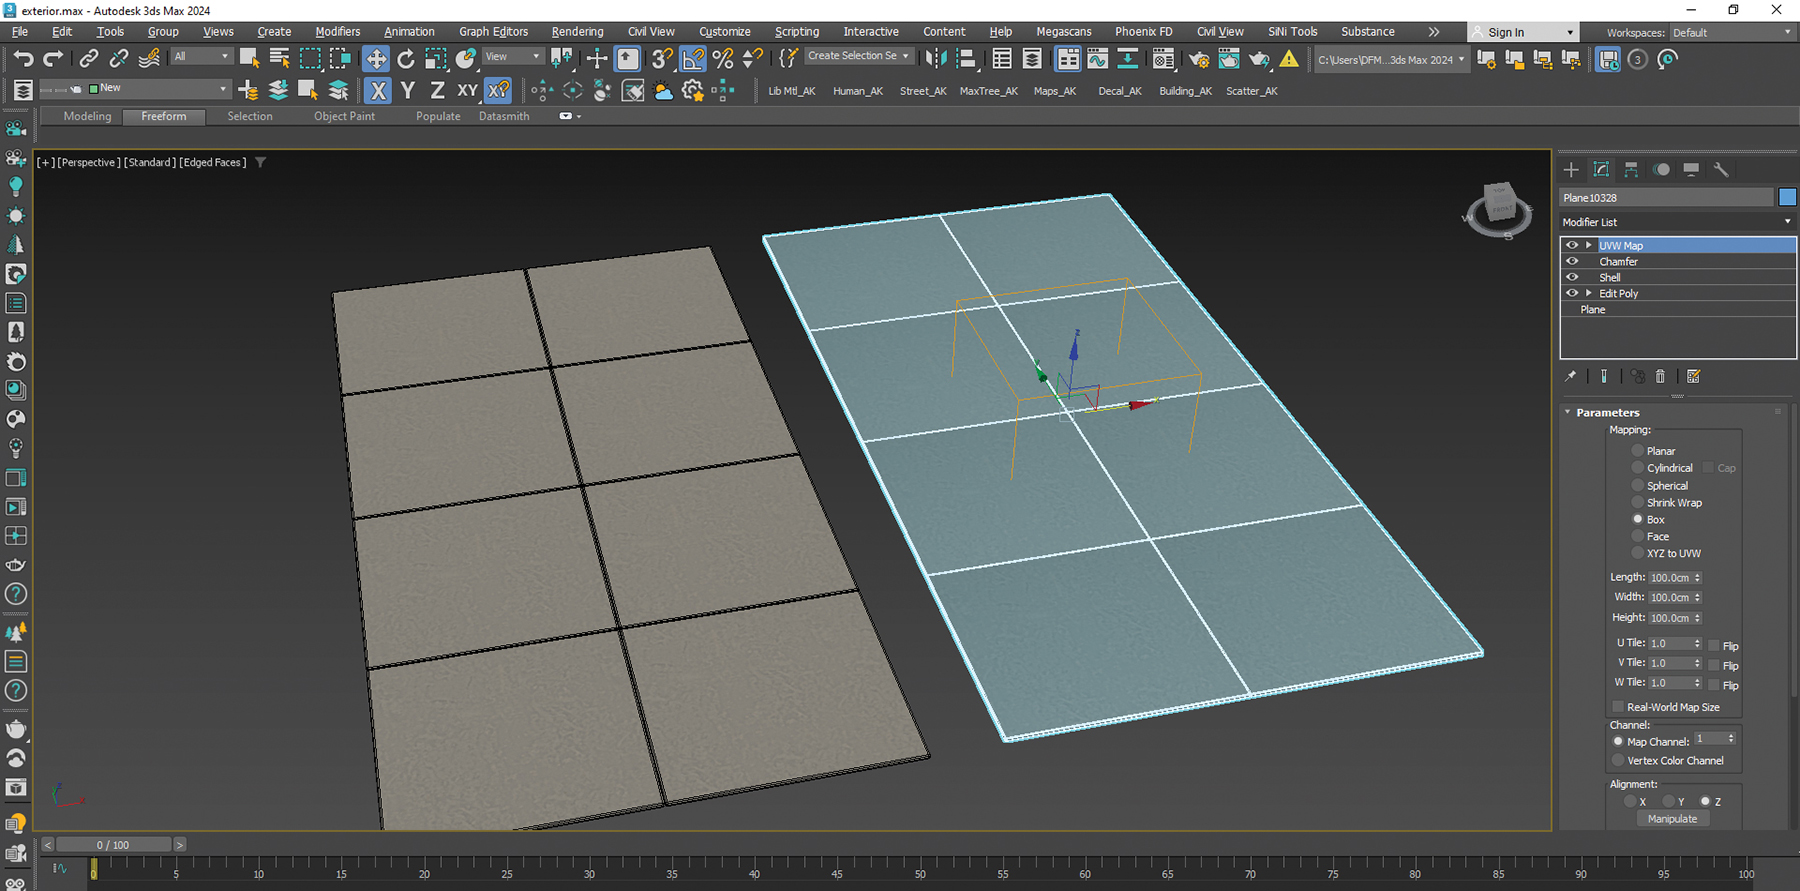
09. Craft paving stones
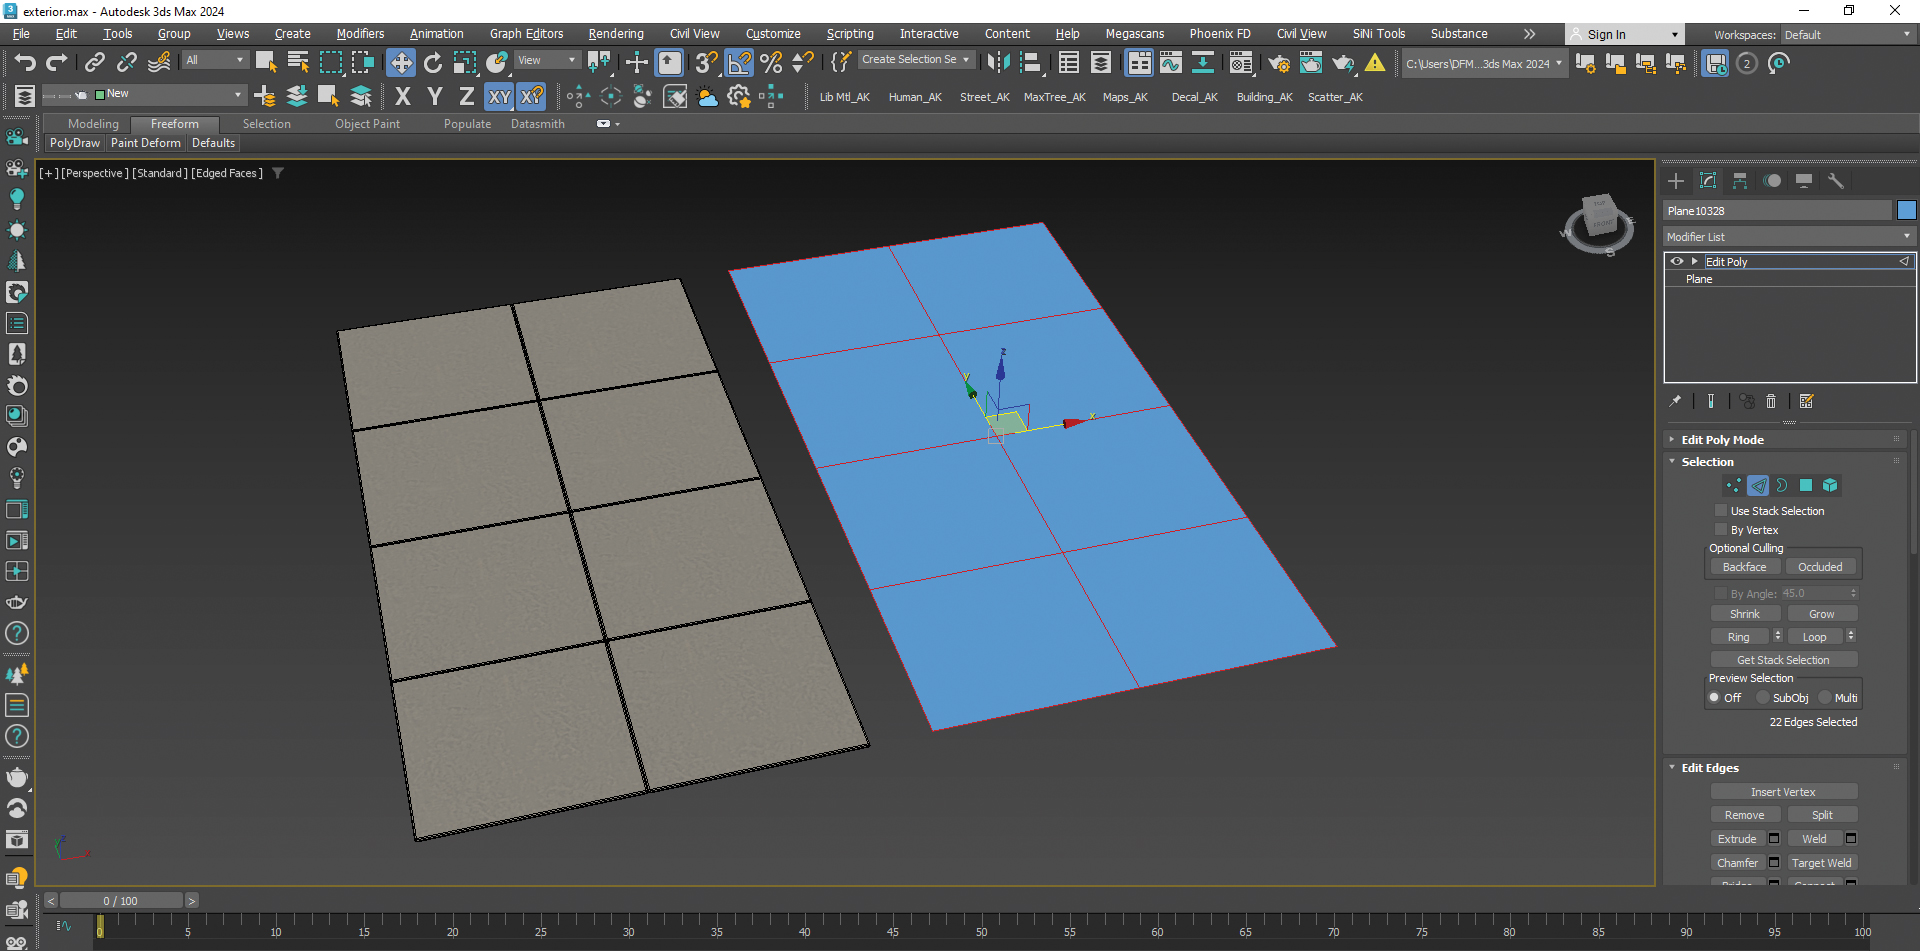
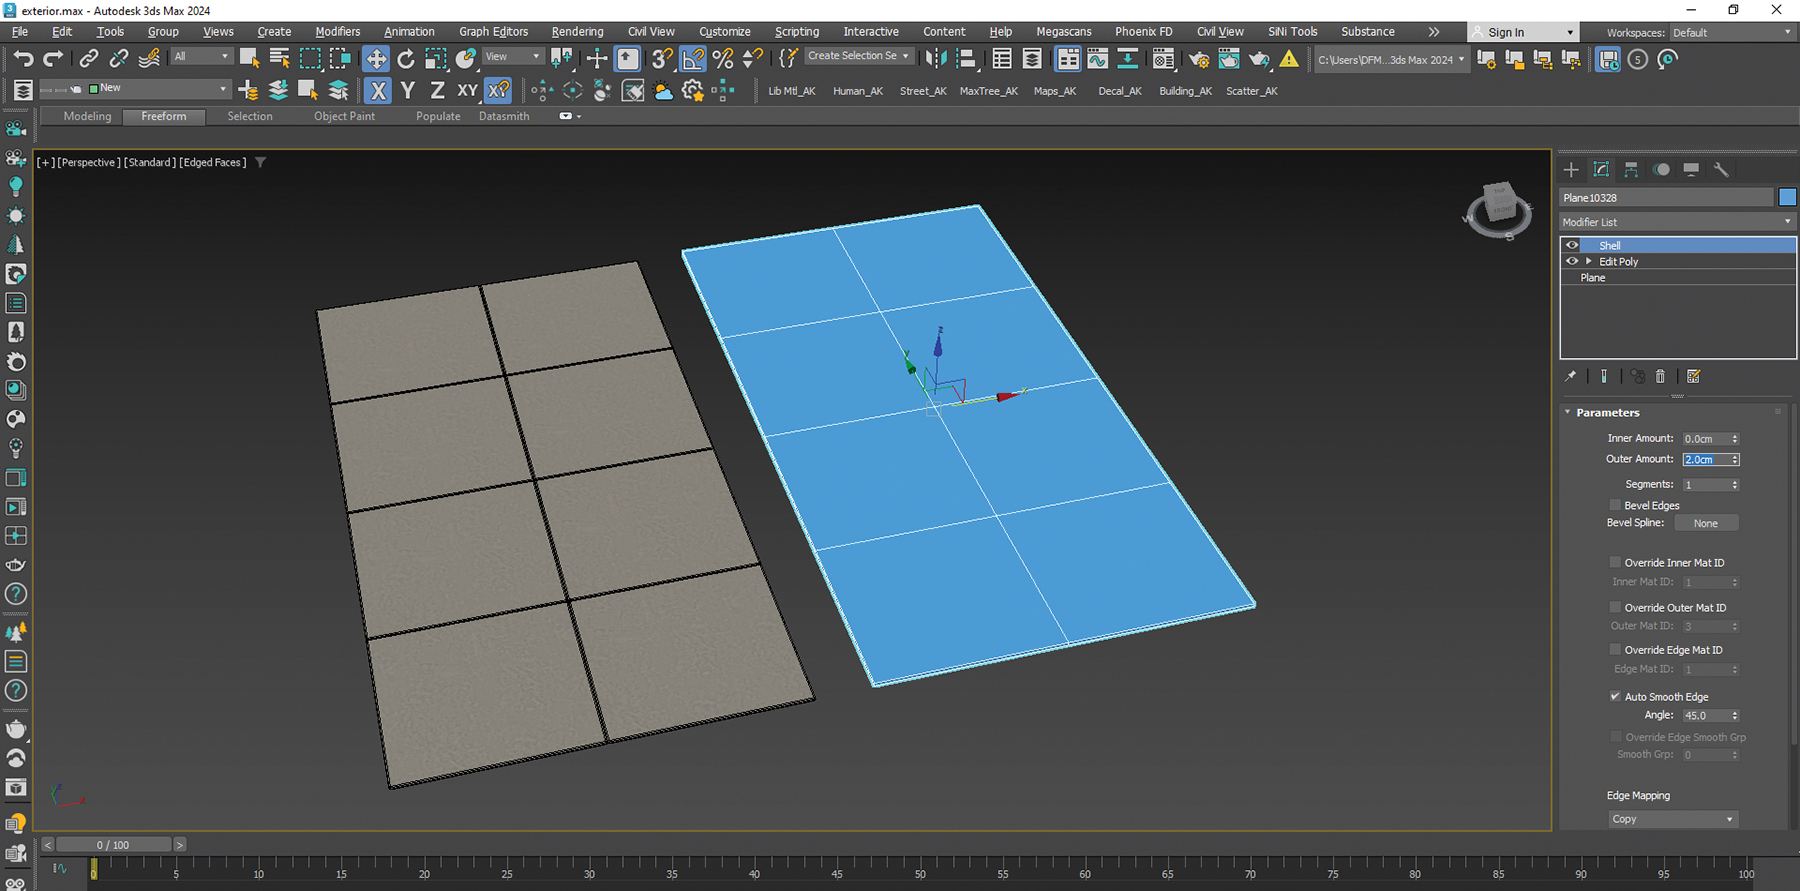
Complex models can often be built from the simplest objects, just like the paving stones in my charming house. To create these, start with a plane and adjust the number of segments according to the amount of paving stones you need. Next add an Edit Poly modifier, select all the edges, and use the Split command under the Edit Edges section to separate all the faces. A Shell modifier will give your surface some height for the thickness in the slabs.
Now use the Chamfer modifier to create bevelled edges. I always recommend using this modifier as no model in the real world will have perfectly sharp edges. The amount of chamfer may vary, but it significantly enhances the realism of your work. Finally, apply a UVW Map modifier to ensure the material is displayed correctly on the paving stones.
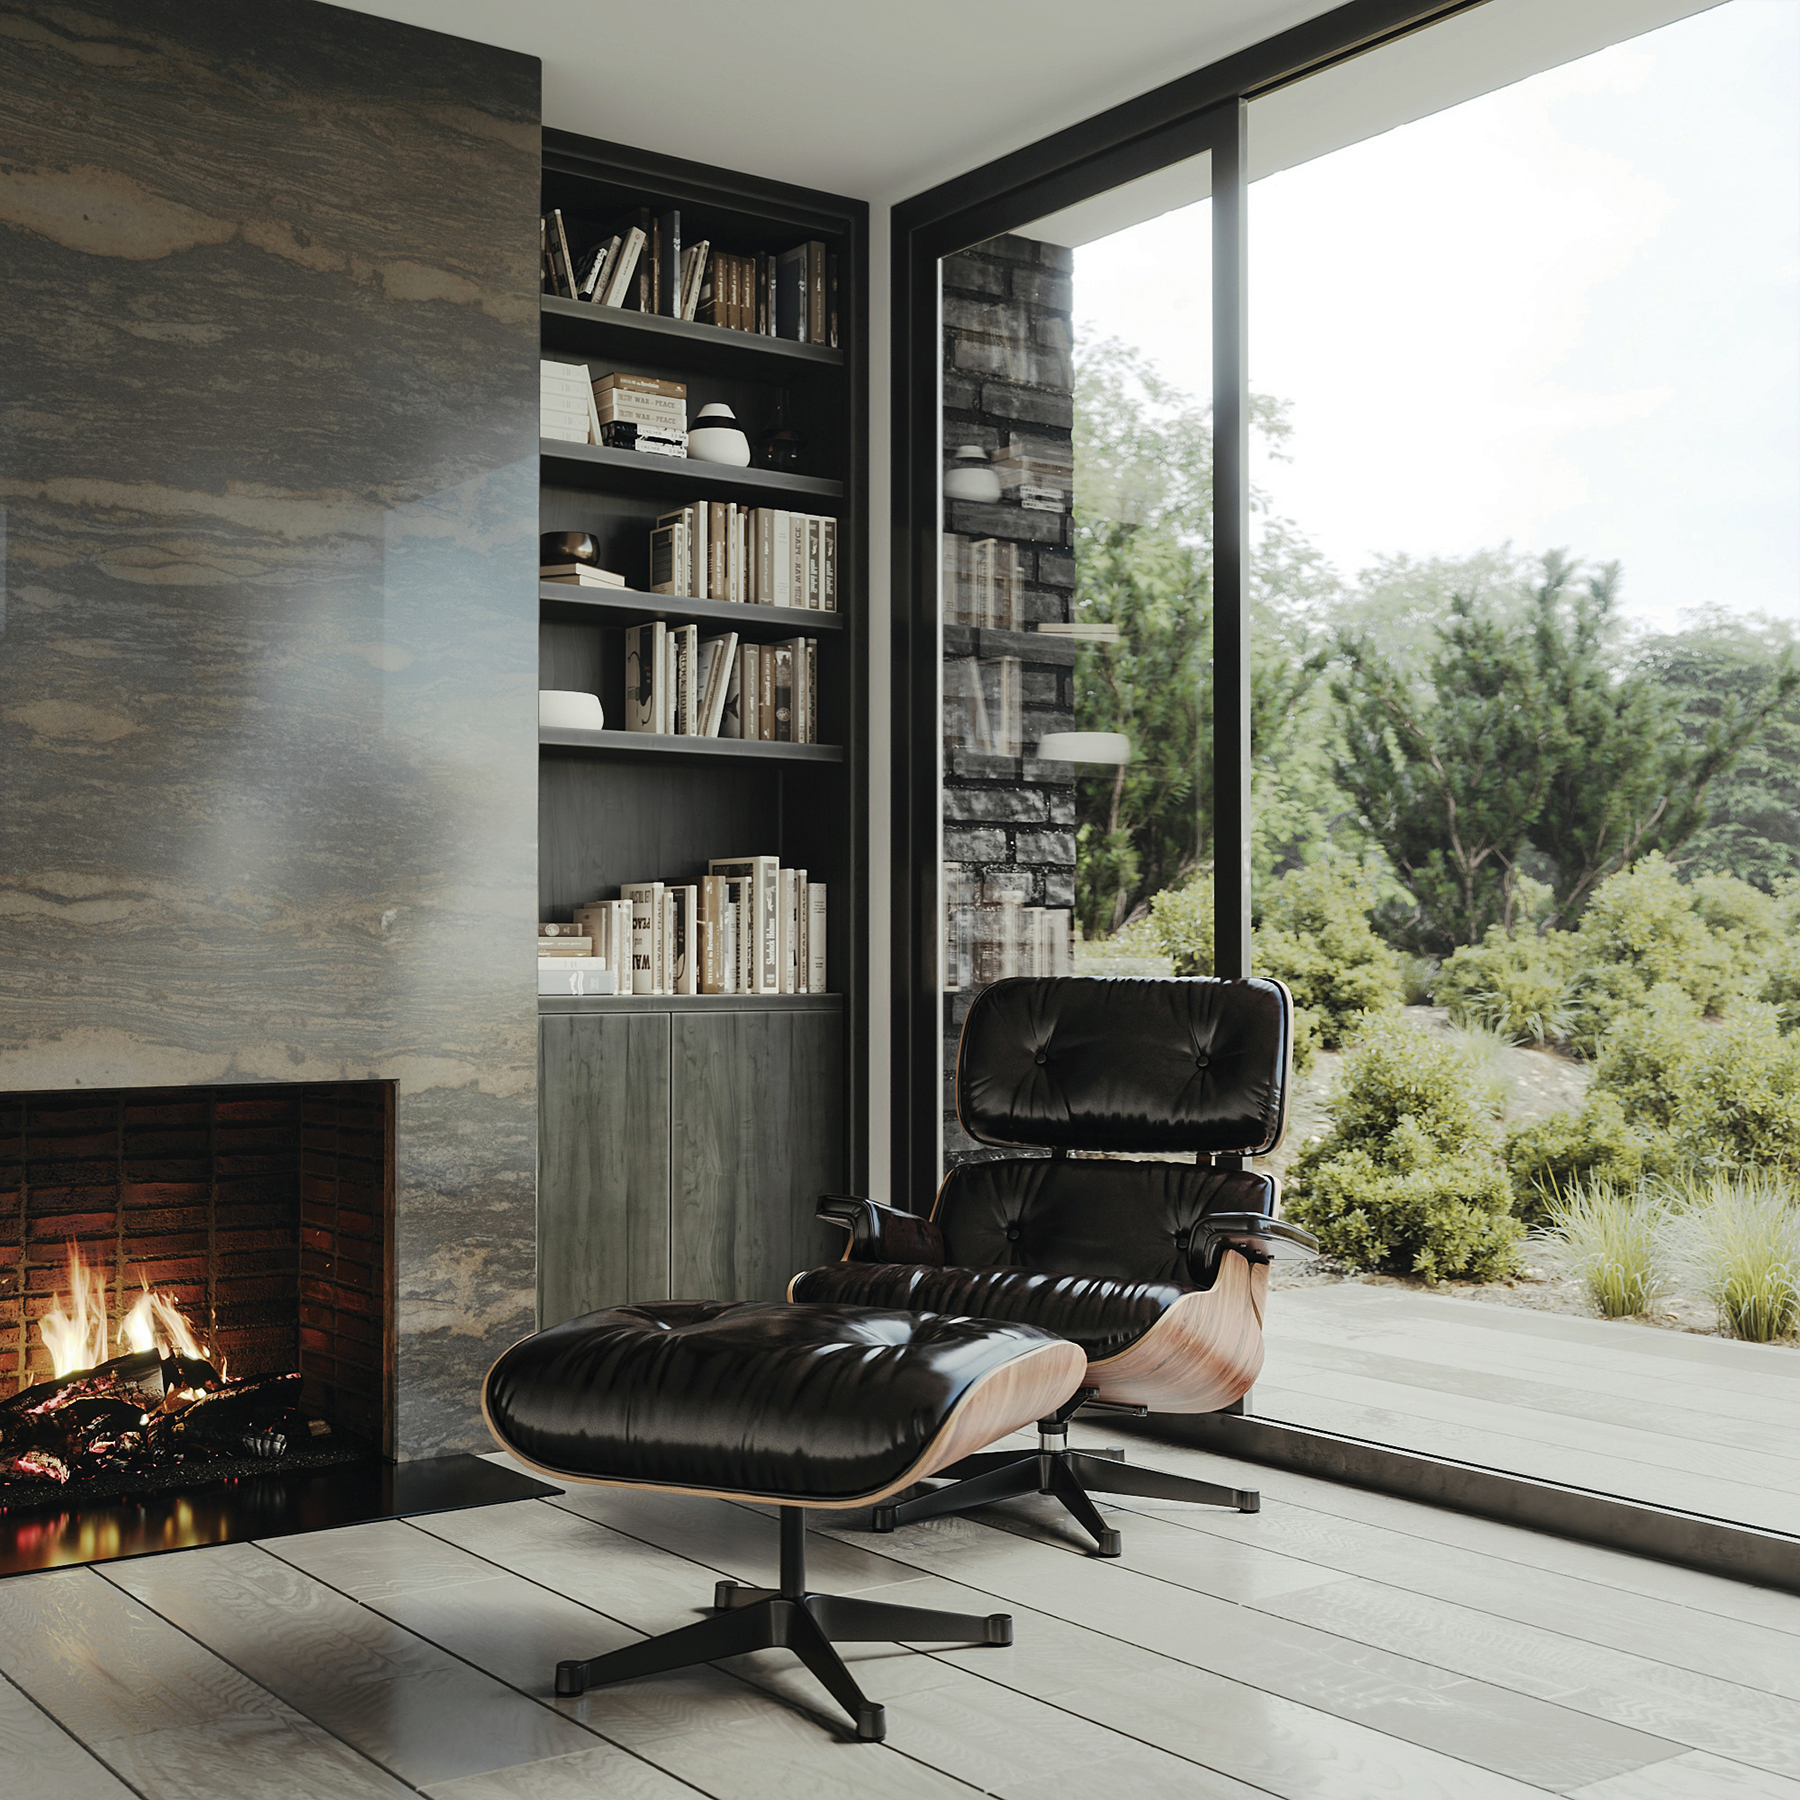
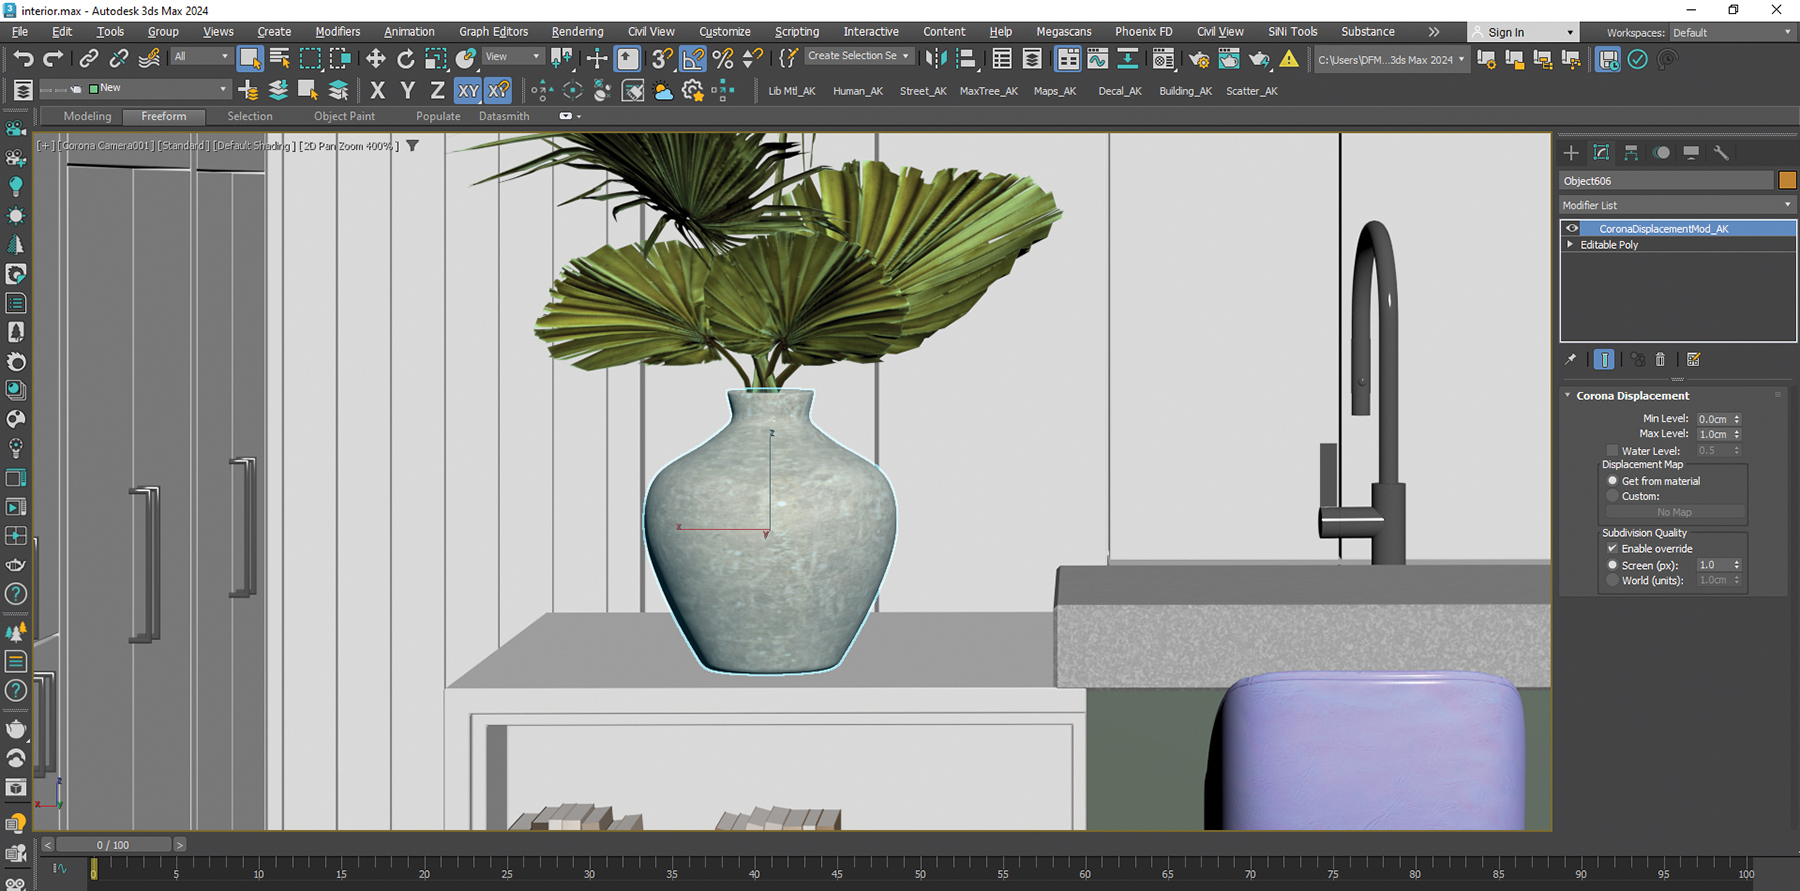
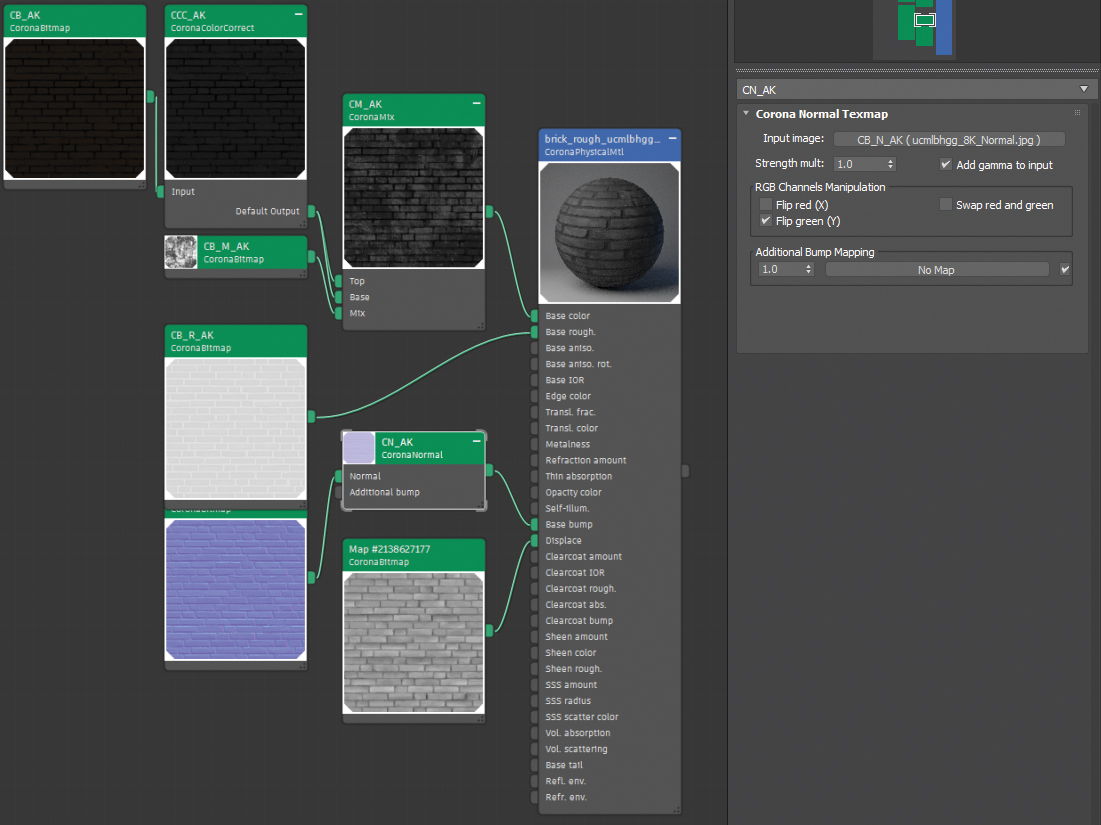
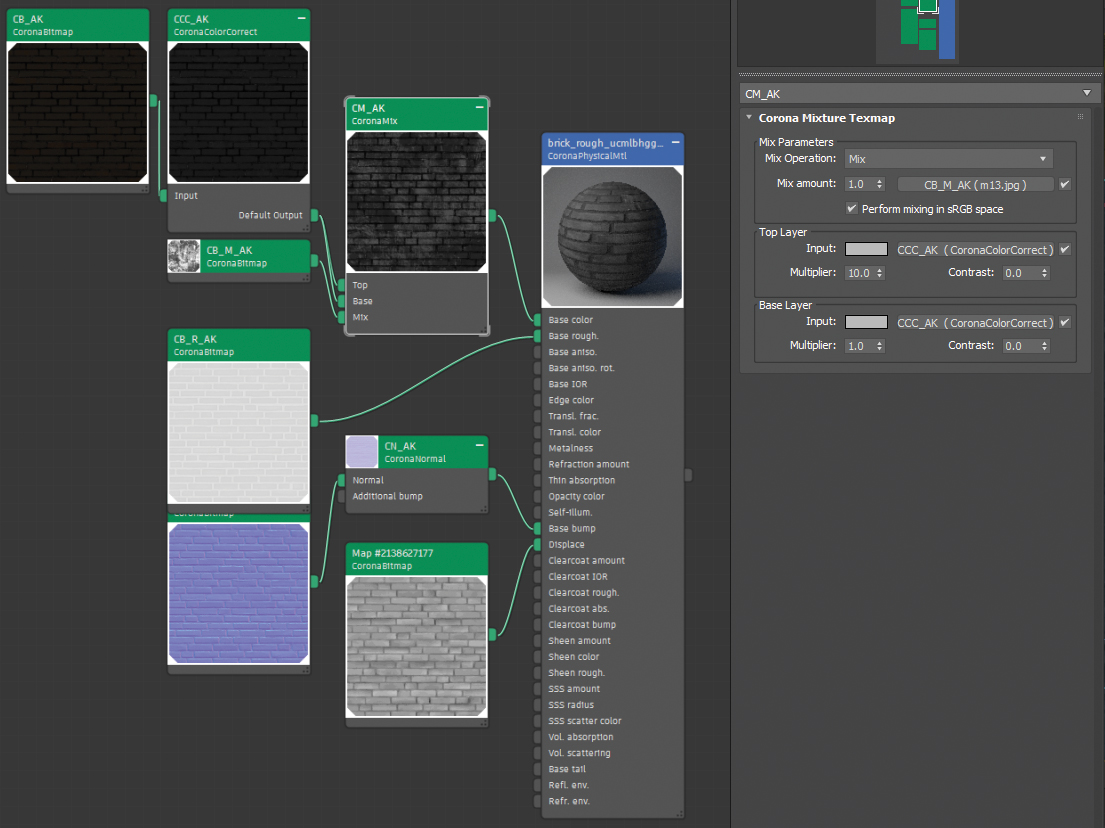
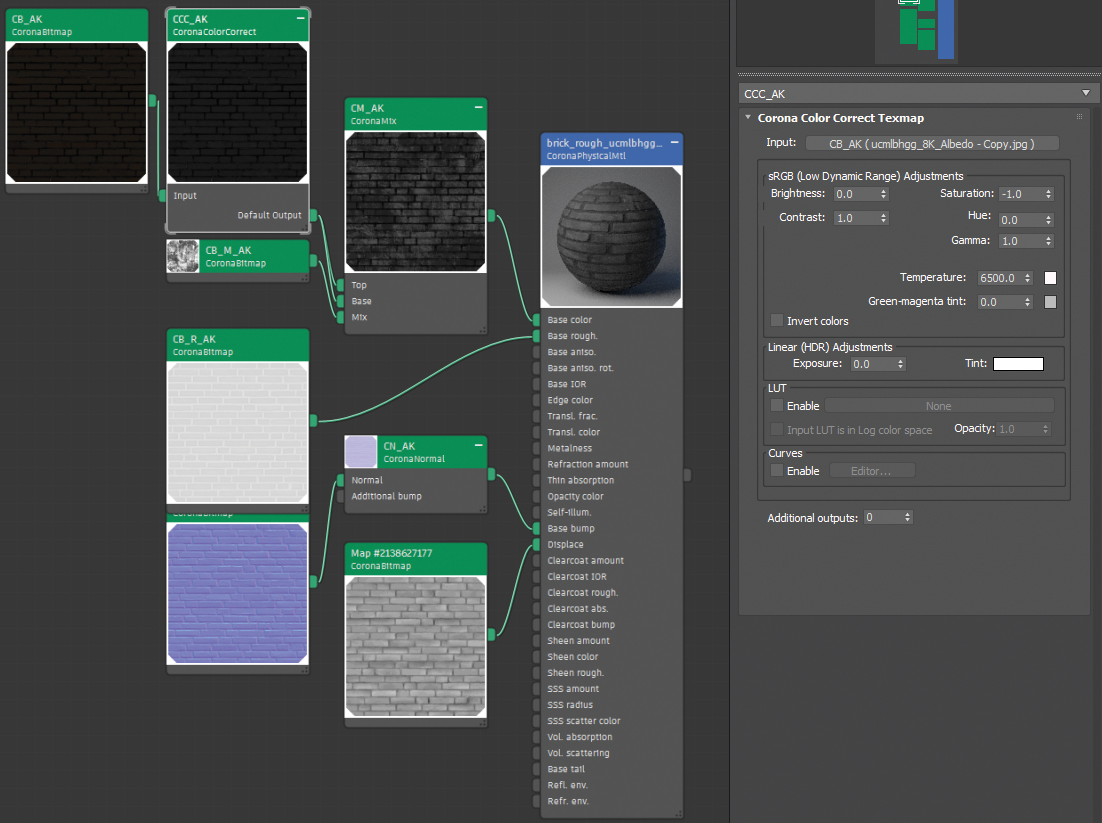
10. Create a brick wall material
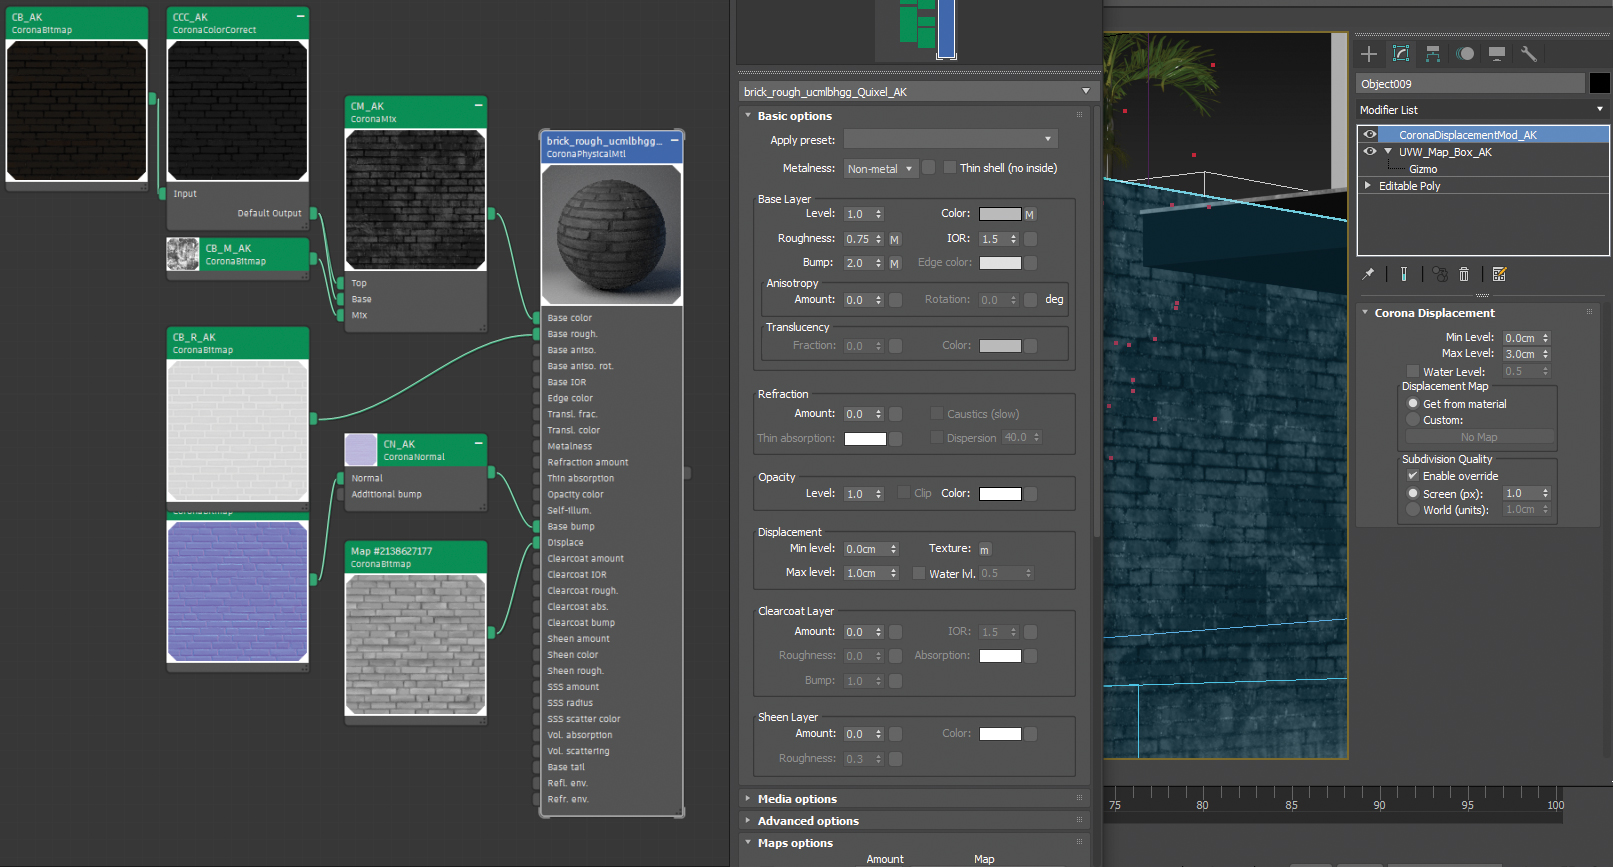
Setting up a brick material is one of the more challenging aspects for any visualisation, as bricks often look flat like wallpaper, which fails to convey sufficient realism. The first key is using high-quality Texture maps, with the Quixel Megascans library offering exceptional quality textures. For Normal map textures, it’s essential to use a Corona Normal map as an intermediary. Make sure to enable the ‘Add gamma to input’ option for proper functionality.
You can use a Corona Mixture map to introduce a touch of randomness and prevent any repetition in the brick texture. To do this, connect Texture Map M to both the Top layer and Base layer within the Corona Mixture Texmap node, then apply a dirt texture to the Mix amount and make sure the Mix Operation field is set to Mix mode.
Elsewhere in my setup, I’ve used a Corona Color Correct map to adjust the saturation of my brick texture, reducing it to a minimum to have more control over its colour. The most crucial aspect of the brick material is using the Displace map and Corona Displacement modifier. I strongly recommend using this modifier and enabling the ‘Get from material’ option. You can also control the height of the bricks by adjusting the Max Level field, though I’d suggest keeping the Min Level unchanged.
Adding randomness and dirt is great for realism in the brick texture. It creates variation and a more natural appearance.
Get the Creative Bloq Newsletter
Daily design news, reviews, how-tos and more, as picked by the editors.

Thank you for reading 5 articles this month* Join now for unlimited access
Enjoy your first month for just £1 / $1 / €1
*Read 5 free articles per month without a subscription
Join now for unlimited access
Try first month for just £1 / $1 / €1

Alireza has 10 years of experience in the field of architectural visualisation, as well as two years of experience in teaching architectural software. Over 300 successful Archviz projects and collaborations with successful architects and rendering agencies.
You must confirm your public display name before commenting
Please logout and then login again, you will then be prompted to enter your display name.