Using Live Captions in InDesign CS5
Jo Gulliver shows how to create captions using information added to an image's metadata.
One of the new features introduced in InDesign CS5 is Live Captions; this feature enables you to generate captions using information stored or added to an image's metadata. It also offers you a number of different methods you can use to generate captions, controlling the look, location and style of the caption.
With asset management and maintaining correct usage for images becoming all the more important within the publishing industry, adding information to the metadata of an image can be a useful tool. The great thing about using metadata is that it applies the information to the image, so no matter when this image gets passed on the important information about the image can always be maintained.
Throughout this tutorial I'm going to show you how to add information to the metadata of an image using Adobe Bridge, and how to then use this information to generate caption text in your InDesign document.
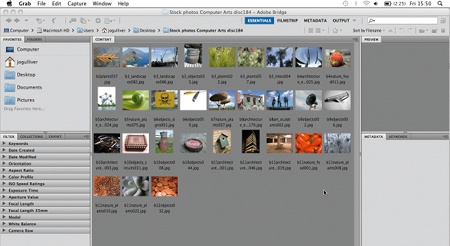
01 Start by opening a new page in InDesign CS5. With your page open, go to File>Browse in Bridge and open Bridge (using the shortcut Alt/Opt+Ctrl/Cmd+O). Select the folder containing your images from the Folder Panel in the top-right corner; if your panel isn't visible, open it via the Window menu.
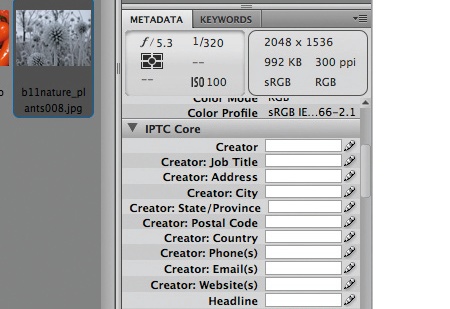
02 Select one of your chosen images and open the Metadata panel found in the bottom right corner on the default window view. Open the IPTC Core drop-down menu. Here you'll find multiple metadata files to select from. I'm choosing to add caption text to the Description field. Once your description is added, click the tick in the bottom-left corner (Apply Icon) to add the information you want.
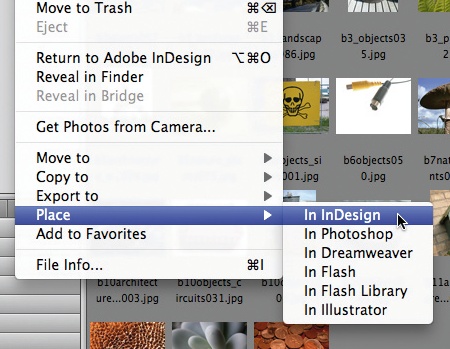
03 With your image still selected, go to File>Place. In InDesign this will take you back to your open InDesign document, where you can place your image. Repeat this process for all the images you wish to use with this layout, or, alternatively, make all your metadata adjustments and then group-place all your images.
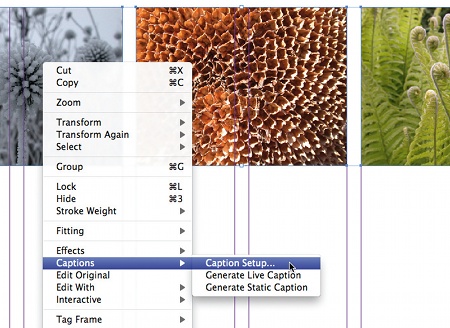
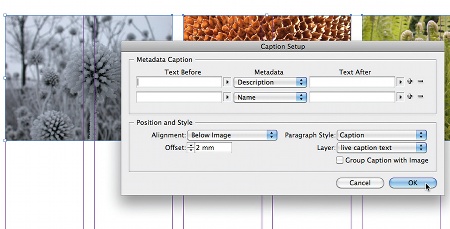
04 Select your images using the Selection tool, and then Right/Ctrl-click, choosing Captions>Caption Setup from the sub-menu to open the Caption Setup dialog. Here you can select what metadata you want to be applied to your live captions from the Metadata drop-down menu. I'm selecting Description to display what we added to our metadata.
Get the Creative Bloq Newsletter
Daily design news, reviews, how-tos and more, as picked by the editors.
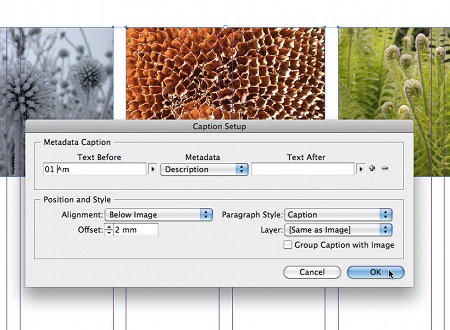
05 You can also choose to add text before or after your description, as well as select where the caption will be placed in relation to the image, apply an offset, add a paragraph style, and specify which layer you want the caption to appear on. Once you OK this option, you'll notice nothing changes immediately.
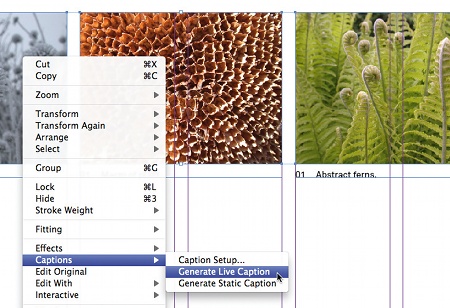
06 The next step is to apply the live caption. Right/ Ctrl-click on your image and select Captions>Generate Live Caption. InDesign will automatically generate a live text frame the same width of the image, containing the description you added to the metadata in Bridge.
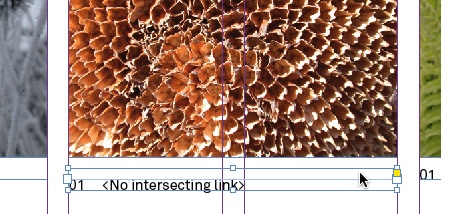
07 By default the image and captions have to touch. If you move the text frame away from the image, the words '<no intersecting link>' will replace the caption text. If you place it so it touches a different image, the text will be replaced by the new image's description.
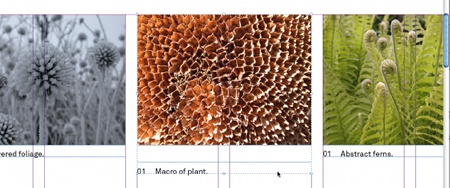
08 If you find the requirement that the image and text frame touch too restrictive, you have the option to group them together in your Caption Setup dialog box. This option enables you to move the caption away from the image while still populating it with the image's metadata. Alternatively, you can use the Group option found under the Object menu (shortcut Ctrl/Cmd+G), which has the same effect.
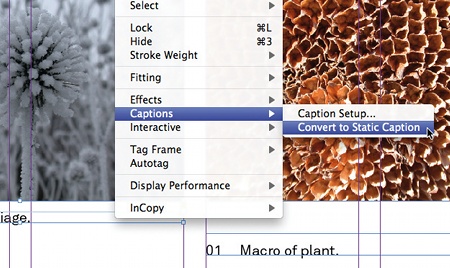
09 The downside to Live Captions is that, once placed, the text can't be edited on the InDesign page. But there's the option to convert the caption to a static caption under the caption sub-menu. This breaks the link but it will no longer automatically update with the changes made to the metadata.
10 This way of creating captions may not be useful to you in your everyday work, but it's a valuable way of displaying important information. An alternative use is to apply the information to a non-printing layer in your Layers palette via the Caption Setup dialog box. This way the information can easily be accessed and used to generate captions in the traditional way, and you can also display multiple fields of the metadata information so that all of your image information can be viewed.
Jo Gulliver
Jo is Computer Arts' PPA Designer of the Year-nominated art editor. Her day typically involves commissioning cover art from the world's most exciting designers, and photoshoots with the biggest names in design.

Thank you for reading 5 articles this month* Join now for unlimited access
Enjoy your first month for just £1 / $1 / €1
*Read 5 free articles per month without a subscription

Join now for unlimited access
Try first month for just £1 / $1 / €1

The Creative Bloq team is made up of a group of art and design enthusiasts, and has changed and evolved since Creative Bloq began back in 2012. The current website team consists of eight full-time members of staff: Editor Georgia Coggan, Deputy Editor Rosie Hilder, Ecommerce Editor Beren Neale, Senior News Editor Daniel Piper, Editor, Digital Art and 3D Ian Dean, Tech Reviews Editor Erlingur Einarsson, Ecommerce Writer Beth Nicholls and Staff Writer Natalie Fear, as well as a roster of freelancers from around the world. The ImagineFX magazine team also pitch in, ensuring that content from leading digital art publication ImagineFX is represented on Creative Bloq.
