Reinterpret iconic album artwork in Illustrator
Matt Needle shows you how to transform an iconic image into a visually striking, unique print
In this walkthrough I’ll show you how to take an iconic design and recreate your own, original version. Using my reinterpretation of the Sgt. Pepper’s Lonely Hearts Club Band album cover, we’ll walk through how to take an idea that already has a graphic presence and create a completely new visual identity for it. This is how I make my pop culture prints.
Along the way, I’ll teach you the pro tricks and techniques that I use to produce pieces like this. We’ll combine typography and illustration, using the Pen tool to create shapes and utilising a range of techniques to create an interesting, original design.
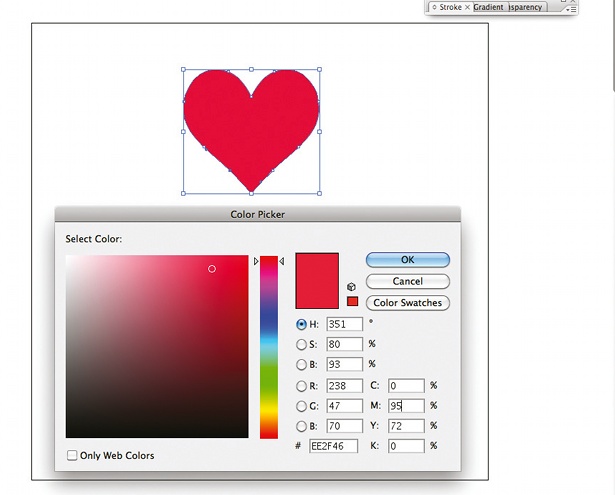
01 First, listen to the album and decide which visual elements to include, taking inspiration from the music. Next, open a 15x15cm CMYK document in Illustrator and, with the Pen tool, draw your first element in a simple, iconic style that contextually suits the composition. I drew a heart shape (you’ll find my heart element in the support files) and filled it with red.
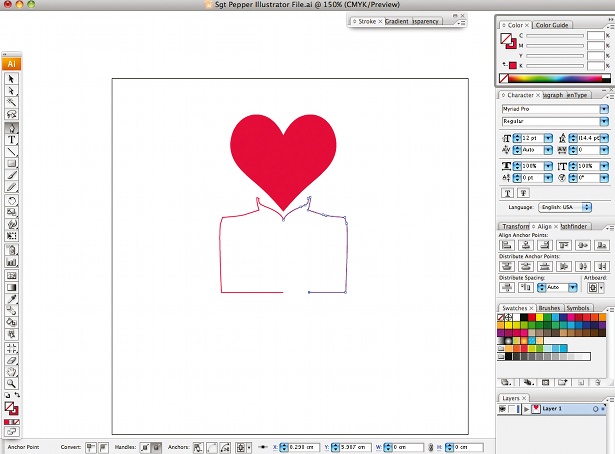
02 Pick another key element and recreate it using the Pen tool. A quick way to produce symmetrical objects is to draw half, and then copy and reflect the linework. For the military jacket, I created a rectangle and drew a folded collar at the top as shown. Copy and paste the shape, and go to Object>Transform>Reflect.
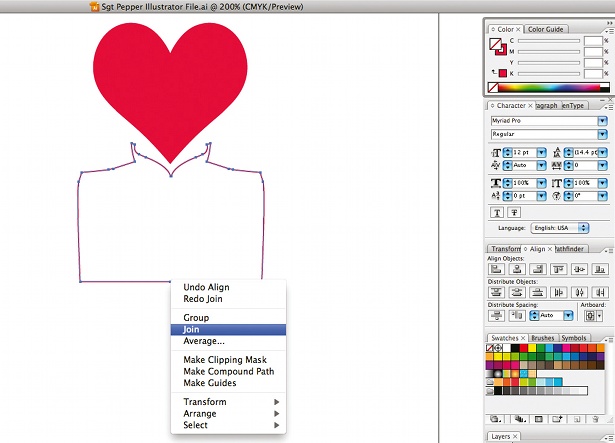
03 Select the two halves and click the Vertical Align Center option. Then select the end points using the Direct Selection tool, Ctrl/right-click and select Join.
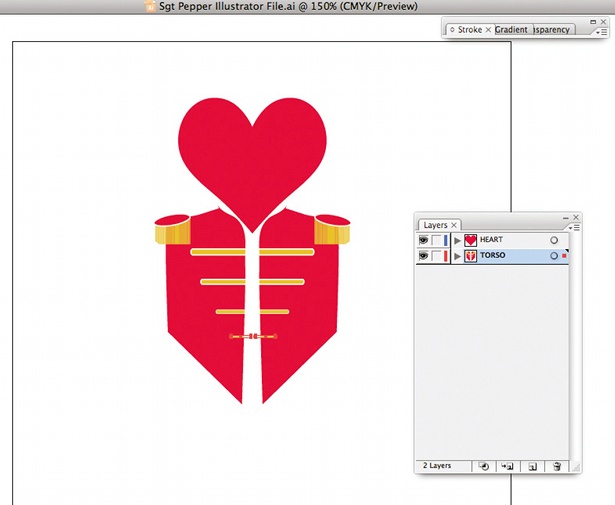
04 Now add colour and more detail to your image. I filled the jacket using the same red as the heart and a white stroke of 1pt, and added small ellipses to the shoulders. Tilt the ellipses and position them parallel to the shoulder of the jacket, adding gold lines underneath using the Pen tool. For the gold colour, I used the values of C: 12, M:18, Y:86, K:0. Select the centre join point created in the previous step with the Direct Selection tool and drag it downwards into a triangle point.
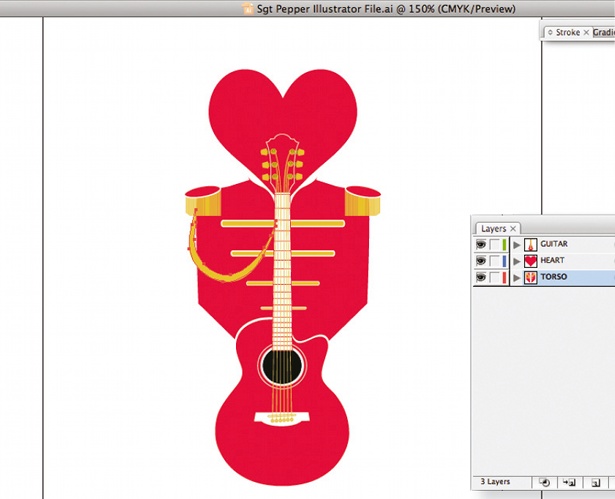
05 Continue adding new elements. If you’re re-creating this piece, open the Needle Stock Illustrations.ai file on your disc, select the guitar and copy it over to your workspace on a new layer, positioned above the previous layers. Centre it so that the guitar head sits in the centre of the heart, and use the Pen tool to create a gold sash on the jacket layer.
Get the Creative Bloq Newsletter
Daily design news, reviews, how-tos and more, as picked by the editors.

Thank you for reading 5 articles this month* Join now for unlimited access
Enjoy your first month for just £1 / $1 / €1
*Read 5 free articles per month without a subscription

Join now for unlimited access
Try first month for just £1 / $1 / €1

The Creative Bloq team is made up of a group of art and design enthusiasts, and has changed and evolved since Creative Bloq began back in 2012. The current website team consists of eight full-time members of staff: Editor Georgia Coggan, Deputy Editor Rosie Hilder, Ecommerce Editor Beren Neale, Senior News Editor Daniel Piper, Editor, Digital Art and 3D Ian Dean, Tech Reviews Editor Erlingur Einarsson, Ecommerce Writer Beth Nicholls and Staff Writer Natalie Fear, as well as a roster of freelancers from around the world. The ImagineFX magazine team also pitch in, ensuring that content from leading digital art publication ImagineFX is represented on Creative Bloq.
