Create a space warp implosion in Photoshop
Photoshop innovator Per Gustafsson explains how to create a classic space scene by building up visual elements on layers, applying filters and creating unique lighting effects
When you talk about Photoshop artwork, the things that spring to mind are compositions built up from various textures, along with lighting and transparency effects. Whether you’re making a commercial image, or doing self-initiated work, it’s always useful to use these techniques, develop them and experiment. In this tutorial we’ll create a dramatic space scene, full of light and energy, imploding and spinning into the centre.
To do this, first we’ll use both photographic and digitally generated elements, and explore how to create patterns, layer effects and objects, with basic filters and some emotion.
Discover 10 inspiring examples of vintage posters at Creative Bloq.
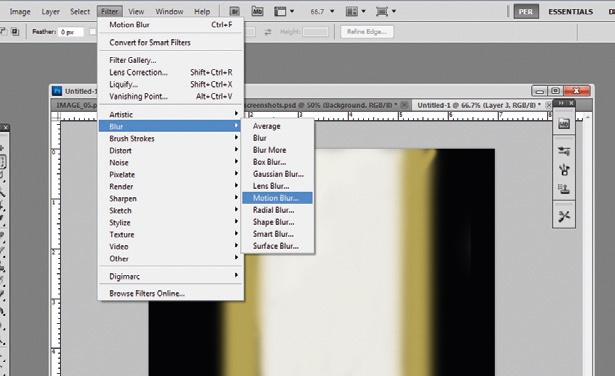
01 First we’ll create a background for this image. It’s mainly handdrawn in Photoshop, and uses a mixture of filters. To begin creating your own background, paint vertical lines in different colours and add Motion Blur in a vertical direction.
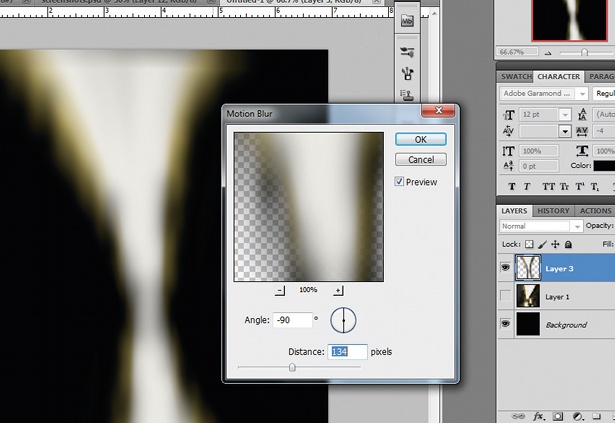
02 Then use the Transform tool to create some perspective, adding more vertical blur to it. Repeat this step, duplicate the layer, changing its size, and move it around to create the shape you want. If I get edges on the layers, they simply disappear with the Blur filter and lend more structure to the shape.
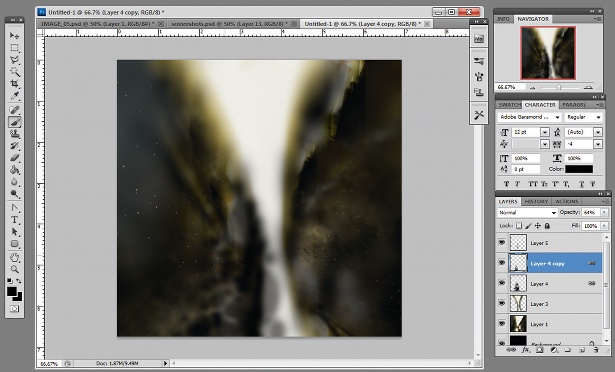
03 To create the smoke effect, paint in black on a new layer on top. Using a brush with a low opacity, paint over and over again, playing with the blur at a low strength. It will start to look like smoke. This is a process you can experiment with until you are happy with the result.
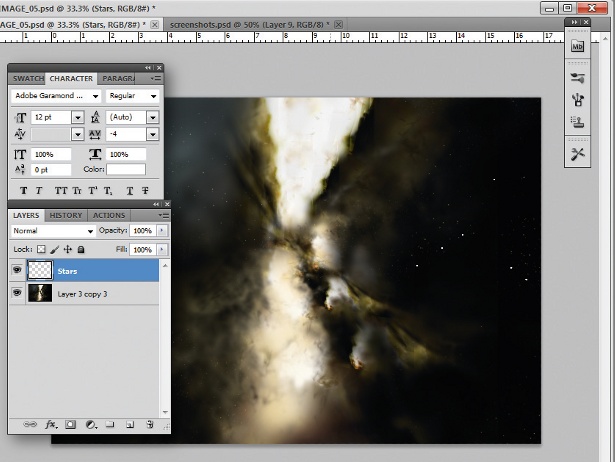
04 When we have a background layer we’re happy with, it’s time to add stars. Create a new layer and start to make dots with the smallest pen on 100% opacity. Duplicate the layer, add some Gaussian blur (Filters>Blur> Gaussian Blur) and change the opacity to 60%. Merge these two layers and do it again if you want more stars. Sometimes I decrease the size of this layer just to make the stars look sharper. Then duplicate and offset that layer a couple of times randomly to get thousands of stars. Create further layers with more or less blur, resulting in a realistic sky backdrop with plenty of depth to it – smaller, sharper stars in the background, and larger out-of-focus ones closer to the foreground of the image.
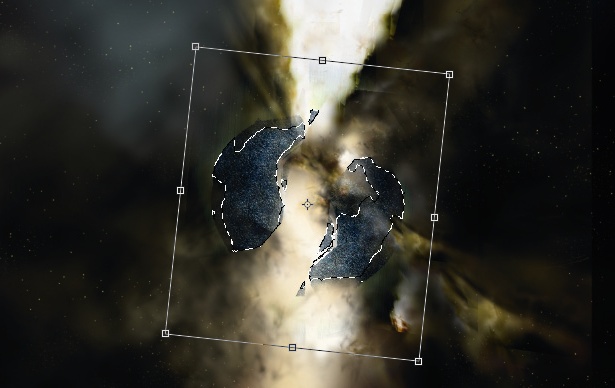
05 It’s time to add stones and physical elements to the implosion, giving depth and structure to the image. Use a stone texture and cut out two semi-circular pieces with the Polygonal Lasso tool to get the sharp edges. Ctrl/ right-click with the same tool to position them where they look best, covering some of the background light.
Get the Creative Bloq Newsletter
Daily design news, reviews, how-tos and more, as picked by the editors.

Thank you for reading 5 articles this month* Join now for unlimited access
Enjoy your first month for just £1 / $1 / €1
*Read 5 free articles per month without a subscription

Join now for unlimited access
Try first month for just £1 / $1 / €1
The Creative Bloq team is made up of a group of design fans, and has changed and evolved since Creative Bloq began back in 2012. The current website team consists of eight full-time members of staff: Editor Georgia Coggan, Deputy Editor Rosie Hilder, Ecommerce Editor Beren Neale, Senior News Editor Daniel Piper, Editor, Digital Art and 3D Ian Dean, Tech Reviews Editor Erlingur Einarsson, Ecommerce Writer Beth Nicholls and Staff Writer Natalie Fear, as well as a roster of freelancers from around the world. The ImagineFX magazine team also pitch in, ensuring that content from leading digital art publication ImagineFX is represented on Creative Bloq.
