Create a seamless pattern
Assemble an eye-catching repeat design for apparel in Photoshop, with some pro guidance from Jeffrey Bowman
When you're designing a T-shirt, it's perfectly possible to combine traditional sketches and Photoshop, particularly when it comes to the more complex process of making it seamless (if you'll excuse the pun).
The aim of this project is to create a pattern that is inspired by the current trends in the fashion and illustration world, and can be applied to a full seam-to-seam T-shirt. In this tutorial, I show you how to give your hand-rendered work a new dimension and take your T-shirt design to the next level.
Click here to download the support files (24.1MB)
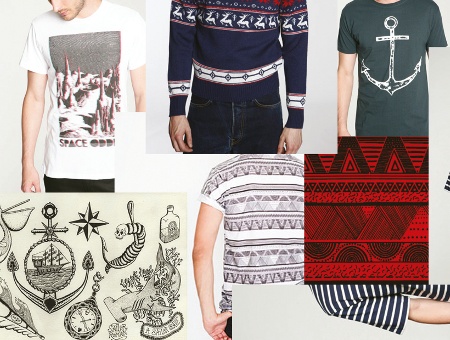
01 The first thing a project like this requires is some market research and inspiration. Take a look at urban clothing shops and websites such as ffffound.com to help gauge what's popular. From this ideas will start to form. To help focus your ideas, the next stage is to produce a moodboard.
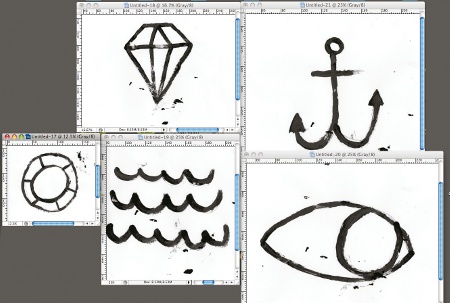
02 The research I carried out suggested that a handpainted design is the way forward, to give the T-shirt that cool, urban feel with a screenprinted, processed look. A limited colour palette will add to the lo-fifeel. It's important to bear in mind that the pattern will be assembled in Photoshop, so creating iconic individual elements that sit well together is essential at this point.
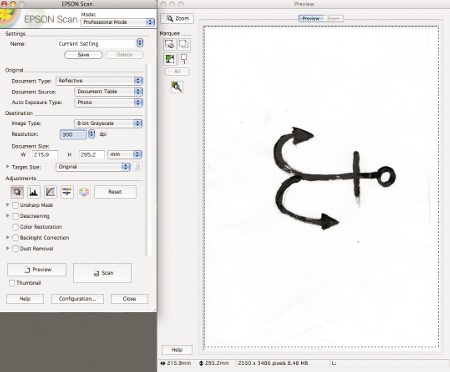
03 Scan the elements onto your computer at 300dpi, greyscale or CMYK. Make sure that you use a strong colour such as black to allow the scanner to pick up all the detail of the brush strokes (or whatever medium you've chosen to use).
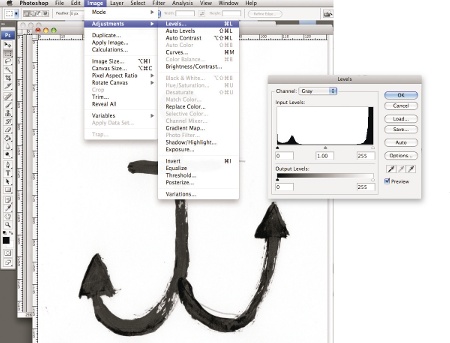
04 Once each element is scanned in, convert it to CMYK, and then adjust the levels in order for the next step to work. Set the levels so that the black becomes really dark, and the white background loses its texture and becomes plain white. Play around with the slider until you achieve this, because it will differ from image to image.
Get the Creative Bloq Newsletter
Daily design news, reviews, how-tos and more, as picked by the editors.
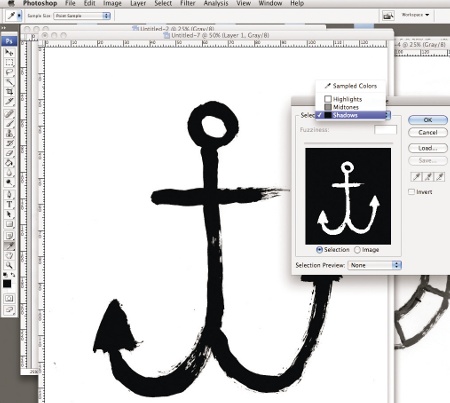
05 Once the levels are sorted, it's time to select the element to be filled with a colour. Go to Select>Colour Range, and from the dropdown menu select Shadows. This will highlight everything black on the page, which is why it's important that your elements are black to begin with.
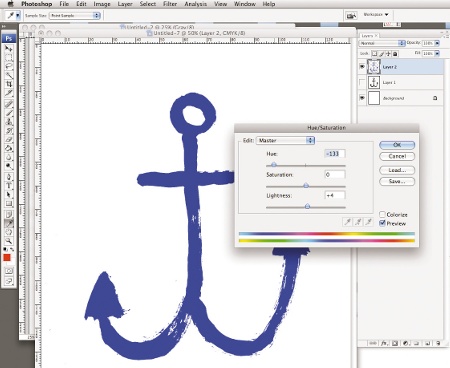
06 Create a new layer, set your foreground to a colour of your choice, then go to Edit>Fill. This should fill the new layer with that colour. Now go to Image>Adjustments>Hue/Saturation, and adjust the sliders to get the colour you want. Repeat this process for all the elements. In this example I chose blue to create a nautical feel.
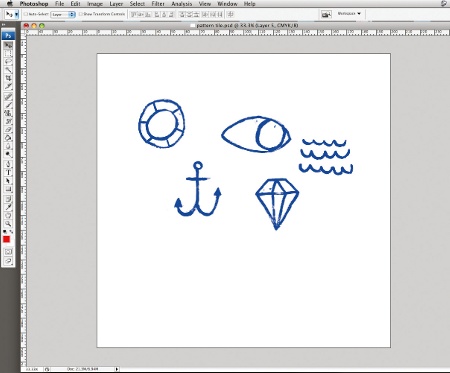
07 Create a new file of 10x10cm (or as big as you would like your pattern tile for your T-shirt to be). Bring all of your elements into this new file and begin arranging them, looking at scale, angles and placement to create a tile that will run across the tee. Remember that it must all join up when the patterns are put together.
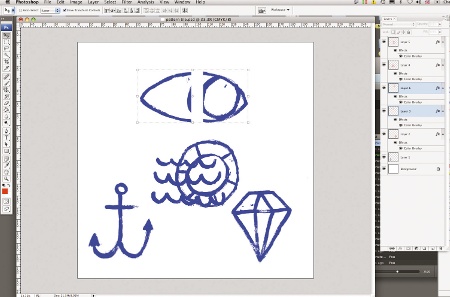
08 To help create a seamless pattern, ensure that some elements overrun the edges and join up at the other side; doing this in several areas will create the seamless look. The best way to do this is to split the element then move the left side to the right, and the right side to the left. You can do the same from bottom to top and vice versa - just make sure they are aligned by holding down Alt when you move them.
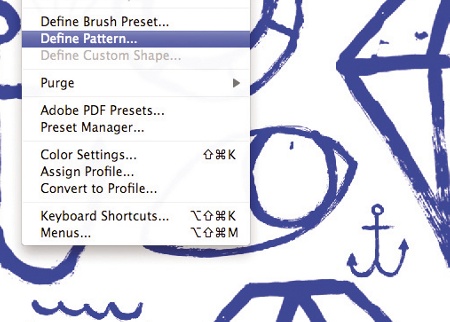
09 Once you're satisfied with your tile, it's time to test it. Flatten the entire image (make sure you save a layered copy) then go to Edit>Define Pattern. This takes your square and adds it to the pattern library.
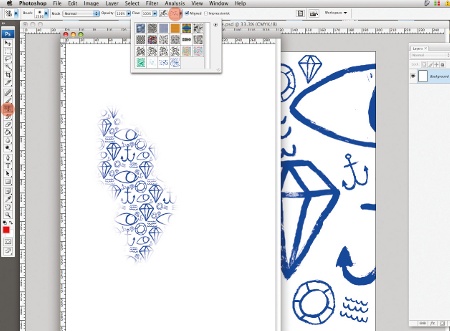
10 Create a new document at A3 or A4, then select the Pattern Stamp tool. At the Options area at the top, your pattern should appear as a little thumbnail in the dropdown menu. Select this, and rub all over the A3 canvas as if you were erasing. The pattern should appear as you cover the document.
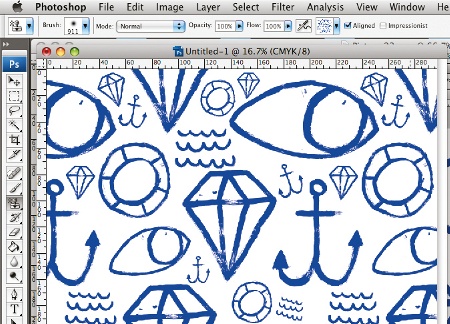
11 Now check that everything joins up correctly. If it doesn't, go back to your layered tile and adjust the layers that don't line up, repeating steps 8 to 10 until they do. Sometimes it can take a little bit of tinkering around to get them right.
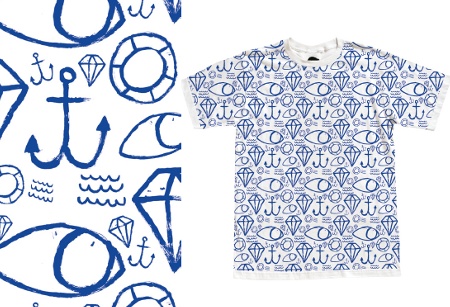
12 Now you're ready to send your final tile to a printer to produce the T-shirt design. Make sure you flatten your final artwork to send to print. In the support files we've included a T-shirt mock-up with which you can test your tile in the same way as you did in step 10 - just create a new layer. You can also find some sample designs and elements to experiment with on the way to producing your own designs.
Jeffrey Bowman
Studio Bowlegs is the pseudonym of UK-based illustrator and designer Bowman, who produces work for magazines, skateboards, T-shirts, editorial, exhibitions, music and motion. www.studiobowlegs.co.uk

Thank you for reading 5 articles this month* Join now for unlimited access
Enjoy your first month for just £1 / $1 / €1
*Read 5 free articles per month without a subscription

Join now for unlimited access
Try first month for just £1 / $1 / €1

The Creative Bloq team is made up of a group of art and design enthusiasts, and has changed and evolved since Creative Bloq began back in 2012. The current website team consists of eight full-time members of staff: Editor Georgia Coggan, Deputy Editor Rosie Hilder, Ecommerce Editor Beren Neale, Senior News Editor Daniel Piper, Editor, Digital Art and 3D Ian Dean, Tech Reviews Editor Erlingur Einarsson, Ecommerce Writer Beth Nicholls and Staff Writer Natalie Fear, as well as a roster of freelancers from around the world. The ImagineFX magazine team also pitch in, ensuring that content from leading digital art publication ImagineFX is represented on Creative Bloq.
