Create liquid effects in Photoshop
João Oliveira explains how to use the Liquify filter to create fluid elements for your Photoshop illustrations
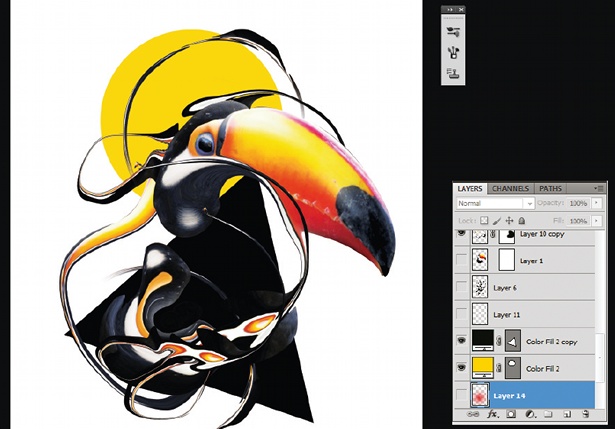
08 Duplicate the layer a few times and place the duplications around it to increase the liquid effect. Erase any unnecessary areas.
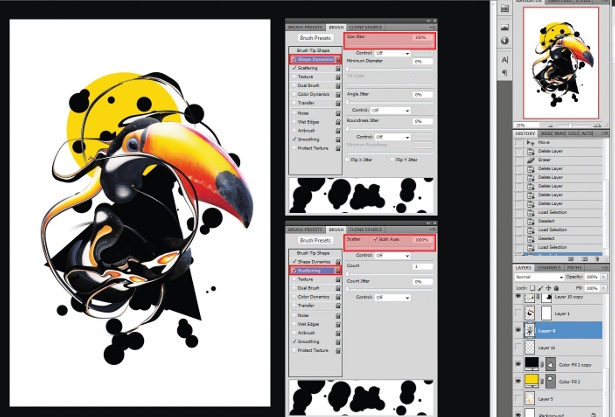
09 With the main composition finished, we can start with the details. Click on the Brush tool and select a big, circular brush set to 100% hardness and with a black colour. Go to the Brush panel, check Shape Dynamics with Size Jitter set to 100%, and check Scattering with Scatter set to 1000%. Create a new layer below the bird layers and above the yellow circle, and paint some circles.
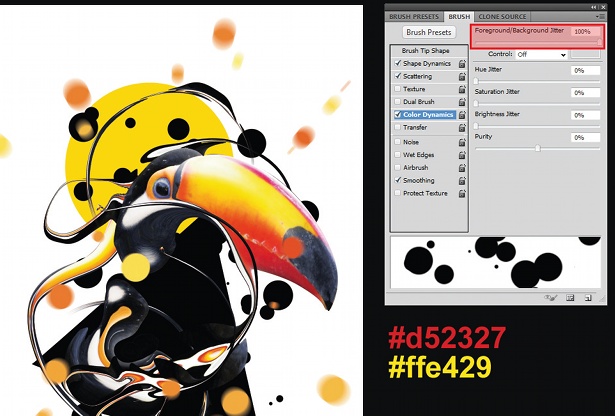
10 Create a new layer on top of everything and repeat what we did in step 09 – but this time with Color Dynamics checked and 100% on Foreground/Background Jitter. Use #D52327 for your foreground colour and #FFE429 on your background colour, and paint some circles around the image.
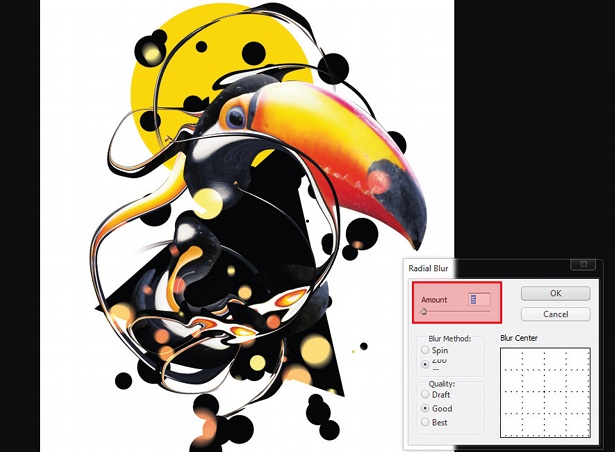
11 We can use several techniques to give movement to the illustration. Motion blurs are very effective, so go to Filter>Blur>Radial Blur and choose a Zoom blur method, and set the amount to around 5. Set the blend mode to Color Dodge and we’ll get some nice glowing orbs. Duplicate the layer, decrease its size and move it around.
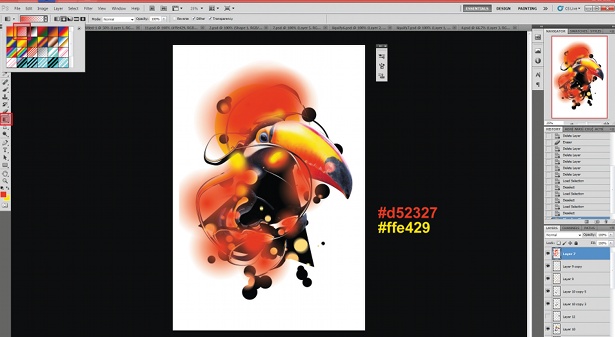
12 To make the image glow even more, you can create a new layer, set its blend mode to Color Dodge, select the Gradient tool (G) with 100% to 0% opacity, and paint coloured gradients onto different places – I used #D52327 and #FFE429. Paint them on light areas, next to dark areas, to create backlight effects.
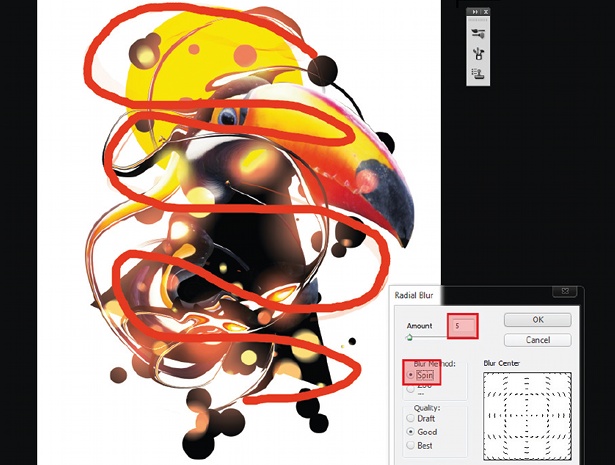
13 We can go even further with the detail. Create a new layer on top of the yellow circle, select the Brush tool with a small-sized circular brush and paint a random line around the canvas – be messy. Go to Filter>Blur>Radial Blur and apply a Spin Blur with a small amount (I used 5).
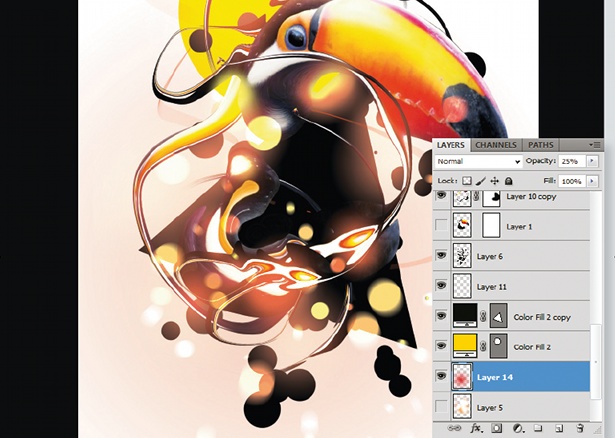
14 To make the glowing orbs more visible, we will add a soft background to the illustration. Create a new layer on the bottom of the image with 25% opacity and paint soft gradients in different places. Use the colours from step 12 and play with the opacity until you can barely see the glowing orbs.
Get the Creative Bloq Newsletter
Daily design news, reviews, how-tos and more, as picked by the editors.
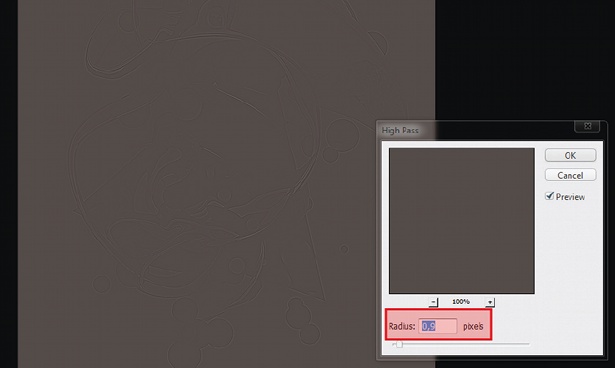
15 To finalise the illustration, flatten the whole image (Layer>Flatten Image), duplicate it, go to Filter>Other>High Pass and select a radius in which you can barely see the contours of the image. Press OK and set the blend mode to Overlay, or Hard Light if you want a very strong sharp effect.

Thank you for reading 5 articles this month* Join now for unlimited access
Enjoy your first month for just £1 / $1 / €1
*Read 5 free articles per month without a subscription

Join now for unlimited access
Try first month for just £1 / $1 / €1

The Creative Bloq team is made up of a group of design fans, and has changed and evolved since Creative Bloq began back in 2012. The current website team consists of eight full-time members of staff: Editor Georgia Coggan, Deputy Editor Rosie Hilder, Ecommerce Editor Beren Neale, Senior News Editor Daniel Piper, Editor, Digital Art and 3D Ian Dean, Tech Reviews Editor Erlingur Einarsson, Ecommerce Writer Beth Nicholls and Staff Writer Natalie Fear, as well as a roster of freelancers from around the world. The ImagineFX magazine team also pitch in, ensuring that content from leading digital art publication ImagineFX is represented on Creative Bloq.
