Create futuristic effects with Photoshop’s 3D tools
João Oliveira explains how to use the 3D panel in Photoshop CS6 to make abstract type-based images
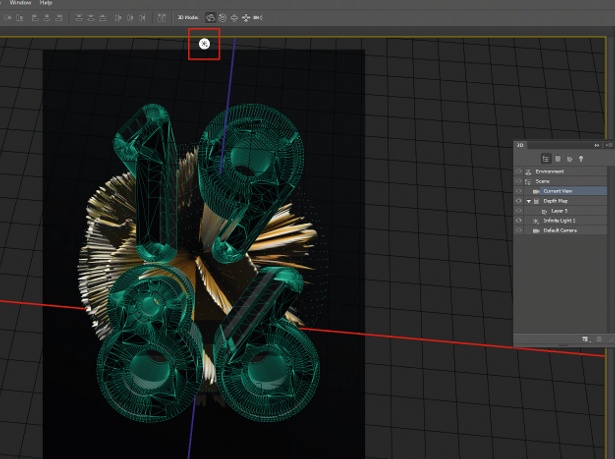
08 Paste the image into your scene, below the sphere layer, and go to 3D>New Mesh From Layer>Depth Map To>Sphere. The results may vary, so try with different images until you get a nice model. Feel free to play around: rotate, move, scale – and don’t forget to experiment with lighting, using the sun icon.
09 To integrate the outcome from the last step, add a Color Overlay. Go to the Blending Options panel (Ctrl/right-click on Layer>Blending Options), check Color Overlay, change the blend mode to Color and its colour to #00ffcc. You can also add an Outer Glow at this stage, using the same colour.
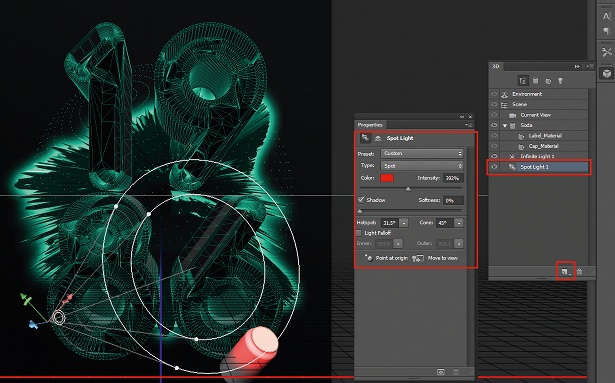
10 The scene needs more so let’s add a new object. Create a new layer on top of everything and go to 3D>New Mesh From Layer>Mesh Preset>Soda. Now create a new light source: on the 3D Panel, click on the paper icon. This will open a menu where you can add new light sources. Select New Spot Light, play with the values and move the light around to focus it on the can.
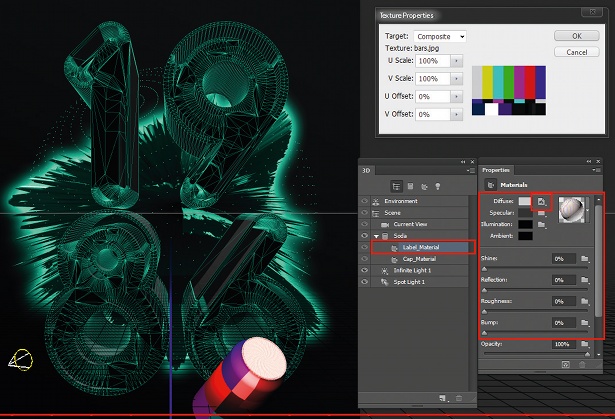
11 Another feature Photoshop provides is the ability to customise materials. Click on Label_Material on the 3D Properties panel. On the right side of Diffuse there’s an icon – click on it and then on Replace Texture. Select any image you like and then move the texture around by clicking on Edit UV Properties.
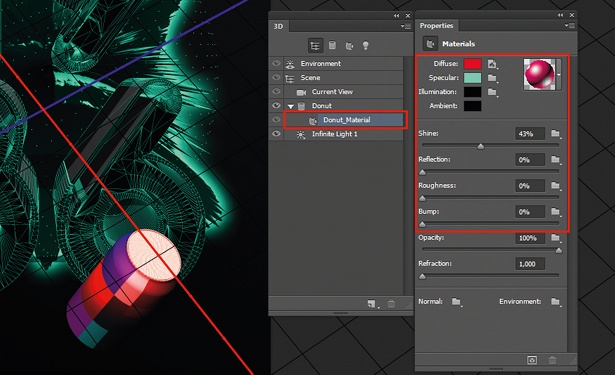
12 Now create another new empty layer, go to 3D>New Mesh From Layer>Mesh Preset>Donut, and play around with the Materials options. I’ve used red as the diffuse color and #00ffd2 as the specular colour, with black for the illumination and ambient. On the Scene tab you can also turn on Lines (like we did in step 03) to give it wireframe look.
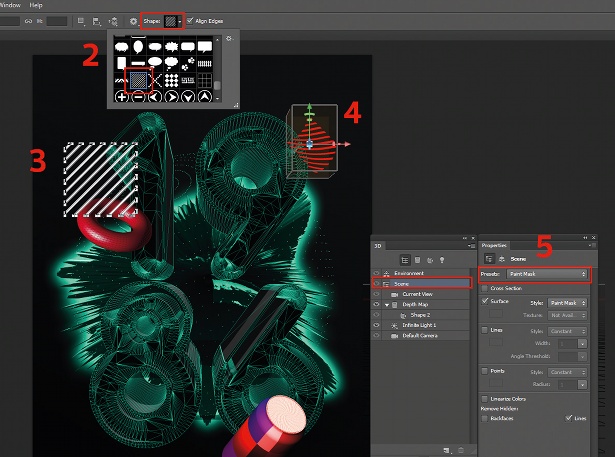
13 Like the vector typography, we can also convert other vector shapes to 3D models. Select the Custom Shape tool, click on the Shape drop-down arrow and select Tiles. Choose any shape and apply it to the scene, then go to 3D>New Mesh From Layer>Depth Map To>Cylinder. Go to Scene Properties and select Paint Mask on Presets, and move and rotate the model around.
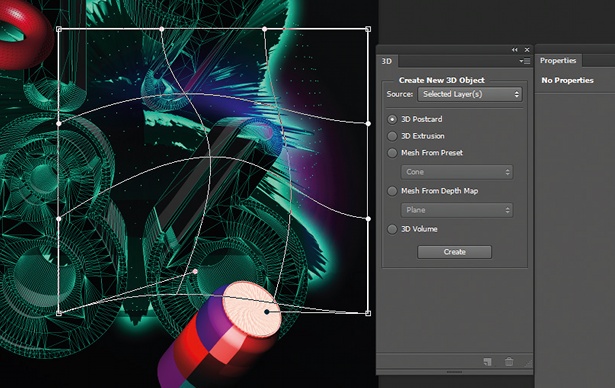
14 In order to add some colour to the scene, create a new layer, change the blend mode to Color Dodge with 50% opacity and use the Circular Gradient tool (T) with #eb0bfd to transparent, to create a gradient. You can also warp the gradient by Ctrl/ right-clicking on it and selecting Warp. Click-and-drag from the bottom left to the middle to change its form a bit.
Get the Creative Bloq Newsletter
Daily design news, reviews, how-tos and more, as picked by the editors.
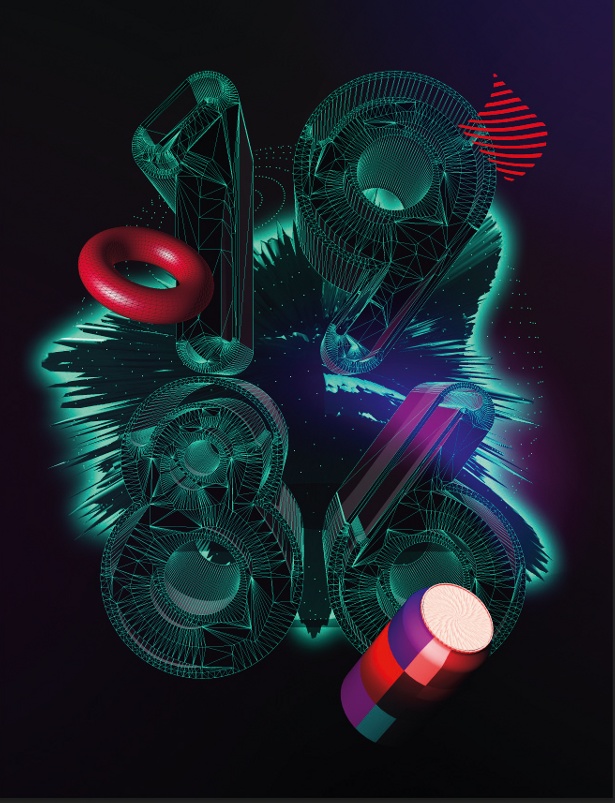
15 Repeat the process again, creating a new layer selecting Linear Dodge (Add) as the blend mode, with 20% opacity, and paint one or two gradients with different colours. I’ve used bright reds, blues and purples.

Thank you for reading 5 articles this month* Join now for unlimited access
Enjoy your first month for just £1 / $1 / €1
*Read 5 free articles per month without a subscription

Join now for unlimited access
Try first month for just £1 / $1 / €1

The Creative Bloq team is made up of a group of art and design enthusiasts, and has changed and evolved since Creative Bloq began back in 2012. The current website team consists of eight full-time members of staff: Editor Georgia Coggan, Deputy Editor Rosie Hilder, Ecommerce Editor Beren Neale, Senior News Editor Daniel Piper, Editor, Digital Art and 3D Ian Dean, Tech Reviews Editor Erlingur Einarsson, Ecommerce Writer Beth Nicholls and Staff Writer Natalie Fear, as well as a roster of freelancers from around the world. The ImagineFX magazine team also pitch in, ensuring that content from leading digital art publication ImagineFX is represented on Creative Bloq.
