Add another dimension
It’s relatively easy to spice up your photos in Photoshop. But how about taking it one step further? The key to success is to fix your colours and enhance them. That way you’ll be sure to achieve eye-catching results
Okay, so you’ve grasped the techniques, but you need more than that if you’re to produce a range of original eye-catching work. Don’t underestimate the power of composition or the importance of balance.
This tutorial will teach you to create stunning effects using glows, loads of Colour Dodge, and lots and lots of neon – hot pinks and lemon yellows are prominent here. You’ll also learn how to utilise white in all the right places, so that white areas look less like negative space and more like the result of added energy and light.
The finer details are very important, too. The small glowing dots used throughout this image may be small, but they add so much. Always pay attention to detail in anything you create – simplicity is good but there are always details that, when added, make all the difference.
This tutorial stresses the importance of strong colour. The background of this piece contains a faint floral pattern, which is key, but very subtle. It does not call your attention or stand out on its own. Rather, it serves its purpose as a background correctly. In addition, another dimension is added using flowers and scanned imagery, giving the image a truly organic feel. So keep in mind the importance of strong colours and solid composition in all your work and you’ll see instant results.
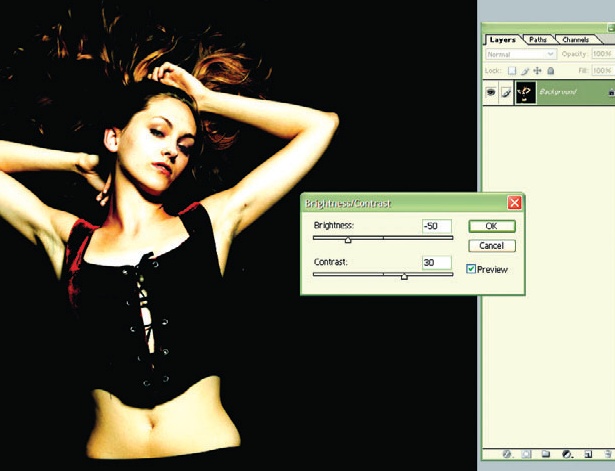
1 Open Model1.tif from the support files. Adjust the Brightness/Contrast to -50 and +30, respectively. Now go to Filter>Sharpen> Sharpen to ensure that the whole image appears as crisp as possible.
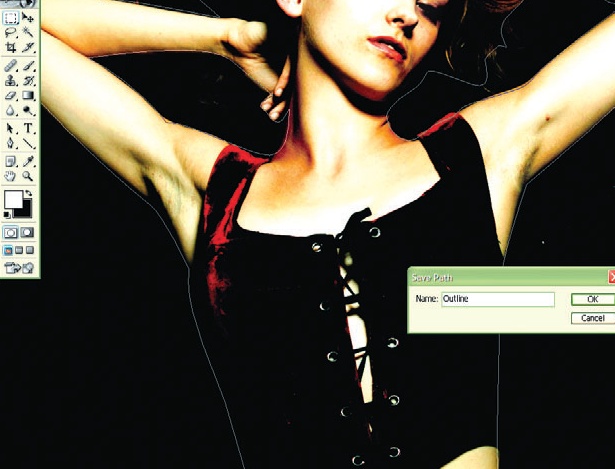
2 Using the Pen tool, draw an outline around the girl’s body. Do not worry about the finer details around the hair, but do make sure that you outline inside the area where her arms bend upwards. Save this Path and label it “Outline”.
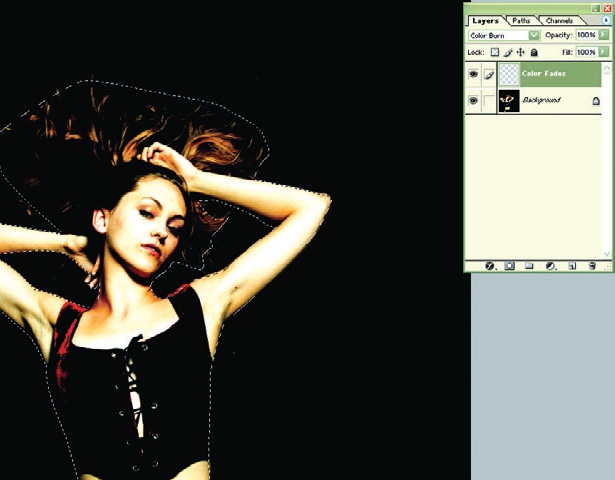
3 Create a new layer named Colour Fades. Set the Blending style to Colour Burn. Select the Path you made in step two and click on Load Path as a Selection.
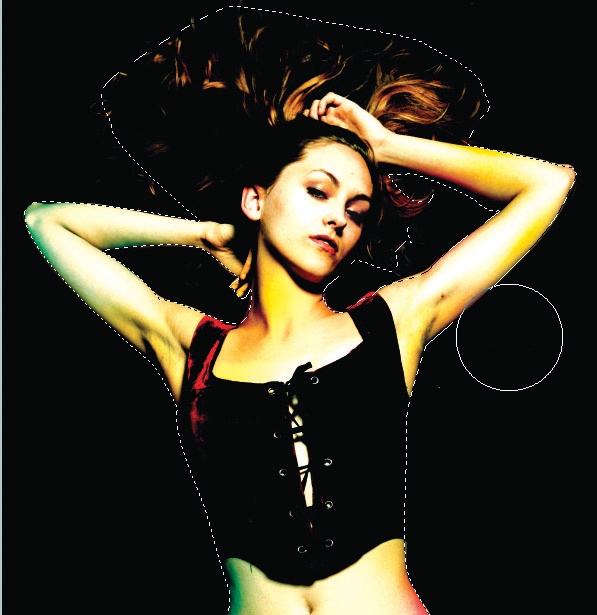
4 Now select a default circle-shaped Brush with soft edges and make the size roughly 550. Using bright pinks, yellows, greens and blues, brush lightly on the girl’s skin using single clicks to add subtle colour to the shadows already present.
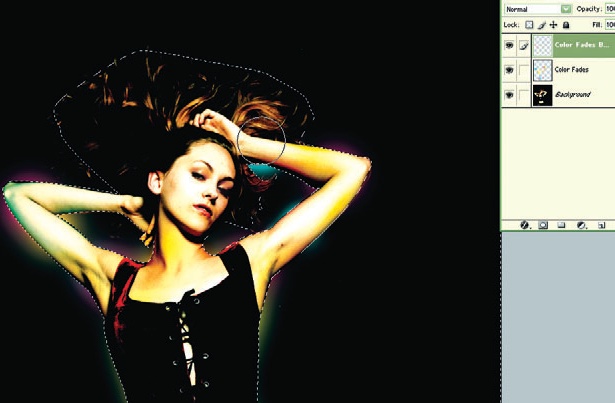
5 Make a new layer and label it Colour Fades Background. Again, click on Load Path as a Selection before choosing Select>Inverse. Repeat step four, but add the soft colour to the background, mostly around the girl’s body.
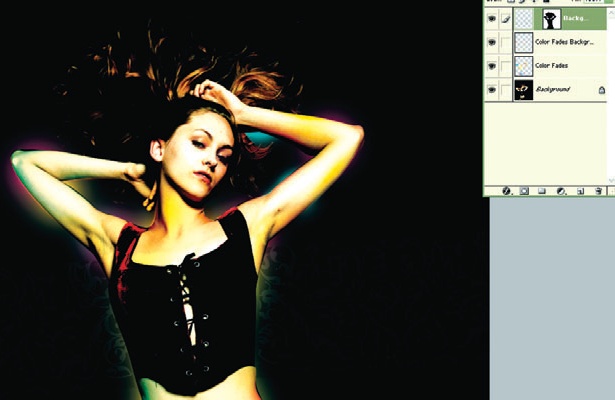
6 Open BackgroundDesign.tif from the support files, Select All and Copy. Go back to the main image, click on Load Path as a Selection and then choose Select>Inverse and then Edit>PasteInto. Rename this layer “Background Design”.
Get the Creative Bloq Newsletter
Daily design news, reviews, how-tos and more, as picked by the editors.
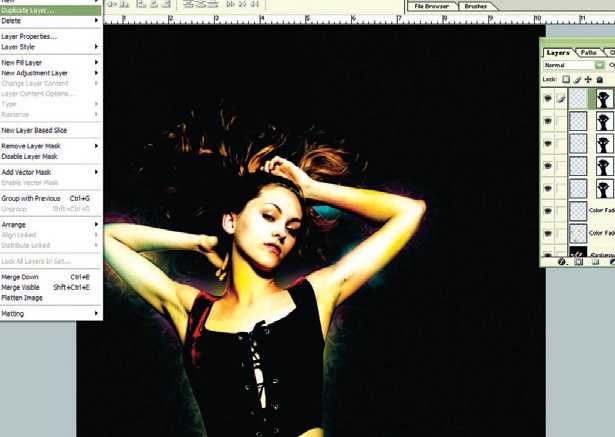
7 Duplicate and move the Background Design layer until you have enough to fill the background. Then merge all of these duplicated layers into one and again label it “Background Design”. Finally, set the Opacity to about 15-20 per cent – whatever looks good to you.

Thank you for reading 5 articles this month* Join now for unlimited access
Enjoy your first month for just £1 / $1 / €1
*Read 5 free articles per month without a subscription

Join now for unlimited access
Try first month for just £1 / $1 / €1

The Creative Bloq team is made up of a group of art and design enthusiasts, and has changed and evolved since Creative Bloq began back in 2012. The current website team consists of eight full-time members of staff: Editor Georgia Coggan, Deputy Editor Rosie Hilder, Ecommerce Editor Beren Neale, Senior News Editor Daniel Piper, Editor, Digital Art and 3D Ian Dean, Tech Reviews Editor Erlingur Einarsson, Ecommerce Writer Beth Nicholls and Staff Writer Natalie Fear, as well as a roster of freelancers from around the world. The ImagineFX magazine team also pitch in, ensuring that content from leading digital art publication ImagineFX is represented on Creative Bloq.
