9 pro tips to cut your design time when using Photoshop CC
Graphic designer Paul Tysall demonstrates how to hone your Photoshop workflow to save time on repetitive pre-press tasks.
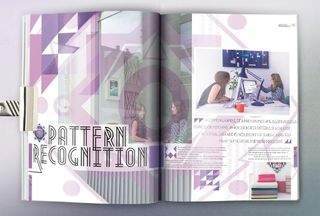
Taking the time to work on streamlining your workflow in Photoshop CC might seem like a contradiction. Free time is a luxury most designers simply don't have. However, in some ways we can be our own worst enemies – sticking to performing certain tasks in a familiar way, even if it's not the most efficient one.
The aim is to let the software do most of the work for you. This guide will look at streamlining the manual tasks for your average print job. I'll focus on the time-swallowing tasks that Adobe has recognised as imperative but fiddly, and for which it has given us some great time-saving tools.
01. Keyboard shortcuts
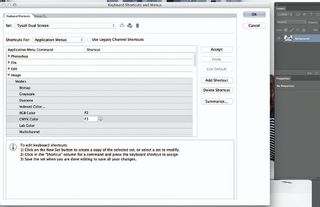
You can find Keyboard Shortcuts under the Edit menu, but get in the habit of hitting Cmd/Ctrl+Option/Alt+Shift K to bring up the options instead. From here navigate to Image, click the triangle to reveal the options and scroll down to CMYK. Now assign a key to it.
02. Standardise your standards
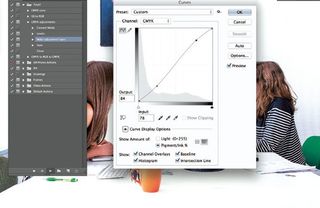
For RGB/CMYK conversions, you can turn a chain of adjustments to an action that you can export as a 'catch-all' conversion droplet. The first stage is the change to CMYK mode, then use Levels to focus on the image's tonal values by dragging the Black and White points in slightly on the histogram.
03. Curves settings
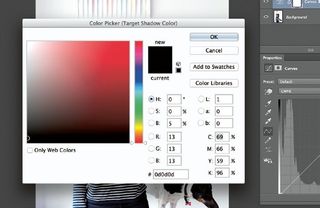
Make Curves appear when batch processing – even if you don't apply it each time. Before you make your action, change the default Curves settings. Open an image and go to Curves. Double-click the Black point sample tool. In colour picker options, HSB Brightness, add a value of 5%.
04. Curves continued
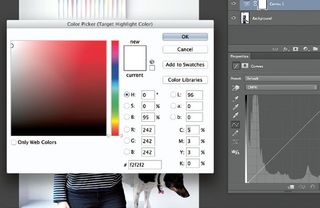
Repeat the process for the White point sample tool, but change the HSB Brightness from 100 to 95. Hit yes to the dialog asking you if you want to save these target colours as default. These settings will help you draw out details when using the Black, Mid-point and White sample tools.
05. Smartly sharpened images
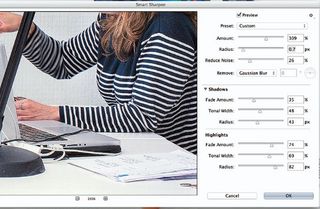
Seeing as the print process is notorious for softening images, it's key to sharpen them in Photoshop. Using Smart Sharpen, start out by dragging the Amount percentage up – the higher the resolution, the larger the values – whilst previewing a high contrast edge that sits in the focal zone.
Get the Creative Bloq Newsletter
Daily design news, reviews, how-tos and more, as picked by the editors.
06. Masking out using Quick Selection
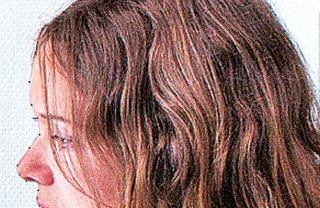
Invariably you will need to isolate part of an image to make targeted alterations. Used in combination with a Wacom tablet, the Quick Selection tool can shave off valuable time. Plus, the Refine Edge option can output your selection directly as a Layer Mask that you can assign to an adjustment layer.
07. The Quick Selection tool
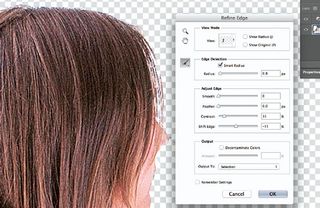
Hit W to go to the Quick Selection Tool. Paint over the areas you're targeting and hold Opt/Alt down to subtract unwanted pixels. Hit the F key multiple times to shuffle through preview modes. Click the Smart Radius option under Edge Detection, and clean the edges by painting along them.
08. Stroke of genius
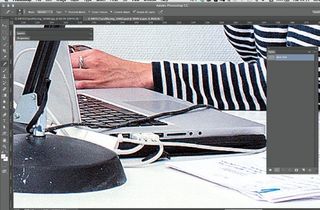
This is a trick for cloning out an unwanted element in a CMYK image. Plot out an open-ended path along the item, select the Spot Healing Brush tool and set the brush size so that it will cover the diameter of the item. Now, in the Path panel click the 'Stroke path with brush' icon.
09. Smart Layers
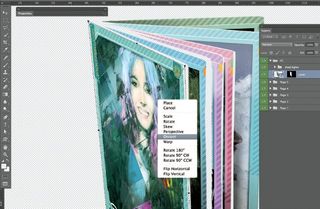
If you're manipulating multiple designs onto the same source image you need to convert your design into a single Smart Layer. To do this, select all the layers then Ctrl+right-click and select Convert to Smart Object. Drag the Smart Layer into your base photo file, then create a Layer Mask.
Words: Paul Tysall
Paul is a former ImagineFX art editor with over 15 years publishing design experience. He now works as a freelance graphic designer and illustrator. This article originally appeared in Computer Arts issue 228.

Thank you for reading 5 articles this month* Join now for unlimited access
Enjoy your first month for just £1 / $1 / €1
*Read 5 free articles per month without a subscription

Join now for unlimited access
Try first month for just £1 / $1 / €1
The Creative Bloq team is made up of a group of design fans, and has changed and evolved since Creative Bloq began back in 2012. The current website team consists of eight full-time members of staff: Editor Georgia Coggan, Deputy Editor Rosie Hilder, Ecommerce Editor Beren Neale, Senior News Editor Daniel Piper, Editor, Digital Art and 3D Ian Dean, Tech Reviews Editor Erlingur Einarsson and Ecommerce Writer Beth Nicholls and Staff Writer Natalie Fear, as well as a roster of freelancers from around the world. The 3D World and ImagineFX magazine teams also pitch in, ensuring that content from 3D World and ImagineFX is represented on Creative Bloq.
