How to improve your character drawing
Paint dynamic creatures for the big screen using Photoshop.
07. Make use of highlights
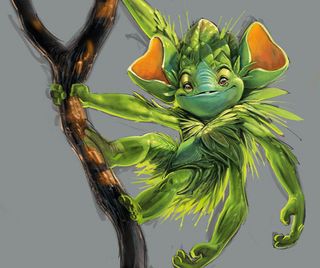
I create a new top layer and call it Highlights. It's time to shift back to the lit areas. (I jump from shadow to light and back again to keep everything balanced.)
I select the Color Picker, grab some direct light colour and brighten the colour up significantly. Then I paint areas that require a bright highlight. I also start adding rim lighting and some deeper shadows.
08. Use an autumnal background
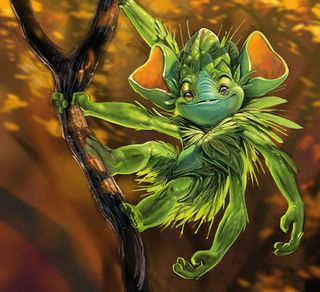
Next, I create a layer underneath all layers and name it Background. Using a natural brush I very quickly start laying in some autumnal colours to complement the greens of the creature.
I treat it loose and abstract, and use darker values to ensure that the creature pops from the background. I then click Filter>Blur>Gaussian Blur, and set the blur at 25 pixels.
09. Introduce photo textures
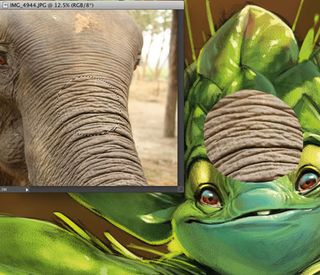
Elephant textures make great creature skin. I select a section with the Lasso tool, drag it over to the illustration and reduce the Opacity to 30 per cent. Then I click Image> Adjustments>Exposure, increase the Gamma setting and adjust the Exposure to increase the contrast. I tweak these adjustments and the Opacity until the texture looks right.
10. Fit the texture to the creature
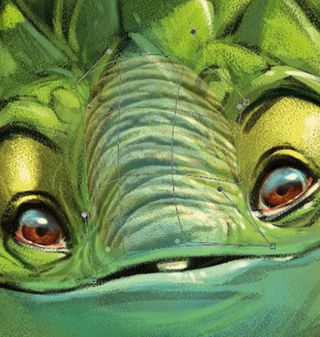
Next, I click Edit>Free Transform, resize the texture to fit and then select Edit> Transform>Warp. Now I can start to shape the texture to fit the creature's form.
I then repeat steps eight and nine to create a mosaic of textures on the creature. I experiment with a variety of textures – here I've used both elephant and leaf textures.
11. Add highlights to textures
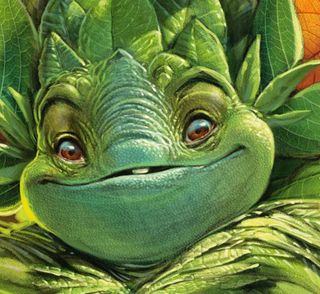
By the end of this stage, the textures should feel like a part of the creature. I start by creating a layer on top and calling it Texture Highlights. Then I select a fine brush and start to highlight over the textures where the light falls. This should be done tastefully. A little goes a long way here.
12. Apply markings
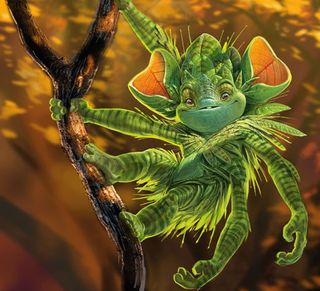
Now I create a layer under the Texture Highlights layer and call it Markings. I set the layer's Blend mode to Multiply.
Now using mid-tone greens and reds I go in and delicately add markings to the creature's skin. This stage adds interest and believability, and helps to describe the form of the creature.
13. Depict foreground elements
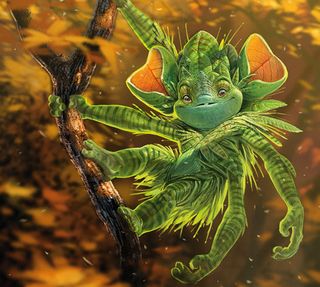
I create a new layer on top and begin to loosely lay in foreground leaves and branches. Because this will be blurred there's no need to get detailed. However, I do build it up, using several layers.
Once everything is laid in, I combine the layers and go to Filter>Blur>Gaussian Blur. Then I set the blur to about 35 pixels. This will give the piece a nice feeling of depth.
14. Adjust depth of field
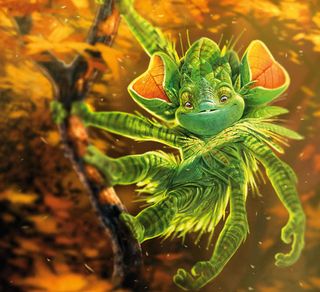
I copy all of the creature layers and combine them into one layer. Then I turn off all of the original individual layers. I select the Blur tool and pick the Airbrush setting. I set this to about 300 pixels and a strength of 50 per cent.
Now I go in and begin to blur out areas of the creature layer that I want out of focus. I do this to divert the viewer's attention to areas of interest, such as the face. This also gives the image a bit of a photographic look. Finally, I flatten the image and adjust the exposure and saturation to get the composition nice and bright.
This article originally appeared in ImagineFX. Subscribe today.
Related articles:

Thank you for reading 5 articles this month* Join now for unlimited access
Enjoy your first month for just £1 / $1 / €1
*Read 5 free articles per month without a subscription

Join now for unlimited access
Try first month for just £1 / $1 / €1
Get the Creative Bloq Newsletter
Daily design news, reviews, how-tos and more, as picked by the editors.
A graduate of Ringling College of Art and Design, Aaron Blaise worked as an animator for Walt Disney for 21 years. He was co-director of Brother Bear and nominated for an Oscar. He has worked in Beauty and the Beast, The Lion King, Mulan and more hit animators movies. Aaron now teaches animation techniques from his studio, online and regularly gives talks at art and animation events.
