The easy way to build quirky characters in Illustrator
Use the vector drawing tool to transform basic geometric shapes into colourful creatures.
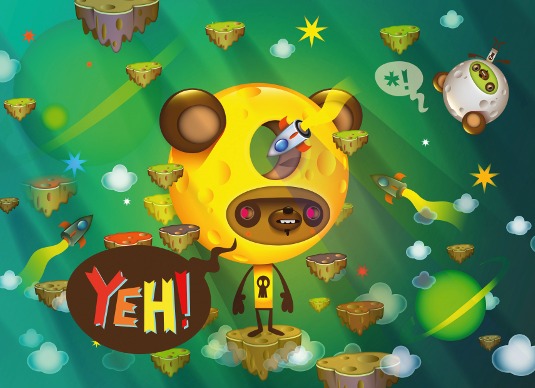
When working in Illustrator it is possible to create brilliant, imaginative characters with comparative ease. One of the best ways to start is by taking a rough pencil sketch, transferring it into Illustrator and using simple geometric shapes to create a basic guide. Various tools and techniques can then be used to add in quirky details, imperfections, highlights and shadows to build up the character.
In this workflow guide I will take you through how to use Illustrator's tools to create your own unique creatures and bring them to life on the page.
Looking for more Illustrator tips? We've found 100 amazing Illustrator tutorials to boost your skills.
01. Get sketching
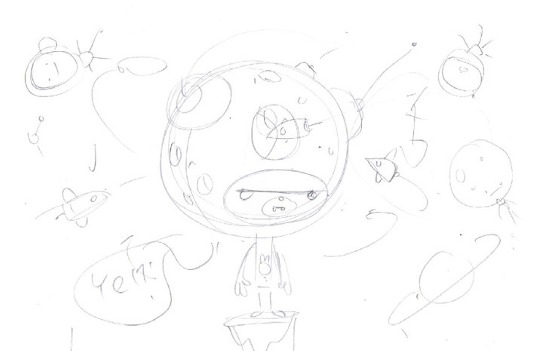
Start with a simple concept sketch of your main character. When you're happy, scan it in, save it and place it in a new Illustrator document. Lock the layer your sketch is on and create a new layer. Change the opacity to 50% (Window>Transparency) to help you see the layer above more easily.
02. Build the character
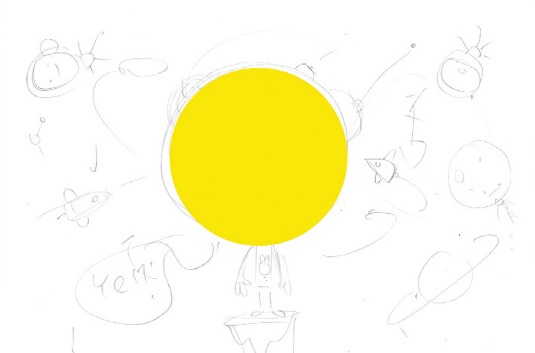
Using your sketch as a guide, begin to create your character on the new layer. Start with the head, which is a circle with a solid fill and no stroke. Reduce the opacity so you can see your sketch behind. Build up your character using basic shapes. It's a good idea to tweak the shapes so they're not perfect.
03. Shrinking circles
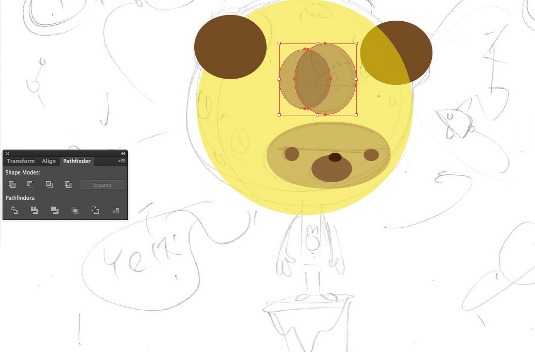
I've given my character a hole in his head. Start with two circles, select both and choose the Divide tool in the Pathfinder panel. Use the Direct Selection tool (A) to delete the overlapping part. Select the head and the central ellipse and 'divide' them. Now delete the 'hole' across the different layers.
04. Colouring in
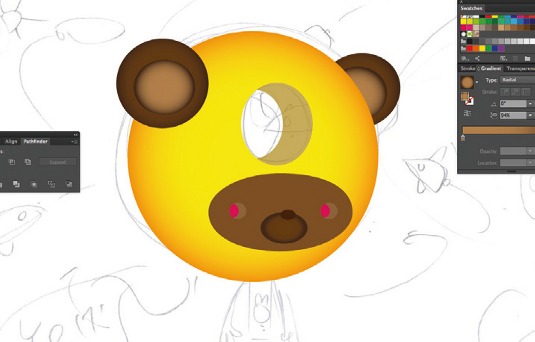
To add colour, bring the transparency of the head back up to 100%, and give it a radial gradient fill. You can alter the shape of the gradient fills by adjusting the angle and aspect ratio in the Gradient panel. You can also drag one of the colour sliders across, so the gradient fades quickly at the edges.
Get the Creative Bloq Newsletter
Daily design news, reviews, how-tos and more, as picked by the editors.
05. Highlights
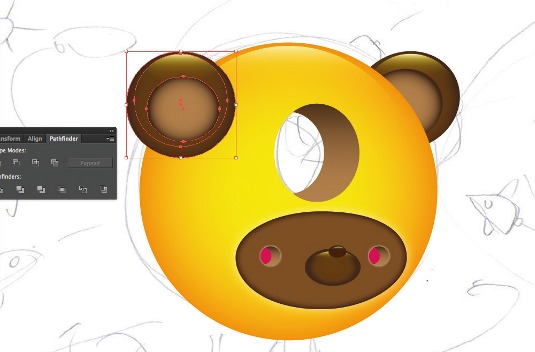
Next, add some highlighted areas. Go into Isolation Mode (double-click the path using the Selection tool) and add a circle with a linear gradient fill at 90 degrees. Use an off-white at the top of the gradient. The bottom is yellow with a transparency of 0%, which blends with the colour of the head.
06. Shadows

For shadows, create a circle over the left ear, distorting it downwards and giving it a gradient fill. In the Transparency panel, adjust the blending mode to Multiply. Send this backward (Cmd/Ctrl+[) so it sits under the ear. Add more shadows under the mouth and nose, tweaking the gradient and transparency.
07. Extra details
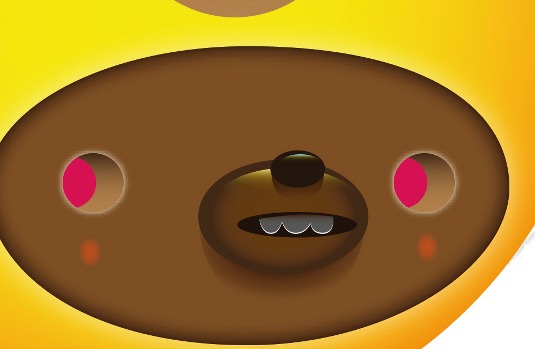
Now add the final facial details, such as the mouth and teeth. I've also given my character some craters on his face. Create an ellipse with a gradient fill - the same colour combination as the head, but make this a linear gradient. Reverse the direction of the gradient on the opposite side of the head.
08. Building the body
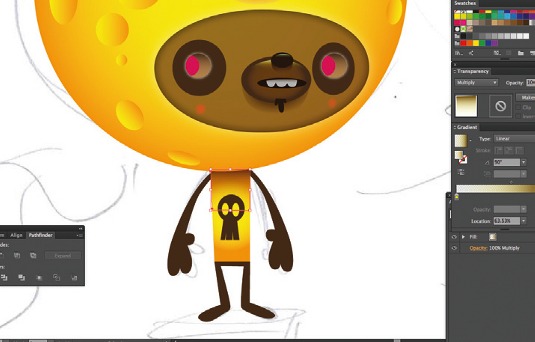
For the main part of the body use a simple square and distort it slightly. This has the same radial gradient fill as the head. Roughly copy the arms and legs from the sketch. These should just be basic shapes, without unnecessary details. Colour these to match the darker colours on the ears and face.
09. Bring the environment to life
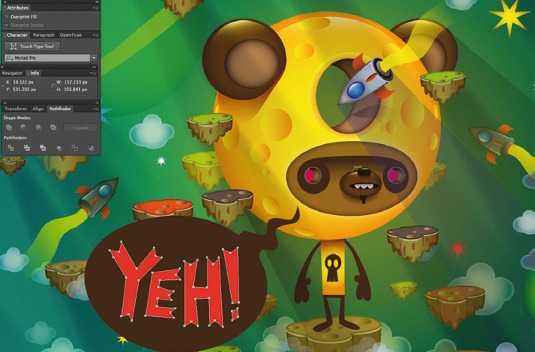
An environment completes the scene - I've included planets and islands using the same shading style across the objects, and added a background colour fill. Finally, check your original sketch for any details you've forgotten - here, there was a mark on the character's brow which made him look meaner.
Words: Jonathan Ball
Jonathan Ball runs Pokedstudio, an illustration and design studio based in Cardiff. This article originally appeared in Computer Arts issue 227; you can find an extended version in Computer Arts Studio Training: Illustrator.

Thank you for reading 5 articles this month* Join now for unlimited access
Enjoy your first month for just £1 / $1 / €1
*Read 5 free articles per month without a subscription

Join now for unlimited access
Try first month for just £1 / $1 / €1

The Creative Bloq team is made up of a group of art and design enthusiasts, and has changed and evolved since Creative Bloq began back in 2012. The current website team consists of eight full-time members of staff: Editor Georgia Coggan, Deputy Editor Rosie Hilder, Ecommerce Editor Beren Neale, Senior News Editor Daniel Piper, Editor, Digital Art and 3D Ian Dean, Tech Reviews Editor Erlingur Einarsson, Ecommerce Writer Beth Nicholls and Staff Writer Natalie Fear, as well as a roster of freelancers from around the world. The ImagineFX magazine team also pitch in, ensuring that content from leading digital art publication ImagineFX is represented on Creative Bloq.
