3 more Allegorithmic challenge finalists share their tips
Three pro artists breakdown their Allegorithmic challenge winning titans, using Substance Designer or Substance Painter.
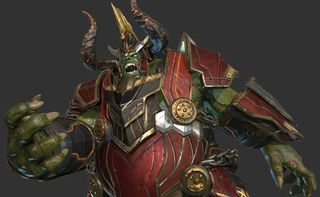
Here we ask the last three finalists of the 3D World and Allegorithmic challenge to breakdown the creation process, sharing their texturing tips.
Koronus
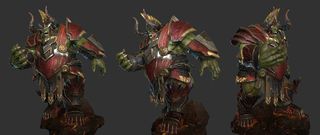
Self-taught freelance character artist Wandah Kurniawan used the contest as an opportunity to learn how to create armour, drawing on concept designs for Crytek's action-adventure game Ryse: Son of Rome to create his Titan, Koronus.
Like many of his fellow contestants, Wandah found that it was the modelling work that took up most of this time on the project. "It was my first time learning hard-surface [techniques] in ZBrush, so I really wanted to give my attention to the sculpting," he says.
Fortunately, Substance Designer ensured that the texturing work went smoothly in the time remaining. Wandah made good use of its features, including the ability to generate dirt, rust and scratches automatically, as well as multi-material blending. "I particularly enjoyed multi-material blending: it works well with SVG masks," he says.
Use SVG masks
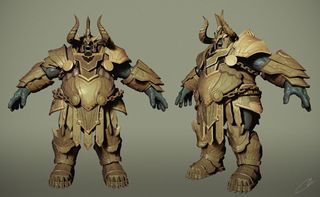
In Substance Designer, you can create a colour mask by using Bake model information, then selecting Convert UV to SVG from the Information to bake drop-down of the dialog that appears.
Connect the resulting map to a new SVG node as a background to edit the mask. You can add more detail to the mask using the Pen or Extrude tools.
Anti-alien Defender
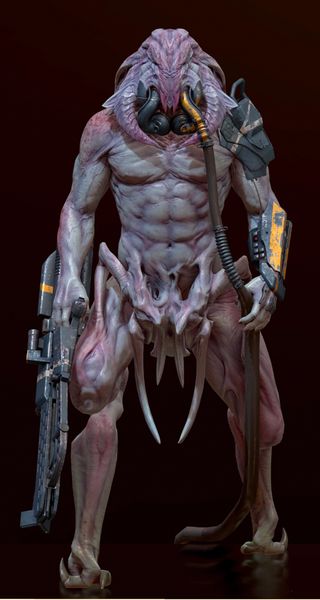
For his Titan – full name, Anti-Alien Two-Legged Defender – Capcom senior character artist JaeHyup Keum drew on creatures from games and movies. "My first idea was to mix an alien with the anatomy of a fantasy creature like a centaur," he explains.
Get the Creative Bloq Newsletter
Daily design news, reviews, how-tos and more, as picked by the editors.
With many game developers moving to a physically based rendering workflow, JaeHyup says that the Substance applications have a key role to play in the process. "They’re great tools for creating PBR shaders," he says.
For JaeHyup, the most challenging part of the work was texturing the organic parts of his Titan. "It was the first time I have tried to create pale skin with a real-time shader," he says. "I used both subsurface scattering and translucency at the same time."
However, Substance Designer's tools for generating rust and worn edges made texturing metal straightforward. "They are a great time saver when creating mechanical parts," says JaeHyup.
Combine normals
To create rusty metal in Substance Designer, I began with a base metal material. Substance materials have Detail Normal information already.
You can combine the Detail Normal of the material with the original normal map from the mesh using a Normal Combine node. Use a Transformation 2D node to control the scale of the texture detail.
Add Rust
I used a Rust Weathering node to create the rust. It needs inputs from curvature, ambient occlusion and position maps: you can generate these using the Bake model information command. Just connecting the maps gives quite a decent rust effect.
Mithala (Kreiken)
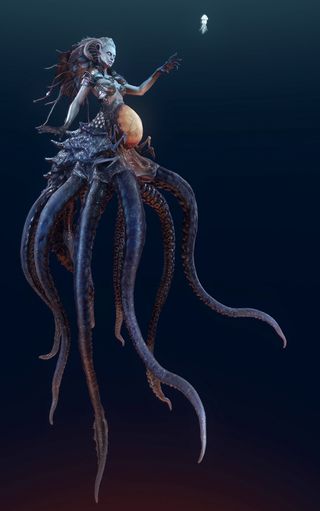
Currently a character artist at Georgia-based game developer Xaviant, Kevin Murphy spent a month working on Mithala (Kreiken), his marine Titan, regarding the project primarily as a technical challenge.
"The main inspiration was to create a multi-material character with a lot of texture types," he says. Not surprisingly for a creature that blends humanoid and invertebrate features, and contains both organic and inorganic elements, Kevin says that his biggest challenge was managing all of the different details in the textures, but that "it was rewarding to see how they all worked out together."
The Substance applications' fast, intuitive workflow also made the task a lot less daunting. "Substance Painter and Designer are both super-easy to pick up if you understand nodes and layers," says Kevin. "My favourite parts of the software were the node system, and multi-channel painting to layers: a big time saver."
File import
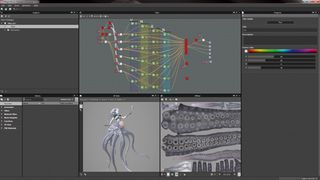
To set up Substance Designer for work, I drag and drop the .sbs file into the Explorer and the .fbx file into the 3D View.
Blend switching
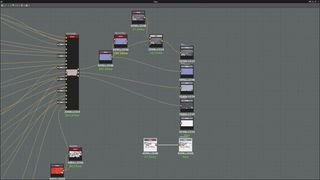
I like to bring a simple target paint in for my diffuse texture and use a Blend node to turn the main output on and off to see how close the final texture is to where I want it.
This also helps to assess the result of any drastic changes further down the pipeline by comparing the results with previous iterations.
Using material IDs
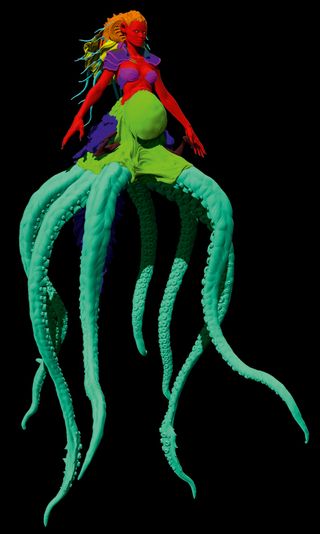
It's easy to plan materials in Substance Designer using the Material Selector or a colour mask. I like to do a Polypaint fill in ZBrush for reference.
This can either be baked into a vertex colour map or used to fill in a Material ID map baked from base colours, giving objects unique colour IDs.
This article originally appeared in 3D World issue 189.
Like this? Read these:
- Download free textures: high resolution and ready to use now
- The best photo apps for iPhone, iPad and Android
- The best Photoshop plugins

Thank you for reading 5 articles this month* Join now for unlimited access
Enjoy your first month for just £1 / $1 / €1
*Read 5 free articles per month without a subscription

Join now for unlimited access
Try first month for just £1 / $1 / €1
The Creative Bloq team is made up of a group of design fans, and has changed and evolved since Creative Bloq began back in 2012. The current website team consists of eight full-time members of staff: Editor Georgia Coggan, Deputy Editor Rosie Hilder, Ecommerce Editor Beren Neale, Senior News Editor Daniel Piper, Editor, Digital Art and 3D Ian Dean, Tech Reviews Editor Erlingur Einarsson and Ecommerce Writer Beth Nicholls and Staff Writer Natalie Fear, as well as a roster of freelancers from around the world. The 3D World and ImagineFX magazine teams also pitch in, ensuring that content from 3D World and ImagineFX is represented on Creative Bloq.
