Animate a logo reveal in Cinema 4D
3D animation meets graphic design as Tim Clapham shows you how to animate and composite a pro-quality logo sequence.
Stage 5: Compositing the animation
This stage will work through the different render passes and how you can use After Effects to manipulate these render passes, by adjusting the opacity, composite modes and adding effects. By using multiple passes when you render your 3D, you have the added control of being able to adjust each individual element in post. This gives you unlimited control and saves a lot of time over re-rendering.
25. Enhance the composite
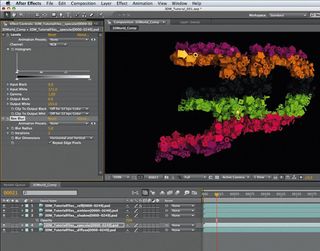
Select Specular in the 3DWorld_Comp area. Select Effect > Color Correction > Levels. In Effect Controls, set Input White to 170. Add Effect > Blur & Sharpen > Box Blur. Set Iterations to 2 and Blur Radius to 5. Tick Repeat Edge Pixels. Set the Shadow layer’s Opacity to 70%. For the Reflection layer, add Effect > Blur & Sharpen > Box Blur; set Blur Radius to 2.5 and Iterations to 2. Tick Repeat Edge Pixels.
26. Reverse the composition
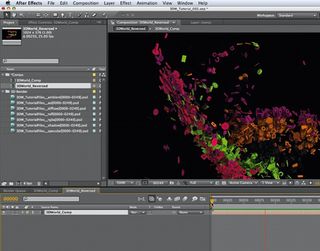
In the Project window, drag the 3DWorld_ Comp onto the New Composition icon to make a copy of it: name it 3DWorld_Reversed. Open the comp and select the only layer. Choose Layer > Time > Time Stretch. Set Stretch Factor to -100%. Click OK. Press the [ key to position the layer at the beginning of the comp.
27. Use a pass as a track matte
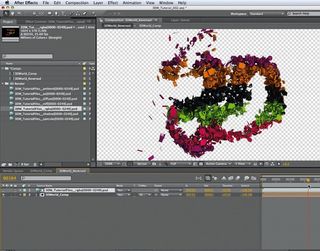
Drag the diffuse pass from the Project window into the 3DWorld_Reverse comp, above the existing layer. Set the 3DWorld_Comp layer’s TrkMat to Alpha Matte. Select the diffuse layer and choose Layer > Time > Time Stretch. Set Stretch Factor to -100%. Click OK. Press the [ key to position the layer at the beginning of the comp.
28. Add some solid layers
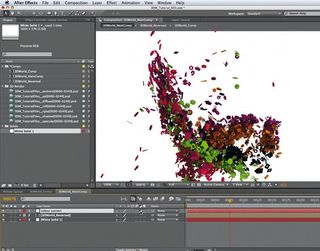
Drag the 3DWorld_Reversed comp onto the New Composition icon. Rename it as 3DWorld_Main. Open the Comp. Choose Layer > New > Solid. Click Make Comp Size, set Color to white and click OK. Drag the layer to the bottom of the timeline. Choose Edit > Duplicate. Drag the new layer to the top of the timeline and activate its Adjustment Layer. (Press [F4] if you can’t see the option in the timeline.)
29. Make colour adjustments
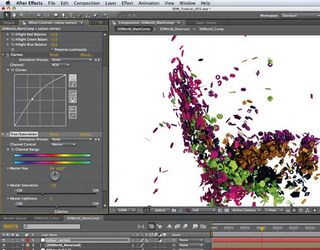
Choose Effect > Color Correction > Color Balance. Adjust the values as follows: Shadow Red -9, Shadow Green 7, Shadow Blue 17, Hilight Red 14, Hilight Green -7, and Hilight Blue -9. Tick Preserve Luminosity. Select Effect > Color Correction > Curves. Adjust the curve to brighten the mid-tones. Select Effect > Color Correction > Hue / Saturation; set Master Saturation to -35.
30. Further colour enhancements
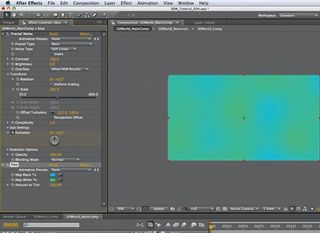
Add another white Solid to the top of the timeline. Select Effect > Noise & Grain > Fractal Noise. Set Complexity to 1 and Scale to 300. At frame 0, add a key for Evolution by clicking its stopwatch. At frame 249, set Evolution to 1x. TRAINING Motion graphics in Cinema 4D
Get the Creative Bloq Newsletter
Daily design news, reviews, how-tos and more, as picked by the editors.

Thank you for reading 5 articles this month* Join now for unlimited access
Enjoy your first month for just £1 / $1 / €1
*Read 5 free articles per month without a subscription

Join now for unlimited access
Try first month for just £1 / $1 / €1
The Creative Bloq team is made up of a group of design fans, and has changed and evolved since Creative Bloq began back in 2012. The current website team consists of eight full-time members of staff: Editor Georgia Coggan, Deputy Editor Rosie Hilder, Ecommerce Editor Beren Neale, Senior News Editor Daniel Piper, Editor, Digital Art and 3D Ian Dean, Tech Reviews Editor Erlingur Einarsson and Ecommerce Writer Beth Nicholls and Staff Writer Natalie Fear, as well as a roster of freelancers from around the world. The 3D World and ImagineFX magazine teams also pitch in, ensuring that content from 3D World and ImagineFX is represented on Creative Bloq.
