How to sketch and draw hands
Hands can be difficult to draw correctly, so follow this guide to learn how to make light work of it, including a quick guide, a more in-depth tutorial and insight into hand anatomy.
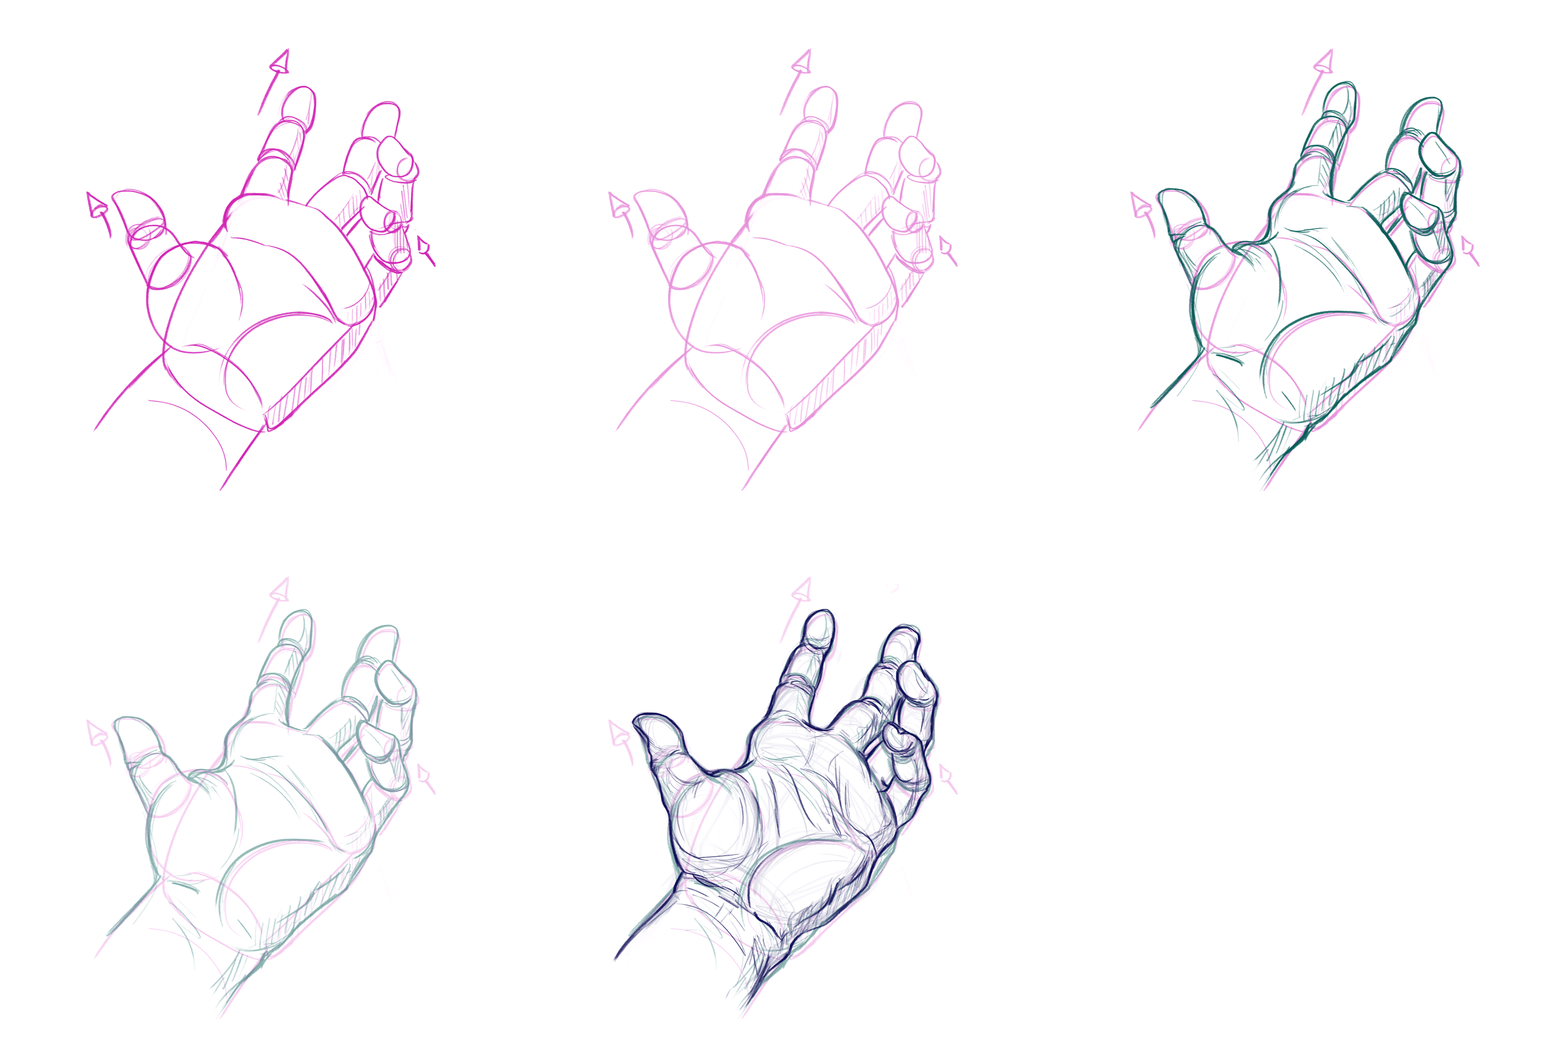
To draw hands, you need to look past the complexity of the hand's anatomy and recognise simple rules that will help you draw from a model or even your own imagination. Although they're notoriously tricky to get right, there are some sketching tips and tricks you can use.
To help you, we've got three tutorials by artists Kate Oleska, Brynn Metheney and Stan Prokopenko to help you explore hands. First, Kate breaks the process down into four simple steps to create a quick sketch. She starts by exploring the structure of the hand, and then looks at how to translate this into a drawing. Watch the video below, and follow her written steps beneath that.
Below, we also have a more in-depth guide on how to draw hands by Brynn, which breaks hand gestures into shapes for a more refined and realistic style, as well as some information on hand anatomy from Stan. But first, here are four simple steps for creating sketches that capture the essence of a hand, at speed.
How to sketch a hand quickly
01. Consider how hands work
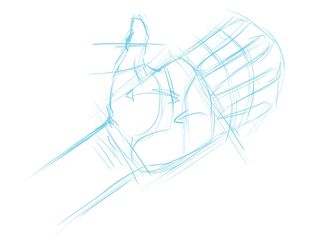
The most important thing in drawing hands is to understand their anatomy. Look at your own hand – it (usually) comprises of a palm, thumb, index finger and the three remaining fingers, which even though they can be moved separately, work together when it comes to grabbing objects. Move your hand and notice how your fingers and thumb bend and move, and what happens to the palm.
02. Find the right gesture
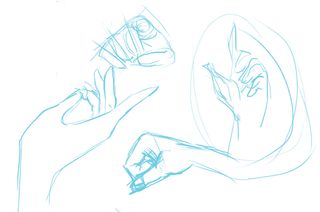
Before you start drawing a hand, make sure you pick an interesting gesture. Try to experiment a lot at this point. A well-drawn gesture can communicate more than a hundred words. Be your own model and actor. Perform a gesture and notice what happens to your hand. Try to emulate those gestures in some fast and loose sketches.
03. Construct your sketch
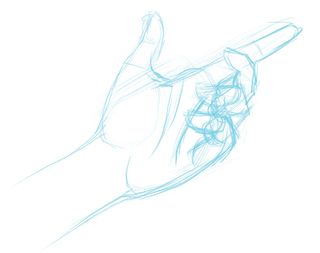
Once you choose the gesture you want to draw, start sketching it in a more precise way. Ask someone to pose for you or observe your own non-drawing hand. Start with bigger shapes; don't focus on small wrinkles or fingernails yet. A sturdy well-constructed sketch will go a long way. Observe how the elements of a hand work together and what happens to the skin and muscles.
04. Work in the details
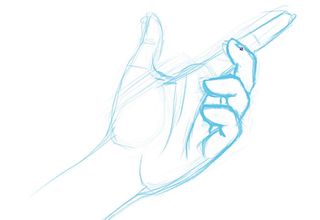
When you are happy with the first sketch, start refining it. Enhance the lines that are important and erase those that aren't. Add wrinkles, fingernails and veins if they are visible. When drawing fingernails, remember that they are not pasted on top of the fingers, they are well embedded in the tips of the fingers. Drawing them correctly is very important.
Get the Creative Bloq Newsletter
Daily design news, reviews, how-tos and more, as picked by the editors.
How to draw a hand
01. Look inside the hand
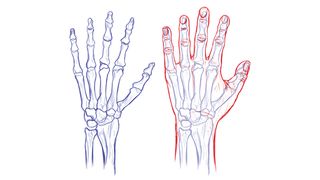
The human hand comprises bone, tendon, lots of connective tissue plus muscle and fat. It’s a strong and flexible appendage. Getting to know how it's formed and how it works can really help you learn how to draw hands. It can be helpful to sketch out skeletal studies of human anatomy in general but, when learning how to draw hands, a lot of the form we know is lost at the skeletal level.
However, if we overlay a surface view on top of the skeletal view, we can begin to appreciate where the skeleton sits within our hands. Scroll down for an in-depth look at the anatomy of the hand, so you can start to understand how the mechanism works and use that knowledge to inform your drawing.
02. Break the hand into shapes
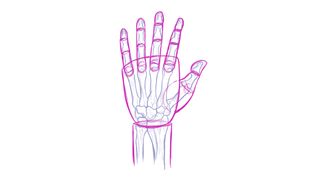
You can lay in broad shapes over the skeletal view in order to build the hand. Use a flattened wedge-like shape for the palm; rectangles for the digits and a teardrop shape for the thumb. You can use the skeletal image above as a base for this step (click on the icon in the top right to enlarge the image).
When learning how to draw hands, simplifying the forms like this will help to remove the pressure of rendering out a perfect hand from the start. From here, you can begin to fill out the shapes into 3D forms to help build the hand and pose it in perspective.
03. Build the hand in 3D
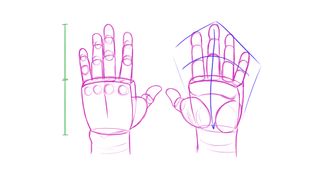
Now it's time to develop the forms to make the hand drawing feel more 3D. Here, our flattened wedge for the palm gains another dimension, the fingers become cylinders and the joints become spheres. We'll call this view of the hand the planar view.
By drawing through our forms, we can show volume, as you can see above in the palm pads. This is also a good time to work on proportion and placement. Notice how the palm is about as long as the middle finger (the green lines indicate this). Remember that the fingers are never the same length or perfectly straight. What sells this is imperfection.
Note the blue lines indicating the angle at which the fingers end. We can also see that the middle finger stems straight from the middle of the hand. Paying attention to these proportions will help you ensure your hands look natural and accurate.
04. Pose the shapes
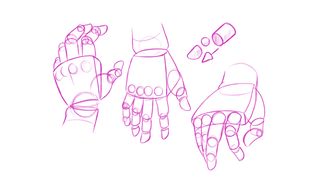
Once you've drawn a 3D version of your first hand, you can try out some poses. By breaking the hand into simpler forms and using contour to explore volumes, you can start to arrange the hand in different poses without worrying too much about detail.
You can use your own hands as a reference, but use the planar view to help keep it simple. This way, you can quickly draw out poses of hands without worrying too much about detail. In creating this tutorial, I found myself looking at my own two hands quite a bit. However, if you need to use your own hands to sketch, you might need to ask a friend or family member to help out.
Note the small diagram of the cylinder and sphere above. Fingers can be unruly at times – it's best to keep them very simple and utilise 3D shapes to represent them at this stage.
05. Get started with planes
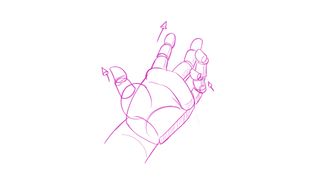
Once you've had some fun with posing, pick a pose that you like and, using your own hand as a reference, draw the hand in the planar view. In the sketch above, the little cones indicate which way the cylinders are travelling. This can help you to keep a grasp on where the curves of the cylinders need to bend.
Again, we want to keep it simple at this stage and not worry about detail. You want to capture proportion, perspective and volume. Note that it's important to work lightly at this stage if you're using pencil.
06. Find gesture and forms
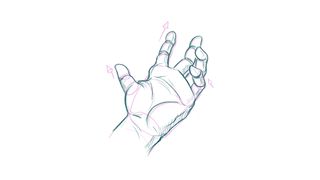
We're working digitally in our examples, so I'll knock back the opacity of the planar drawing here to begin to find the forms I see on my own hand. If you're working traditionally on paper, be sure to start out light and gradually build up volume and forms with heavier lead only as you get to the end of your study.
From here, you can use the planar view as a guide to help lay in the forms of your own hand as you look at it. Be careful to take note of how the forms curve around each other and also bear in mind the silhouette of your hand. In the example above, you can see where I've deviated from the pink line and instead used it as a guide to find where the forms turn in space.
07. Begin to lay in detail
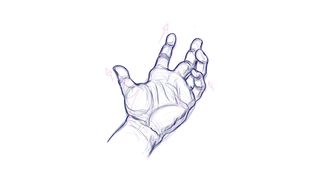
Now you can push back the first two layers, or switch to a heavier lead to begin to lay in those details. You can see how helpful the construction of both the planar view drawing and the gesture drawing really help me place details like wrinkles and creases in the hand. I can also begin to place fingernails and render out the side of the palm.
Hand anatomy
Hands are complicated pieces of anatomy, so they can be hard – even intimidating – to draw. But if you start to understand hands inside out, you can remove the guesswork. By having an understanding of all the dimensions, structures and joints, you have a blueprint that can allow you to make confident decisions about how you represent the hand. Read on for a deep dive into the structure of the hand beneath the skin so you can learn how to draw hands well.
01. The arm bones
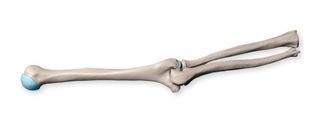
The lower arm is split into two bones. In our forearm, the radius can rotate around the ulna so our hands can flip over. The radius and ulna are three-quarters the length of the humerus. The upper arm contains the femur – a thick, strong bone. It’s shaped like a mallet, with a long cylindrical body and a set of big bumps (condyles) on the bottom. The femur is three cranial units long.
02. The bones of the hand
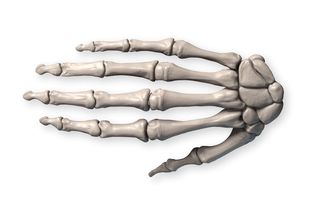
Our hands consist of three sections: a jumble of bones at the start, then a set of long bridge bones, and then the three-jointed digits. The hand’s three sections are organised from small to large for maximum dexterity, so you have a short wrist and long, elegant fingers. The length of your hand is equal to that of your face.
03. Thenar eminence
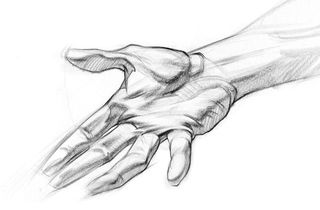
Most of the muscles that control your hand are located in your forearm (these are called extrinsic muscles). But there are some muscles on the hand itself that you should know about. Called intrinsic muscles, these create three squishy masses on the otherwise bony surface of the hand. All three are shaped like teardrops, so they're not hard to capture. The biggest one, which runs from your wrist to your thumb, creates a rolling hill when the thumb is out, and gives the thumb a pot belly when the thumb is moved towards the palm.
04. Hypothenar eminence
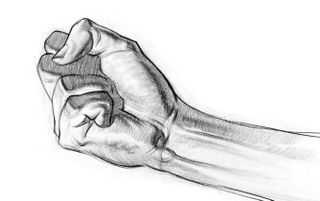
The other palmar mass runs from the base of the hand to the pinky metacarpal. It actually wraps around the outside of the bone, which is why the pinky edge of your hand is kind of soft and squishy. Notice that his pinky mass is flatter than the thumb mass.
05. First dorsal interosseous
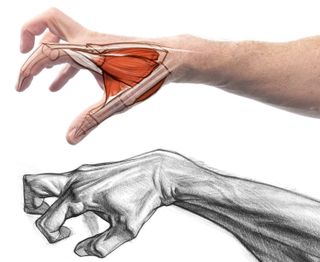
The third major muscle mass can be found on the back of your hand. It fills the space between your thumb metacarpal and your index finger metacarpal. It’s easy to see when you tuck your thumb up against your index finger since it creates a big, round egg form. When the thumb is out, it stretches thin.
06. Bones on the back of the hand
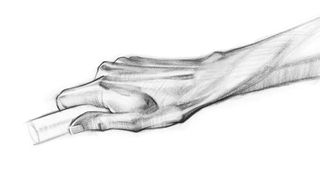
The dorsal side of your hand is bony, especially at the joints. You can represent this characteristic by drawing the dorsal contour with straight lines and corners. The back of the hand is a flat plane, and it doesn’t change much when the hand moves (only some tendons move). This contrast with the front of the hand, which changes a lot depending on the position of the pinky and thumb.
07. The tendons in the hand
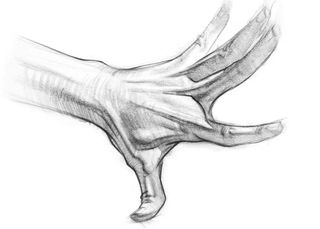
There are also tendons that run along the back of the hand. Each finger receives at least one. When drawing tendons, make sure you keep them subservient to the larger form of the hand. Don’t shade each cylindrical tendon with dark lines and sharp edges because this will create funny-looking, distracting chasms in the middle of the hand. A subtle indication here and there is all you need, unless you’re drawing a character that calls for pronounced tendons.
08. Veins in the hand
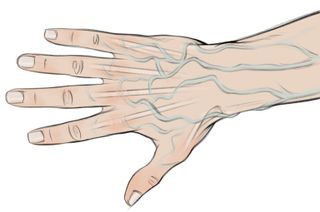
The back of the hand also has veins. These veins run along the back of the hand, like tendons do, and meander in the spaces between bones where they’re safe. You should keep the difference between tendons and veins very clear: tendons are straight, and veins are curvy, like lazy rivers. Veins also have a darker, cooler local colour.
09. Fat pads on the palm
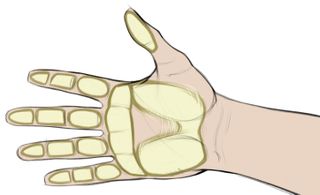
Finally, on top of the muscles, fat pads surround the centre of your palm. They cover and soften the muscular masses of the palm. There are also fat pads along the palm-side of each finger. These fat pads are very malleable: you can squash, stretch and flatten them to exaggerate the action of the hand.
For more tips and practice, see our pick of the best drawing books.

Thank you for reading 5 articles this month* Join now for unlimited access
Enjoy your first month for just £1 / $1 / €1
*Read 5 free articles per month without a subscription

Join now for unlimited access
Try first month for just £1 / $1 / €1


