Find out how illustrator Magdalina Dianova uses Blender to create a cosy setting that helps to express her character’s personality.
(Image credit: Magdalina Dianova)
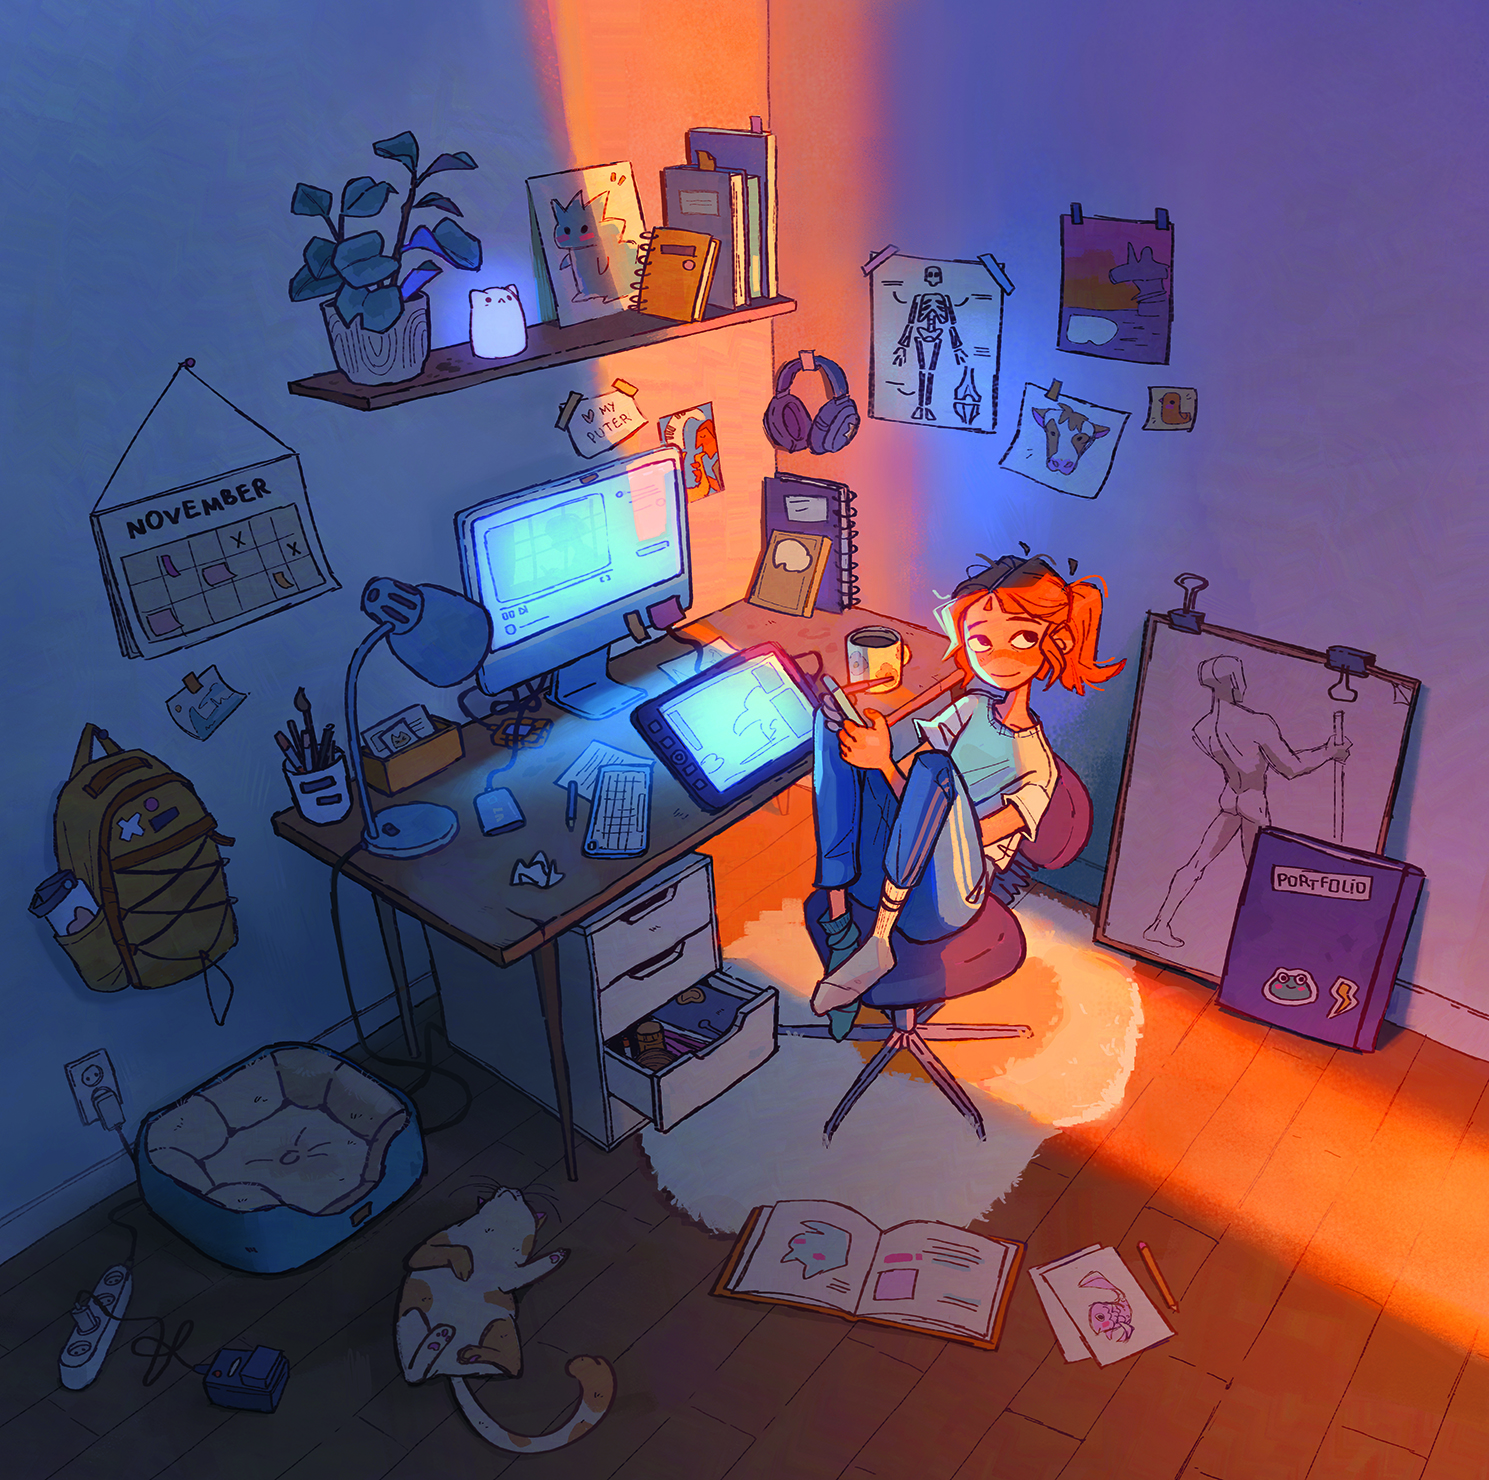
A well-crafted environment can tell us so much about a character: their values, interests, or even their weaknesses. In this tutorial, we’ll explore the details that make a space feel authentic and lived-in, turning it into a powerful storytelling tool.
We’ll start by setting up a 3D scene in Blender to establish perspective and lighting (see some ace Blender tutorials here). There’s no need for any advanced skills, as we’ll mostly arrange placeholders and add basic lighting for reference. As we go, I’ll share some tips on balancing shapes, creating a harmonious colour scheme, and using lighting to set the mood and tell a story. I’ll also show you how you can use adjustment layers to paint light more efficiently and direct the viewer’s attention.
Your character’s story will inform every decision you make, so the first step is to think about who they are and write down some key traits (see our character design tips for more ideas). Do they have any special interests? What’s one thing about them that you really want to communicate in your piece? You don’t have to write a full story, but the more information you have, the more depth your illustration will have. See more 3D software and digital art software if you need new tools.
Latest Videos From Creative Bloq
Magdalina Dianova
Magdalina is a self-employed artist and illustrator with a passion for character design and her many, many hobbies.
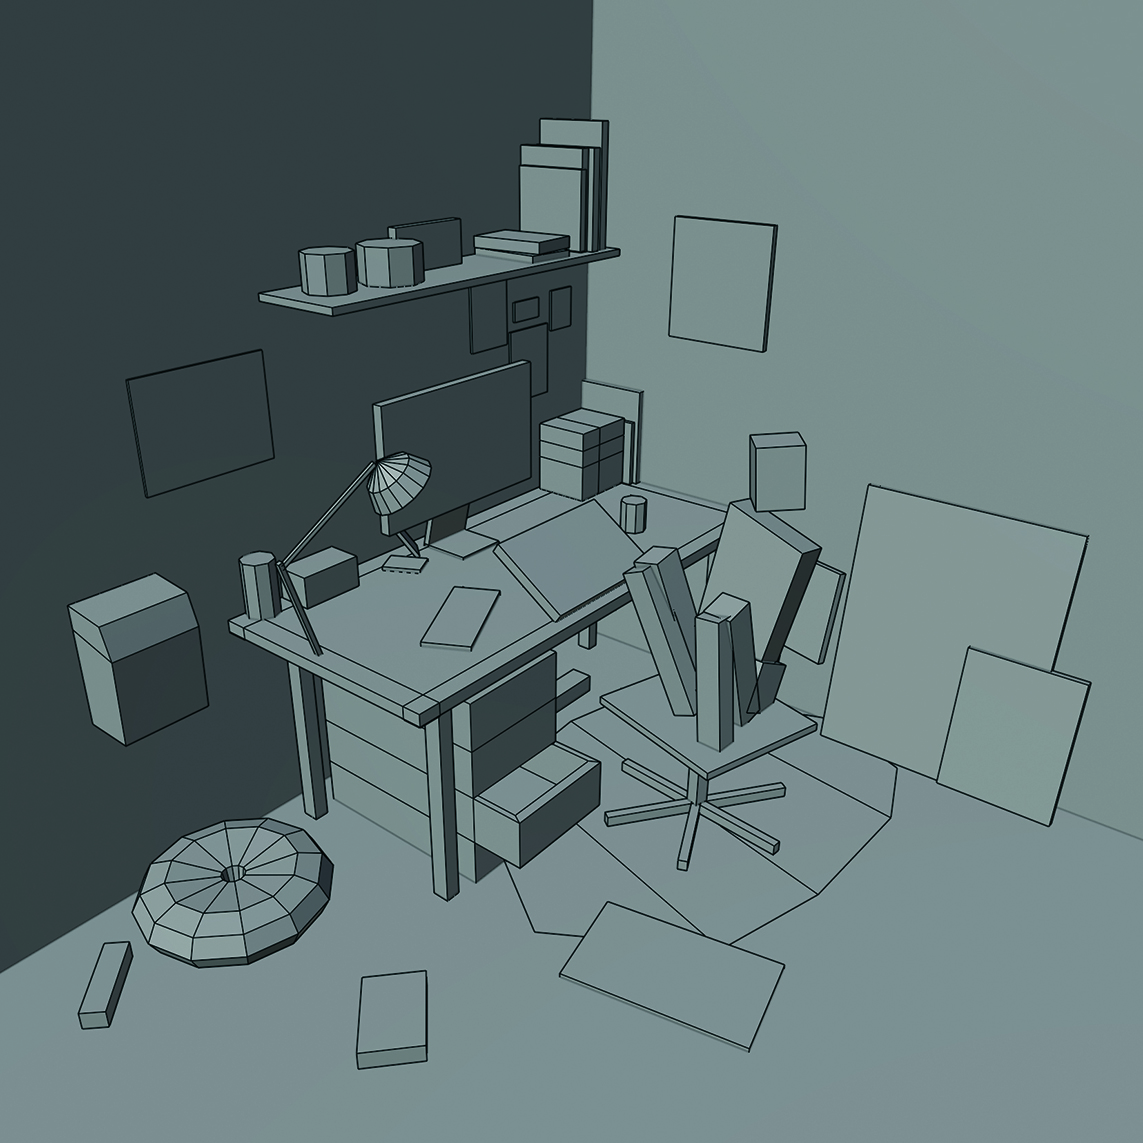
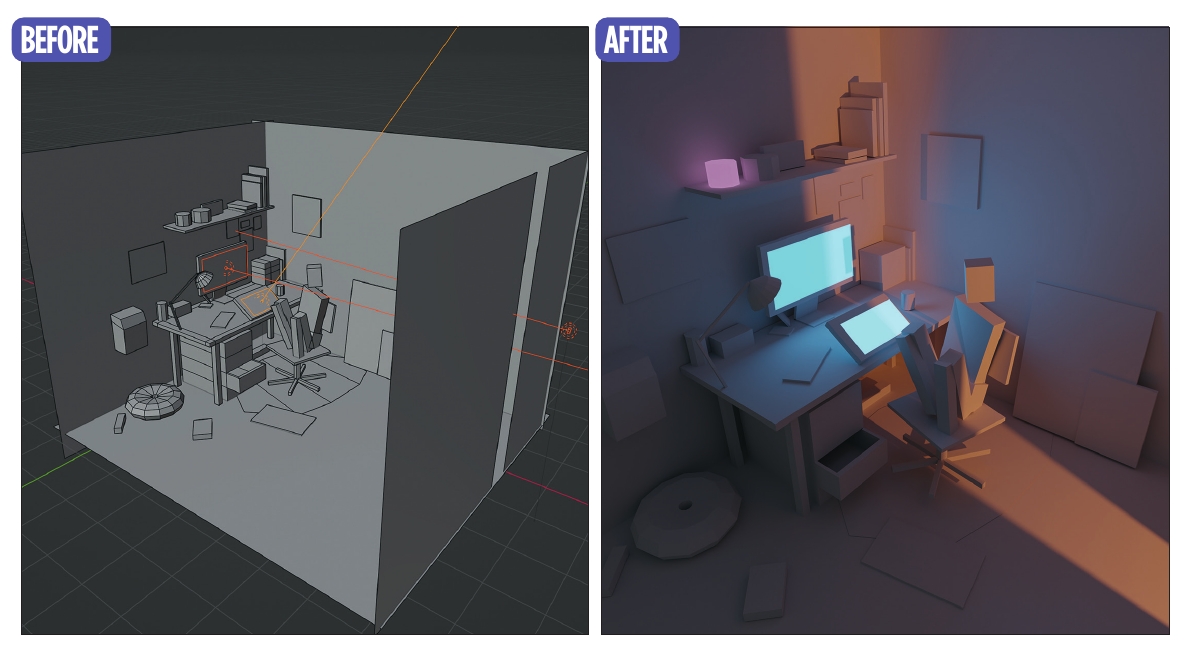
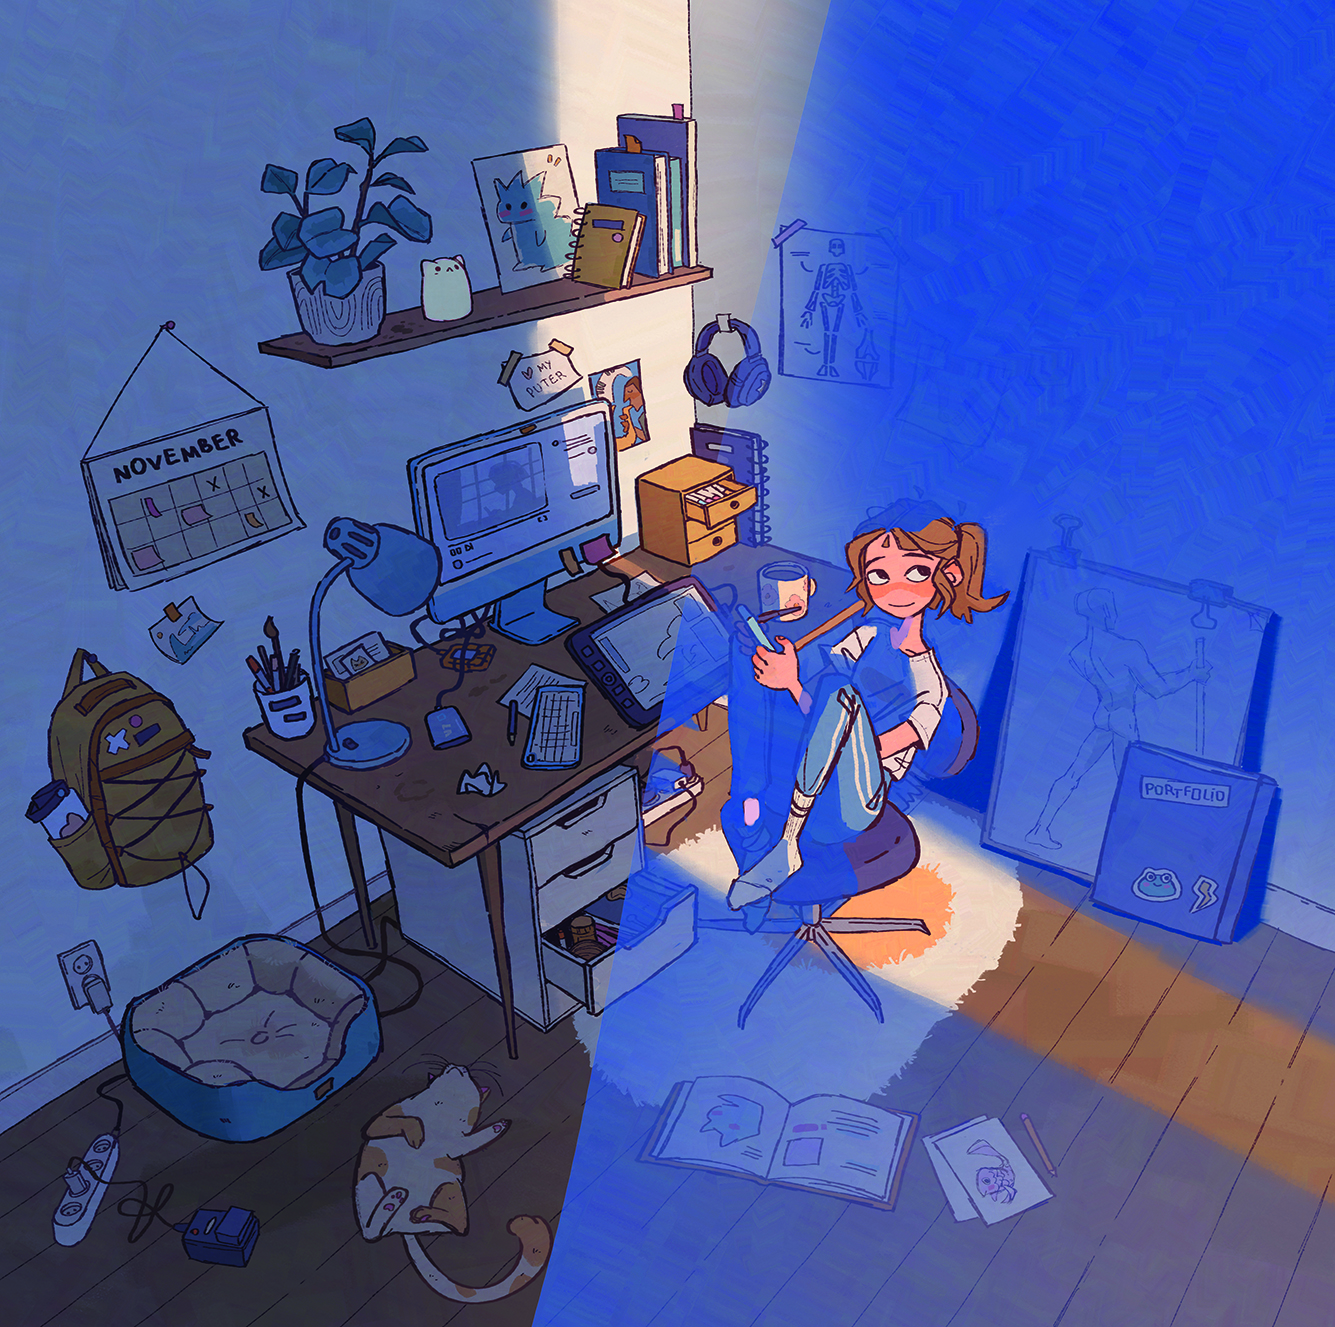
I always start by building a rough 3D scene to establish the camera angle and composition. There’s no need to model specific props here, just arrange boxes as placeholders. I set up a second viewport to see through my camera, which allows me to check the positions of the elements within the frame and avoid any tangents. Remember to set the camera’s focal length, as this will determine the perspective distortion.
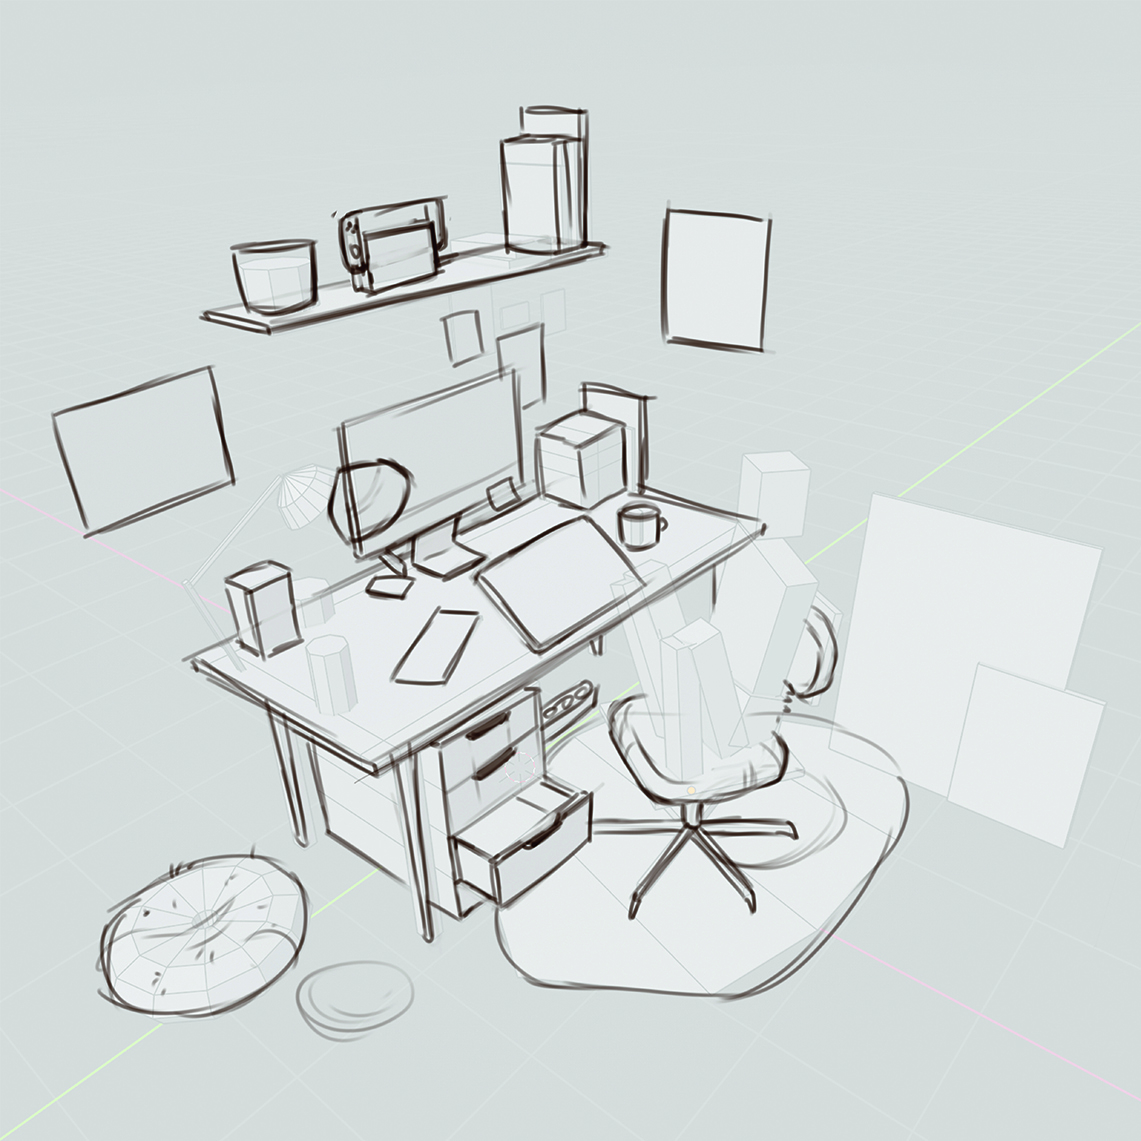
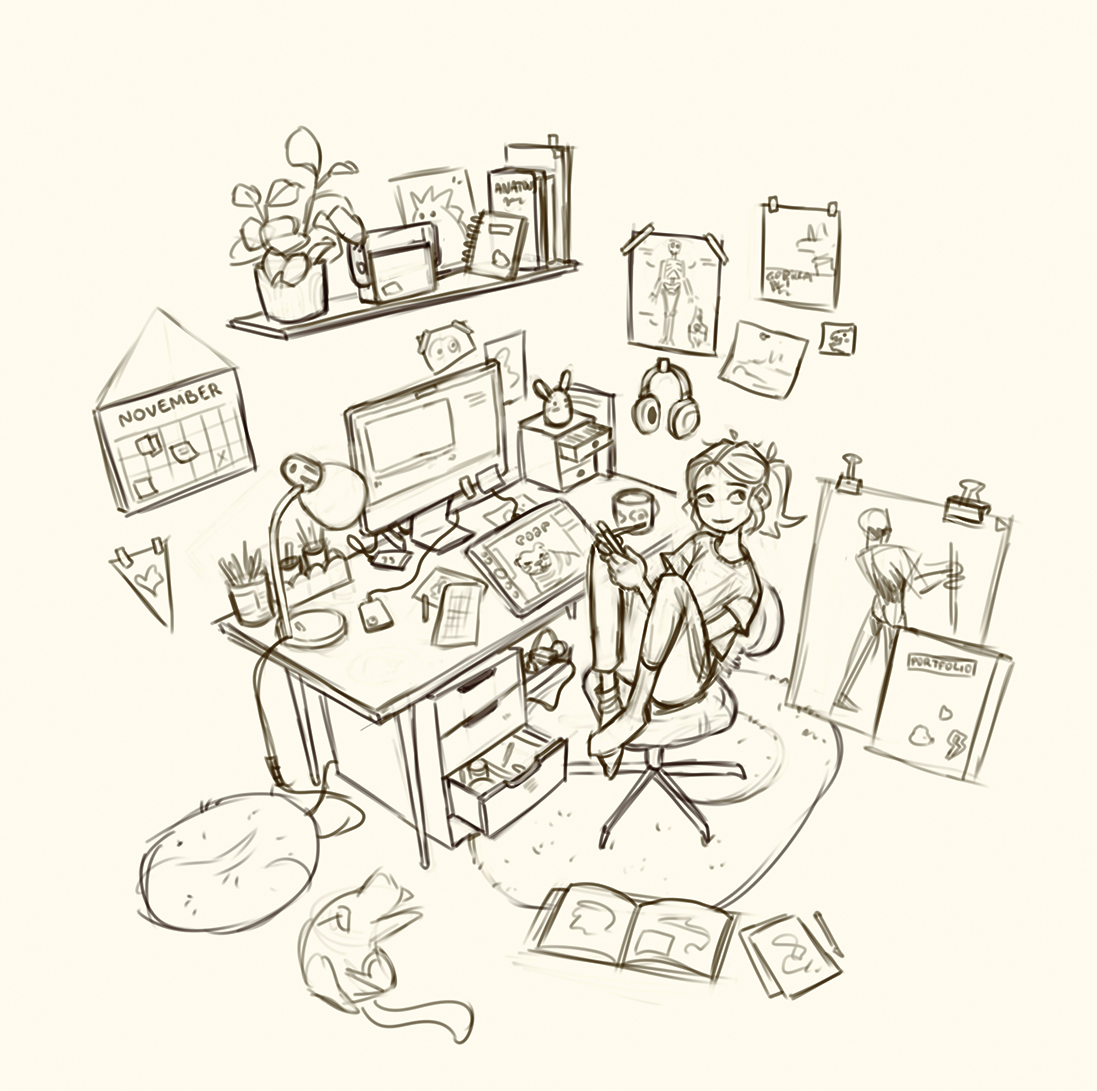
Once you’re done with the model, take a screenshot and start sketching in the big volumes on top, balancing big, medium and small shapes for visual interest. I use a lot of overlaps because they add a sense of depth. Also think about what your character would own. Would their desk look sleek and modern, or worn and vintage? Imagining the items they’d keep nearby helps build the story and adds personality to the environment.
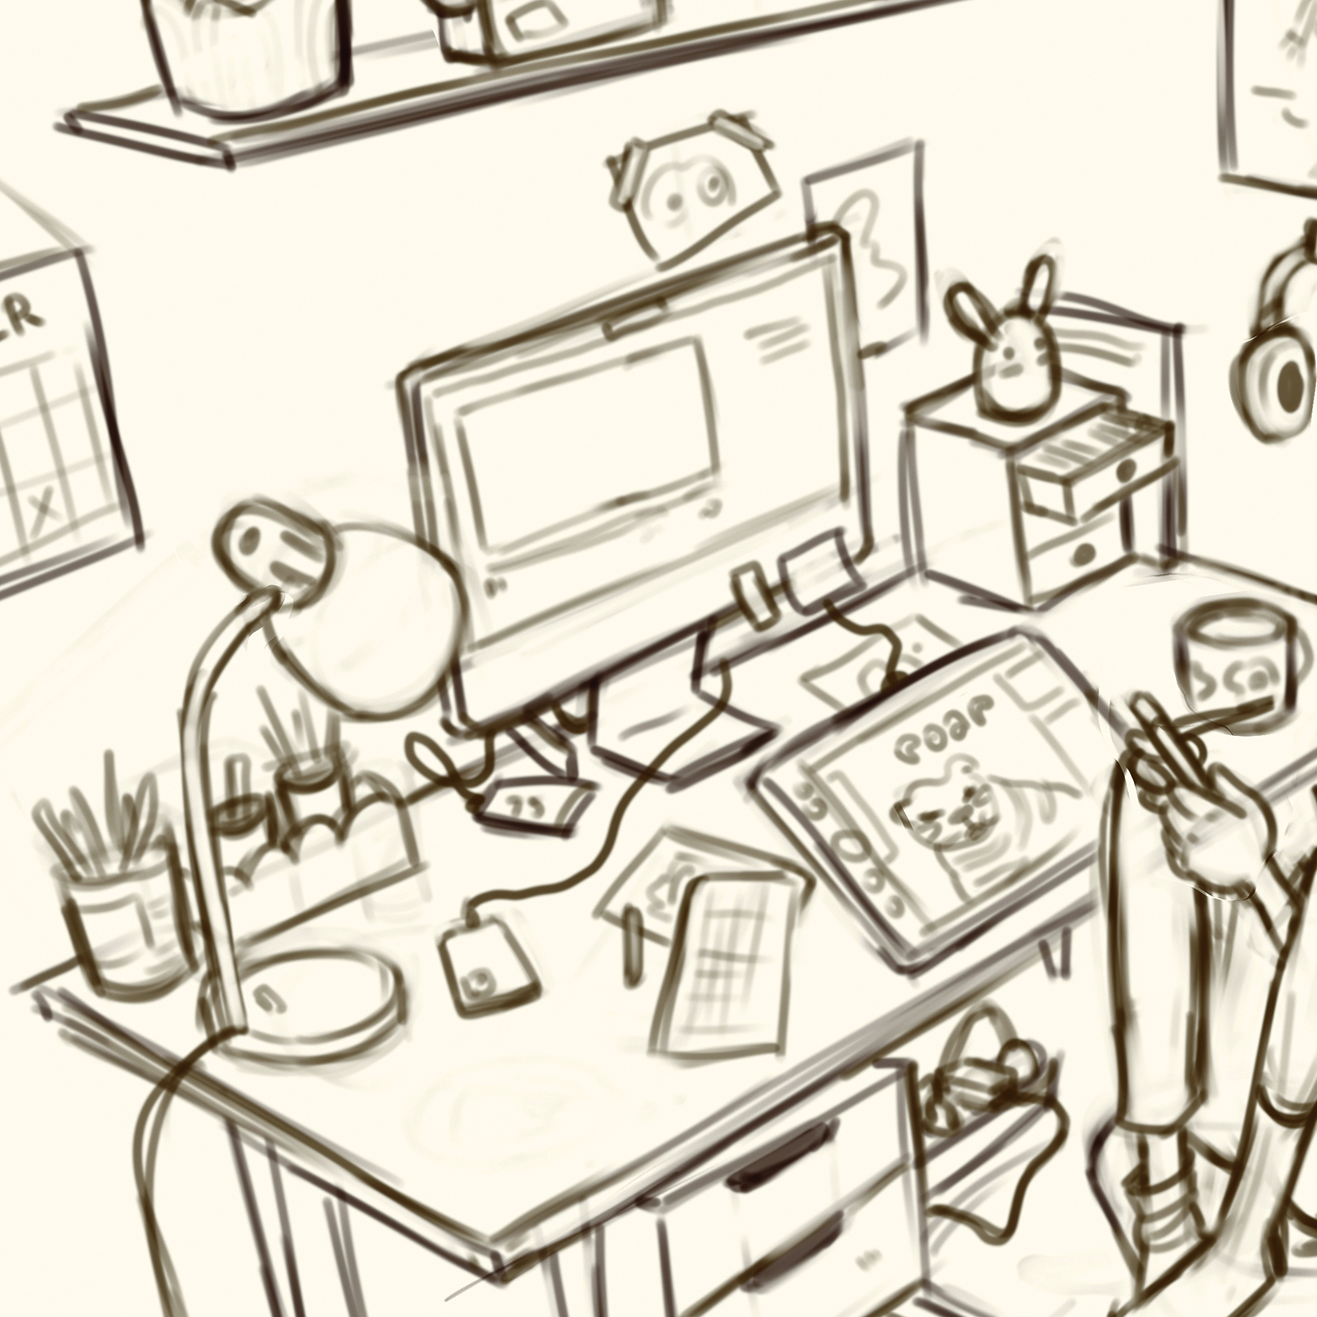
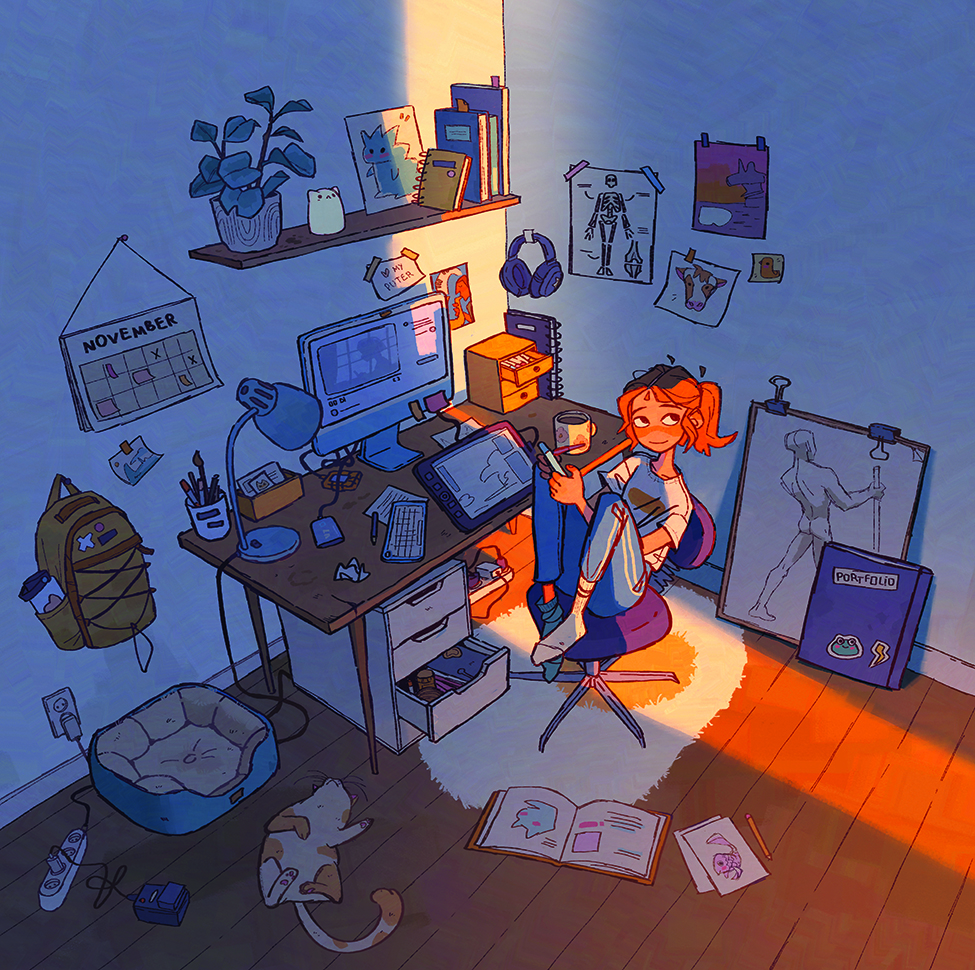
Small details can breathe more life into the illustration. For example, tangled cables, a messy drawer, or scattered art supplies might suit a character who’s creative but disorganised. Imperfections, such as mismatched socks or silly little knick-knacks, can help make the space feel authentic and lived in.
The character’s pose and expression should always be motivated by the narrative. For instance, my character is easily distracted, so instead of drawing she’s taking a break and holding her phone. I want to show her face, so I’m having her glance to the side as if someone just opened the door, which gives her pose purpose. Every choice you make should support the story.
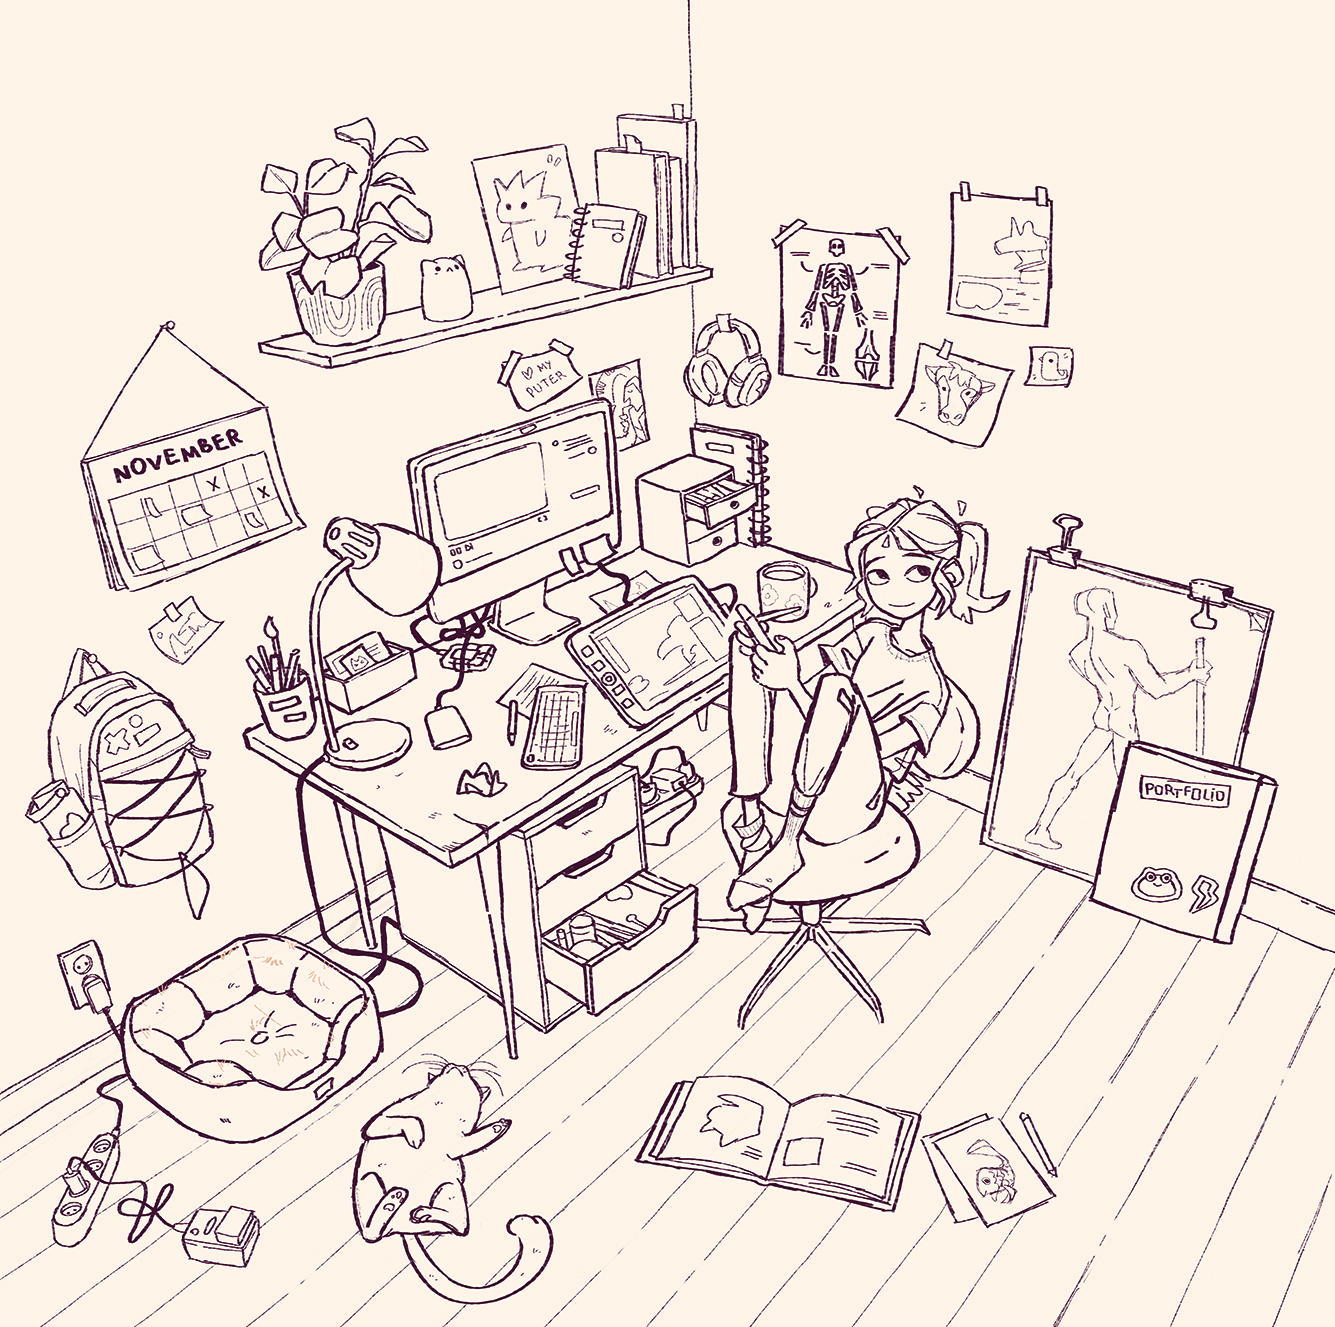
To refine the lines, you can either clean up your sketch layer or make a new pass on top. Make sure to group elements onto separate layers to make changes down the line easier. To maintain a manageable file size, group large elements that don’t touch on the same layer, and keep the character isolated on their own layer.
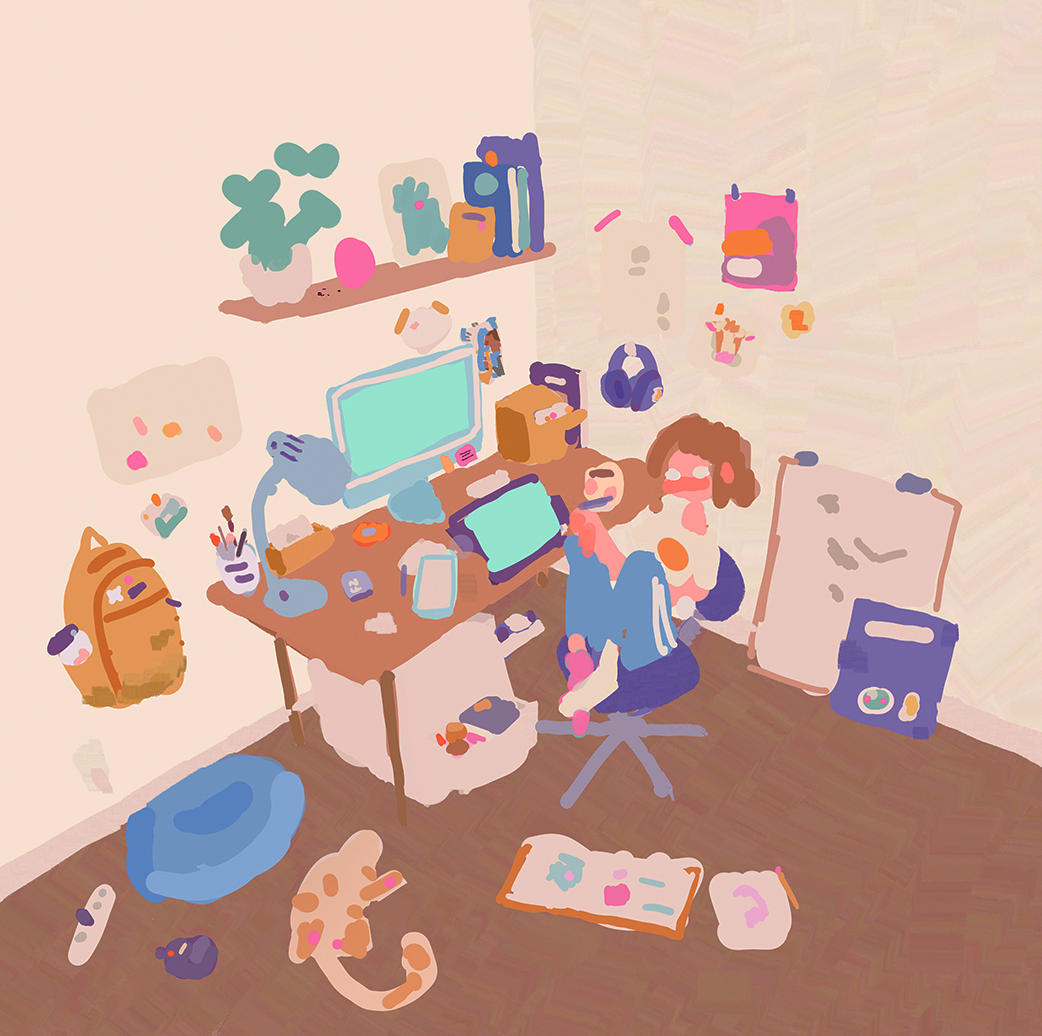
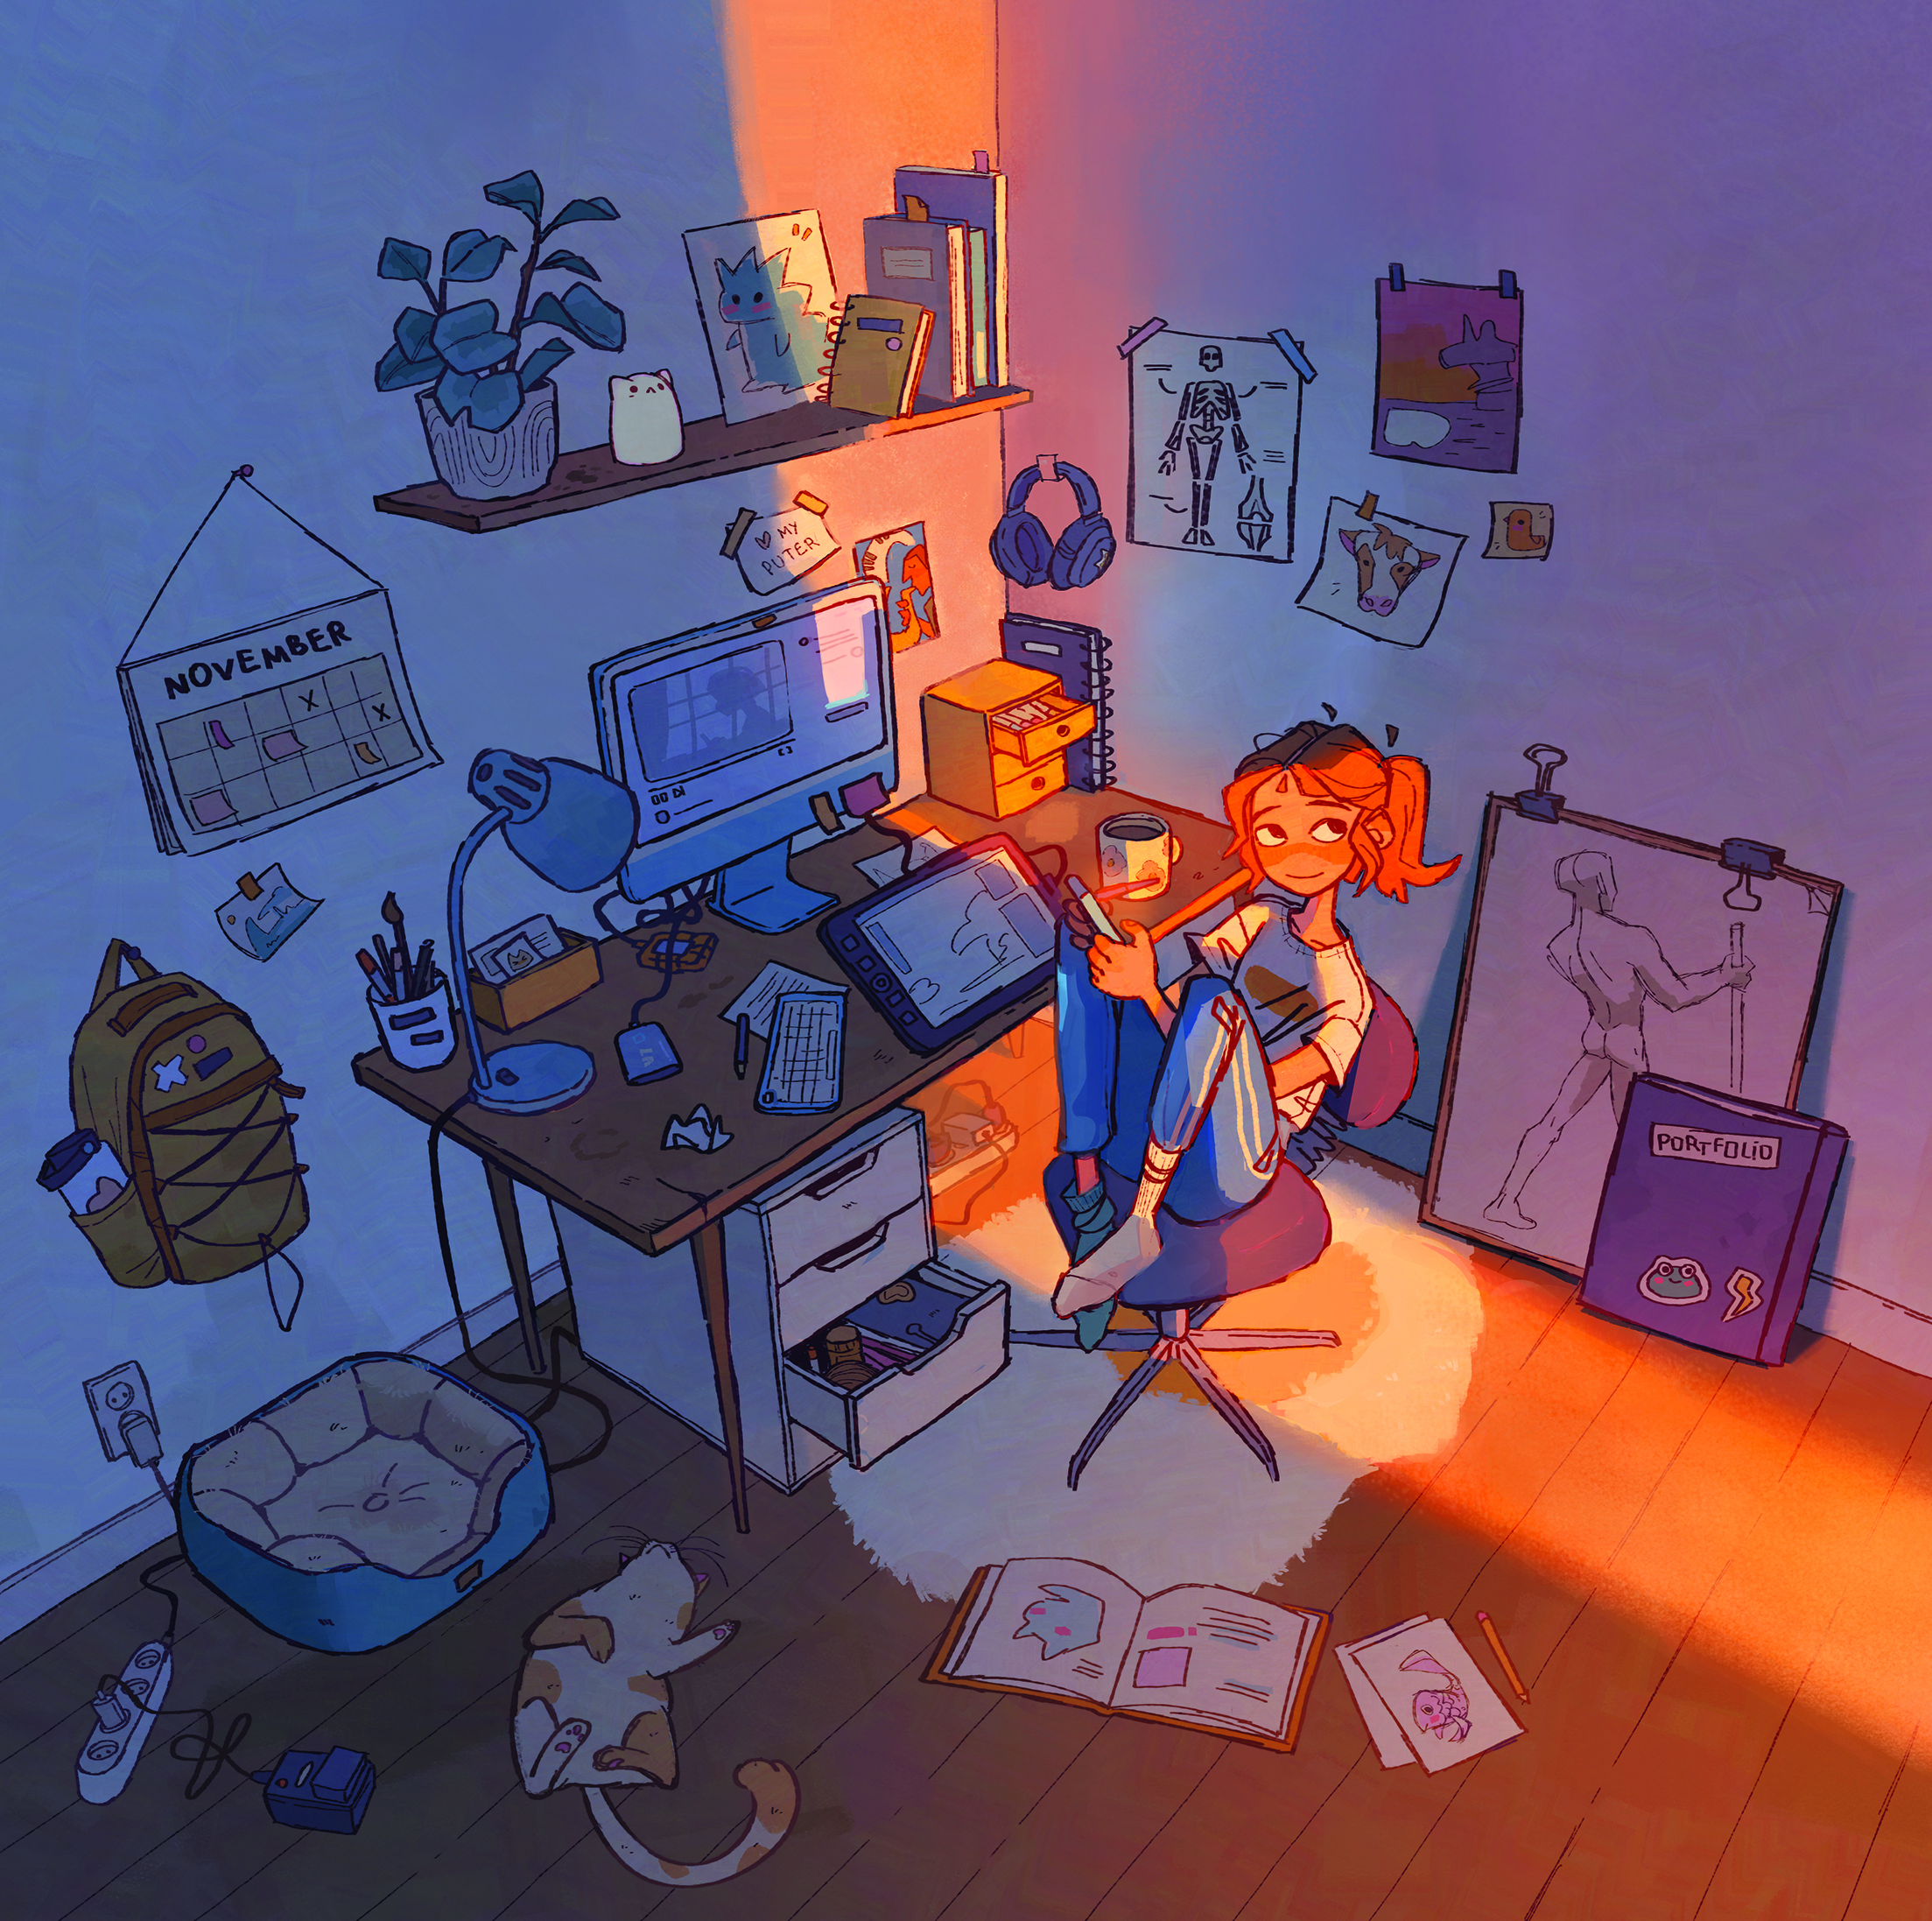
Colour is another great tool you can use to communicate your character’s personality and set the mood of the scene. To develop a unique palette, start by choosing one colour that’s going to be your ‘black’; mine is a deep, desaturated purple. No colour should be darker than that. This is going to affect the rest of your colour choices, pushing the image in an interesting direction.
After establishing the colour scheme, scale it down and start colouring in the elements, grouping them onto layers again. At this stage, add simple form shadows to darken the planes that won’t catch any light. I’m using an opaque brush with colour variation to add more texture to my image. Details like worn spots on the floor or smudges on the desk give life to the scene and enrich the character’s story.
Using Blender again, let’s set up the lighting. The goal is to support the story while creating an engaging composition and separating the character from the background. Since my character is looking at the open door, I’ll have warm light seeping through in contrast with the dark blue room. For this, I have one 600W orange area light coming between two planes on the side, and two cool 20W ones for the displays.
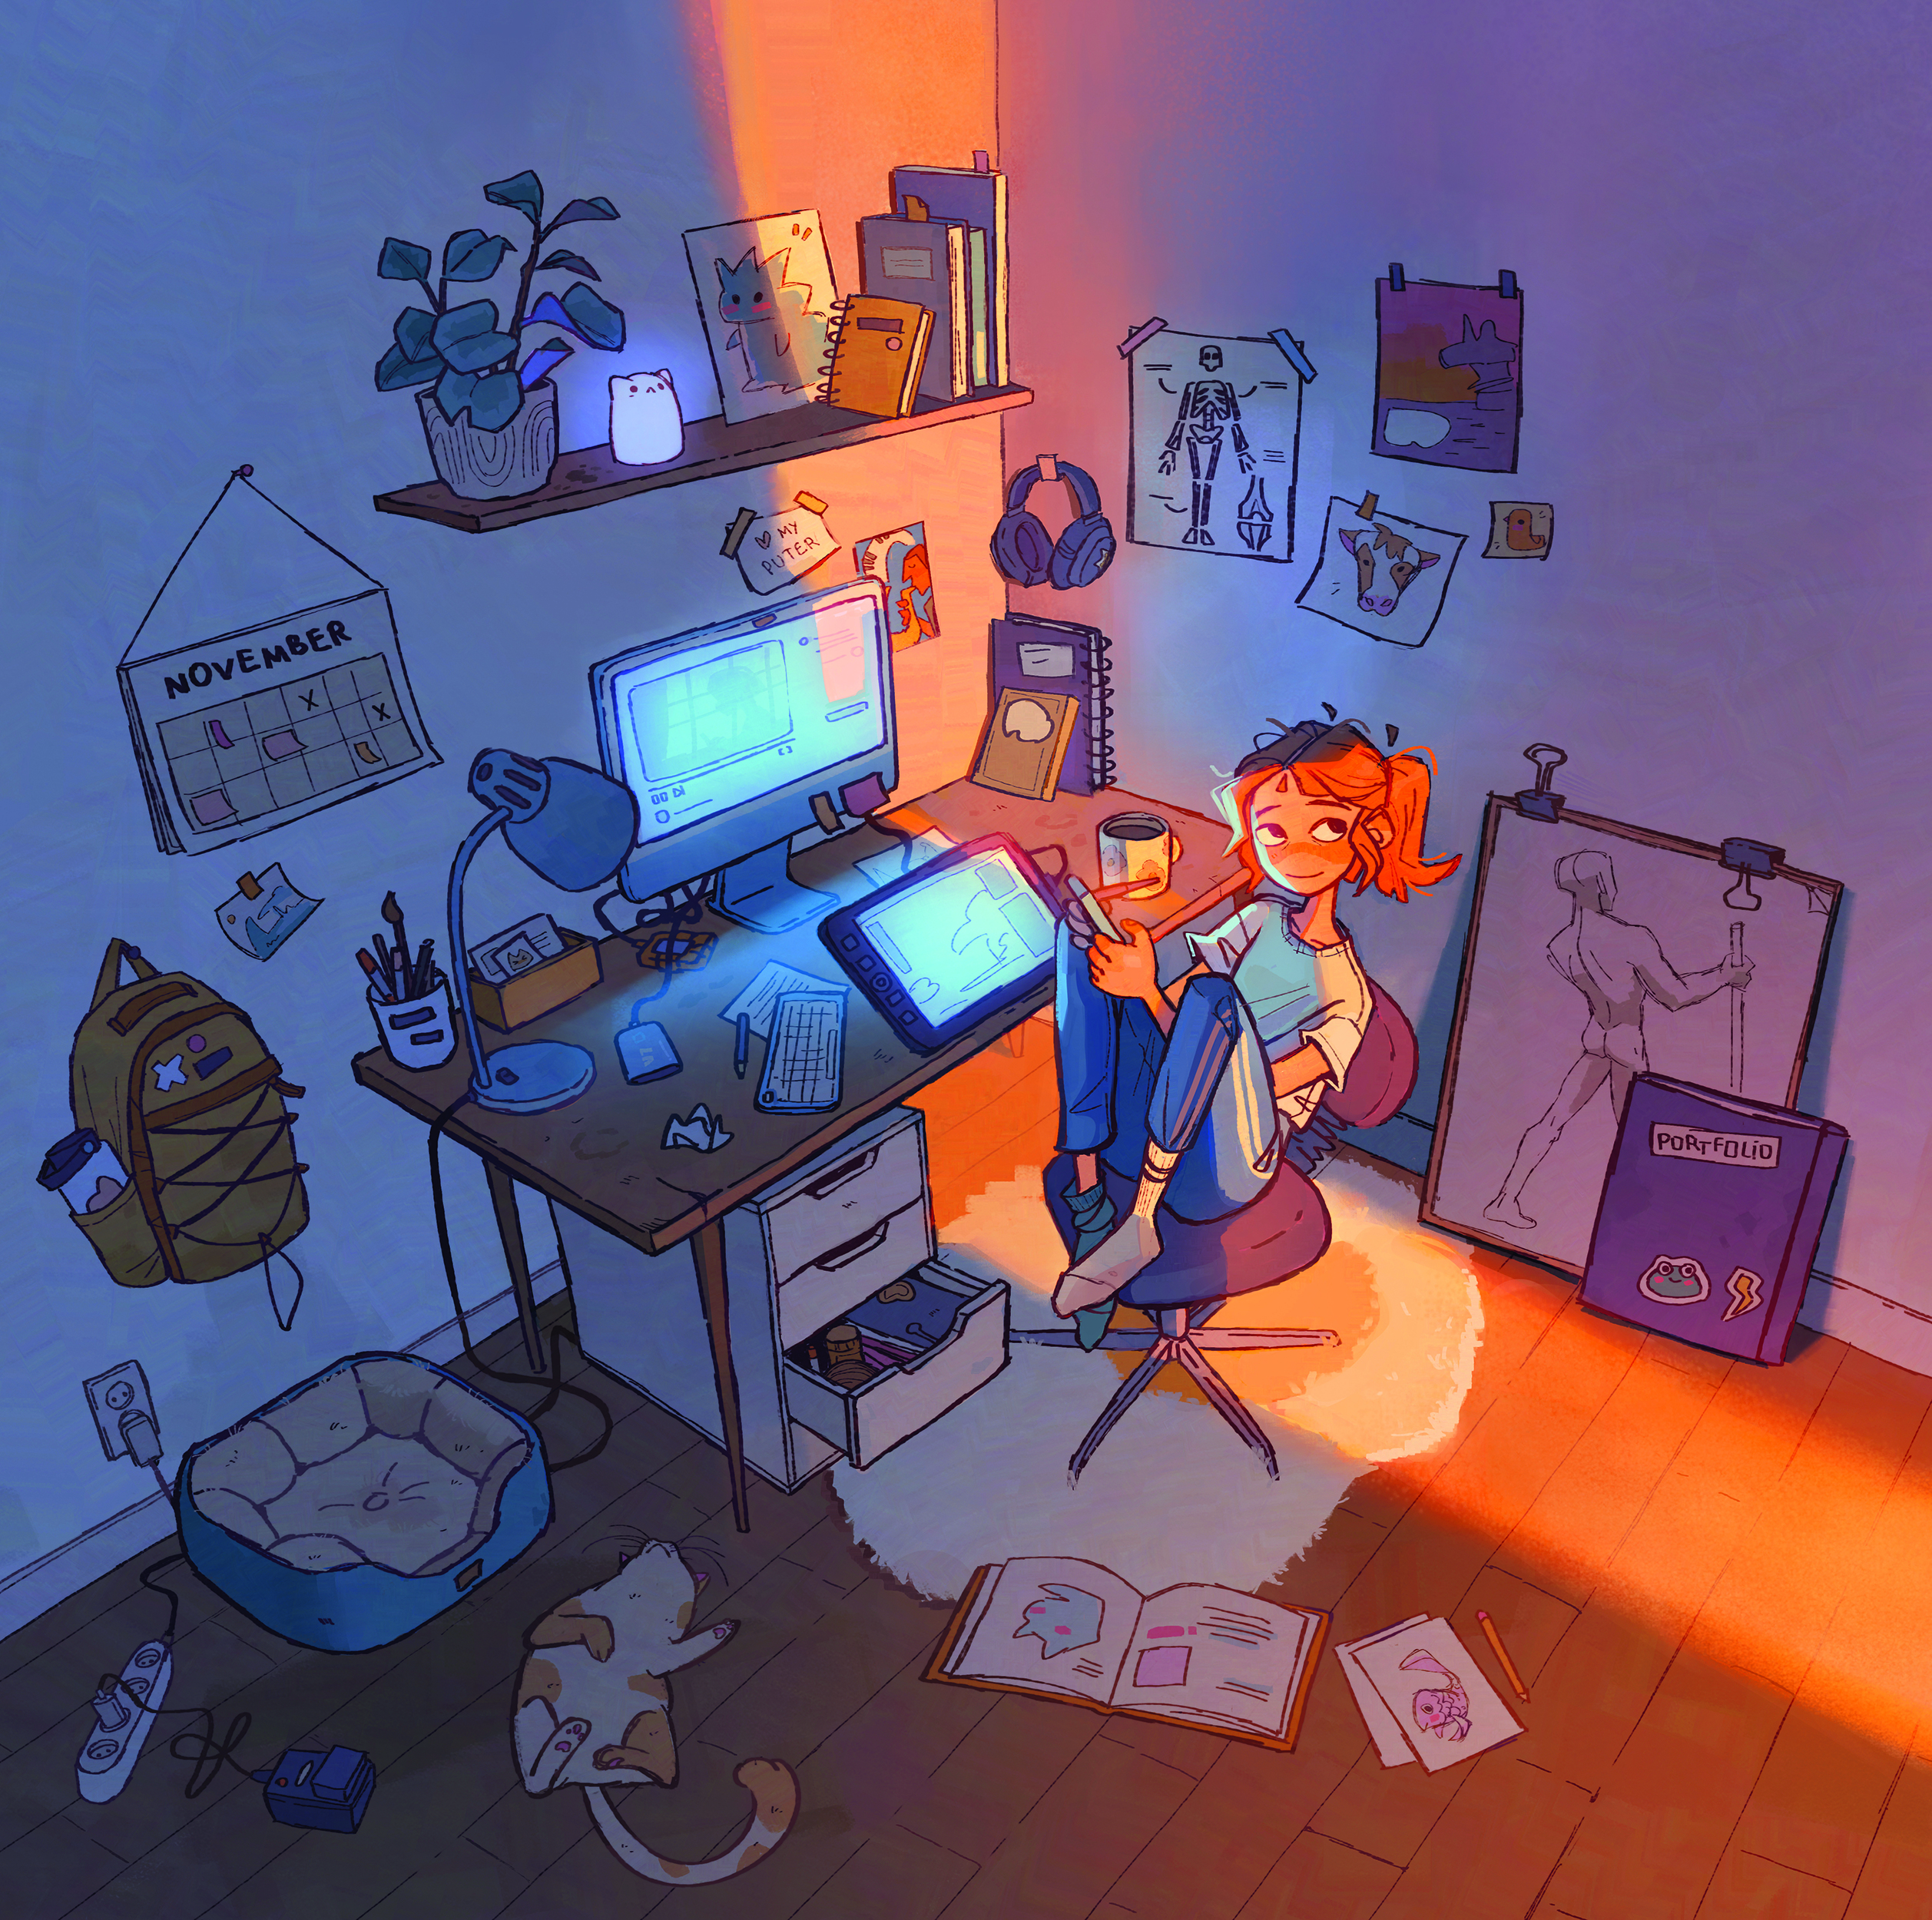
Create a shadow layer filled with a dark blue colour and set it to Multiply mode. Referencing your 3D render, use a mask to erase the areas where the light hits, with a combination of soft and hard brushes for better edge control, while simplifying the shadow shapes to make the image more readable. To get deeper shadows, you can paint with a darker colour in certain areas.
Using adjustment layers to add the lighting gives you a lot of control over the image. I’m applying a Hue/Saturation layer to bump up the saturation and add warmth in my image. Adding a Color Balance layer also brings more reds and yellows to the highlights. Make sure you mask any adjustment layers so their effects aren’t applied to the shadow areas. If you change the shadow shapes later on, remember to update the masks for these layers to keep your lighting consistent.
Use a layer on the Hard Light blending mode to enhance the light’s vibrancy, and an Overlay layer to paint that saturated band between light and shadow. Focusing on one light source at a time helps you maintain control and makes your lighting more cohesive.
An Add layer is great for any practical lights, like the two displays or the cat lamp seen here. Duplicating the layer and applying Gaussian blur gives the light that soft glow effect – just make sure to erase it on objects that wouldn’t be affected. Bring in another Hard Light layer to paint the areas where secondary light hits, like the surface of the desk, and to add a soft, warm glow around the character’s face.
I simplify and flatten the areas where I don’t want to draw too much attention, such as the shelf and the corner beside the desk, with a masked Brightness/Contrast adjustment layer. Darkening the background behind my character creates contrast, which helps them stand out and directs the viewer’s attention.
Finally, set a gradient map on Soft Light blend mode to help unify the colour scheme. At this stage you can paint finishing touches like wispy hairs and strands on the carpet where it catches the light to enhance its fluffy texture. To add light particles you can either use a splatter brush, or paint with a soft white spot using a big airbrush and set the layer mode to Dissolve at 1-2% opacity.
This content originally appeared in ImagineFX magazine, the world's leading digital art and fantasy art magazine. ImagineFX is on sale in the UK, Europe, United States, Canada, Australia and more. Limited numbers of ImagineFX print editions are available for delivery from our online store (the shipping costs are included in all prices)
Alternatively, you can access us instantly through our digital options: