How to paint portraits with urban style in Procreate
Bring a touch of street chic to your artwork as Alvaro Escobar explains his process for creating expressive, stylised portraits
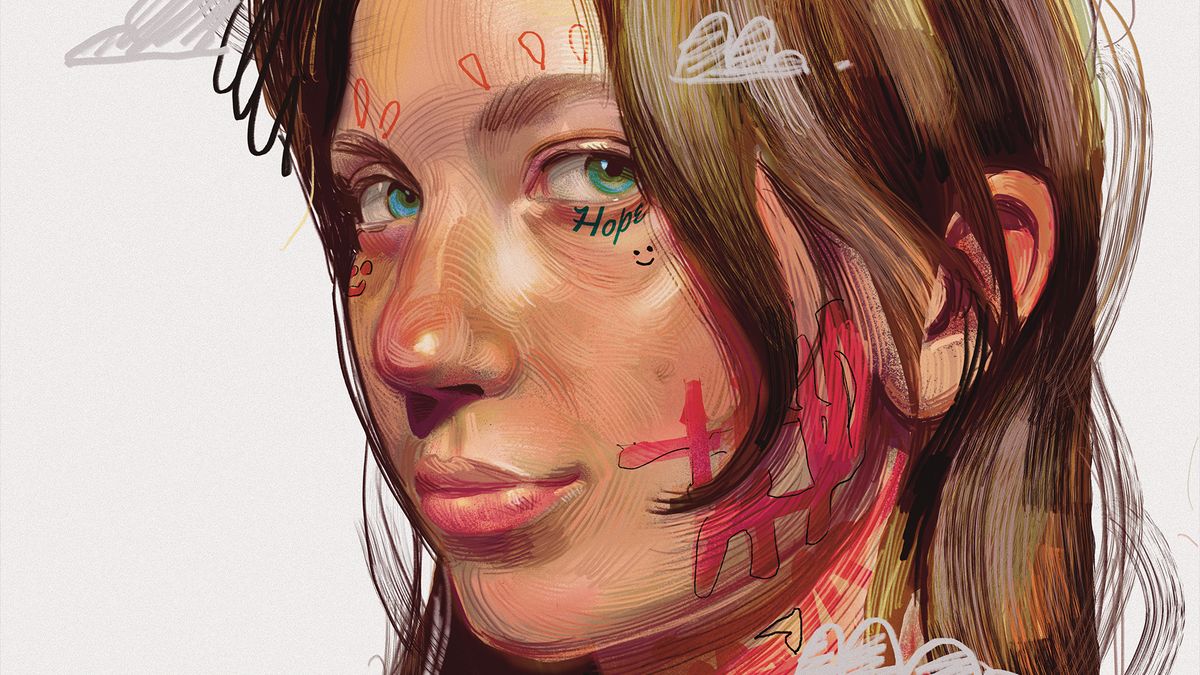
Welcome to my digital portrait workshop! In this tutorial, I’ll guide you along the process
I follow for creating a detailed and expressive portrait using a variety of digital brushes and techniques. Whether you’re a fresh-faced beginner just getting started or an experienced artist out to refine your skills, this workshop will offer valuable insight and practical steps to give your work a lift. If you haven't already, check out our collection of Procreate tutorials for more creative inspiration.
We’ll start off with the basics of composition and proportions using a hard airbrush for quick and gestural layout. This foundational step helps in establishing the overall structure of your portrait. From there, we’ll refine the sketch with a precise brush, considering major shadow shapes and highlights to add depth and dimension.
Throughout the workflow, we’ll also make use of tricks like canvas flipping and the Selection tool to maintain symmetry and focus on specific areas. By saving and loading selections, we can ensure an efficient process and precise detailing.
We’ll explore layering techniques to build up shadows, highlights and midtones, gradually transitioning to colour adjustments for a warm, lifelike appearance. Texture plays a key role, so we’ll employ various brushes to add intricate details and smooth finishes too.
Incorporating elements like hatching and graffiti enhances the portrait’s character and style. Finally, we’ll wrap things up with a layer of solid white fill in the Multiply blend mode and add noise for a cohesive, polished look.
01. Create a basic idea
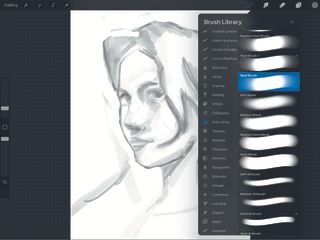
Start out with the Hard Brush Airbrush to quickly lay out the composition and proportions for your piece. This first step is meant to be quick and gestural, so don’t get too hung up on the details here.
02. Refine the sketch
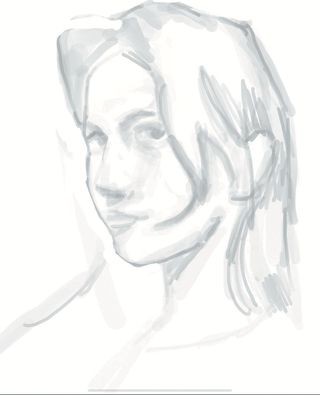
Next, lower the opacity of this base layer. With that done, create a new layer and use a precise brush – such as the MaxU Visdev brush I used – to go back in and refine the sketch a little further. In this step, make sure you take into account the major shadow shapes such as under the nose and chin, as well as lightly marking out the location of any highlights you want to add.
03. Flip your canvas
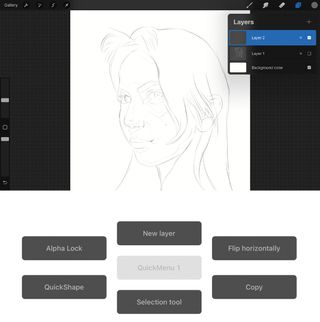
This is the point to make minute changes and tweak the overall look of the portrait. I’ll use a shortcut in the QuickMenu to frequently flip the canvas over horizontally, which gives me a different perspective of the piece and makes any elements that look lopsided or askew stand out easier for me to fix up.
04. Cut out the portrait
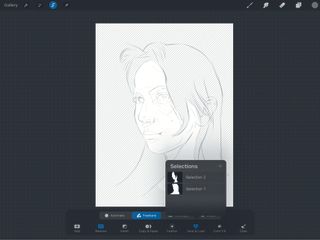
Use the Selection tool to single out the portrait from the background. This essentially creates a stencil that we can use with large textured brushes without any danger of colouring outside the lines.
05. Create more selections

Once we’ve made the selection using the Freehand option, use the ‘Save & Load’ option to save your selection ready to return to whenever it’s needed. From there, draw out and save more specific parts of your portrait, such as the character’s face and hair, as their own loadable selections.
06. Greyscale for values
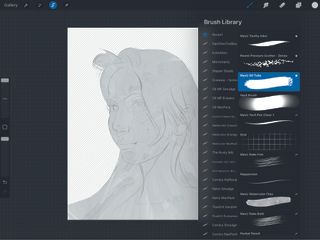
With the original saved selection, fill in a base value colour using a textured brush. As I used the MaxU Oil Tube, which mimics oil paint from the tube, this gave me an interesting foundation for texture that I could build from. Work in greyscale for these first steps of the rendering process, as it will help you focus on the values before beginning to think about colour.
07. Place the highlights and darkest areas
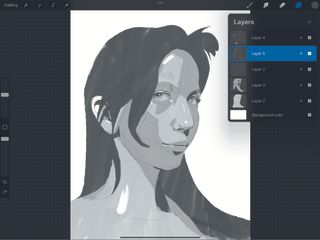
Paint in the shadow shapes on a separate layer, then on further layers paint the highlights, as well as the darkest values for the image. Creating each of these helps us set the value scale so that we can focus on the subtle value changes in between them.
08. Develop the finer changes in your values
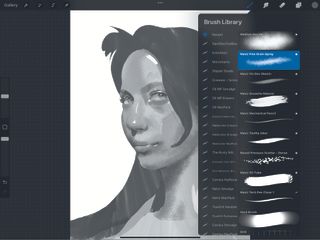
With another textured brush, such as the MaxU Fine Grain Spray brush, we’ll now lay subtle value changes between the limit values that we’ve already set. After this, smooth out some of those textures with a finer, softer brush; in this case I’m using a spray paint brush.
09. Choose the base colour
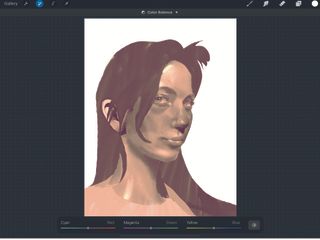
Once you’re happy with the values in greyscale, you can then move on to bringing in the colour. First merge all of the layers together and then use the Midtone setting in the Color Balance options to set a base colour for the portrait. I’m going for a warm look, so I set the base layer to a subtle tan and yellow hue.
10. Adjust the colour balance
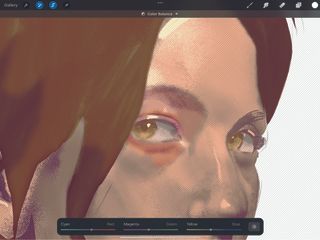
Using the Selection tool, pick out individual parts of the face and change their colours using the Color Balance sliders. These sliders enable you to edit the colours of the shadows, highlights and midtones within your artwork.
11. Develop the facial texture with hatching
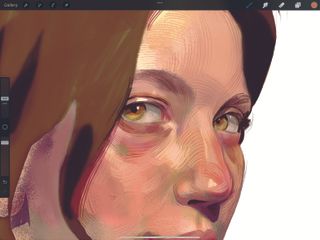
The next step is to add a hatching texture, which I did with the MaxU Mechanical Pencil brush. Use the Color Picker feature to select a colour for this. Knowledge of facial muscle and bone structure is helpful here, as using hatching that follows the facial contours looks natural.
12. Create realistic texture for the hair
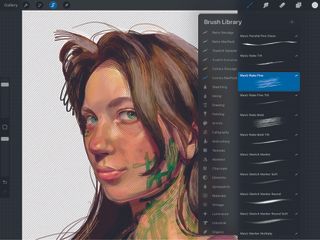
Using a fine rake brush, layer brush strokes to create a smoother finish on your character’s hair. Your saved selection will help a lot for this step as it enables you to work faster without having to worry about accidentally drawing over the rest of the portrait.
13. Add unique elements to make your work stand out
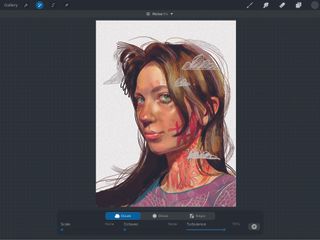
Typography and graffiti feature heavily in most of my work. Here I used the Vivid Light blending layer to add graffiti elements to the face. As a final touch, add a layer of solid white fill in the Multiply blend mode, then use the Noise feature to add noise to the layers below.
This content originally appeared in ImagineFX magazine, the world's leading digital art and fantasy art magazine. ImagineFX is on sale in the UK, Europe, United States, Canada, Australia and more. Limited numbers of ImagineFX print editions are available for delivery from our online store (the shipping costs are included in all prices).
Get the Creative Bloq Newsletter
Daily design news, reviews, how-tos and more, as picked by the editors.

Thank you for reading 5 articles this month* Join now for unlimited access
Enjoy your first month for just £1 / $1 / €1
*Read 5 free articles per month without a subscription

Join now for unlimited access
Try first month for just £1 / $1 / €1

Alvaro is a Salvadoran-American illustrator based in Washington, D.C. He works across a variety of disciplines including concept art, editorial illustration and portraiture.