AI in Krita could be your new secret weapon – I test it out
How to add local AI rendering, and my top tips for getting it right.
Seriously, if just a few years back someone told you we’d be creating images, and even animations, in our browser windows, you might have told them to go sleep it off. But here we are, with Adobe's Firefly being just one of the AI options available in browser.
But personally, I can’t see myself working in a browser window all of the time. The cloud may seem like an easy option but I still prefer locally running software on my workstation, which is where Krita and its excellent AI workflow via a third-party plugin steps in.
Krita's use of AI just one of the things I love about it (you can read here how I think it's the new Photoshop), and in this article I'll be running through my experience using AI in Krita, one of the best graphic design software and digital art software options (and it features in our best free animation software guide). I'll show you how to add AI rendering into Krita, and share some top tips for making it work the best it can.
(If you're into browser-based tools, see my list of cloud-based Adobe alternatives).
Why use AI – and what are the options out there?

My first foray into AI was in Photoshop so I've got a good comparison point. Whatever side you may be on in the AI debate, AI and PS are a very logical pairing. And yes, I have the same reservations about AI that many of you do. But I use it for creating sections of my work. Not anything close to generating an entire image.
And why would I want to? Creating images is a part of me, I enjoy the process. But I also know that the process we choose needs to be competitive in the current market. Creating an entire 3d background, which is the way I once worked, is simply not cost-effective today. So instead I will likely start to farm those parts of my process out to AI.
But for those of us who are no longer using Photoshop, what can we use instead? I’m only back on GIMP since leaving PS last year (see my GIMP 3.0 review here and my GIMP vs Photoshop comparison). So I missed the years when Resynthesizer was doing some great work providing “Content Aware” and healing brush type effects. But it’s incompatible with version 3.0, with no fix in sight as the issues have been known about and unaddressed for years. One other AI project for GIMP that I found is the work of just one guy, currently a college student who works on the project when he has time. So GIMP’s AI options seem to be non-existent right now.
Get the Creative Bloq Newsletter
Daily design news, reviews, how-tos and more, as picked by the editors.
AI in Krita
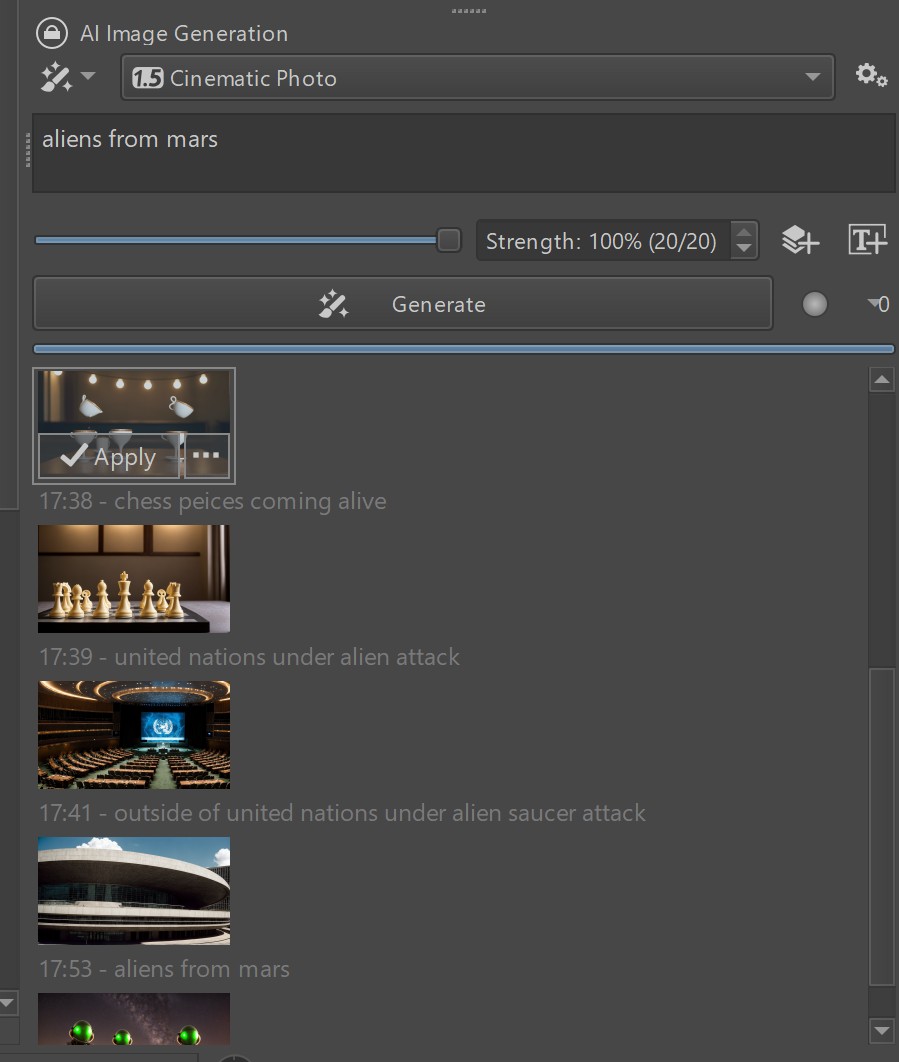
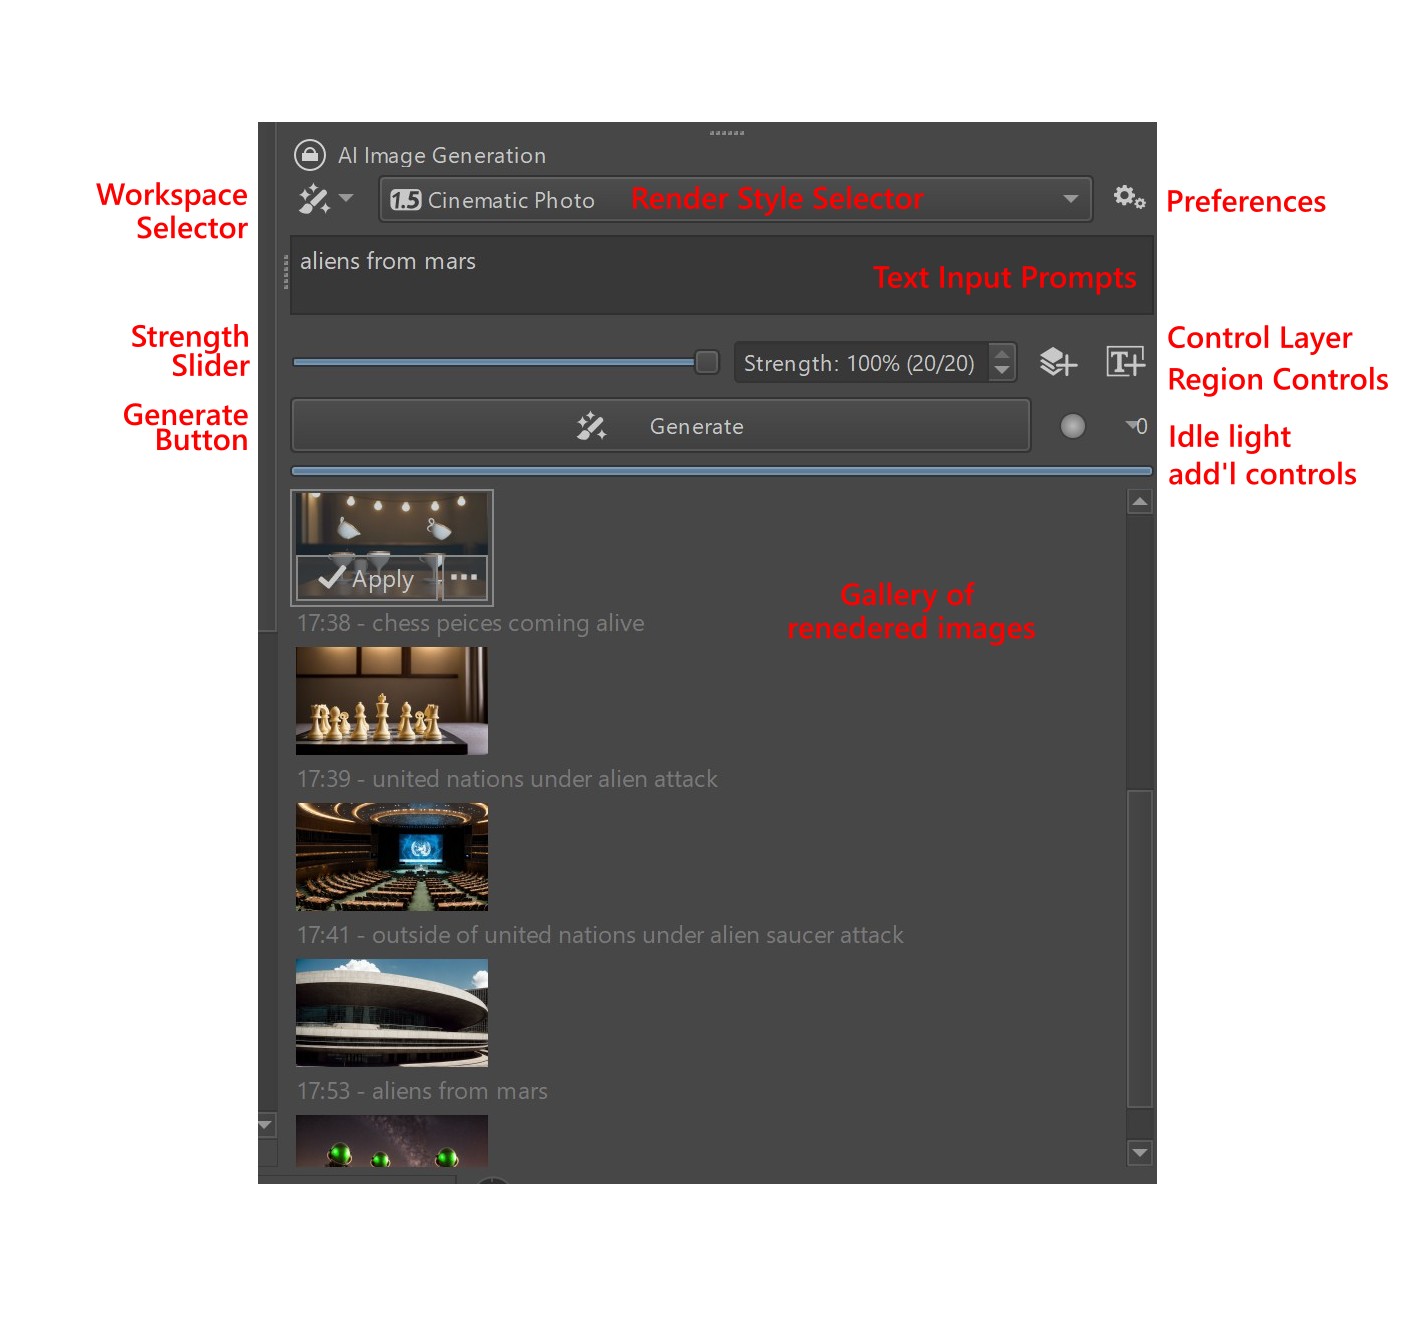
But I found a plugin last year, for Krita, called “AI Image Generation”. As you can see in the image above, it docks right into the Krita right-side panel. Its primary user interface is quite simple, with only four elements to address.
1. Workspace Selection:
Select between the default Generate interface, and Upscale, Live and Animation.
2. Rendering Style:
Choices include Cinematic Photo 1.5, Comic & Anim, Digital Artwork, and Flux.
3. Text Entry, scene description:
This is where you type in the scene instructions.
4. Strength Slider:
It’s there, but rendering options reduce if this slider is lowered. So I don’t touch it.
5. The GENERATE button:
And this is where it all happens. One press and the rendering begins.
Getting started – hardware tweaks
When I first installed this plugin into Krita last year, I had it set up to use the providing company’s cloud rendering, rather than rendering locally. I began using the free credits for the rendering service, and the rendering speed seemed nice. Test renders were taking me 30 seconds, maybe up to a minute.
But when I ran out of the free credits, I stopped. I have a few friends that have gone down that bunny hole, spending on rendering credits the way my Grandmother used to spend on lottery tickets. I knew local rendering was the way to go.
So I set up the local rendering option. It was surprisingly easy to do (more on this below). And I began to render. And, it was slow. I mean Molasses level slow, many minutes for small tests.
You see, at the time I had an AMD Radeon pro workstation GPU card. It was rock solid, as workstation cards are. But no speed demon.

AI rendering tends to prefer NVIDIA cards over AMD, we know that. But I had no idea how big a difference there actually was. I assumed I would need a very powerful NVIDIA card to make this work efficiently. And sure, the more powerful the better. But it turned out I didn’t need to go crazy on this.
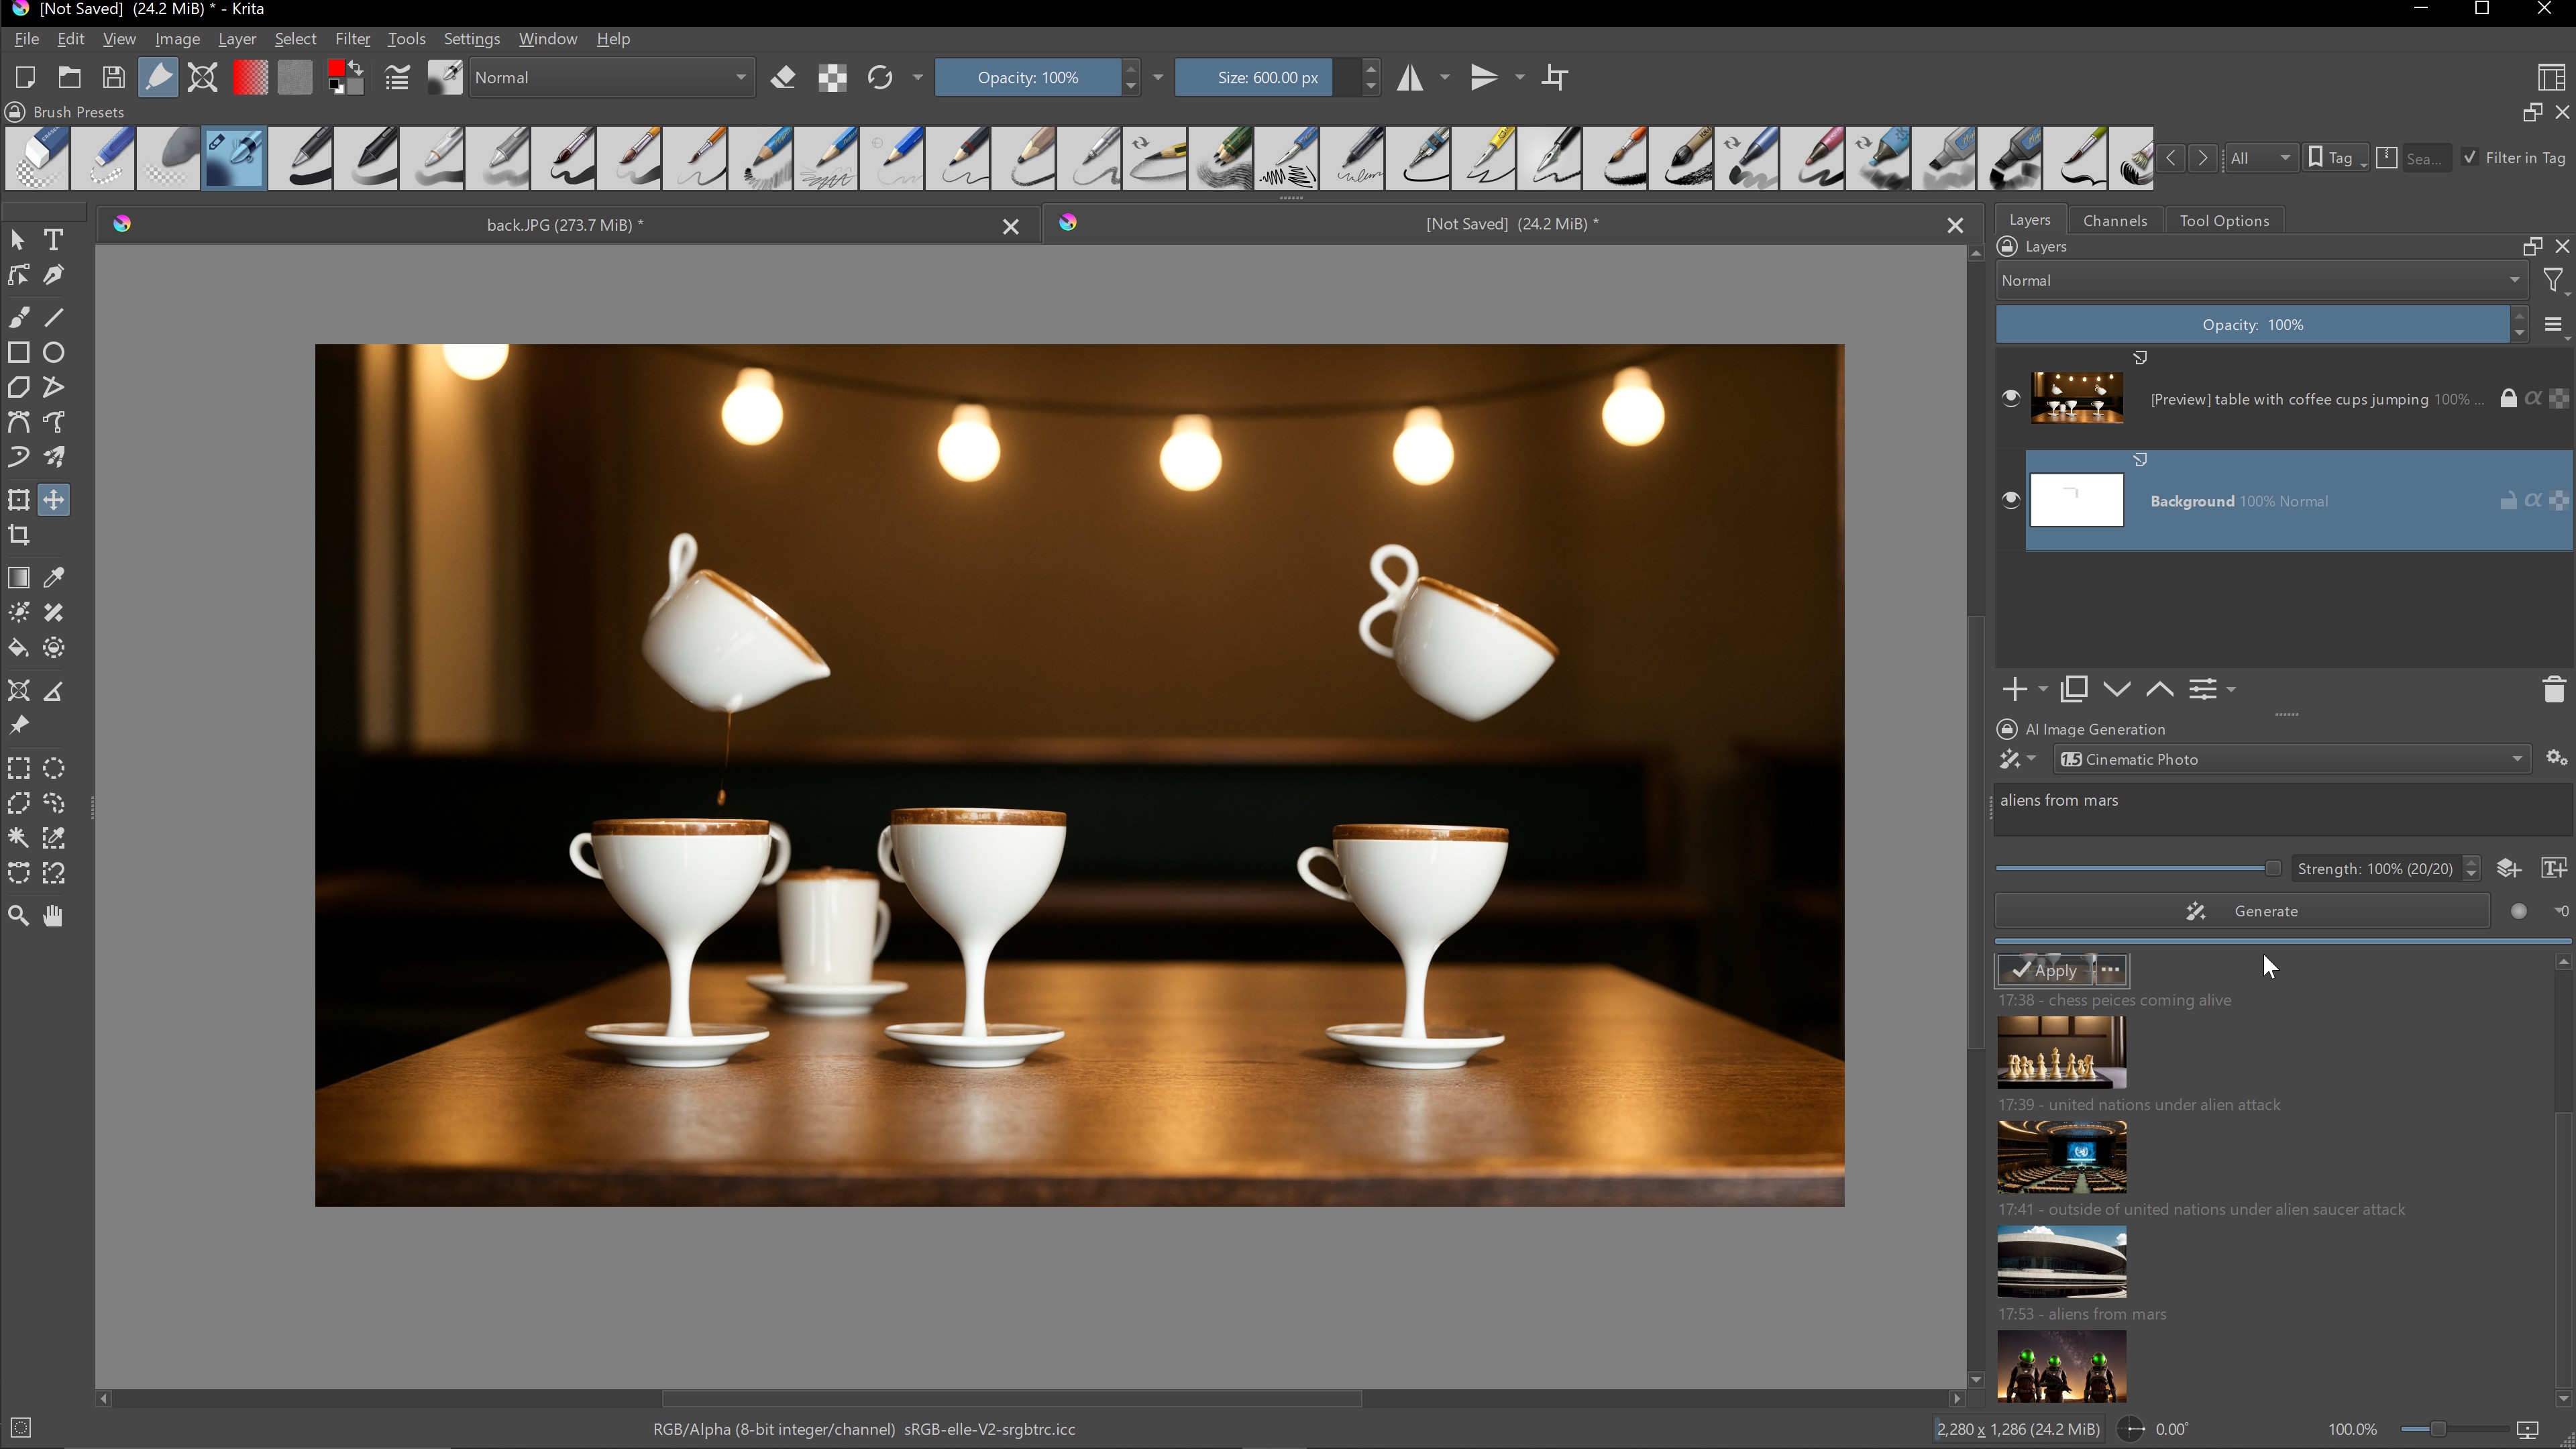
For reasons that have to do with general workflow in Krita and GIMP, I recently swapped out the AMD card for a basic NVIDIA 4060 with just 8GB of video ram (around $300 online – but see a range of great graphics cards here). A total entry level GPU. And to my complete surprise, it made all the difference!
I’ve been rendering the images you see in this article, at a size of 2280 x 1286 pixels. This can easily be scaled up past HD resolutions. And these renders all took under a minute each! Not bad for a very old Windows box, running NVIDIA’s least expensive GPU.
I’ve read, perhaps best taken generally, that Adobe’s average cloud rendering power is approximately equal to having an NVIDIA RTX 3060/8GB.
Krita settings
Under the very simple homepage are many settings. The image below shows one of 5 preferences pages. The Server Configuration page is where you decide if you shall pay for rendering services, or do it yourself.
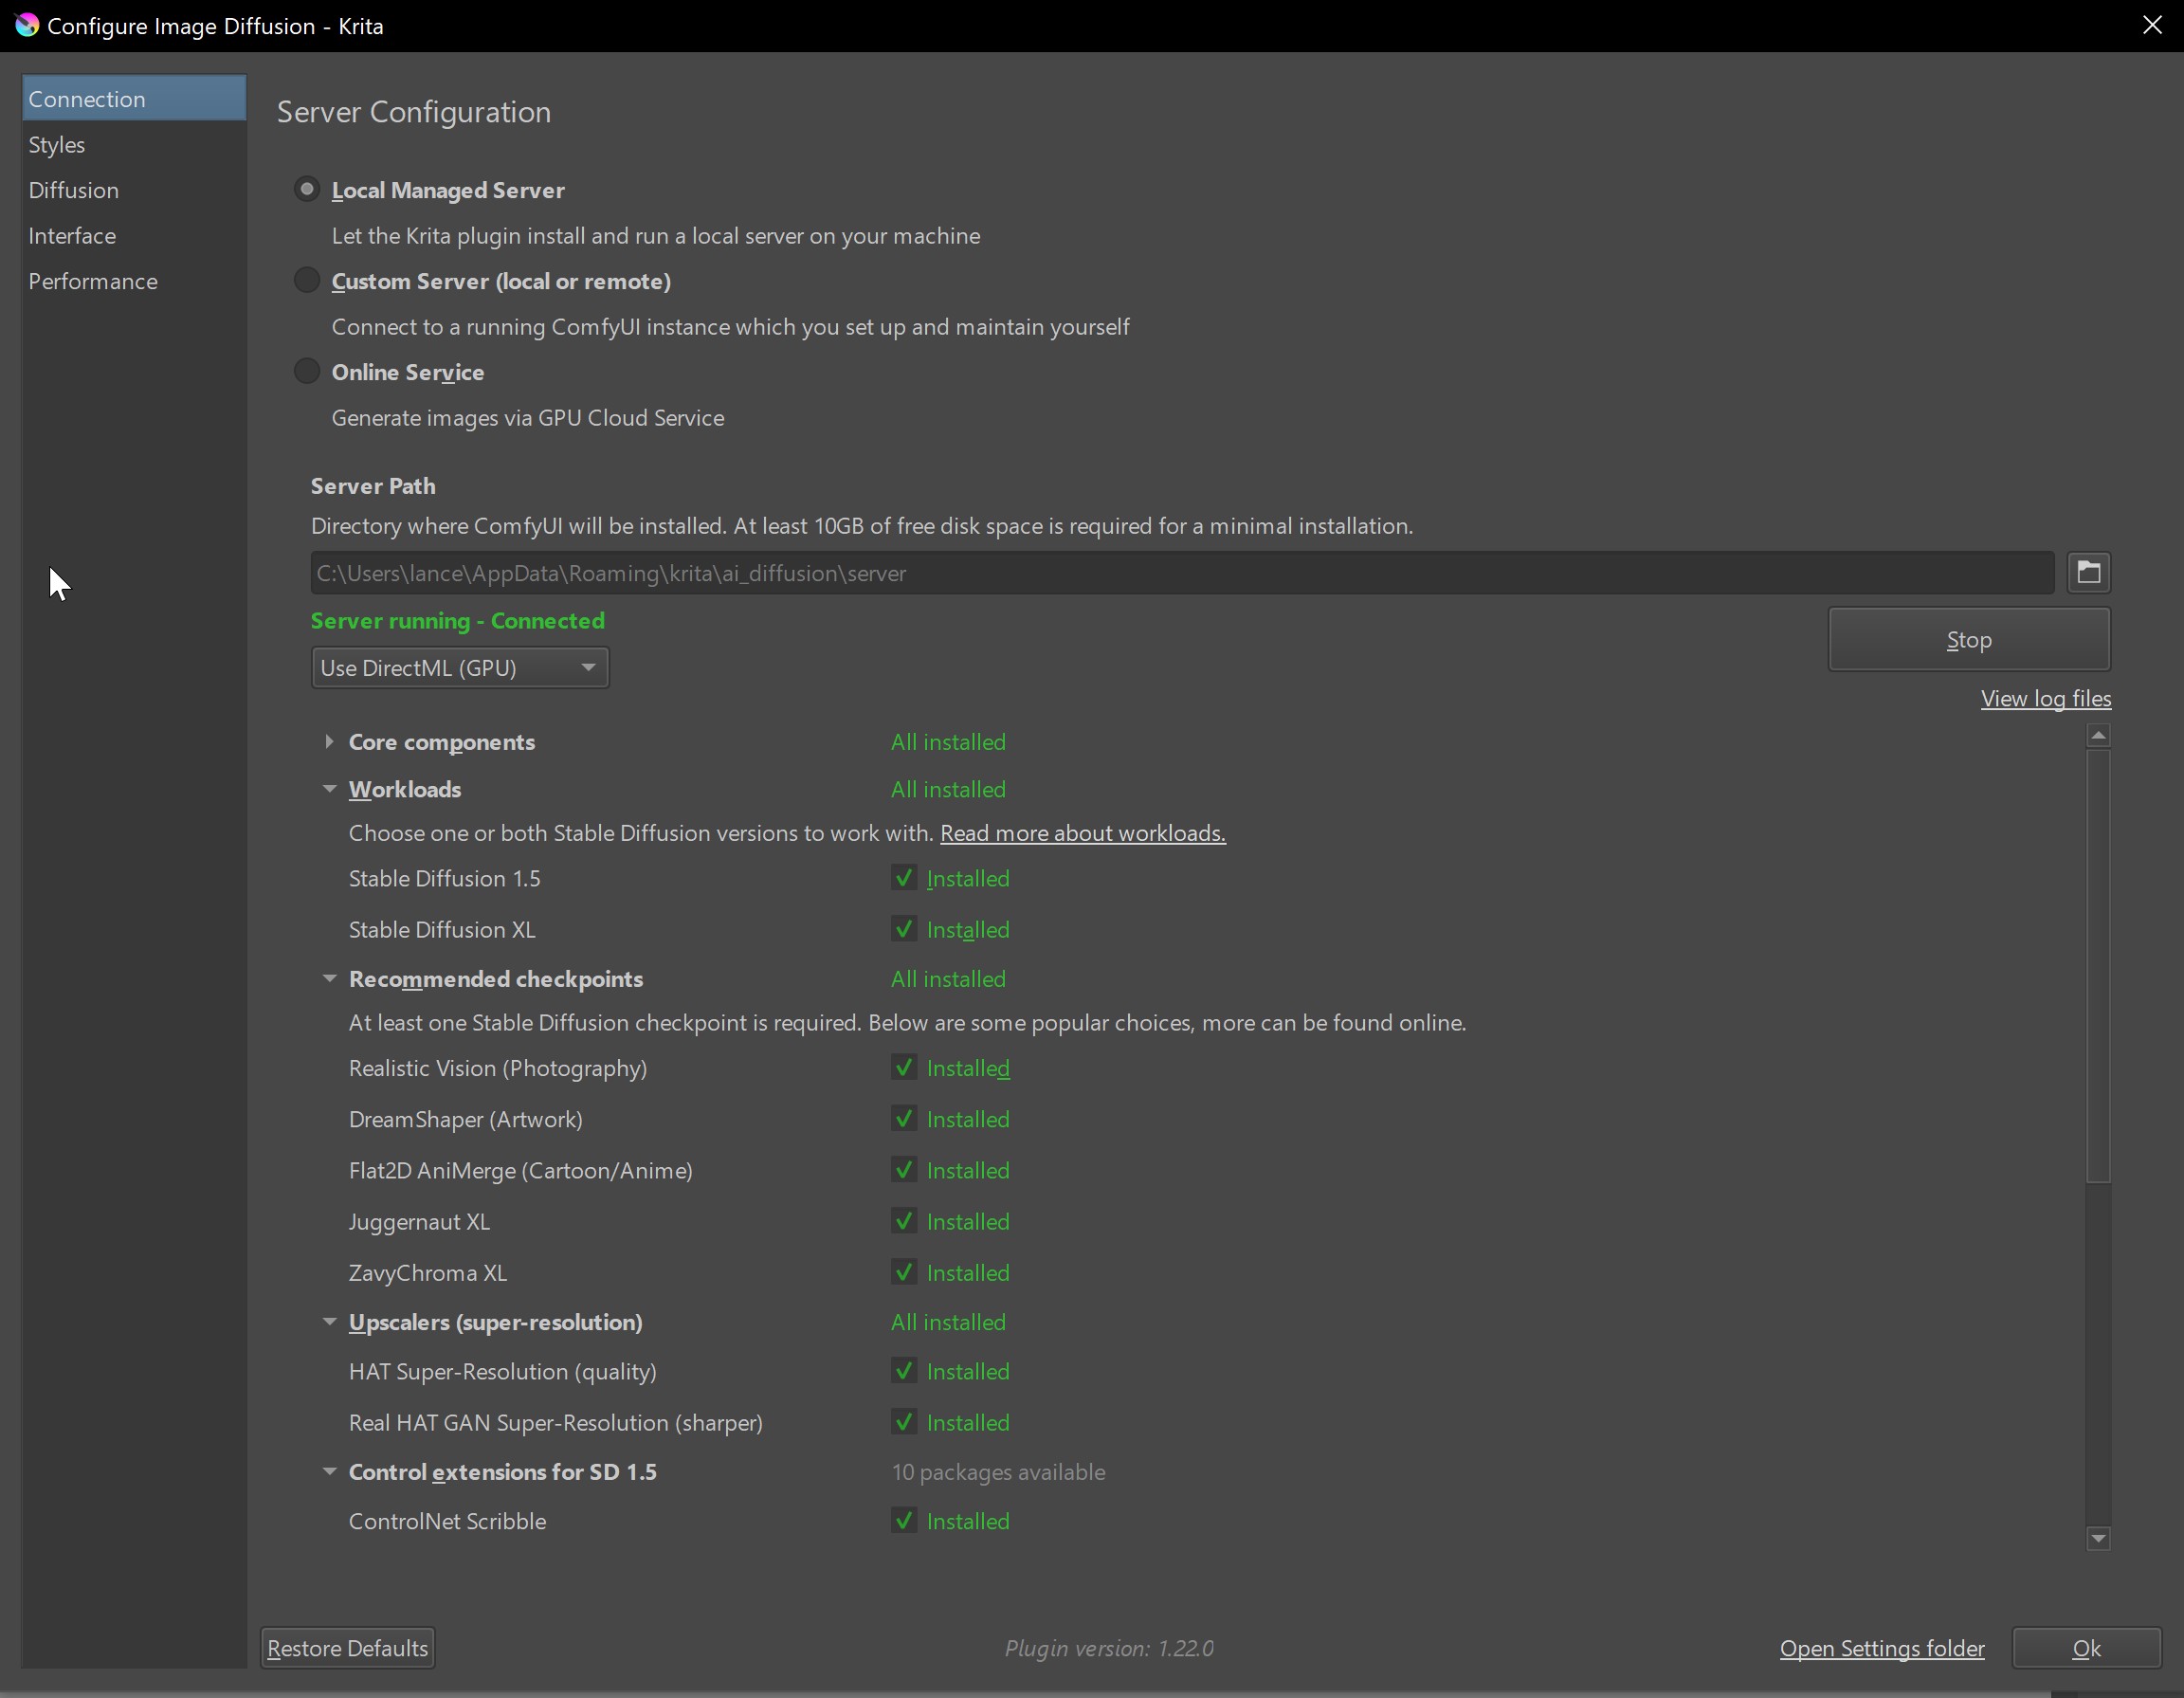
The program needs to set up a hosting server to run locally. Thankfully it can do all the grunt work for us, you will not need a degree in networking. Then choose the rendering option, ideally NVIDIA GPU. Below that you choose the systems you wish to use. I’m on an older Windows box, but I clicked (almost) all the options. You have to try something to know what it’s about. Click the INSTALL button and sit back while it downloads and installs all of the large libraries.
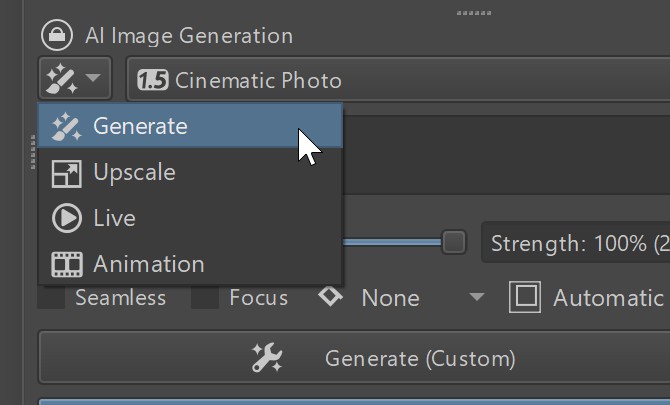
And that’s almost it. Close out and go back to the main page. You will see a pop-up dialog that is referred to as the Workspace selector. The default workspace is what we are in now, called GENERATE. We will leave discussion of the other workspaces for another time.
There is one other setting you will want to address.
Choose a Style: What style you wish your images rendered in is the biggest decision. We have similar choices to make in 3D work as well, as these are all processes that must in the end be rendered.

Content Aware
The controls we have in this GENERATE workspace will vary a bit if we marquis any part of the canvas. If a canvas selection ("marching ants") exists, then the main button has a number of additional options, such as whether or not the rendering must blend with the surrounding imagery.
Essentially, by making a selection, we change the rendering from a full AI generation, instead to a Content Aware type of FILL or EXTEND. Which is awesome because that is something Krita doesn’t have!
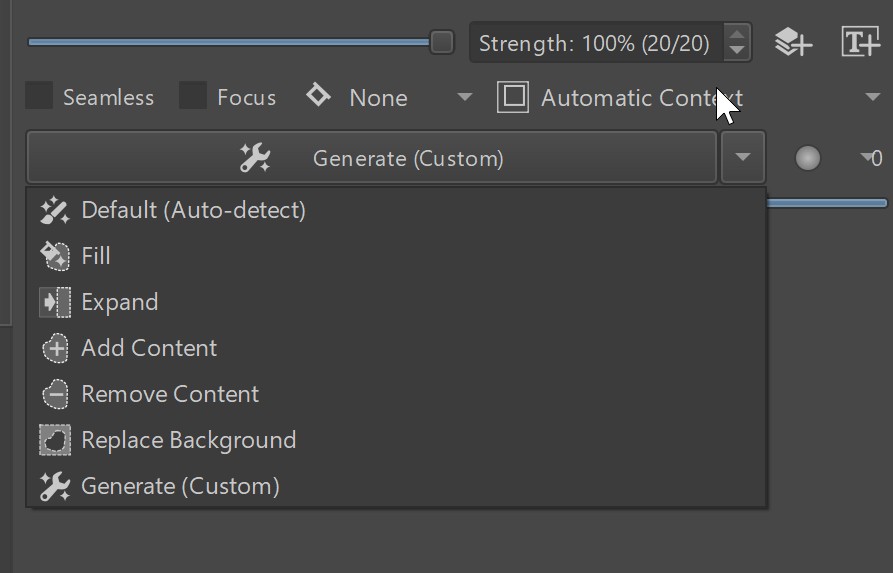
In this case, you will need to make sure that the text input area is empty. If you do use a text prompt, that information will be calculated into the results as well.
The other Generate options, like Expand, Fill, Replace Background, are all variations on the theme, and will require some testing to get a handle on what is best used where.
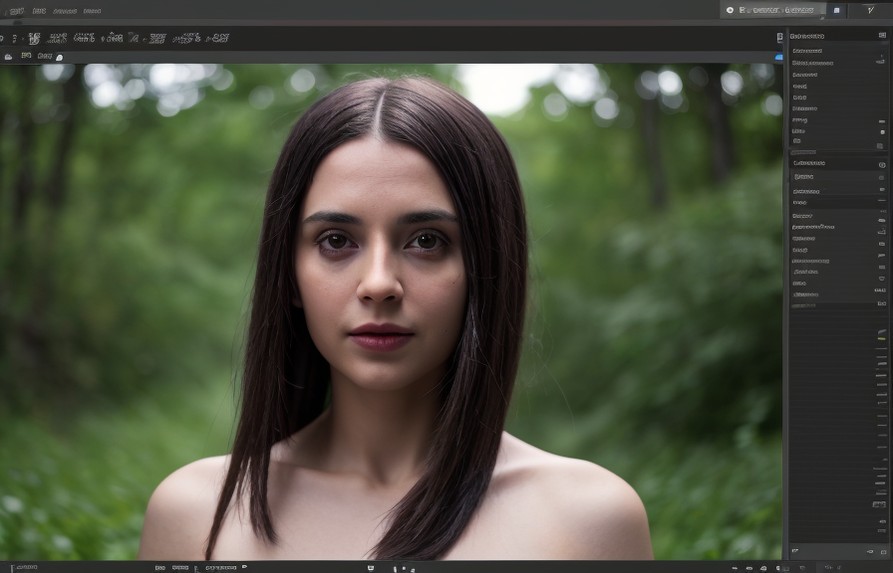
What doesn’t seem to be included here are any type of Healing Brush tools. While Krita does have a functional “Smart Patch” tool, it still falls short of similar tools in Photoshop. But not by huge amounts.
There’s more to say, and more to cover. And I look forward to many discussions about this tool. Including ways to use it for selections and masking, and maybe sharpening blurry photographs. But for now, you have everything you need to install it and start playing with it. Something with this much power doesn’t come along every day.
You can start on the Krita website, and click on the yellow INSTALLATION button.
Pro tip
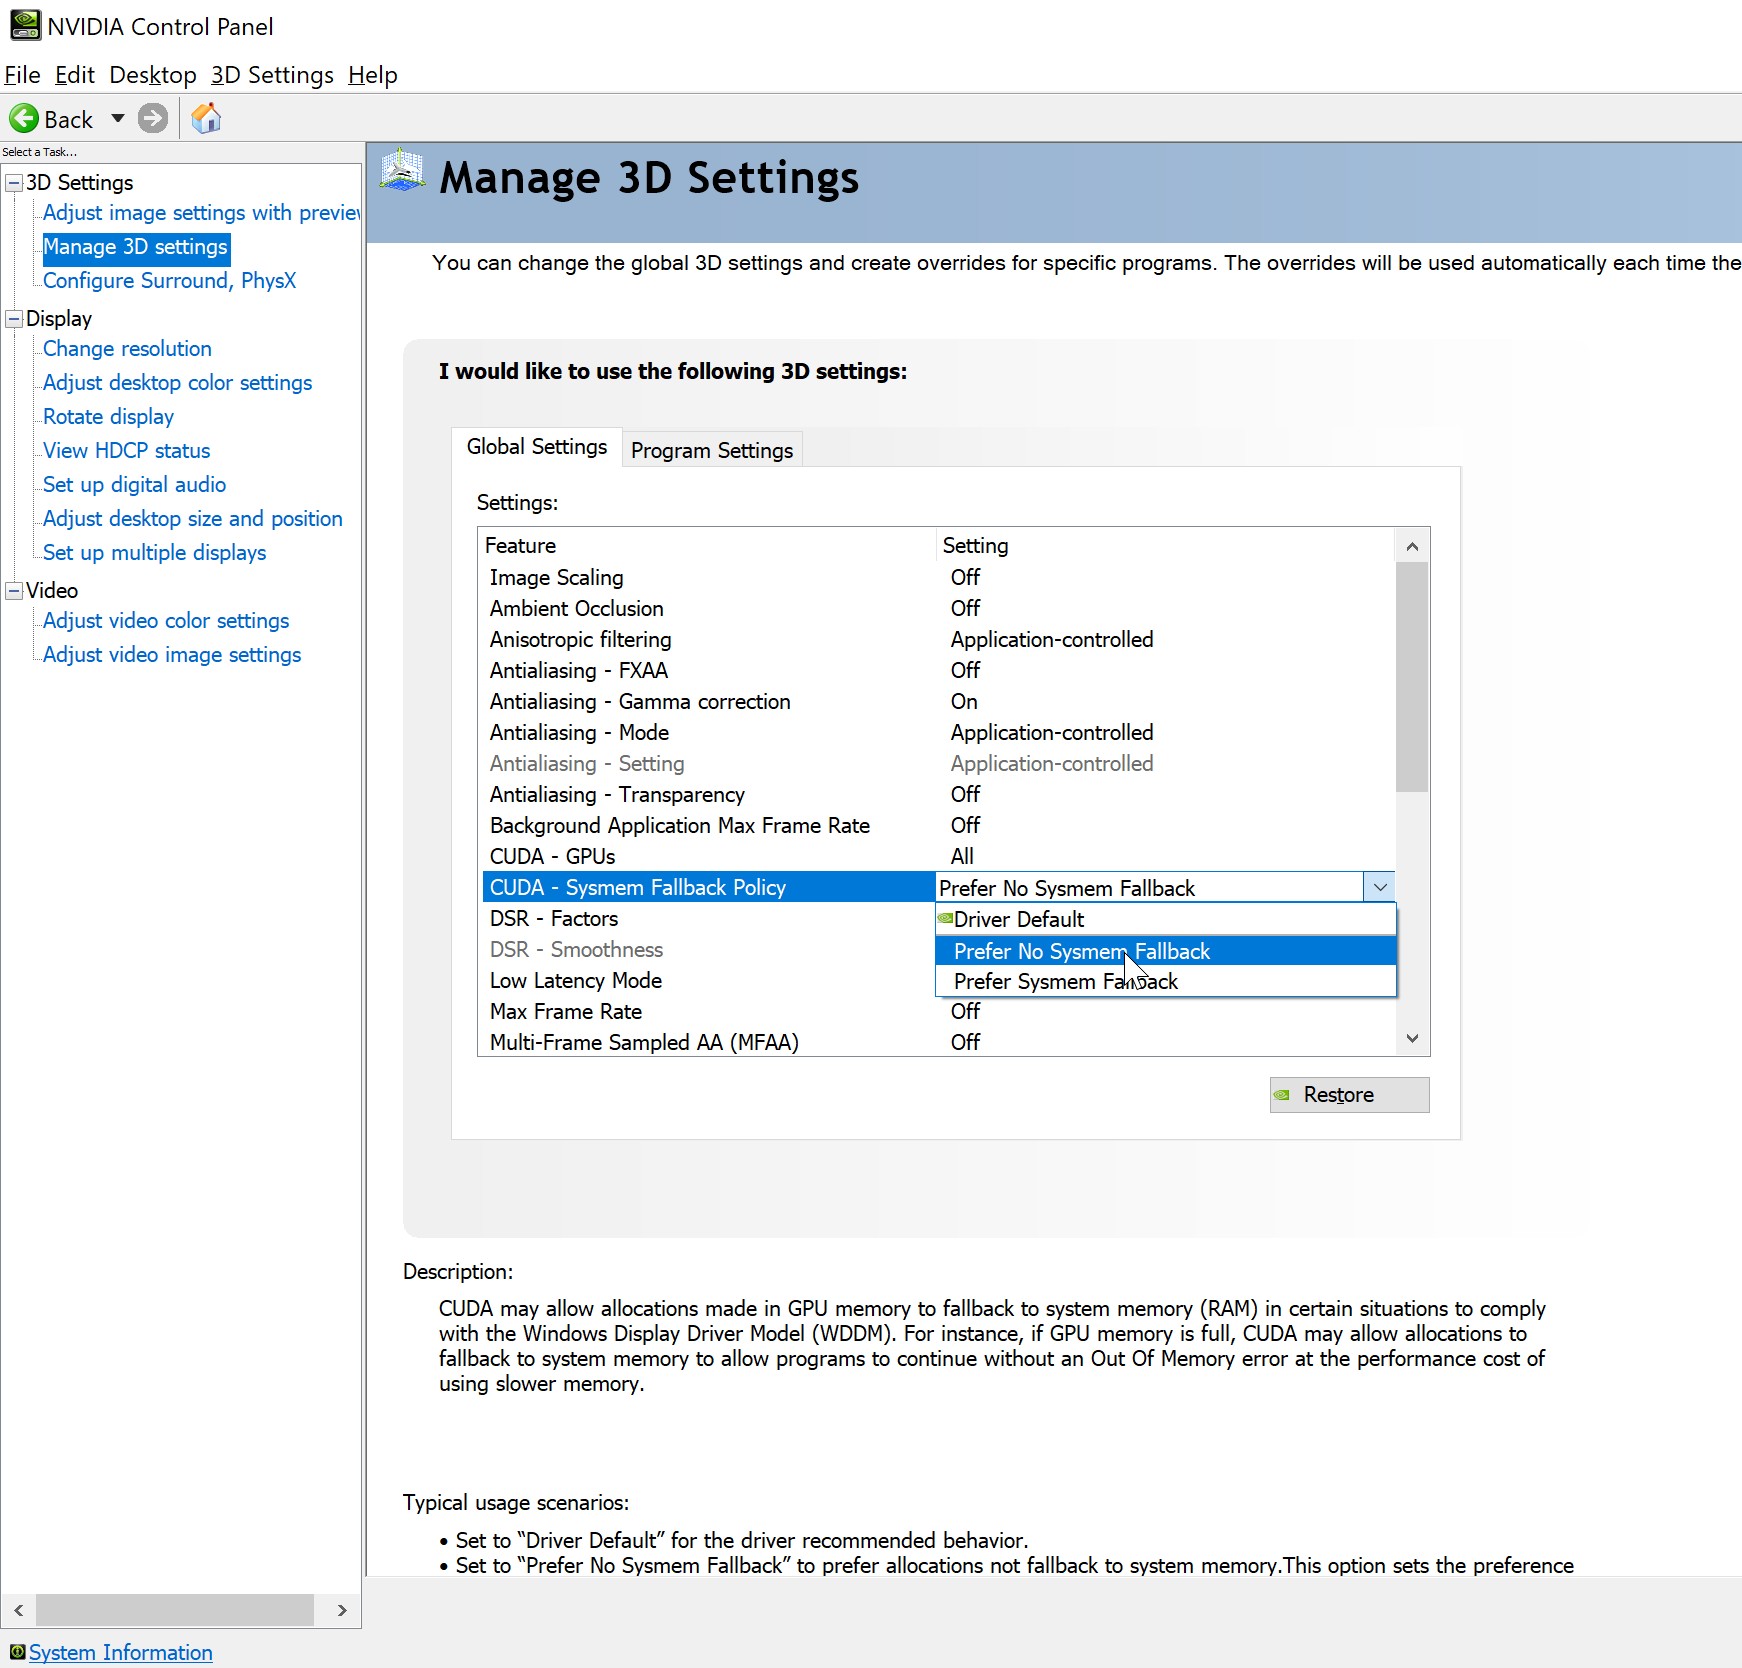
Because we are so dependent on our GPU, it makes sense that its control panel setting will have impact on our work. I read, but have not verified, that setting that CUDA Fallback to "No System Fallback" improves render times. See if it works for your system!
See my Krita vs GIMP comparison here.

Thank you for reading 5 articles this month* Join now for unlimited access
Enjoy your first month for just £1 / $1 / €1
*Read 5 free articles per month without a subscription

Join now for unlimited access
Try first month for just £1 / $1 / €1

Lance Evans is creative director of Graphlink Media, a boutique creative marketing agency that specialises in building brands and has worked with such high-profile clients as Olive Garden, Miller Beer and AMEX. Lance was an early adopter of digital tools, and was on the original beta team for Photoshop. Lance has written for Creative Bloq on a wide range of topics, from technical photography tips to the ins and outs of branding.
You must confirm your public display name before commenting
Please logout and then login again, you will then be prompted to enter your display name.
