Animation basics: 5 pro tips for using keyframes
Learn how to get the most out of your keyframes with these useful tips from Rob Redman.
Animation is a task that lends itself to minimalism but by this I'm not talking about the action in your scene (although simple can be best there too) but in the keyframing of your action. It's very easy to add keys to everything and you will soon be faced with a timeline that looks intimidating at best and unusable at worst.
I'm going to show you a few ways you can work with your keyframes to minimise the pain and to allow you to work efficiently and effectively, letting you concentrate on the action in the scene.
01. Its all in the rig
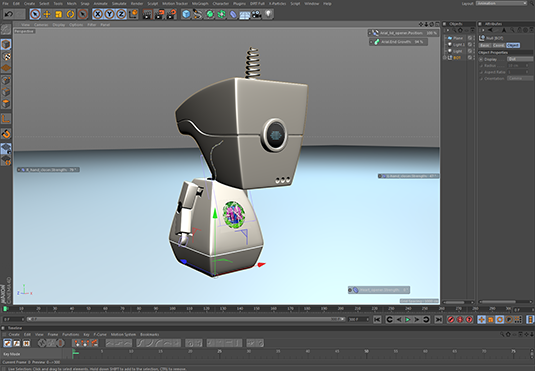
Keyframe animation can be a time consuming and intricate task. Make life easier for yourself by ensuring you are working with clean, easily understood rigs.
My robot model has a few simple controls added to the viewport that are only visible when he is selected. This means I don't need to trawl through hierarchies to find what I need and can concentrate on only the parts I'm animating at any given time.
The little circle to the left of each label means I can add keyframes directly as well, so I don't need to lose focus on the actual motion.
02. Be choosy about what you keyframe
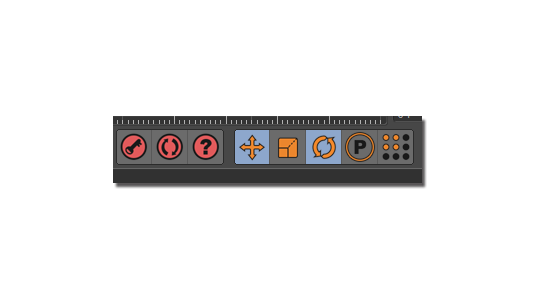
Most software will have a default set of parameters that will be keyframed when you hit the record button. These are usually position, rotation and scale, and quite often a point level or parameter option too. On top of that many apps will have auto record turned on. While this can help you get up and running it really isn't good practice.
Try to deactivate recording anything that you don't choose yourself. Putting yourself in the driver's seat will enable you to understand your timeline better and will reduce unwanted clutter. It will also make it a whole lot easier to go back and make adjustments should you need to (and you will).
03. Blocking out
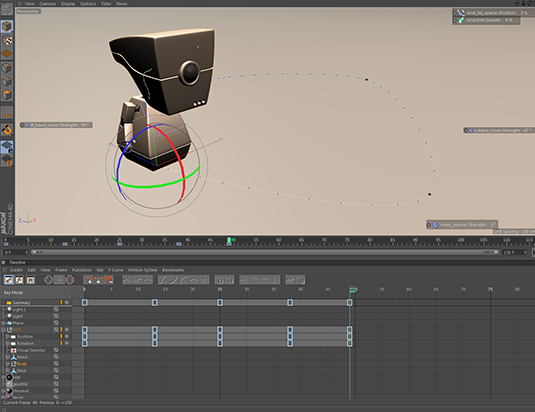
The first step is to block out your animation. This is best thought of as as start, middle and end position, although it can be far more complex depending on your needs. Try to keep details to a minimum here and concentrate on getting the overall pacing right before you move on to other things.
Start with just the overall position and orientation. You can add in limb movement and hip sway later. You can see in the timeline that I have a full two second animation set up with keyframes at the start and end that are identical. This makes step 4 more logical.
04. Duplicating keyframes
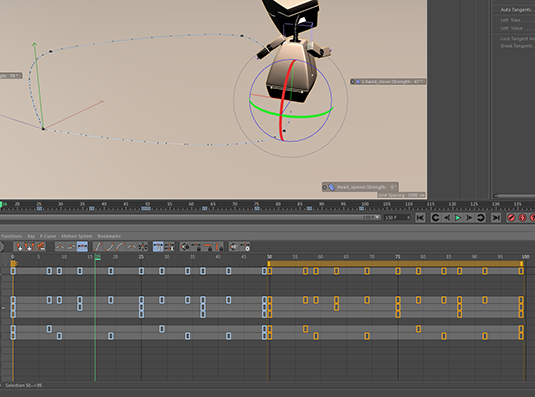
Once you have the basics in place you can use them to create loops. In my example you can see my robot is doing a little dance where he moves in a circle with a little twirl at the end. All I've keyed here is some simple position and rotation for the body, head and arms. I've actually duplicated some of them, specially the keys on frame 49, so I don't get any odd jerkiness at each loop point.
I can now select all those keys and Ctrl-click and drag to generate a fresh loop. I can then click on the name of each item and add in a little variation for a more natural look. By grabbing the end handle of any selected set of frames you can change the speed of that section, with a smooth interpolation.
05. Keep a handle on the curves
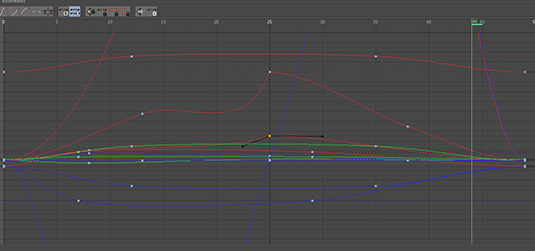
While the keyframe view is great for organisation the true power is in the curve editor, so swap over to that (the space bar in C4D) and all your keys will be there with colour coded curves and each keyframe represented by a black dot with handles. These handles are where you fine tune things and add some personality to your animation. There are a few preset styles of interpolation from easy ease, to ease in or ease out but really you want to be taking manual control.
Curves work in a logical way, moving along the timeline so if you want to ramp up your motion you would take the handle to the left of a key and adjust that. You can pull them up down and left and right, making nailing that velocity and falloff easy. Generaly speaking the shorter the handle the quicker the change and the steeper the angle (compared to the one on the other side) the sharper the motion.
Another massive benefit to the curve editor is that you can actually change the vaule of a keyframe, not just it's interpolation. If you grab a handle you can move it up and down, which raises or lowers the value. That means no need to navigate your scene to find the right part, move to the correct frame, set what you are recording then make then change and record it. You just select one dot and move that. No re-recording needed.
Words: Rob Redman
Creative director and VFX supervisor at Pariah Studios, Rob is also often found speaking at industry events and teaching either on location or at his studio.
Like this? Read these!
- The Cinema 4D secrets of Iron Man's interface
- Hands-on review: Adobe After Effects CC
- How to land your dream job in VFX

Thank you for reading 5 articles this month* Join now for unlimited access
Enjoy your first month for just £1 / $1 / €1
*Read 5 free articles per month without a subscription

Join now for unlimited access
Try first month for just £1 / $1 / €1
Get the Creative Bloq Newsletter
Daily design news, reviews, how-tos and more, as picked by the editors.

The Creative Bloq team is made up of a group of design fans, and has changed and evolved since Creative Bloq began back in 2012. The current website team consists of eight full-time members of staff: Editor Georgia Coggan, Deputy Editor Rosie Hilder, Ecommerce Editor Beren Neale, Senior News Editor Daniel Piper, Editor, Digital Art and 3D Ian Dean, Tech Reviews Editor Erlingur Einarsson, Ecommerce Writer Beth Nicholls and Staff Writer Natalie Fear, as well as a roster of freelancers from around the world. The ImagineFX magazine team also pitch in, ensuring that content from leading digital art publication ImagineFX is represented on Creative Bloq.
