How to do a basic paintover in Procreate: 6 top tips
Create an eye-catching paintover in Procreate on the iPad.

Knowing how to do a paintover in Procreate will transform your projects. After all, being able to sculpt a creature on the iPad is all well and good, but if you can’t fully realise that vision in colour, your ideas will remain very limited. Colour, tone and mood are all crucial components for a concept artist presenting their ideas to client.
For me, Procreate is the the ideal solution to add life to my sculpt. Using Procreate I have the ability to create and stack layers, work with masks, opacity and hues, and maintain a greater degree of flexibility that would allow me the ability to alter colours or tones as the client desires.
In the workflow below I'll show you how I take a simple character sculpt made in Forger and bring it to life with Procreate. This will include a look at colour, texture, and Procreate's brush options.
Don't forget, if you want to learn more about Procreate's community-created brushes, check out our guide to the best Procreate brushes, including free and premium options. And if this tutorial has whetted your appetite for creative tools, head on over to our guide to the best iPad apps for designers.
01. Sculpt in Forger

Sculpting in Forger is very similar to ZBrush (here's our top tips for mastering ZBrush), you can push and pull your forms and remesh at any point. It contains an object outliner and layers, so after a little practice, the interface becomes pretty familiar.
Here I’ve imported some of my own stamps to create a layer of detail for the stamp brush, which only operates in drag rectangular mode. To make this work I have to ensure all my stamps have a decent feathering.
Achieving this type of detailing is, I believe, a first for any app-based sculpting program – my final model is around 3.5 million polys.
02. Render in Forger

Rendering in Forger is limited, but you can do some basic material assignments and change the location of the single light source. So I’m rendering out some passes to comp together in Procreate.
A single left light, top, bottom and right. I’m also approximating something like an ambient occlusion pass, and assigning a very specular Blinn to the skin surface.
03. Layer in Procreate

Once I have my renders, I can start the paint-over process. First I bring all my images into Procreate and stack them in the layers box. I can now start to make new layers, like a colour pass that has a clipping mask to the basic render below it.
This way I can paint the basic colours on top of my render. I also speckle in some variation with a spotty brush of light and dark spots to vary the skin tone. Most of my layers are set to Screen, Soft Light or Lighter Color.
04. Test lighting passes

I’m going to try out all my lighting passes, and possibly blend them to give a faked global illumination. During this process I realise that I like the left side light the best, and focus on a concept that utilises this light source most.
The other passes are still blended in to a degree, and to do this I set each layer to Screen and turn down the opacity until I am happy with the result. I’m also assigning a colour to my left light as a clipping mask.
I rendered the lights all in white, so I simply have to create a fill layer above it and then set that to colour and clipping mask, and it should give me a nice yellow light source to work with.
05. Apply texture detail

I’ve downloaded some nice photo reference of lizard skin and some green eyeballs. I’m importing these images into Procreate on separate layers and then using masks to reveal the sections of texture I want.
For something that's just a concept paintover, I'm not fussy about getting it exactly right. I really just want to capture the feel, so this is a nice quick way to add some real-world details to the final image. I’m also using a crosshatched brush to give the fabric of the bandana a little textured feel.
06. Create a background

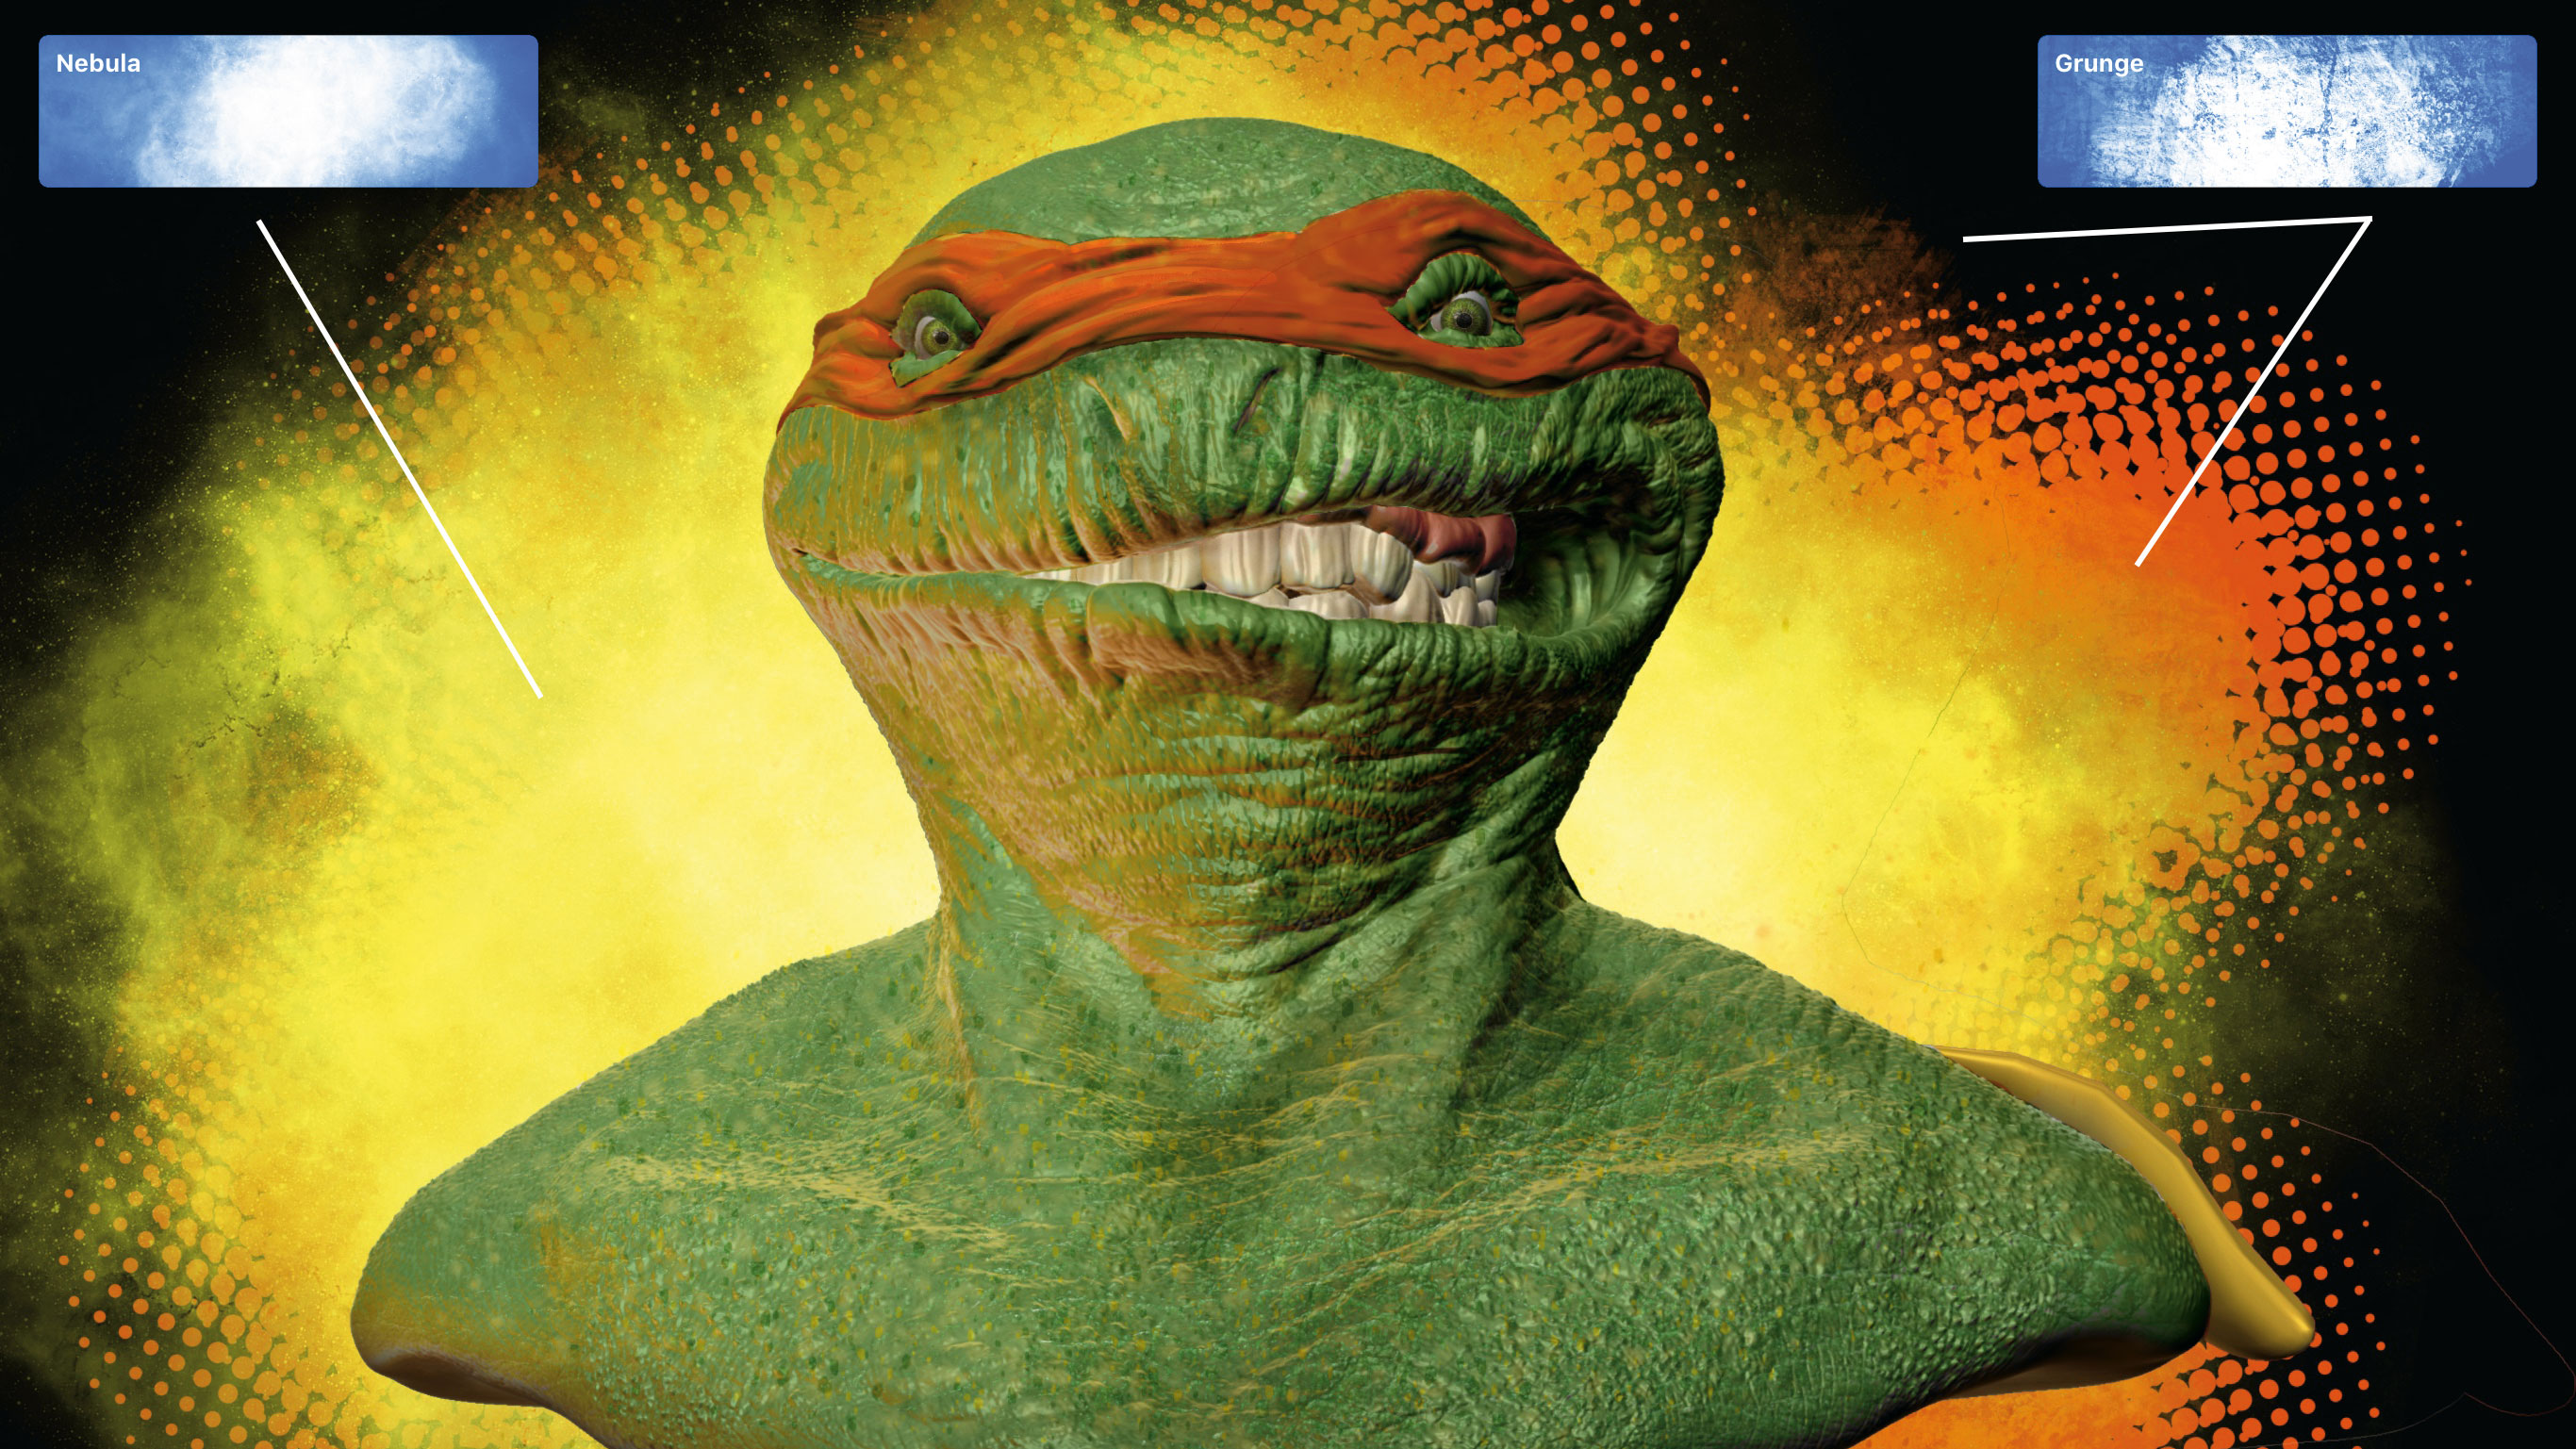
Setting any image against black will seem a little boring. With my strong left side light source, it would be nice to play that up a bit more, so using a few of Procreate’s default brushes I can add some cool effects to the background to make it pop a bit more.
I use three brushes for this, nebula, grunge and halftone, and layer each one on top of the next to give it a sort of comic-y look, but with the mysterious light from the turtle mutagen. TURTLE POWER!
This article originally appeared in issue 254 of 3D World, the world's leading magazine for 3D artists. Buy issue 254 or subscribe here.
Related articles:

Thank you for reading 5 articles this month* Join now for unlimited access
Enjoy your first month for just £1 / $1 / €1
*Read 5 free articles per month without a subscription

Join now for unlimited access
Try first month for just £1 / $1 / €1
Get the Creative Bloq Newsletter
Daily design news, reviews, how-tos and more, as picked by the editors.
