Painting in the 80s airbrush style
Get that retro airbrush effect with this artist's top Photoshop tips.
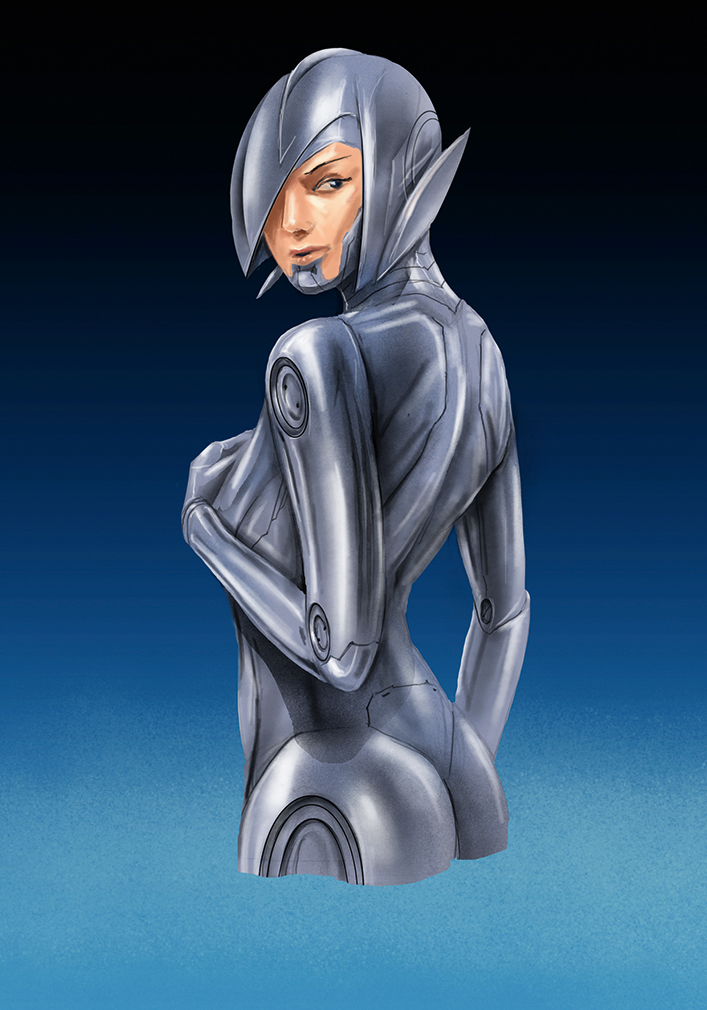
What instantly pops in my mind when heard about learning how to paint in an airbrush style are the amazing early paintings of Hajime Sorayama. To recreate his iconic style digitally, I want to use similar steps in the work process, emulating what he would use with the traditional medium.
I attempt to replicate the small imperfections of the airbrush, use digital masking techniques with selections, and vary the edges the same way as the artists of the '80s did to separate the main shapes.
I also want to show the key style points of this genre. These include using simple backgrounds with gradients, oversaturated colours, and highly reflective materials such as chrome, glass or shiny plastic that are relatively easy to replicate digitally.
I chose the style of Sorayama because I feel his works incorporate all the aesthetics of the '80s. If you'd like to mimic the work from a particular time period, the best way is to choose an iconic artist from the time, study their style and then reverse engineer how the artworks were created. If you understand the process with traditional mediums, you can recreate them digitally.
01. Preliminary sketch
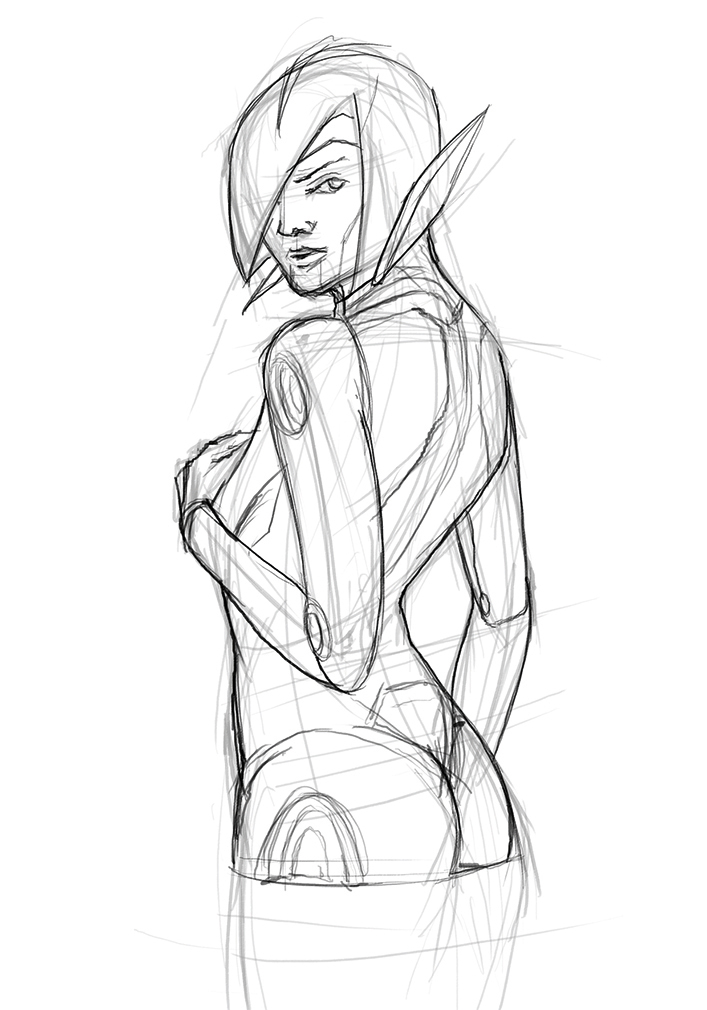
I create a rough sketch based on a reference photo of a model to get the correct pose, then do a more clean line-work version on a separate layer, which includes the key characteristics of Sorayama’s robot girls. I do this pretty quickly to capture the overall feeling, but the more you spend on developing clean and accurate line-work, the better your final design will be.
02. Painting a gradient
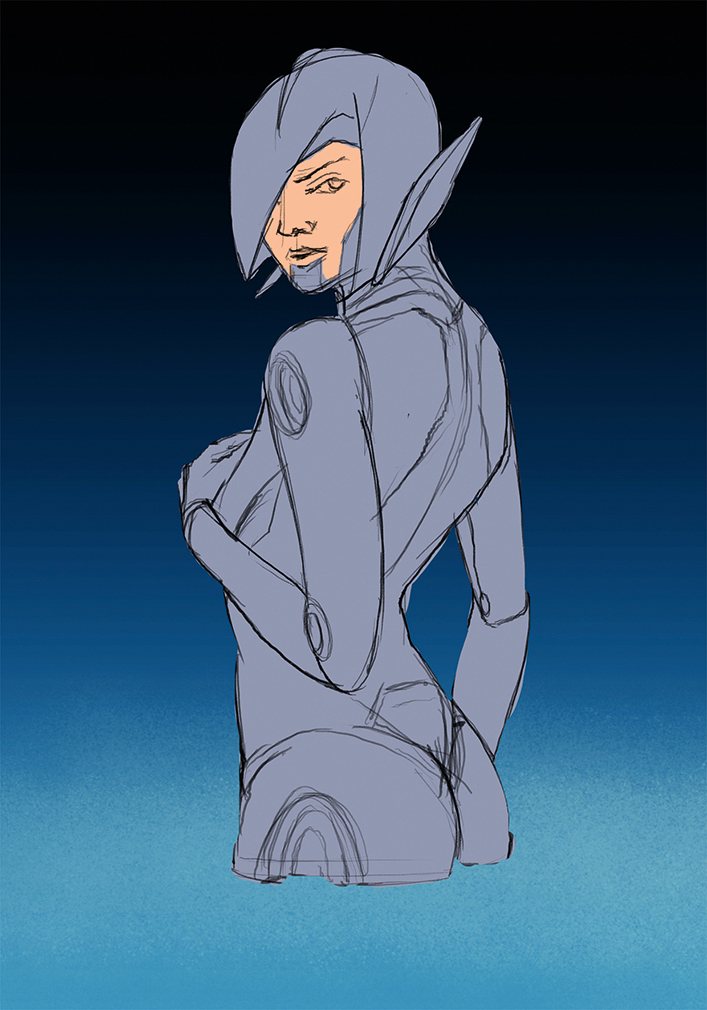
Next, I paint a simple gradient in the background using my custom airbrush and block in the silhouette of the girl. I use a blueish grey colour to capture the plain material colour of chrome without reflections. From this point on I use this silhouette as a layer mask: this enables me to keep the outer edges of the robot/human character clean.
03. Adding values

I gradually move from the mid-values in the painting towards the darks and lights. I only use Photoshop’s Soft brushes to emulate the original technique and try to replicate the classic glowing reflections from the metallic surfaces. I also start to push back my original line drawing in the same way that I would cover it with paint, as if I were using a traditional airbrush.
04. Final touches
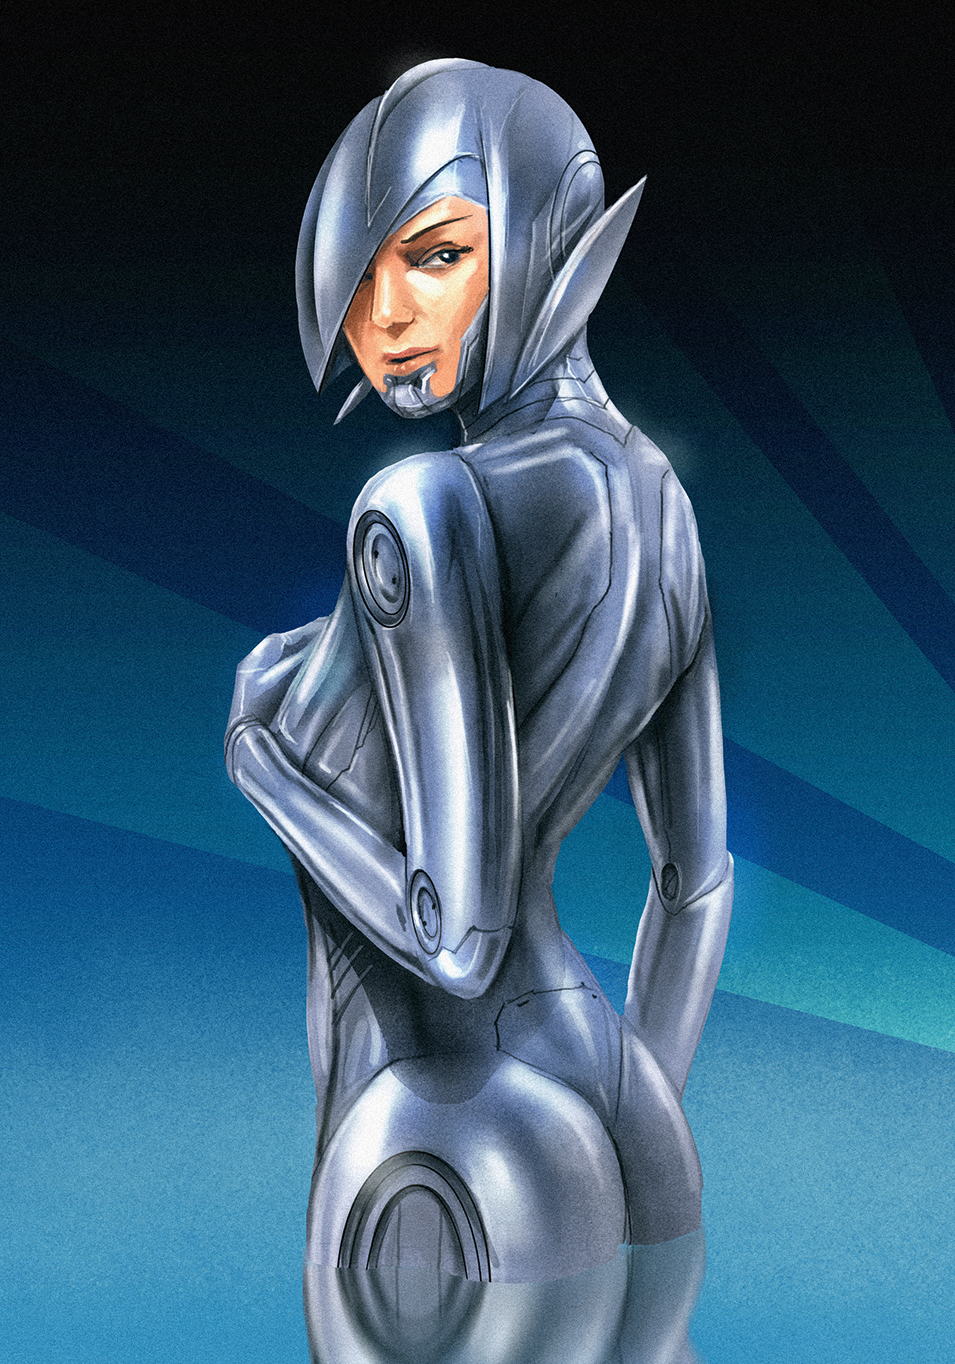
I introduce hard edges, much like how traditional airbrush artists use physical masks. I use the Lasso tools to create selections and paint inside those. I also paint in thin seam lines as small details to break up the bigger shapes. As a final touch I paint the typical glowing reflections and add some grain and noise effects, to recreate the feel of early small-sized airbrush works.
This article was originally published in ImagineFX magazine issue 137. Buy it here.

Thank you for reading 5 articles this month* Join now for unlimited access
Enjoy your first month for just £1 / $1 / €1
*Read 5 free articles per month without a subscription

Join now for unlimited access
Try first month for just £1 / $1 / €1
Get the Creative Bloq Newsletter
Daily design news, reviews, how-tos and more, as picked by the editors.
