How to colour comics
A leading colourist shares 14 techniques for adding colour to comic artwork.
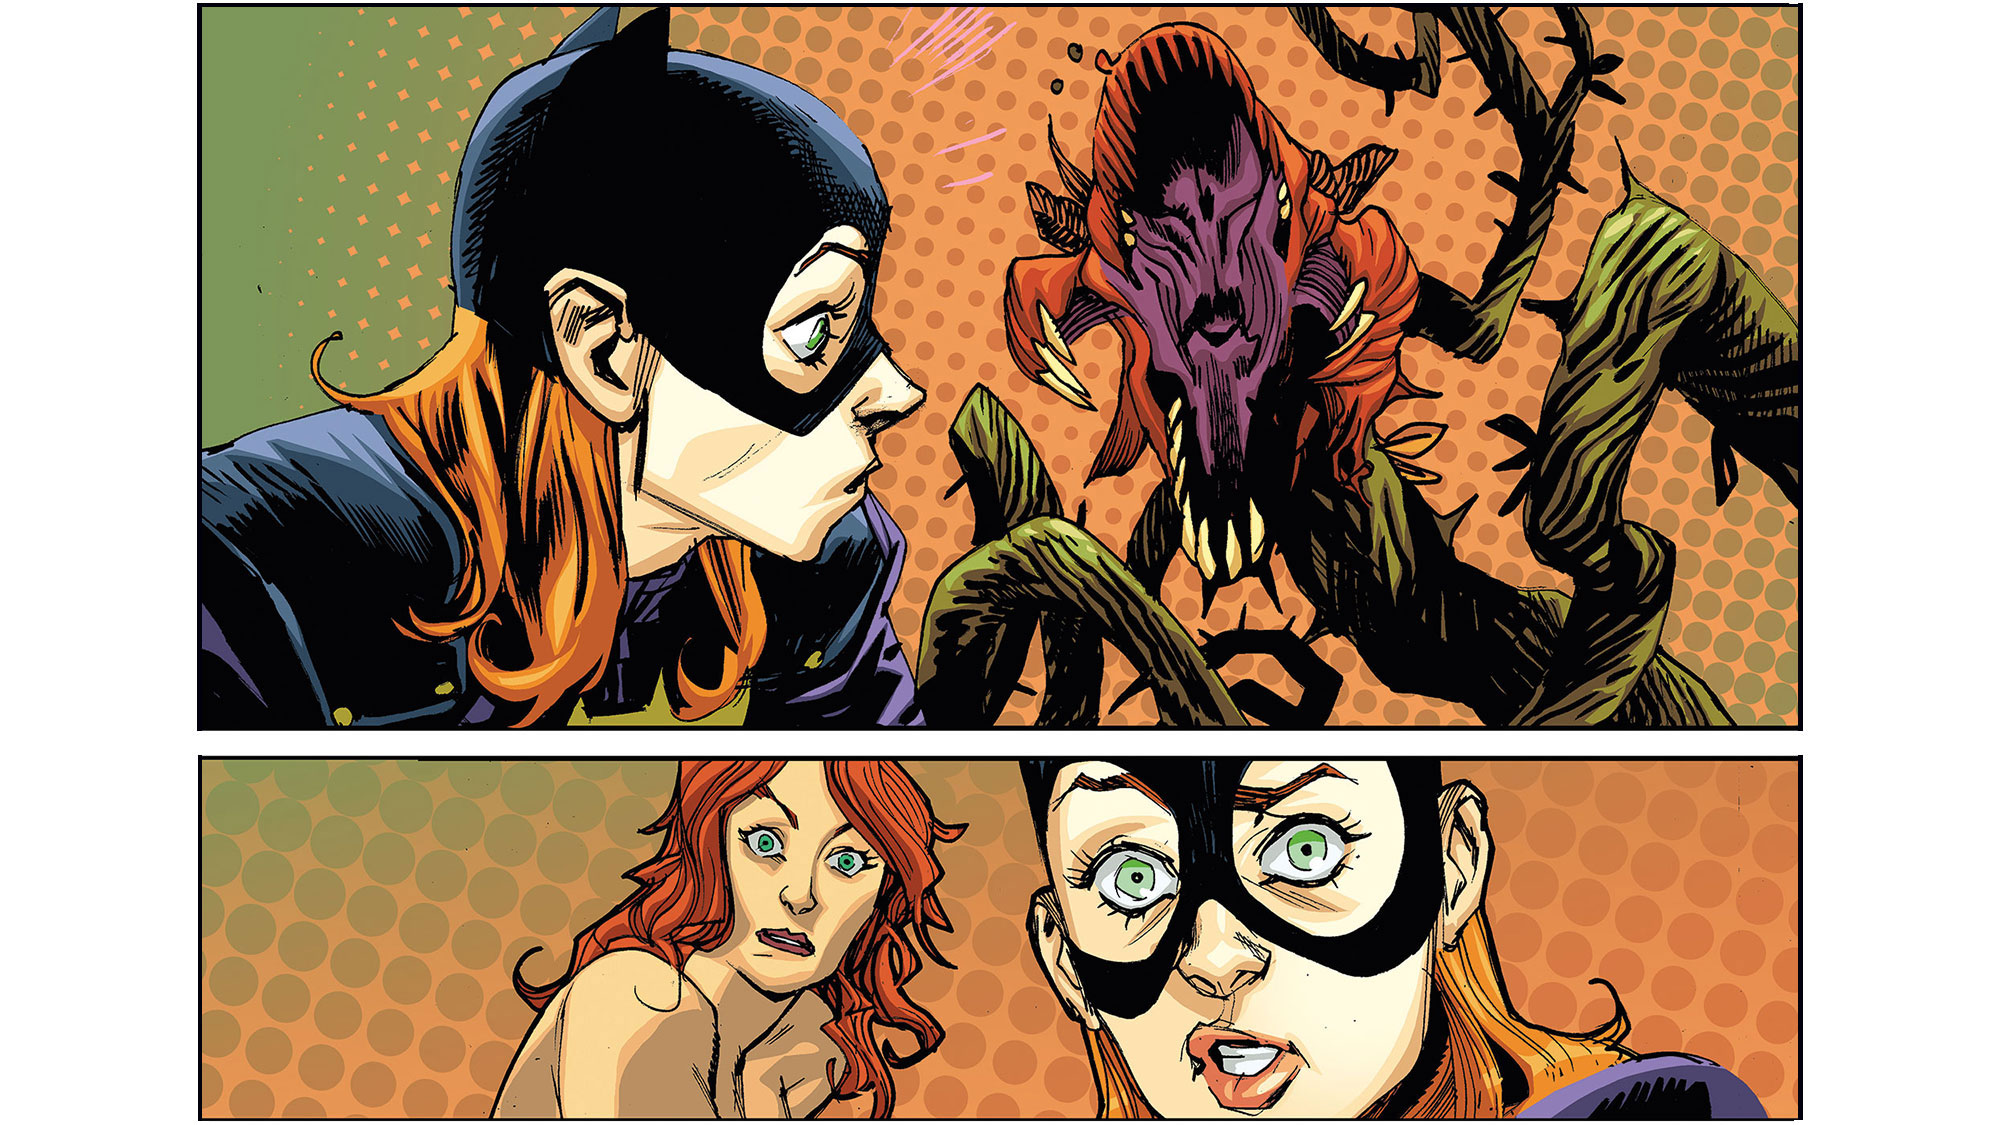
Colouring comics is the best job in the art world, as far as I’m concerned, because it leans heavily towards the fun part of art: the storytelling. In this article, I’m going to take you through my top tips for adding colour to black and white drawings to bring your scenery and character designs to life.
Colour can help expand the scope of a comic, turning each panel from a two-dimensional drawing into a window to a rich, nuanced world. The colour in those panels can flow together to set the pace, like a song. I’ll start by answering some key questions, before sharing some tips for getting the most from colour. If you’re after drawing tips, take a look at our article on how to create a comic page.
Why use colour in comic art?
This might seem like an inane question, but it’s worth thinking about what benefits colour can bring to an illustration that black and white can’t. Colour can convey things like mood, time of day, change of scene, image planes and depth of field.

Colour can be a great visual shorthand to help a reader grasp what’s going on, without hammering them over their head with dialogue or having to draw absolutely everything in a scene. Something as simple as a yellow background and blue shadows can tell you that it’s sunrise.
What software should I use?
Until recently, Photoshop CC was the de facto software used in comic book colouring, but Clip Studio Paint has been changing that. Clip is much faster with some tasks like laying in flat colours, primarily due to its advanced Paint Bucket tolerance settings that auto-trap and detect line gaps when filling inked shapes. A huge time saver!
That said, I still prefer the brushes available in Photoshop for rendering. Beyond the desktop, I’ll sometimes work on my iPad Pro using either Clip or Procreate as well. Not sure which app is right for you? Take a look at our guide to the best software for digital artists.
01. Start with flat colours
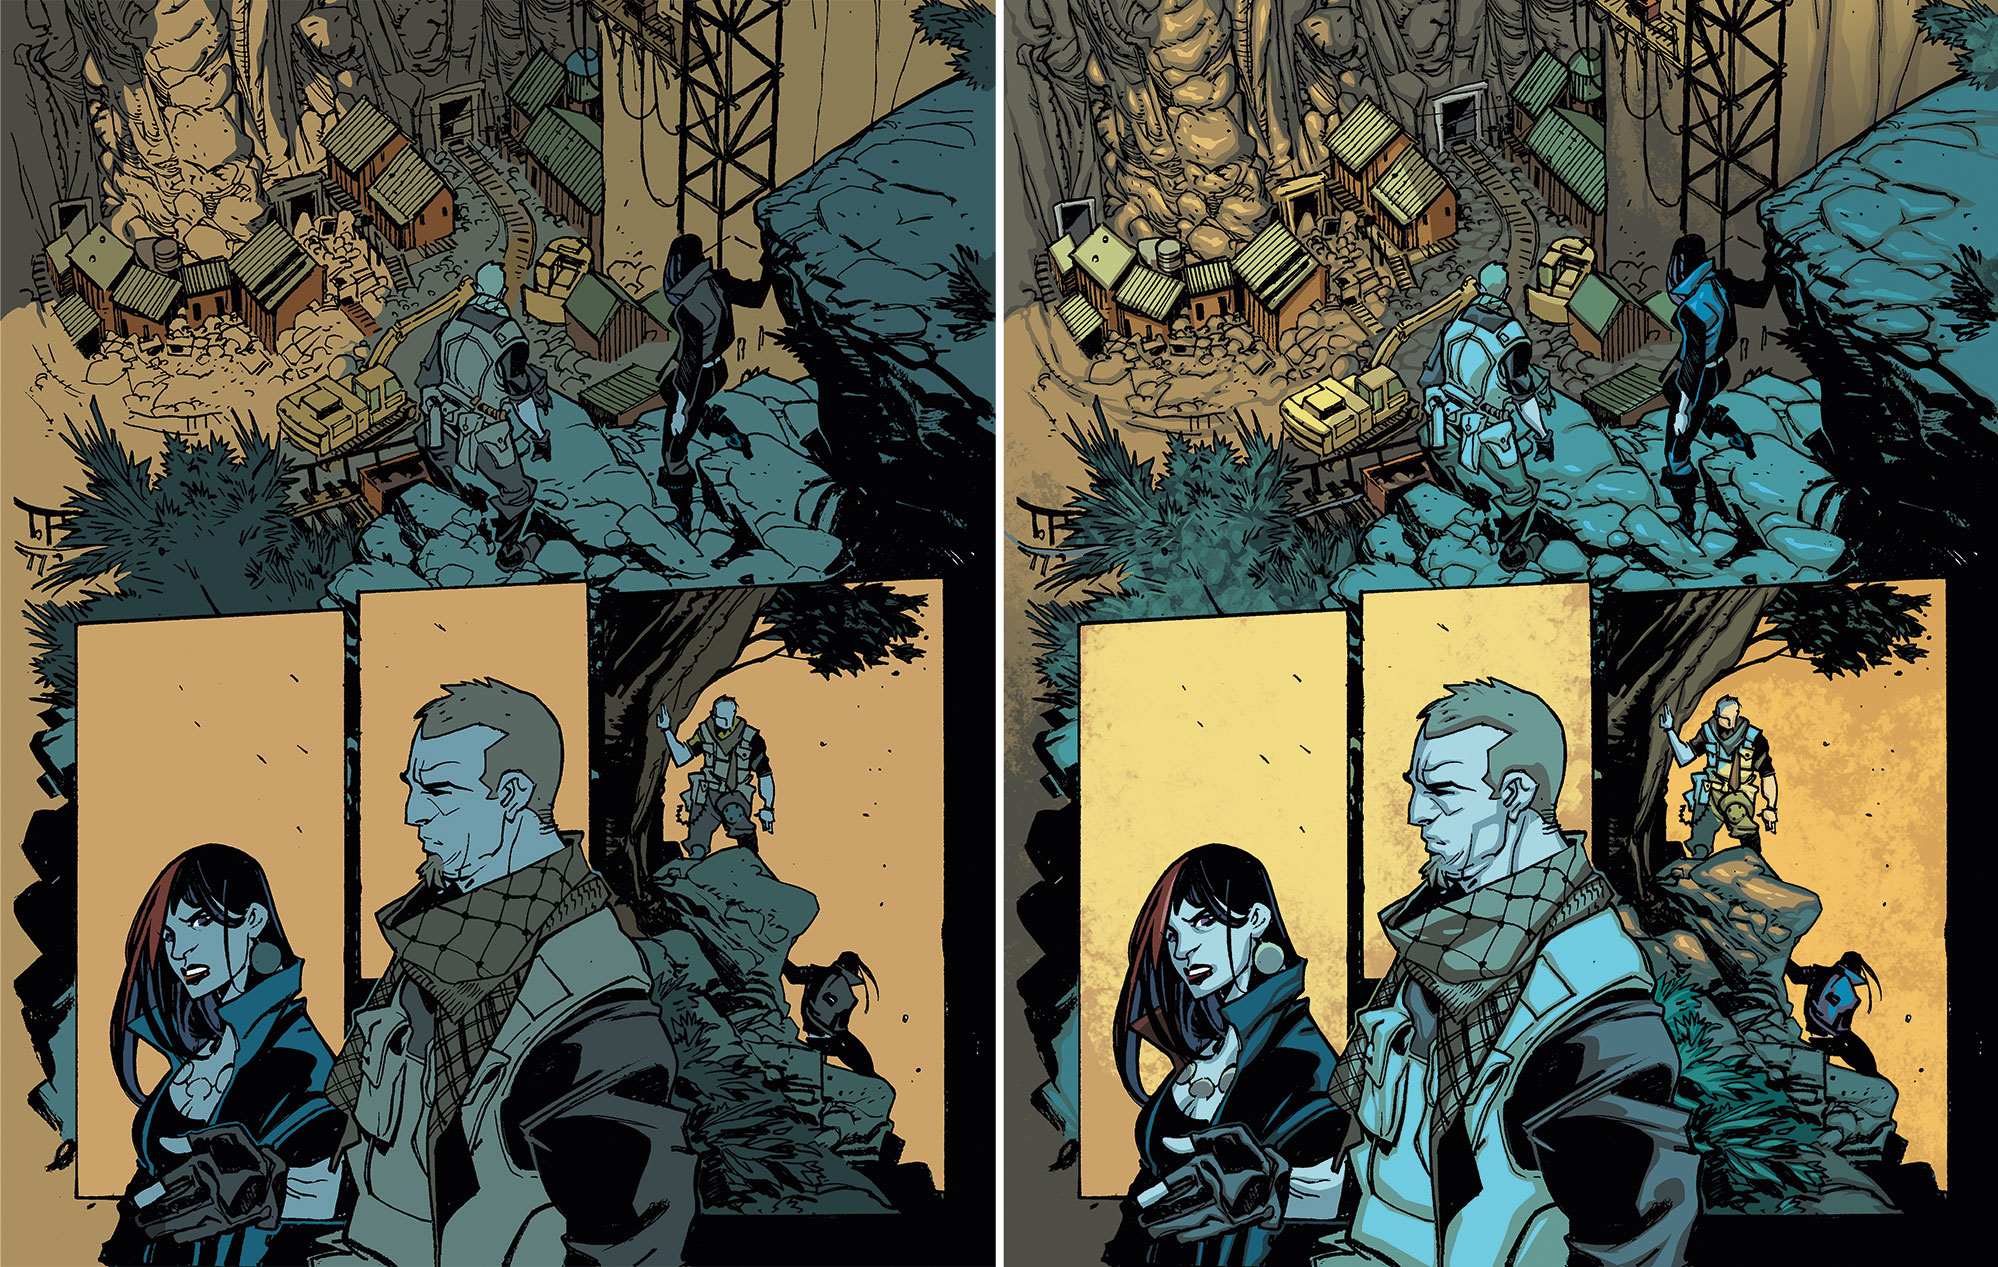
Laying in ‘flats’ is a standard step for colourists in the US comic industry. Flatting is the process in which flat, contiguous, aliased shapes are laid in on a separate layer from the line art to make it possible to select areas when rendering.
Like most colourists, I usually subcontract this step to a professional flatter to save time. Once I get a batch of flats back I’ll go over them all with a Paint Bucket to change the base colours accordingly.
02. Don’t use too many layers
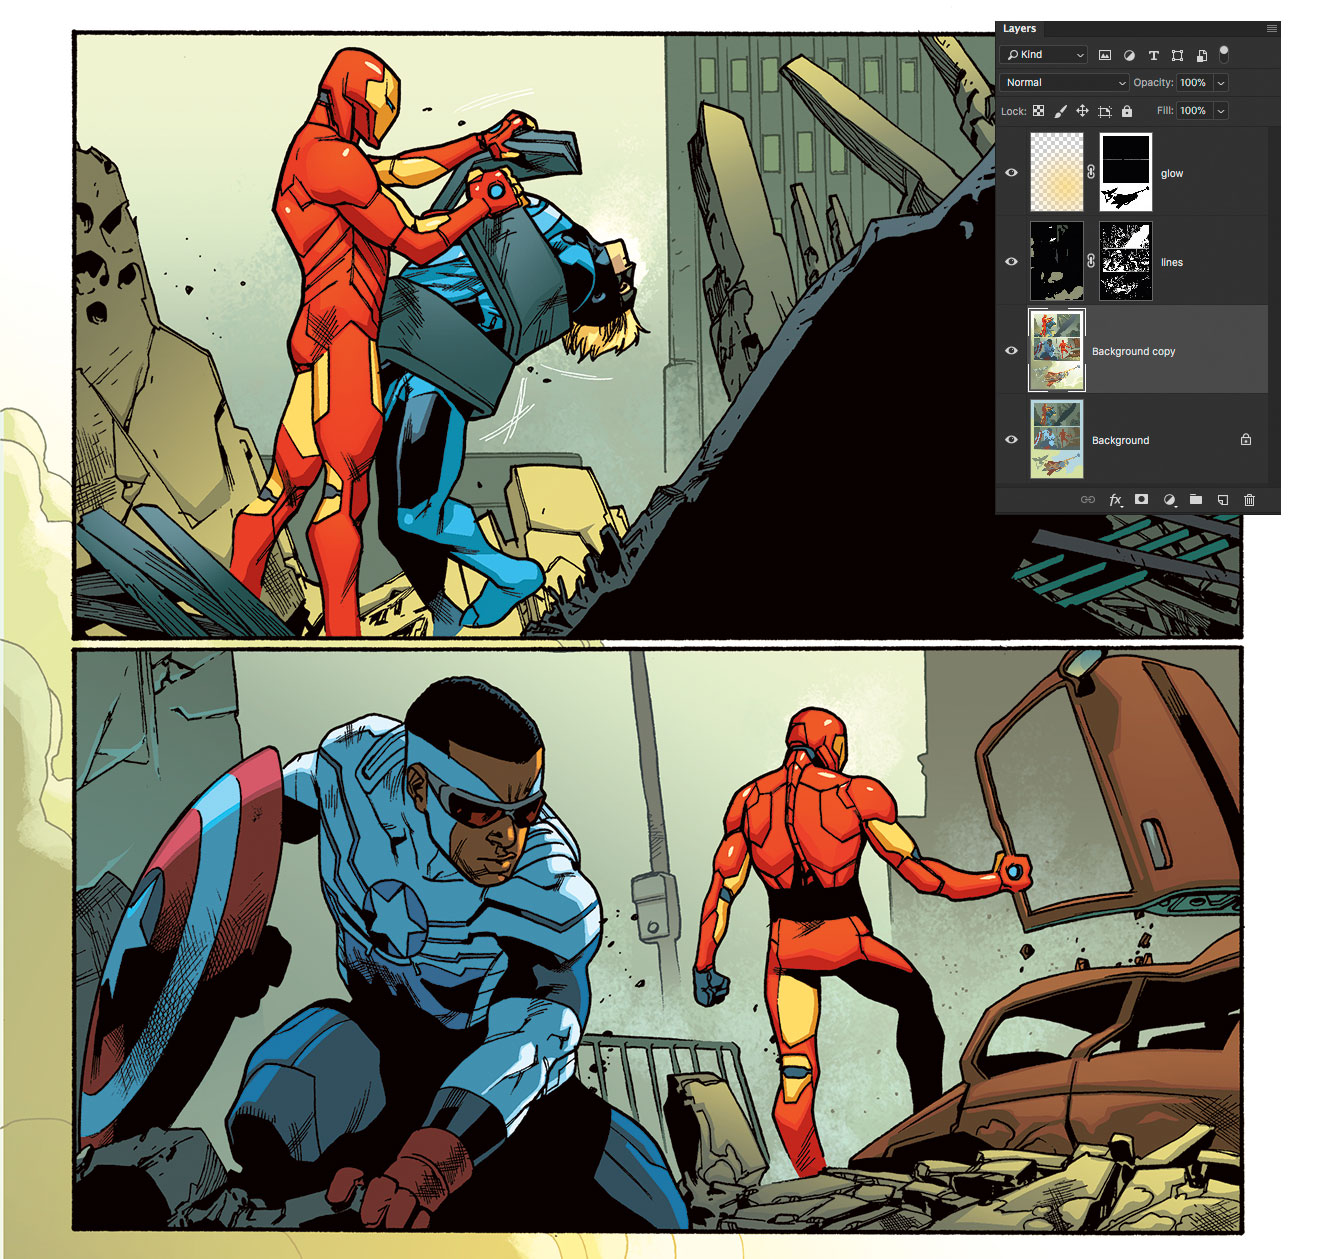
I’ve seen colourists use dozens of Photoshop layers on a page. I find it hard to keep track of so many (read: I think that’s crazy), so I usually limit myself to three or four. This will generally consist of my flats, a duplicate of those flats to render on, and a layer with my lines on it. Clean and simple. I might have a layer or two for colour-holds (coloured line art) and/or glows and lighting effects, but that’s generally it.
03. Decide on your painting style
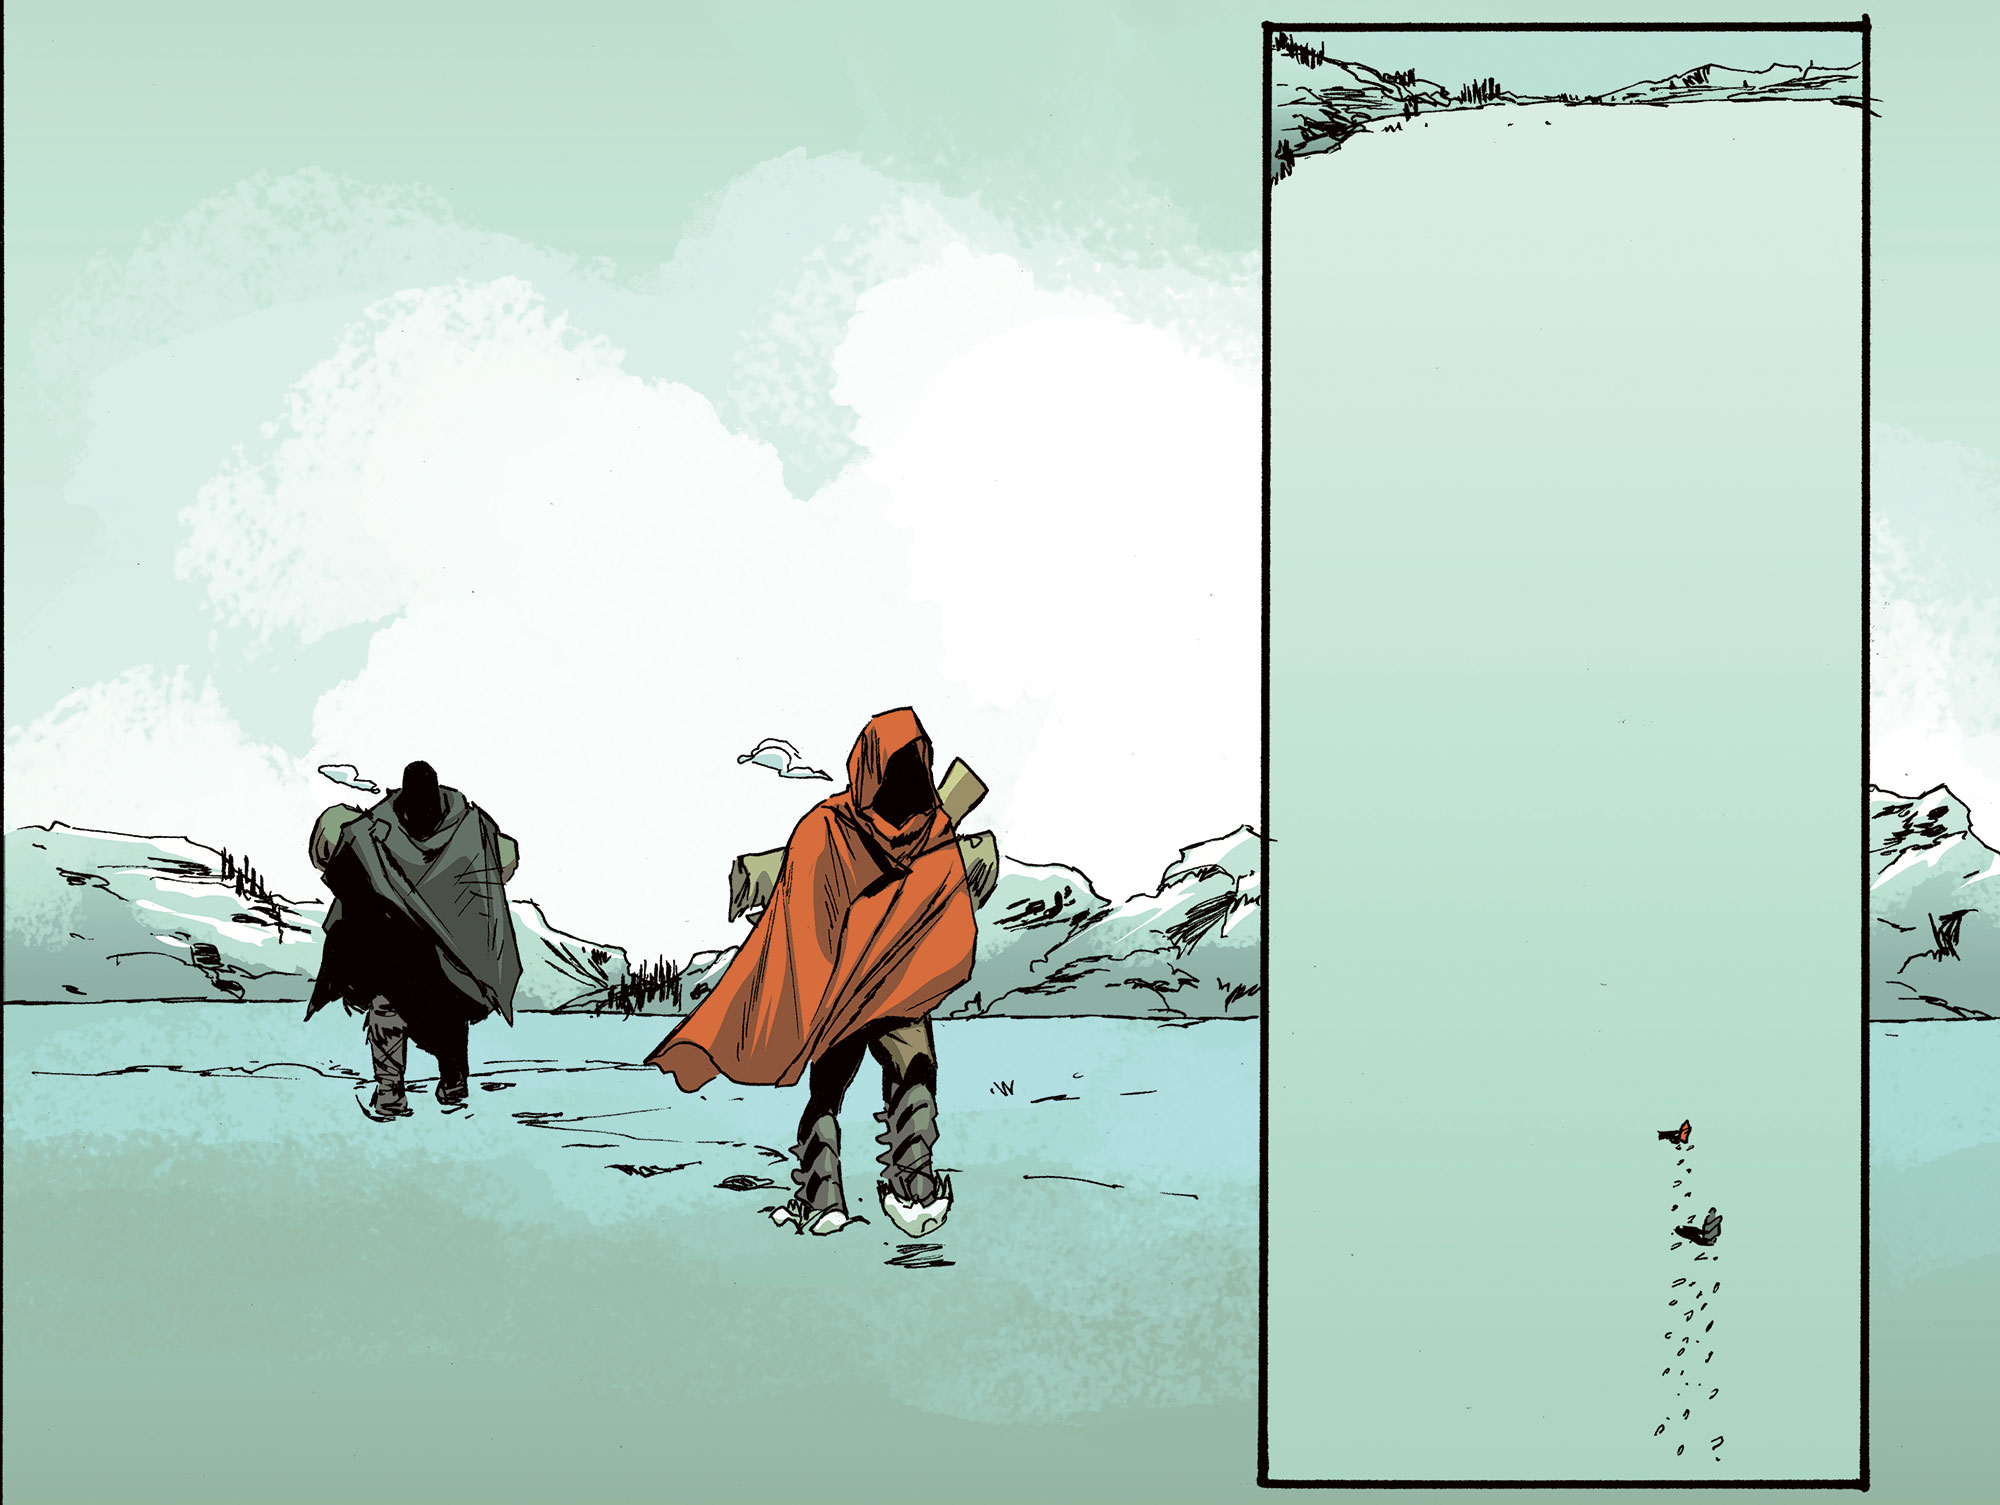
By using an aliased Lasso or the Pencil tool, I can render in a flat, ‘anime’ colour style that’s easy to edit with the Paint Bucket. Using an Airbrush or painterly brushes can be more artistically expressive, but makes changes more time consuming. Having the flats layer as a backup for each shape’s selection makes that editing easier, however. Both styles have merits, and they can be combined. I’ll often paint my backgrounds, and use flat shapes for characters. Or I might leave shadows flat and render into the highlight areas.
04. Consider how much detail to include
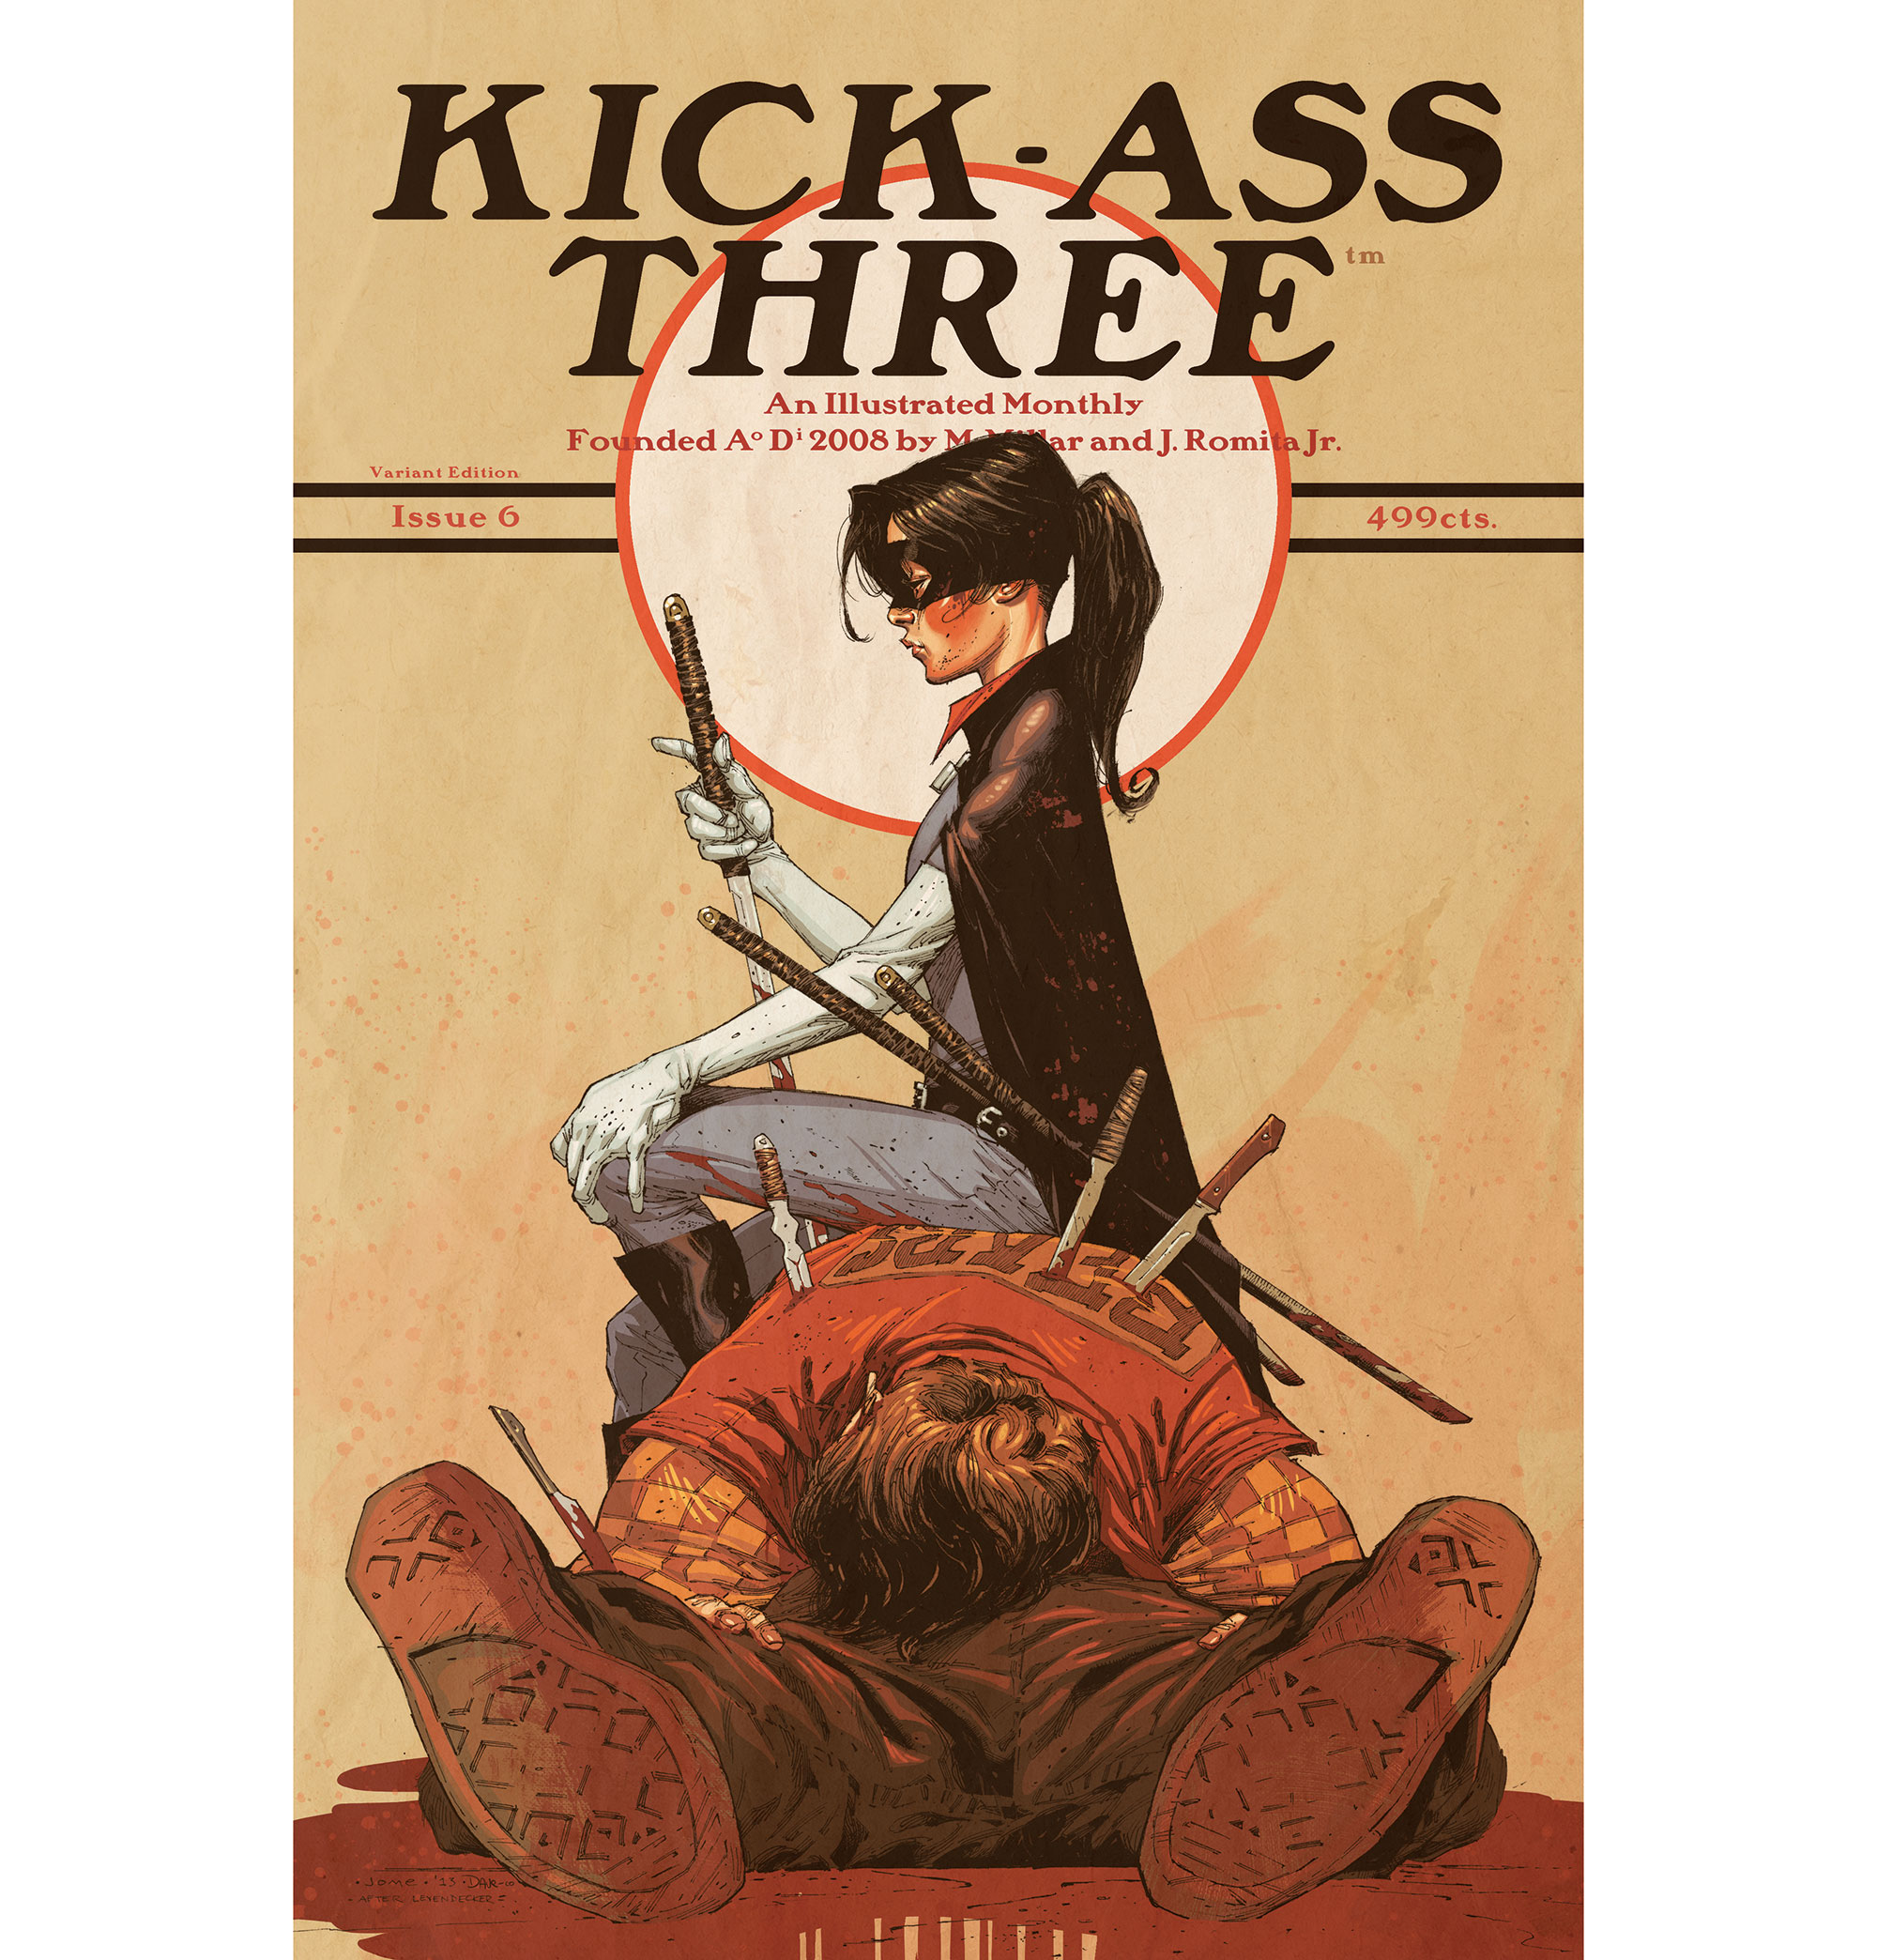
A hyper-realistic, detailed style can add weight to a story via grit, texture, stubble and so on, while a simple style can let the reader mentally fill some blanks and speed up the reading experience, without having to work through a glut of detail.
A simpler rendering can allow for more expressive hits of colour. I’m not trying to sell detail short here. Detail adds gravity and that counts for a lot. There are pros and cons to dropping out details, and I hum and haw over rendering options every time I start a new gig.
05. Add some personality

A lot of colourists, veteran and newbie alike, worry that their colour should fade into the background to let the line art shine. I don’t really subscribe to this school of thought. Collaborative art should be collaborative! I hope my work is recognisable regardless of the rendering style I use, through my colour choices and the sorts of shapes I use in my rendering.
Collaborative art is like being in a band. Everyone needs to play to their strengths and show their personal style. Otherwise the art you make together becomes boring.
06. Use colour and shape to tell a story
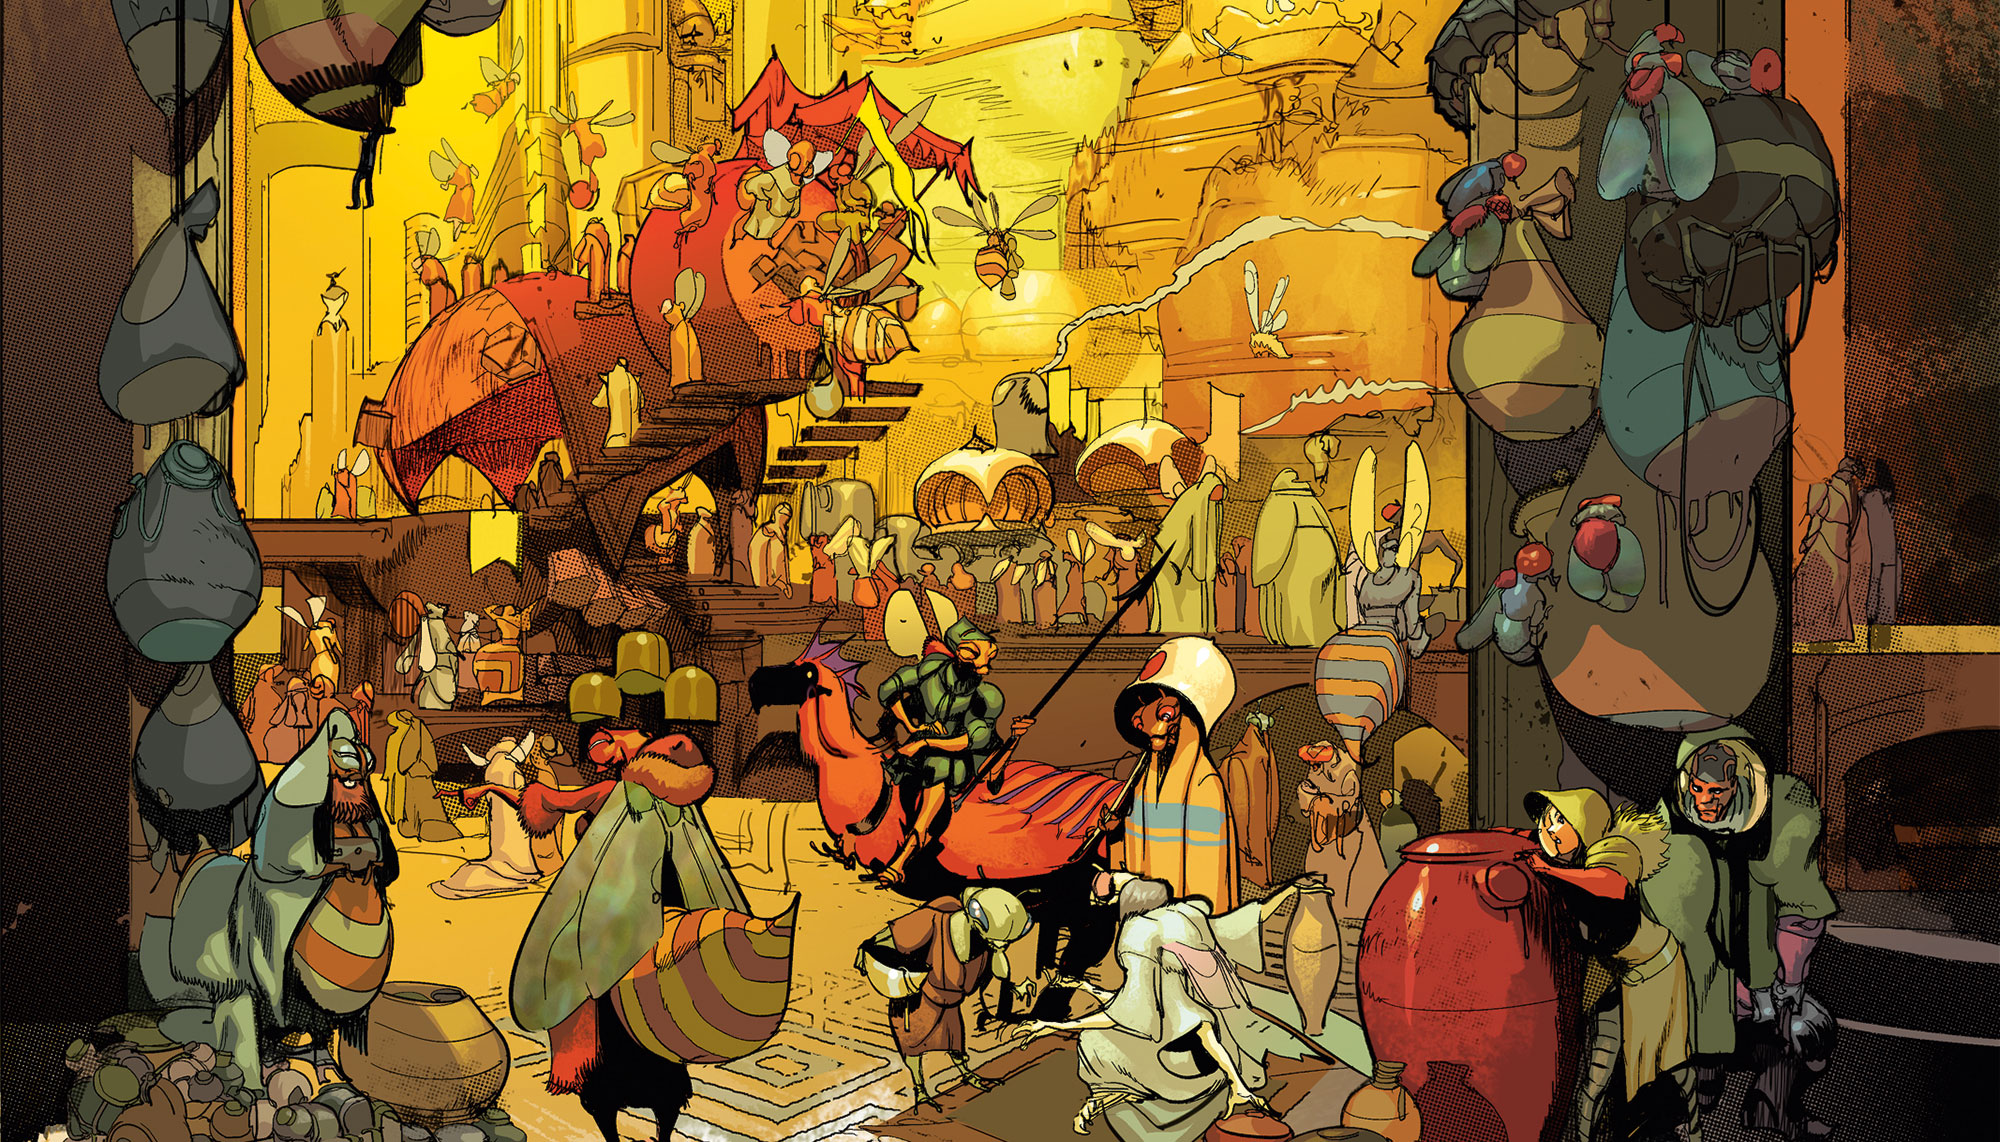
Colour can be a great way to direct the reader’s eye via shadow lines, colour patterns and the like. While the main characters and action do their thing on the page, I can subtly reinforce the eye line and direct the action without clubbing people over the head with it. In the case of this page from LOW, I’ve used a triad of red shapes to quickly draw the eye to our heroes, despite the chaos of the rest of the image.
07. Build mood with your colour choices
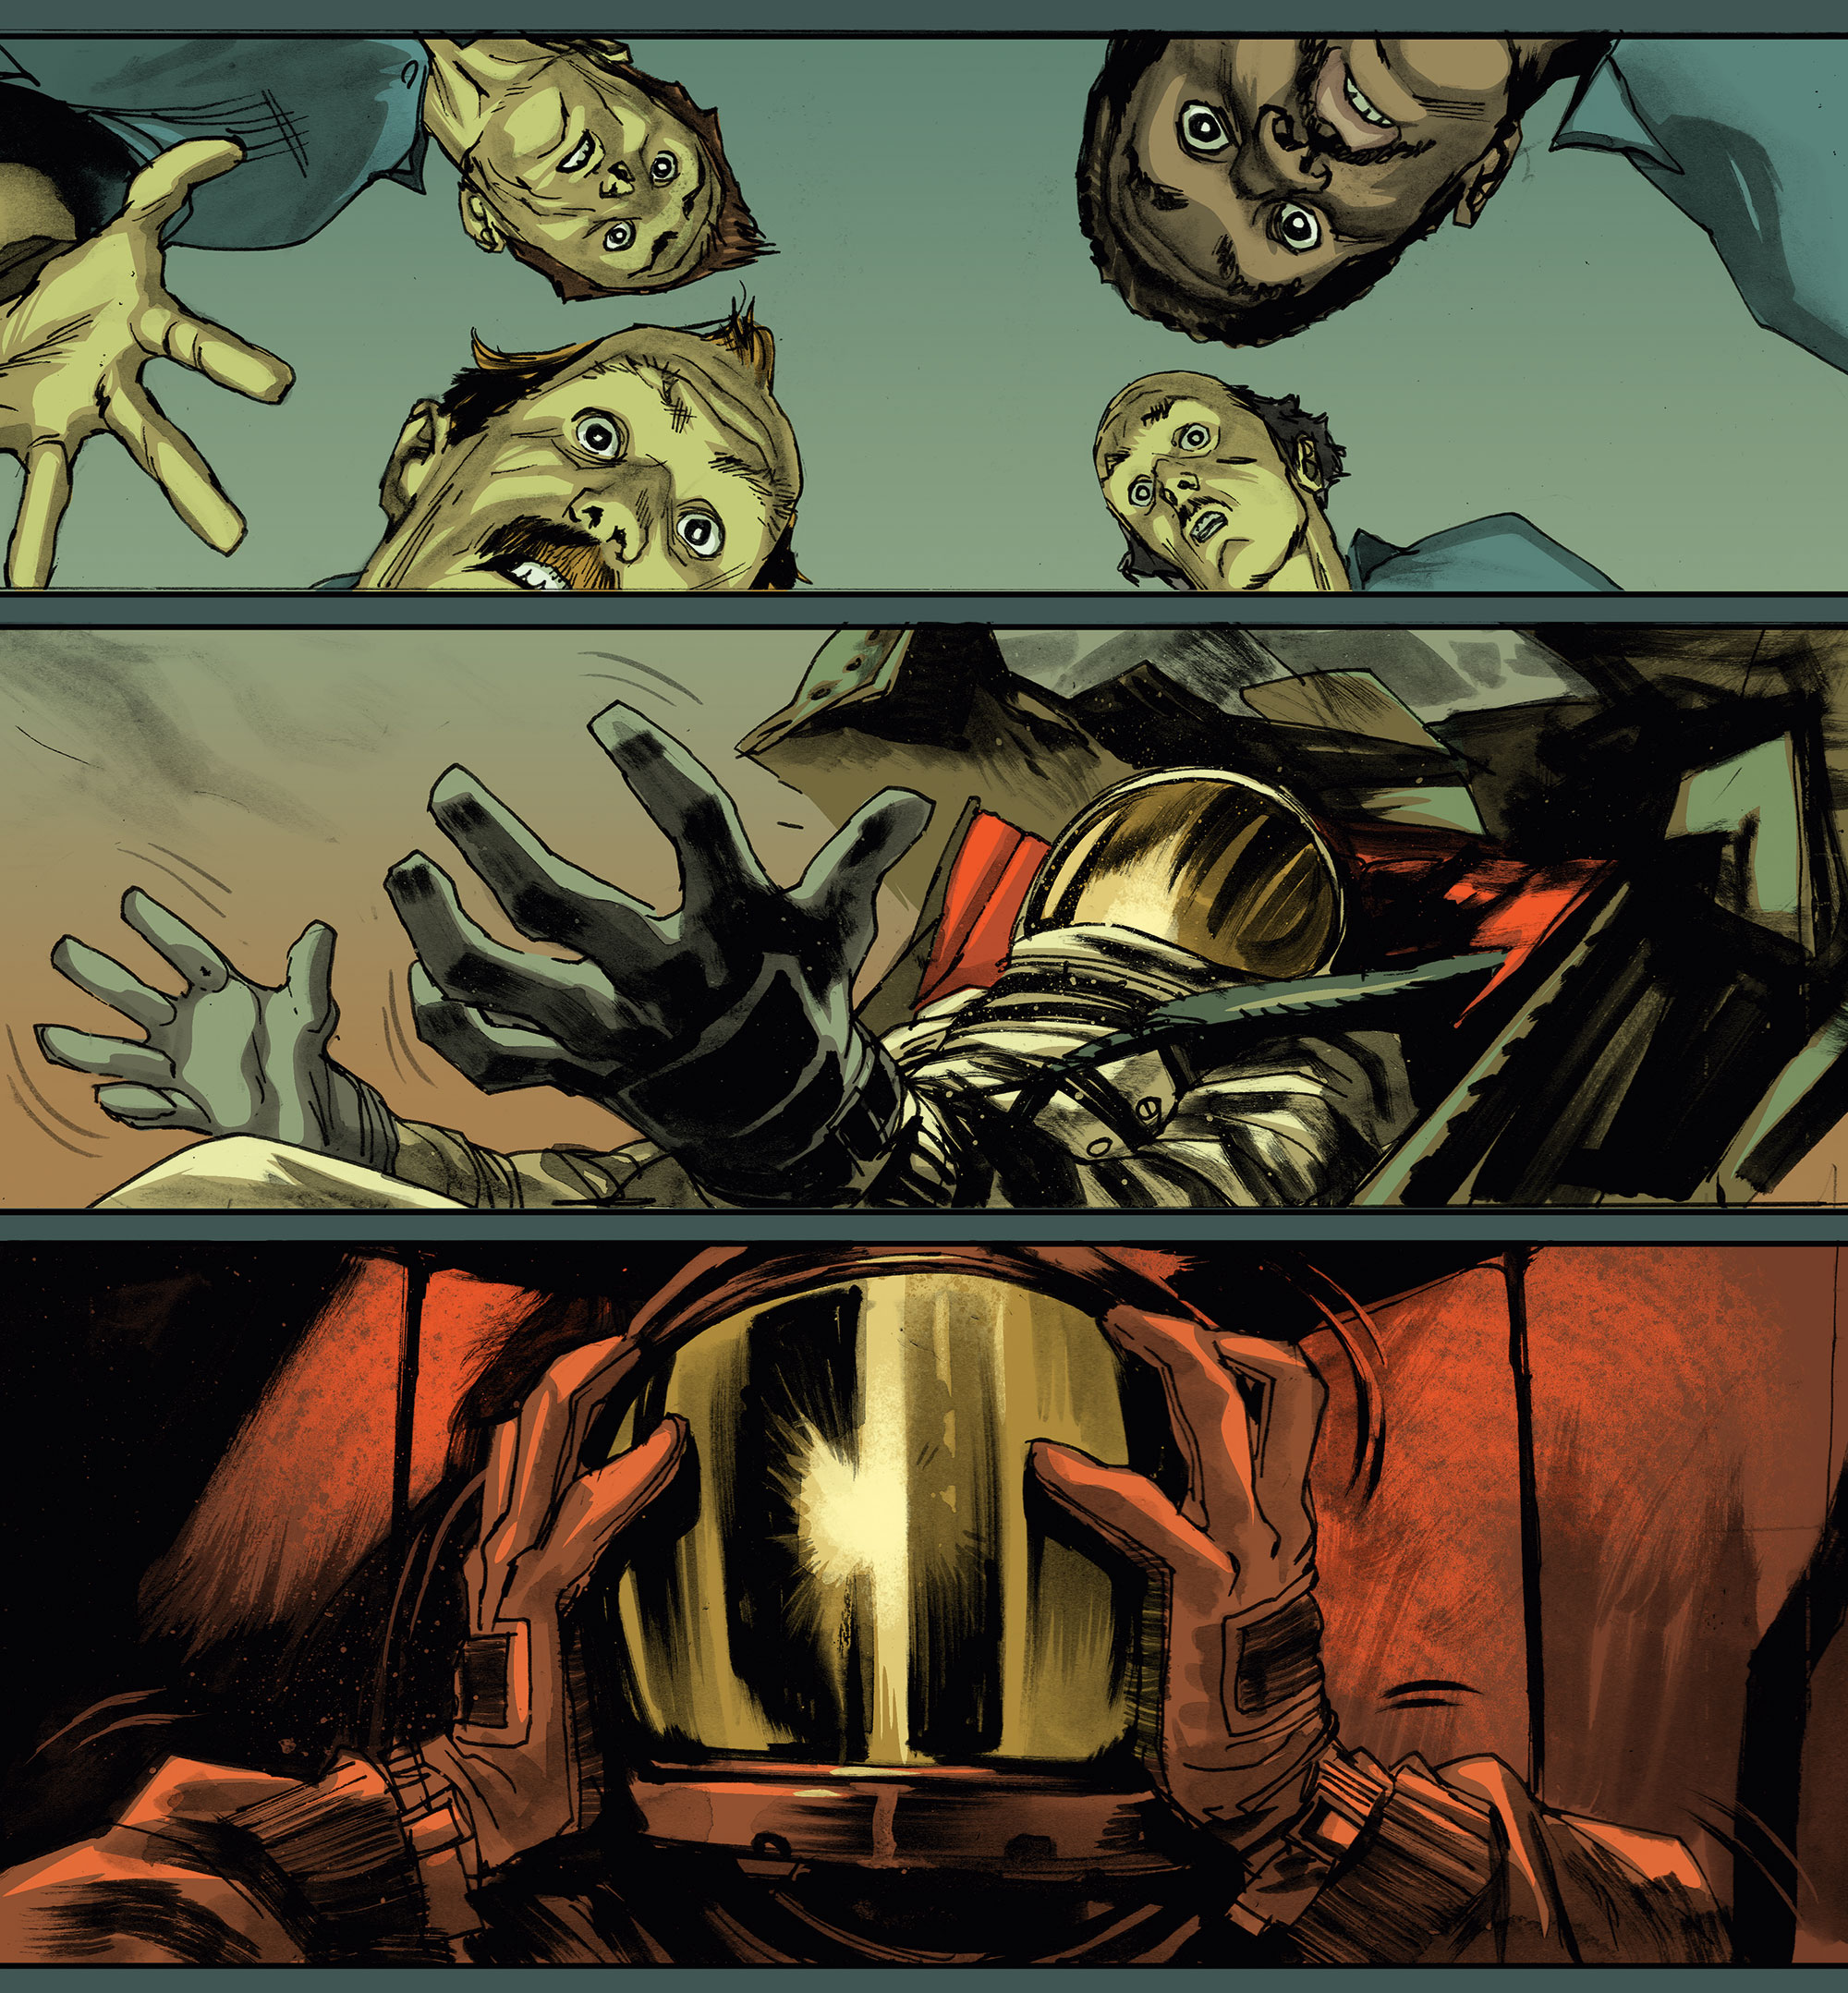
I try to use colour to help support the story. There are plenty of standards like blue or desaturated tones suggesting quiet or melancholy, while orange or green might hint at toxic chemicals in the air. A saturated red warns of imminent danger.
Colour shorthand like this can be a great way to help the reader understand what’s happening beyond and between the panels, and help separate scenes. If I’m working on a longer project, creating custom colour cues (and sticking to them) can be a great way to set that project’s world-building apart from the pack as well.
08. Use value to create planes and silhouettes
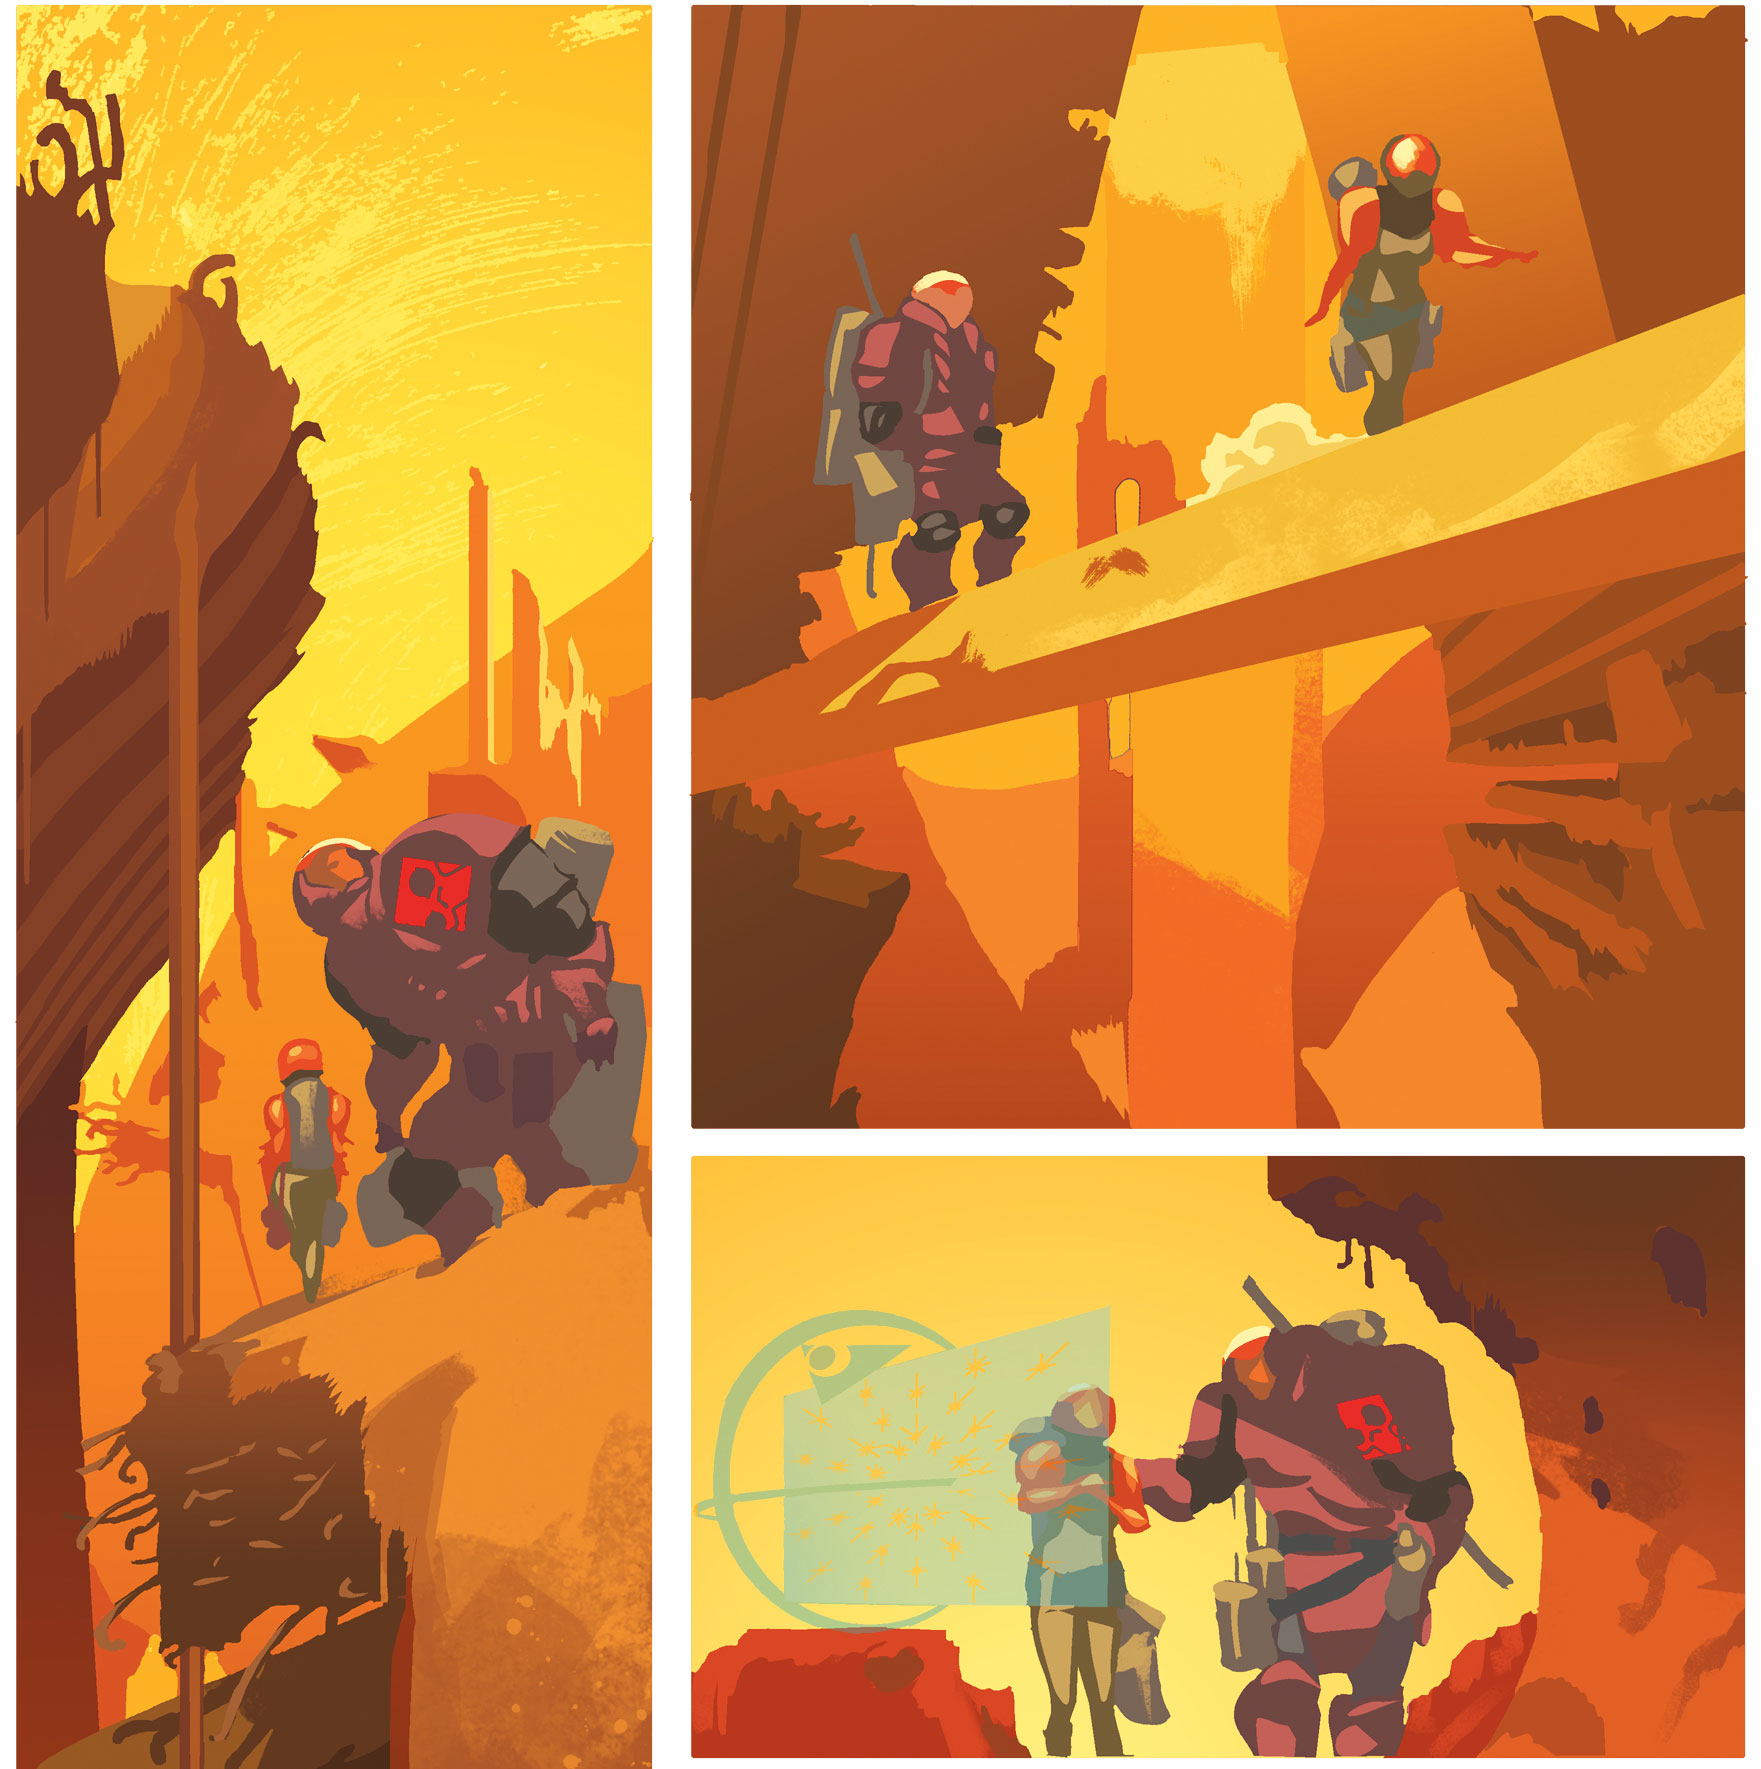
I tend to use desaturated, dark values for one plane, and saturated, light values for another. Popping things off those planes in a third value range with as much contrast as possible helps to focus the eye on the subject of the panel. These values don’t necessarily have to be different hues.
I often find that when people think about colour they focus too much on hue, and forget about value. As far as I’m concerned, value is the absolute, most important element in a colour, then it’s saturation and hue.
09. Check your page in greyscale
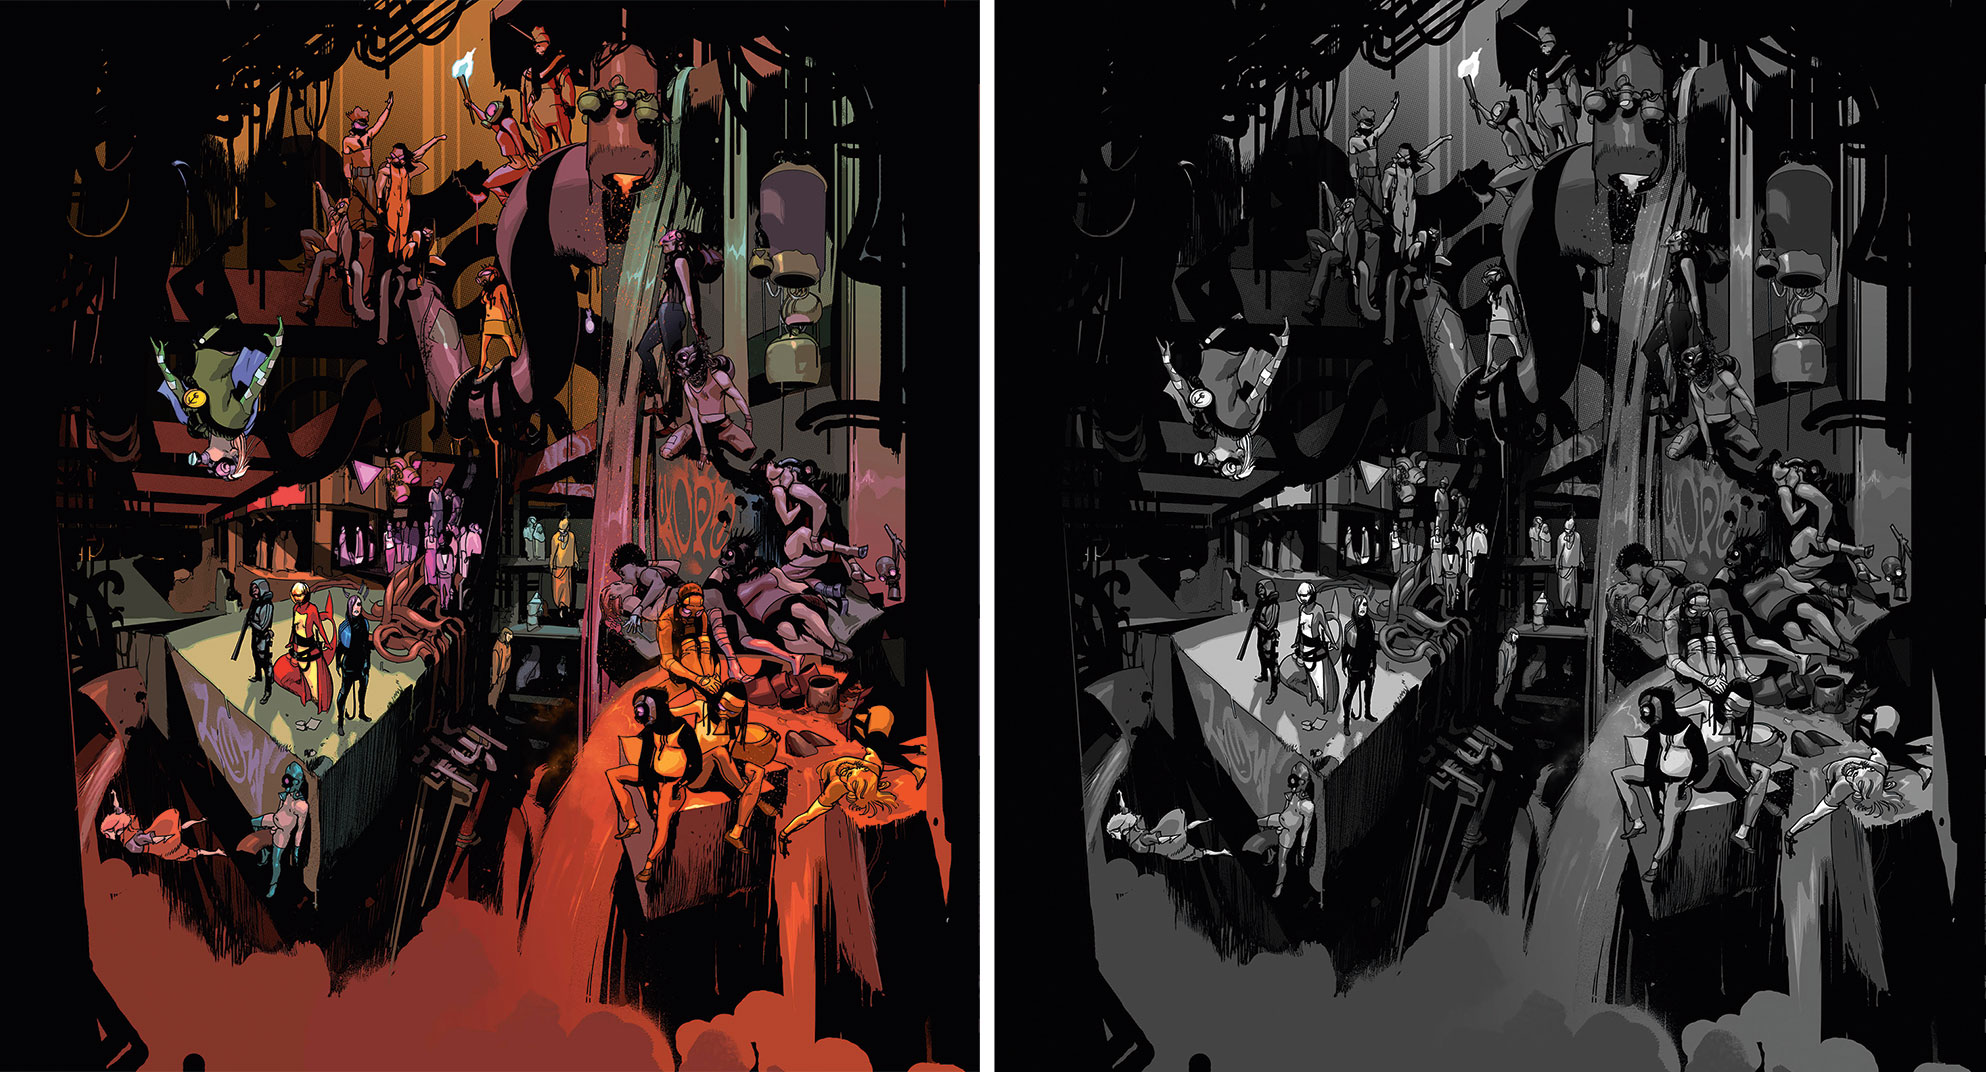
Photoshop makes it easy to check my values. If I’m working on something with complicated, overlapping planes, I’ll open a new window for it and change the proof setup to Grey. This enables me to work on the colour file while getting real-time feedback for my values in that second tab. For less-complex pages, I’ll just use a hotkey to flip to Grey proof mode from the regular view occasionally to keep myself in check, making sure that bright reds among other colours aren’t throwing things off value-wise.
10. Limit your colour palette
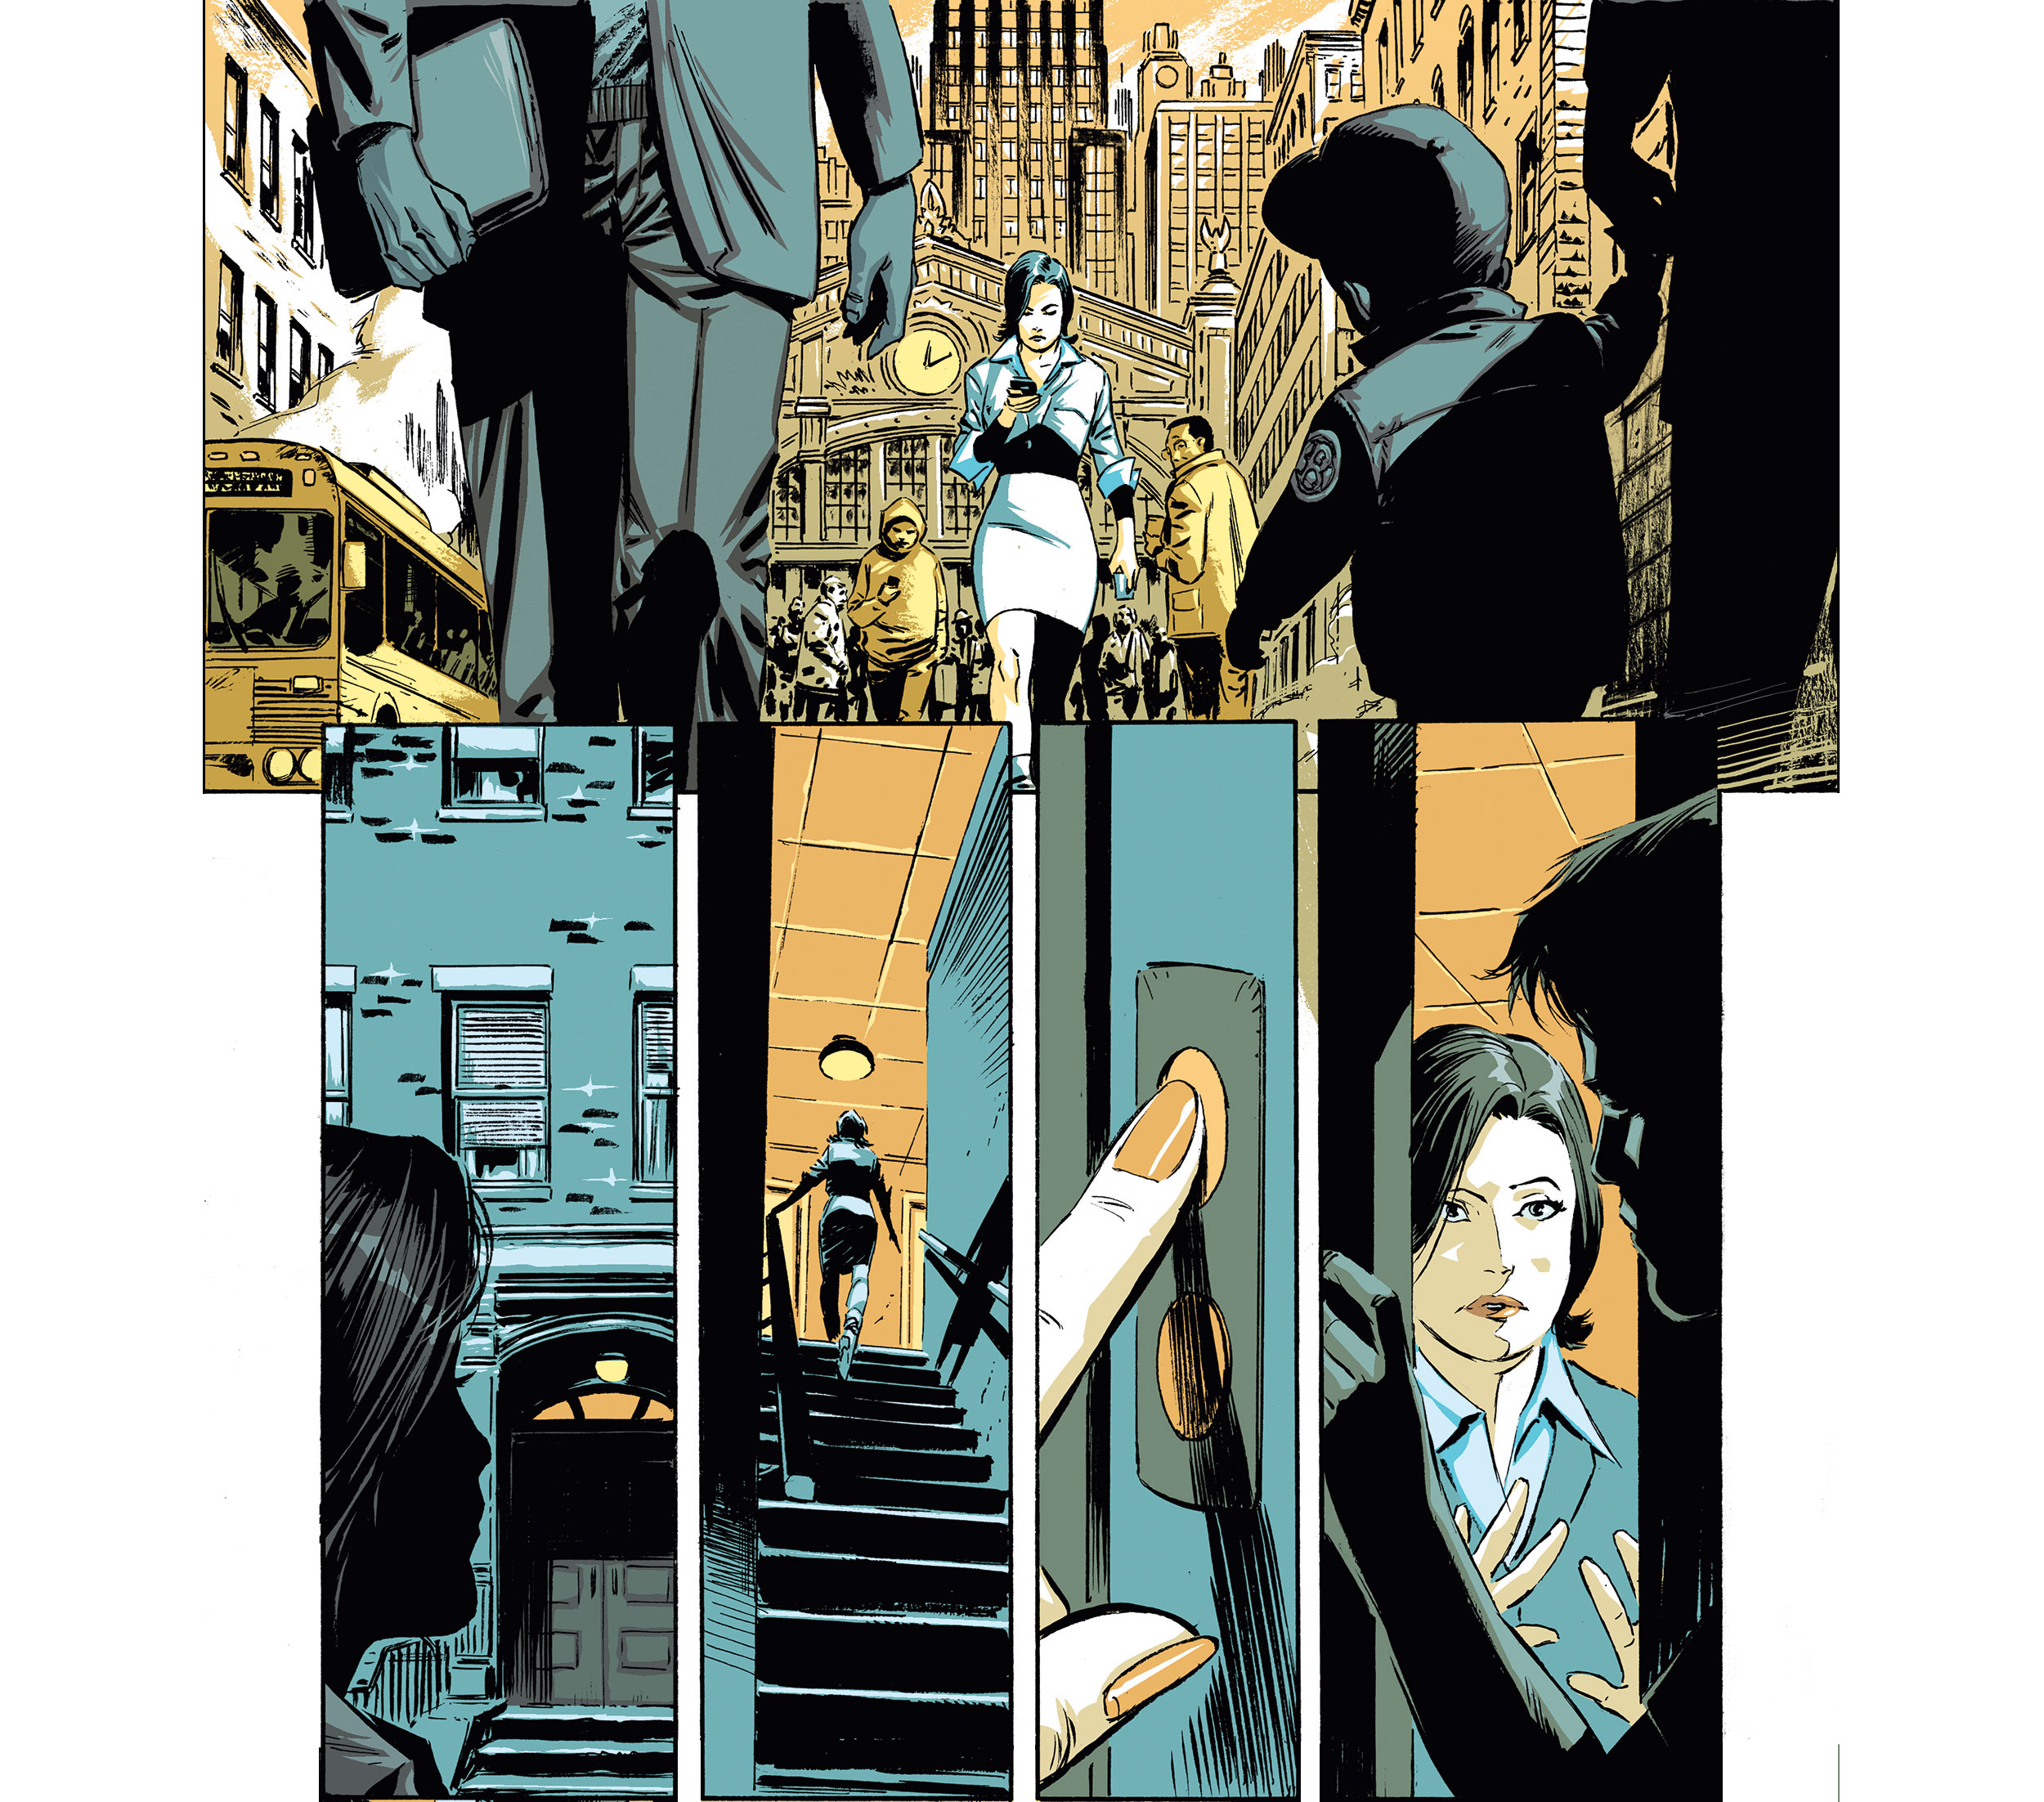
I try to stick with value choices, and limit my colour palette to what’s necessary to tell the story. Colour should have a reason for being there, and if something isn’t key, it often helps the story to use values in some neutral colour instead of hues to help it sink into the background. The simpler you keep your colour, the more impact a change in colour will have, helping the reader understand that something important is happening.
11. Expand the canvas through colour
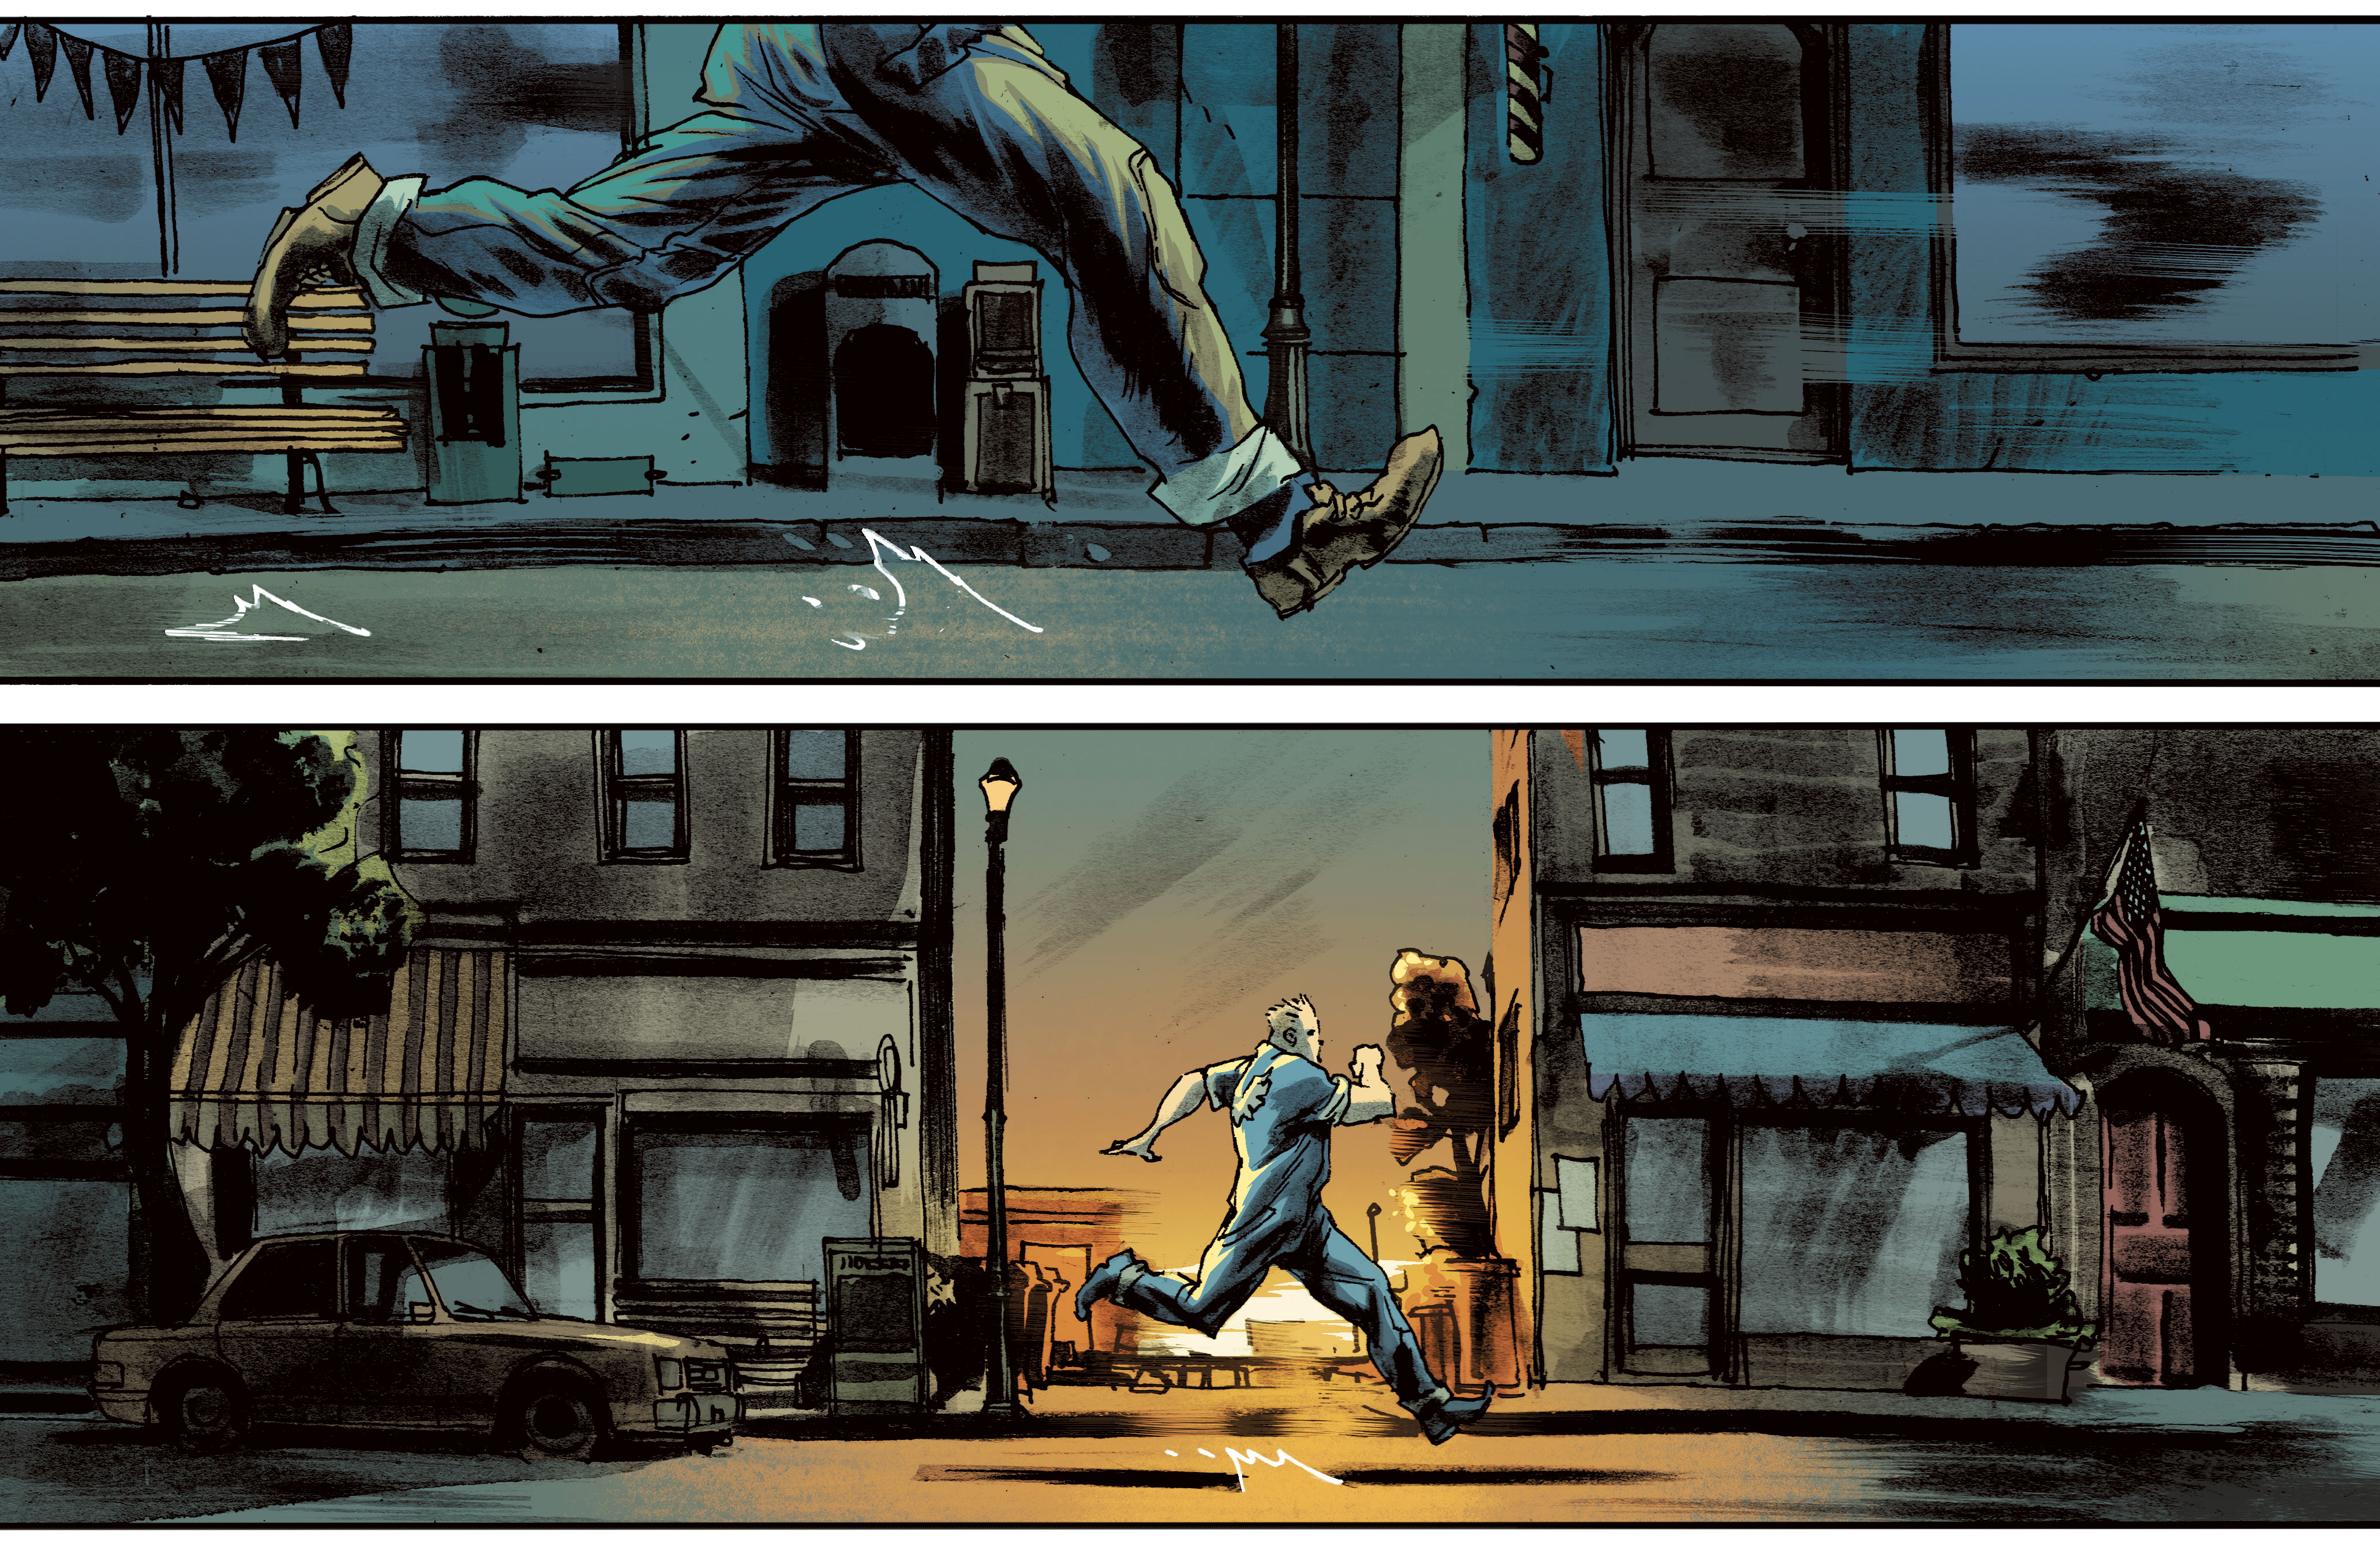
You can imply a whole world off-panel with colour, which is one of my favourite parts of being a colourist. I tend to put a lot of thought into the environment that a story takes place in. What materials are things made of? How dusty are they? What’s the sun’s position in the sky? How many minutes, hours or seconds have elapsed since the last panel? Are any lights turned on off-panel? I ask myself questions like this all day long. It’s not just about colouring what you can see on the page.
12. Make notes before you start
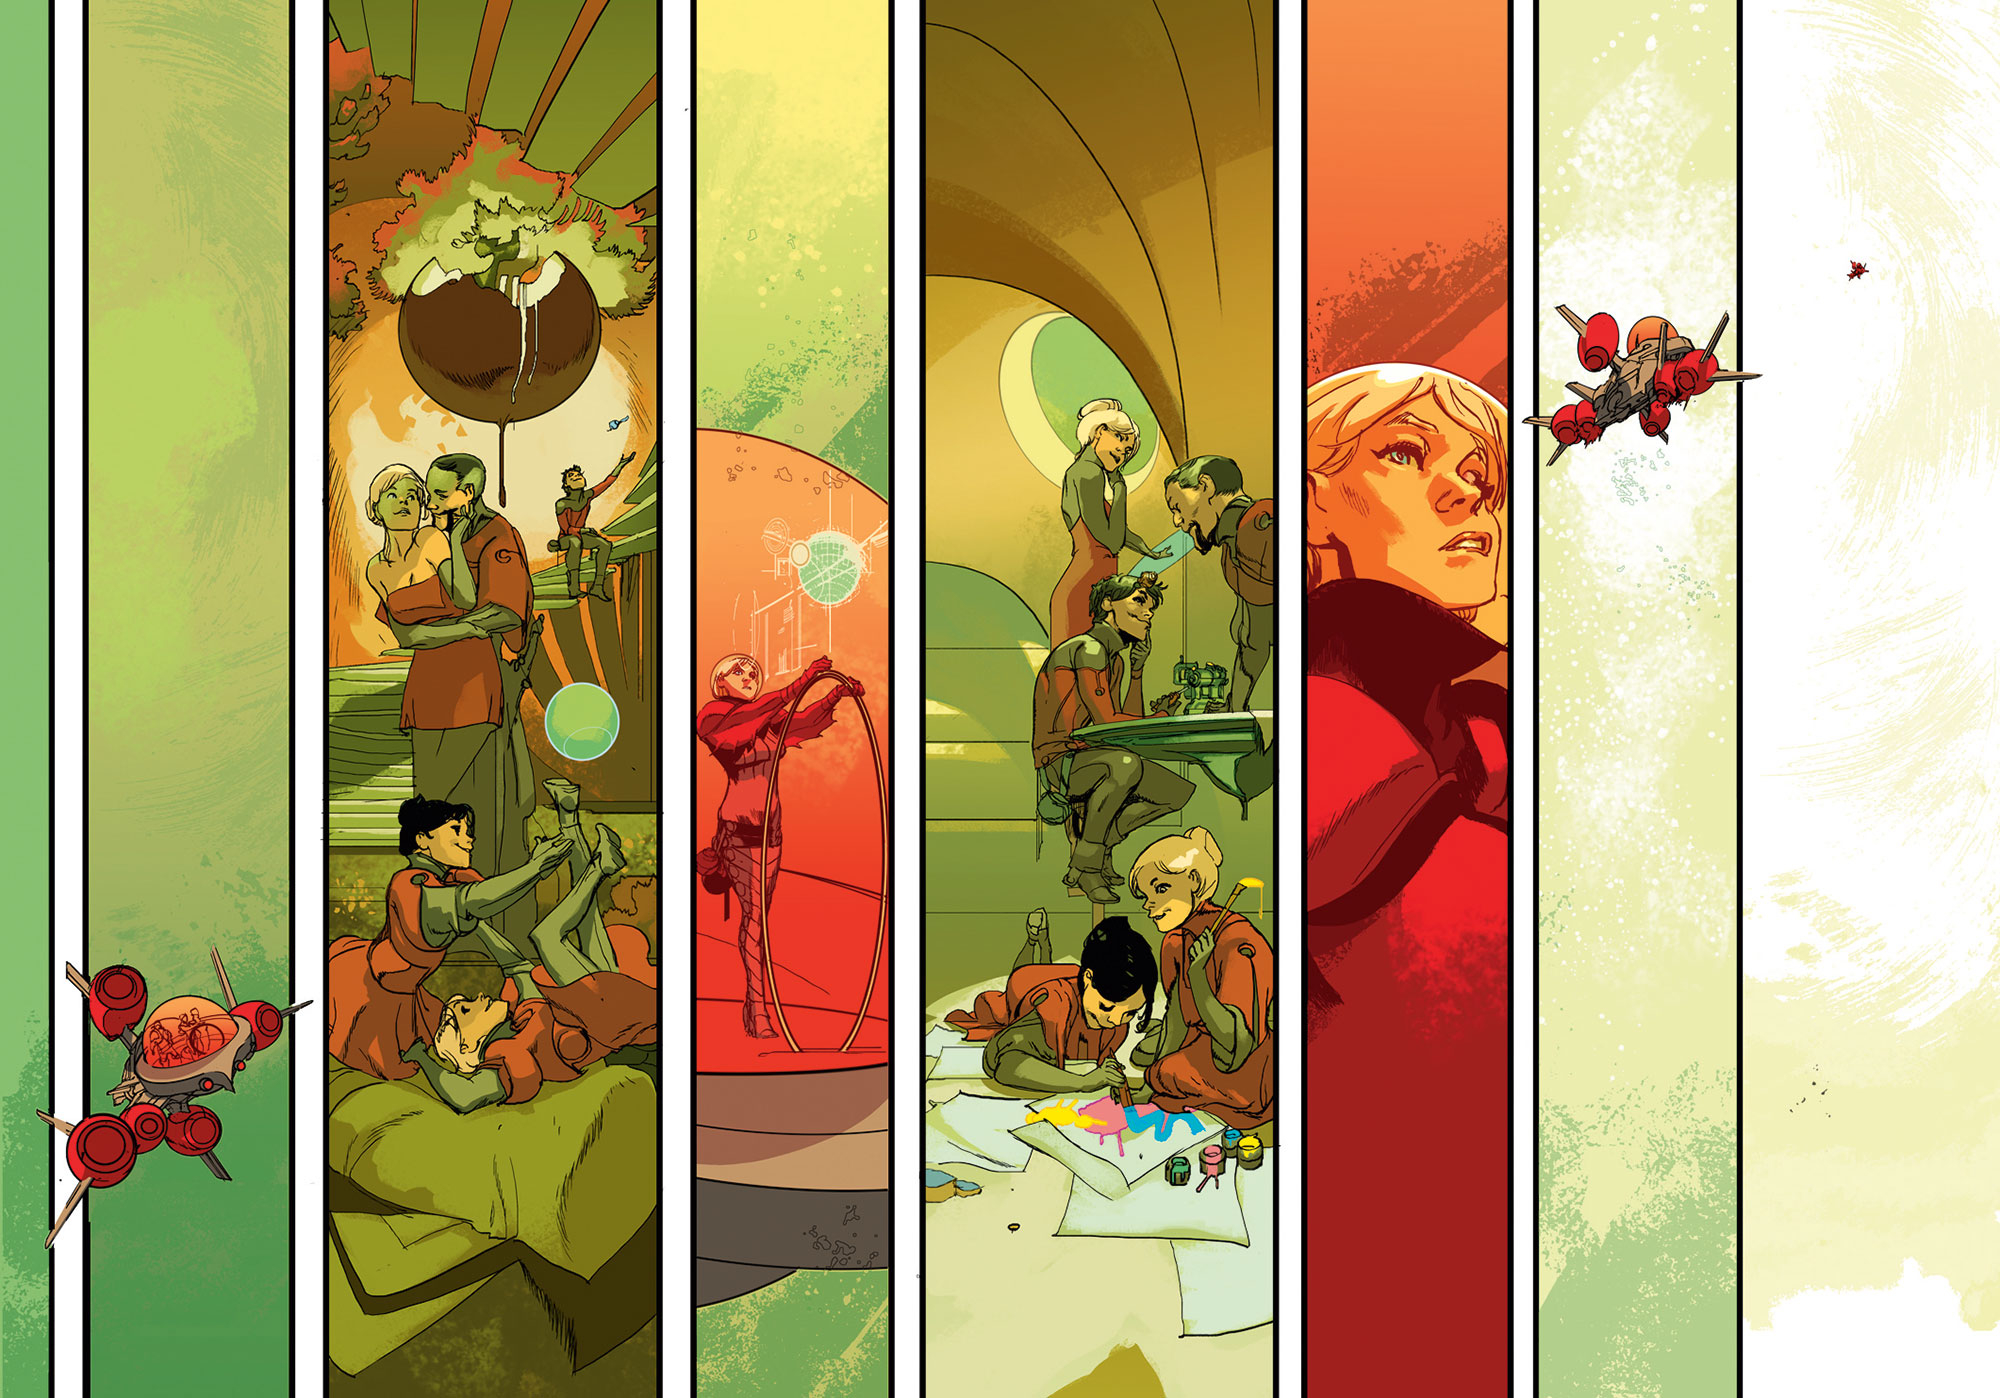
I take notes on a script before starting an issue – marking time of day, scene changes and emotional beats. Do this in advance if you don’t have much artwork in and you need to get started anyway.
That said, if time allows it can be useful to look at all your flat colours together for a book, to make sure that the ‘musicality’ of that colour works. Building themes, carrying them across different scenes, maybe using pop colours to emphasise important story elements. You’re taking the reader on a colourful journey, so make it enjoyable for them!
This article was originally published in ImagineFX, the world's best-selling magazine for digital artists. Buy issue 160 or subscribe.
Read more:

Thank you for reading 5 articles this month* Join now for unlimited access
Enjoy your first month for just £1 / $1 / €1
*Read 5 free articles per month without a subscription

Join now for unlimited access
Try first month for just £1 / $1 / €1
Get the Creative Bloq Newsletter
Daily design news, reviews, how-tos and more, as picked by the editors.
