Create a UV wrap using Maya's Roadkill plugin
Follow these four simple steps to create a UV wrap in Maya.

You need good UV unwrapping of your model for good results. UV mapping is the technique used to 'wrap' a 2D image texture onto a 3D mesh. If you've painted texture maps in the past, you'll know that bad UV mapping coordinates can make the texturing process painful. In this Maya tutorial, I'll offer my tips to help.
It's best to start with a clean mesh. This means your mesh has been created with all quadrangular faces, and has no extra vertices. When you're happy with your mesh, you are ready for the next step: UV unwrapping.
I use the Roadkill professional plugin for Maya. It automatically lays out UV co-ordinates and minimises distortion in just a few clicks. Here's how I do it.
01. Run the plugin

Firstly you'll need to run the plugin by typing Roadkill into the Maya MEL editor, and press Enter. Now select your model and check all boxes in Roadkill then press unwrap.
02. Select the model
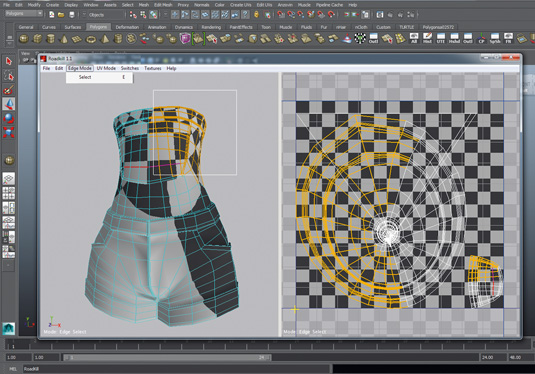
Now it's time to select the model you want your 2D image texture to wrap on to. Press E on the keyboard, or Edge mode-Select (press E) inside Roadkill and drag-select the model to make it live. The Roadkill interface is just like Maya, so Alt+left click will rotate, Alt+middle click will pan and Alt+right click will Zoom.
03. Position your seams
It is usually best to place seams where real clothing has seams (where the panels of cloth would be sewn together). This method is more realistic and it reduces the pain of hiding seams.
If the seams are not placed in a realistic location, you will need to make sure you can paint textures in a way that the seams will not be visible. Try to keep UV seams to a minimum and carefully choose where to place them so they are least visible to the viewer.
Get the Creative Bloq Newsletter
Daily design news, reviews, how-tos and more, as picked by the editors.
03. Cut your wrap
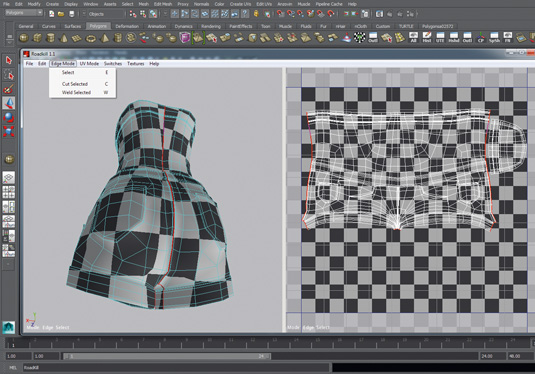
Once you decide where you want to place the seams just Shift+click to select the edges one by one or double-click the edges. Now press C or Edge mode-Cut select for cutting edges. If you want to be able to stitch the edges back together, select the edge and press W or have Edge mode-Weld selected.
04. Export the UV Map for texturing
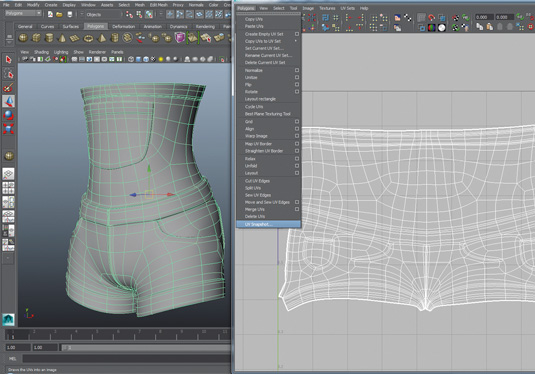
You have now finished the UV map, so exit the file (you don't even have to save it). It will now update back in Maya with its new UV. You can then create a snapshot of this map to paint your texture map. Select Polygons>UV Snapshot and now go and have some fun painting a texture for your 3D model.
This article first appeared in issue 187 of 3D World magazine.
Like this? Read these!

Thank you for reading 5 articles this month* Join now for unlimited access
Enjoy your first month for just £1 / $1 / €1
*Read 5 free articles per month without a subscription

Join now for unlimited access
Try first month for just £1 / $1 / €1
