Advanced Shopify theming techniques you should be using
I have been working on Shopify themes for the past few years, and now as a designer advocate at Shopify, I have learned countless tips, tricks, and hacks that you can use to reinvigorate your theme design process and, ultimately, make your workflow more efficient. This article will provide you with an overview of several advanced theme development techniques that I have been using recently. I’ll also include code samples and resources that you will find useful when you’re building your next theme on Shopify.
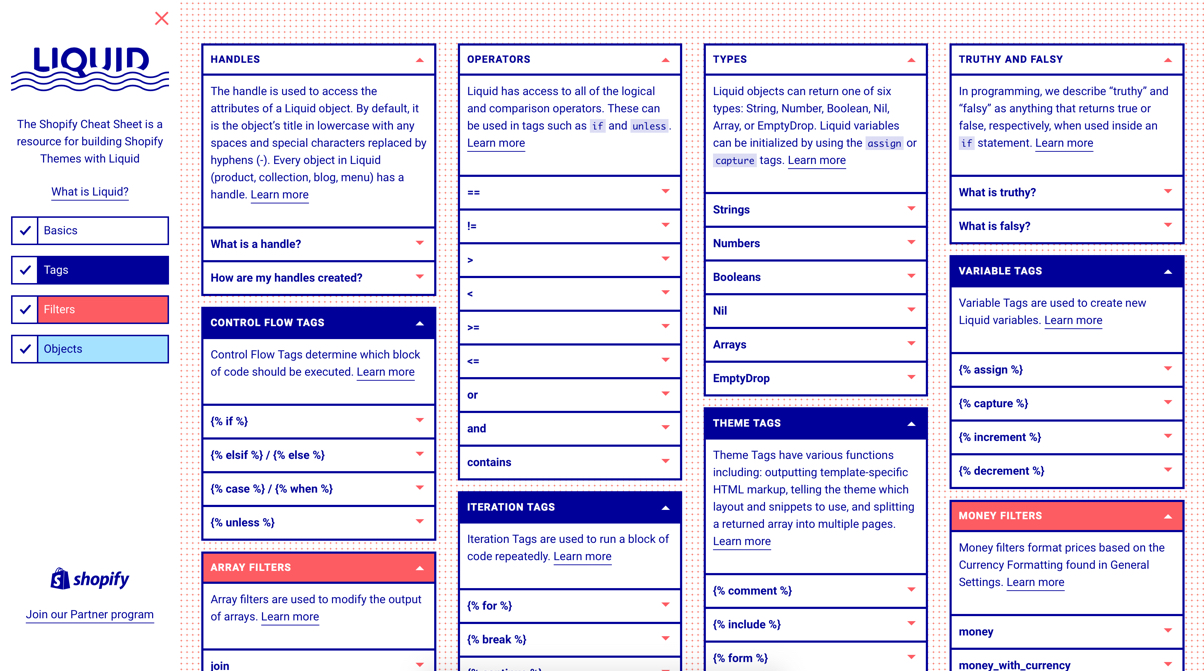
I like to think of Shopify theme development as a blank canvas. Shopify gives you the tools to design and develop beautiful stores using toolsets that you already know like HTML, CSS, and Javascript. The only new element you will need to familiarize yourself with is Liquid. Liquid is the Shopify template language that allows you to use placeholders to pull data from a store into your theme. It’s quick to learn and I recommend you bookmark the very useful Liquid cheat sheet to help you get up and running quickly.
Setting up a Shopify theme development environment
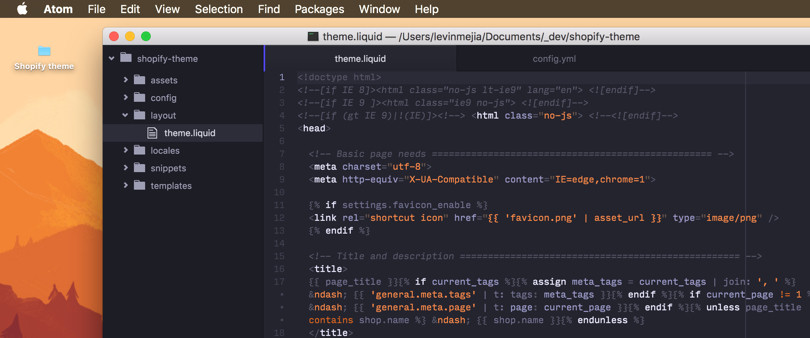
When I start designing and developing a new Shopify theme, the first thing I do is set up a development store in my Shopify Partner dashboard. Setting up a Shopify Partner account will give you access to an unlimited number of development stores. Development stores never expire and provide you with all the features of a fully paid store. Shopify has a online editor for theme development, but my preference is to work on themes locally because I can use Atom – my code editor of choice. If you’d like to set up a local theme development environment as well, you can check out the how-to article I wrote recently.
As a designer advocate, I get to connect with many great designers and developers and see first hand what works well for them, and what doesn’t. One thing that I’ve noticed is how time is often wasted while setting up placeholder content for a store before the design and development process can even begin. To help with this I recently released a toolkit which consists of product data and images. You can use these to set up a fully loaded store with just a few clicks. This will help save you valuable hours and will allow you to make better design decisions. This real-world product data gives you the context needed to accurately see what the final result will look like.
Brief Liquid overview
If you’re new to Liquid, don’t be intimidated. My own background is in design with some front-end knowledge, yet I now teach others how to use it. Put simply Liquid allows designers to use placeholders within their HTML which when requested will be replaced with live store data. Here’s a quick overview of the key elements:
- Output – Uses the {{ }} syntax and allows you to pull textual data from a store. A good example is {{ product.title }} which will be replaced with the title of a product entered via the Shopify admin
- Logic – Uses the {% %} syntax and allows the use of if statements and more. This is very useful when you want to show certain parts of a page dependant on a particular condition. For example, if a product is sold out
- Filters – These are denoted via the | character and allow you to manipulate your output. A simple example is {{ 'i want this to be uppercase' | upcase }} which will take the text on the left and output it in uppercase
You can find out more and learn more advanced features of Liquid by watching this presentation.
Now that we’ve got a basic understanding of Liquid, let’s take a look at five advanced theming techniques that you can add to your workflow. If you have any problems following along as we move through these techniques, we have a lot of educational resources that you will find helpful.
Advanced theme technique 01: dynamic product type tags

Dynamic product type tags are a great way to improve the buying experience in your client’s store. Dynamic product type tags make it easy for buyers to click on a product type and browse similar products.
For example, if a customer clicks on jackets, the buyer will be taken to a collection that lists all of the jackets available. This is powerful because the jackets in the store did not have to be manually sorted into a jackets category. The sorting and collection is all done for you in the background.
The following code sample will create a clickable dynamic product type tag. Upon clicking the associated product tag, buyers will be taken to a page where they can browse all of the similar products available on the store.
Show type and set dynamic link:
<p>Type: {{ product.type | link_to_type }}</p>Display and add links to all product tags:
{% if product.tags.size > 0 %}
    <div class="product-single__tags">
      <p>Tags:
        {% for tag in product.tags %}
        {% assign tag_coll = '/collections/all/' | append: tag %}
          {{ tag | capitalize | link_to: tag_coll }}{% unless forloop.last %},{% endunless %}
        {% endfor %}
      </p>
    </div>
{% endif %}
Advanced theme technique 02: customizable line properties
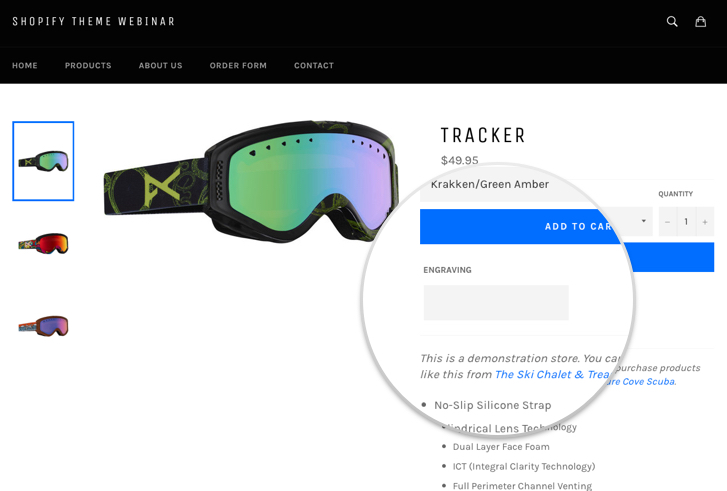
If you would like to request information from a buyer, such an engraving details, you can add a line-item property box to your product page to request that information. Just insert the following code sample to add a line-item property to any product page:
<div>
  <label for="Engraving">Engraving</label>
  <input type="text" name="properties[Engraving]">
</div>
The line-item property information will be saved on the ‘notes’ field in the customer’s order. You can find out more about how to customise product pages in the Shopify Docs.
Advanced theme technique 03: snippets
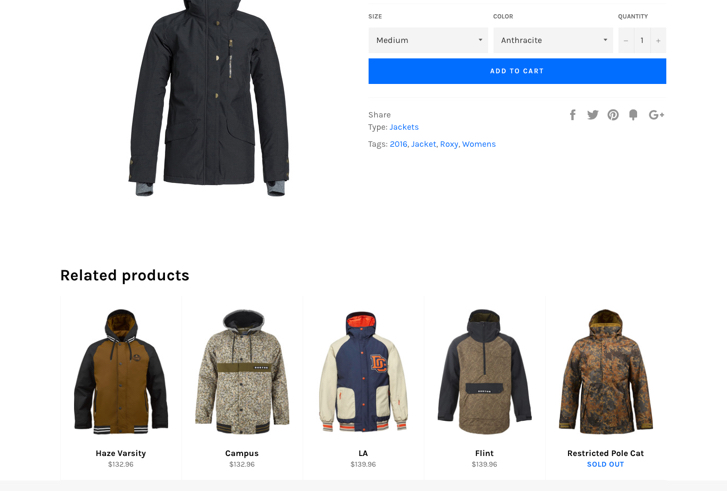
Snippets help us reuse and repurpose lines of code, and they also help us organize long templates into just a handful of snippets. If you have worked with PHP in the past, snippets works similarly to PHP includes.
Snippets are created in the 'snippets' folder of a Shopify theme, and the name given to the snippet will be the name we use to reference the snippet and include it in our liquid file.
For example, the following code snippet will return a list of five related products and can be reused on other liquid templates:
{% assign related_collection = product.collections.first.products | sort: 'price' %}

    {% if related_collection.size > 0 %}
      <div>
       <h2>Related products</h2>
       <div>
         {% for product in related_collection limit: 5 %}
          <div>
            {% include 'product-card', product: product %}
          </div>
         {% endfor %}
       </div>
      </div>
{% endif %}
The snippet will be called ‘related-products.liquid’, and we can include the snippet in our ‘product.liquid’ file as follows:
{% include related-products %}We can include this snippet in multiple files. If we make a change to the snippet this will be reflected in every file that references it. Being clever with snippets will make your template files easier to read and your workflow more streamlined.
There are plenty of other ways to use snippets in your themes too — the possibilities are endless.
Advanced theme technique 04: B2B order form
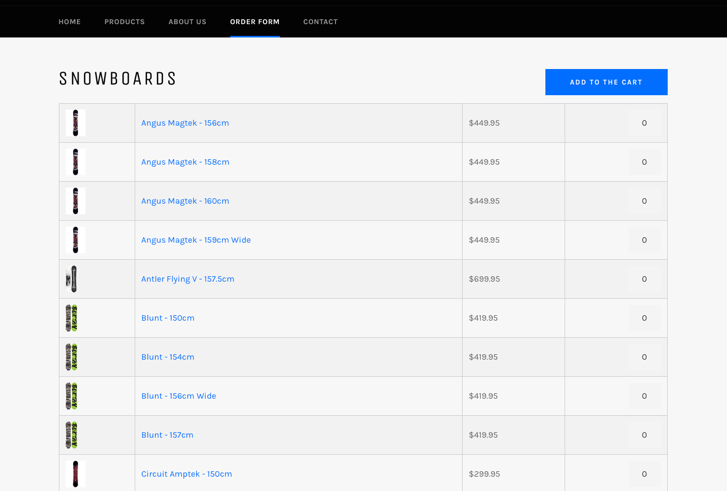
Bulk order forms are ideal for B2B (business to business) ecommerce. Not every theme will require a B2B order form but by using product collections and custom templates they are easy to create.
The following code sample will create an order form for a product collection. A full explanation of why order forms are useful and how to implement them is available in the Shopify Docs.
{% comment %}
    Source: https://gist.github.com/carolineschnapp/9122054
    If you are not on a collection page, do define which collection to use in the order form.
    Use the following assign statement, replace 'your-collection-handle-here' with your collection handle.
    {% assign collection = collections.your-collection-handle-here %}
    Use the assign statement outside of this comment block at the top of your template.
    {% endcomment %}

    {% paginate collection.products by 100 %}

    {% if collection.products_count > 0 %}
    <div class="action-bar top clearfix">
      <h1 class="left">{% if template contains 'page' %}{{ page.title }}{% else %}{{ collection.title }}{% endif %}</h1>
      <input class="action-button submit button btn right add-to-cart-order-form" type="button" value="Add to the cart" />
    </div>
    {% else %}
    <h1>{% if template contains 'page' %}{{ page.title }}{% else %}{{ collection.title }}{% endif %}</h1>
    {% endif %}

    {% if template contains 'page' and page.content.size > 0 %}
    <div class="rte">
    {{ page.content }}
    </div>
    {% elsif collection.description.size > 0 %}
    <div class="rte">
    {{ collection.description }}
    </div>
    {% endif %}

    {% if collection.products_count > 0 %}
    {{ 'http://yui.yahooapis.com/pure/0.4.2/tables-min.css' | stylesheet_tag }}
    <table class="pure-table pure-table-bordered">
      <tbody>
      {% for product in collection.products %}
        {% if product.available %}
          {% for variant in product.variants %}
            {% if variant.available %}
            <tr class="{% cycle 'pure-table-odd', '' %}">
              <td>
                <a href="{{ product.url | collection }}">
                  <img src="{{ product.featured_image.src | product_img_url: 'thumb' }}" alt="{{ product.featured_image.alt | escape }}" />
                </a>
              </td>
              <td>
                <a href="{{ product.url | collection }}">
                 {{ product.title }}{% unless variant.title contains 'Default' %} - {{ variant.title }}{% endunless %}{% unless variant.sku == '' %} - {{ variant.sku }}{% endunless %}
                </a>
              </td>
              <td>
                 {{ variant.price | money }}
              </td>
              <td style="text-align:right;">
                <input onfocus="this.select()" class="quantity field" data-id="{{ variant.id }}" min="0" {% unless item.variant.inventory_management == blank or item.variant.inventory_policy == 'continue' %}{% assign max = variant.inventory_quantity %}{% for item in cart.items %}{% if item.id == variant.id %}{% assign max = max | minus: item.quantity %}{% endif %}{% endfor %} max="{{ max }}" {% endunless %} type="text" value="0" tabindex="1" />
              </td>
            </tr>
            {% endif %}
          {% endfor %}
        {% endif %}
      {% endfor %}
      </tbody>
    </table>
    <div class="action-bar clearfix">
      <input class="action-button submit button btn right add-to-cart-order-form" type="button" value="Add to the cart" />
    </div>
    {% else %}
    <p>There are no products in this view.</p>
    {% endif %}

    {% endpaginate %}

    {% if collection.products_count > 0 %}
    <script>
    Shopify.itemsToAdd = [];
    Shopify.addItemstoTheCart = function() {
      if (Shopify.itemsToAdd.length) {
        var item = Shopify.itemsToAdd.pop();
        $.ajax({
          url: '/cart/add',
          dataType: 'json',
          type: 'post',
          data: item,
          success: Shopify.addItemstoTheCart,
          error: Shopify.addItemstoTheCart
        });
      }
      else {
        window.location.href = '/cart';
      }
    };
    jQuery(function($) {
      $('table .quantity:first').focus();
      $('[max]').change(function() {
        var max = parseInt($(this).attr('max'), 10);
        var value = parseInt($(this).val(), 10) || 0;
        if (value > max) {
          alert('We only have ' + max + ' of this item in stock');
          $(this).val(max);
        }
      });
      $('.add-to-cart-order-form').click(function() {
        $('.add-to-cart-order-form').addClass('disabled').attr('disabled','disabled');
        // Resetting.
        Shopify.itemsToAdd = [];
        $('.quantity').each(function() {
          var quantity = parseInt($(this).val(), 10);
          if (quantity) {
            Shopify.itemsToAdd.push( { id: $(this).attr('data-id'), quantity: quantity } );
          }
        });
        if (Shopify.itemsToAdd.length) {
          Shopify.addItemstoTheCart();
        }
        else {
          alert('All quantities are set to zero.');
          $('.add-to-cart-order-form').removeAttr('disabled').removeClass('disabled');
        }
      });
    });
    </script>
    {% endif %}

    <style>
    .action-bar { margin: 15px 0; }
    .action-bar.top { margin: 30px 0 0; }
    .action-bar h1 { margin:0; padding: 0; line-height:1 }
    .left { float: left; }
    .right { float: right; }
    .clearfix:before, .clearfix:after { content: ""; display: table; }
    .clearfix:after { clear: both; }
    .clearfix { zoom: 1; }
    /* Additional styles for table */
    table.pure-table { margin: 15px 0; width: 100%; }
    table.pure-table tr td:first-child, table.pure-table tr th:first-child { padding-left: 12px; }
    table.pure-table tr td:last-child, table.pure-table tr th:last-child { padding-right: 12px; }
    table.pure-table img { float:left; padding: 5px 0; }
    table.pure-table td { vertical-align: middle; }
    .quantity { text-align: center; width: 60px !important; margin: 0 !important; }
</style>
Advanced theme technique 05: metafields
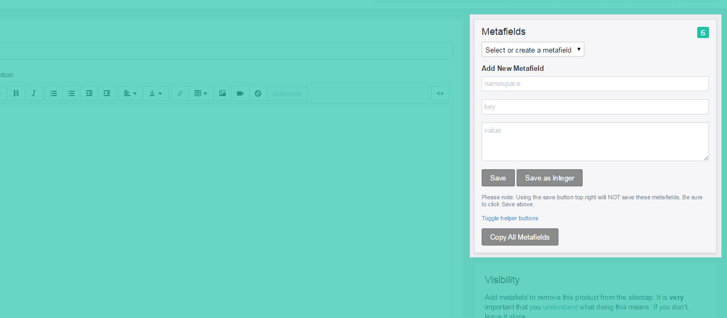
Metafields can help you extend the functionality of online shops by giving you the ability to add additional information to products, collections, orders, blogs, and pages. Using Liquid, you can then display the additional metafield information on storefronts.
Metafields have four components: namespace, key, value, and a description (optional). Namespaces will be used to group different metafields, keys will be used to reference our information, and values will contain our unique content. We can also specify if the value is a string or integer.

We can use the above metafields as follows:
Input:
{% assign instructions = product.metafields.instructions %}
{% assign key = 'Wash' %}
<p>Washing instructions: {{ instructions.Wash }}.</p>

Output:

Wash instructions: Cold water.
Metafields are a very powerful tool. To make working with them easier I recommend installing a bookmarklet tool for Google Chrome called ShopifyFD.
From novice to pro
If you would like to try out these Liquid techniques for yourself, all you need to do is set up a Shopify development store by signing up to the free Shopify Partner program. I regularly create test stores to try out new ideas and concepts and I strongly recommend that you do the same.
Sign up to Creative Bloq's daily newsletter, which brings you the latest news and inspiration from the worlds of art, design and technology.
