Adobe CC 3D tips for graphic designers
Get to grips with that extra dimension with these top tips for graphic designers.
Adobe has had 3D capabilities in Photoshop, Illustrator and After Effects for some time now. Hopefully, you've had a chance to dip your toe into that 3D toolset in at least one of these applications. What you may not have figured out yet, is how to make that 3D masterpiece look modern and sophisticated with your lighting, rendering, and post-production. Here we take a look at how these applications can help you create some stunning 3D art.
Photoshop CC
In Photoshop you’ll have many options for 3D settings. The best thing you can do for your Photoshop 3D game is to get comfortable using image based lighting (IBL). Adobe allows you to download 3D assets by going to the 3D tab at the top and choosing “Get More Content”.
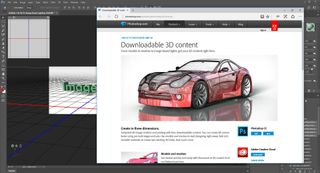
You can scroll down to the bottom of the web page that launches and choose "Download Creative IBLs". While you're there, check out some of the other awesome 3D assets like stages and sets.
Once you have the download, unzip and store them with your project. Here I have a basic 3D extrusion on some text.
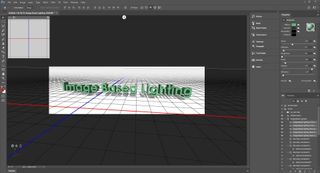
To change my lighting to IBL I’ll turn off my Infinite Light in the 3D tab for comparison purposes.
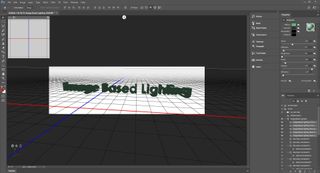
Click the Environment layer in the 3D tab and make sure IBL is checked in the properties at the top. You should see an image next to that which looks like a grey picture with dots in it.
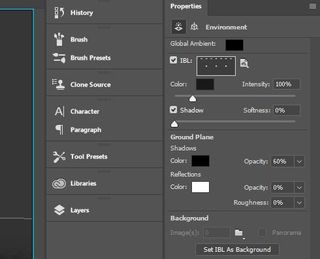
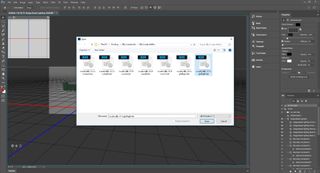
Click the Map for the IBL button next to that grey and white dot picture and choose to replace texture. A browse window will open. Navigate to the Creative IBLs we downloaded earlier, choose number 07, and click Open.
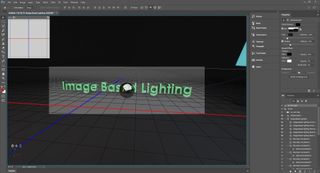
Now you’ll have a reflective ball in the middle of the screen which you can click and drag to rotate theIBL around your scene. You may still choose to turn back on your infinite light if you feel it’s too dark on its own. The more reflective your materials are, the more visible the IBL will be.
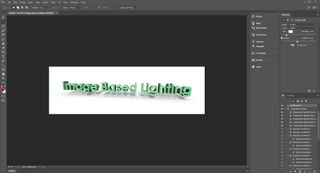
To truly appreciate the change, you’ll want to compare before and after renders. Click the render button at the bottom of the 3D Panel.
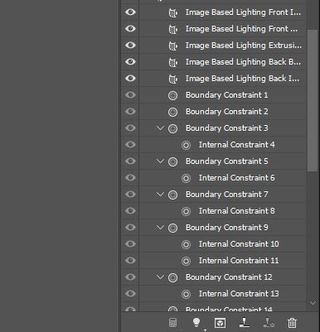
Don’t forget to soften up those shadows in both of your lighting properties to get a more realistic looking render.
Next page: After Effects tips...

Thank you for reading 5 articles this month* Join now for unlimited access
Enjoy your first month for just £1 / $1 / €1
*Read 5 free articles per month without a subscription

Join now for unlimited access
Try first month for just £1 / $1 / €1
Get the Creative Bloq Newsletter
Daily design news, reviews, how-tos and more, as picked by the editors.
