7 expert tips for facial animation in iClone 7
iClone makes it easy to create HUD animation for realistic digital humans.
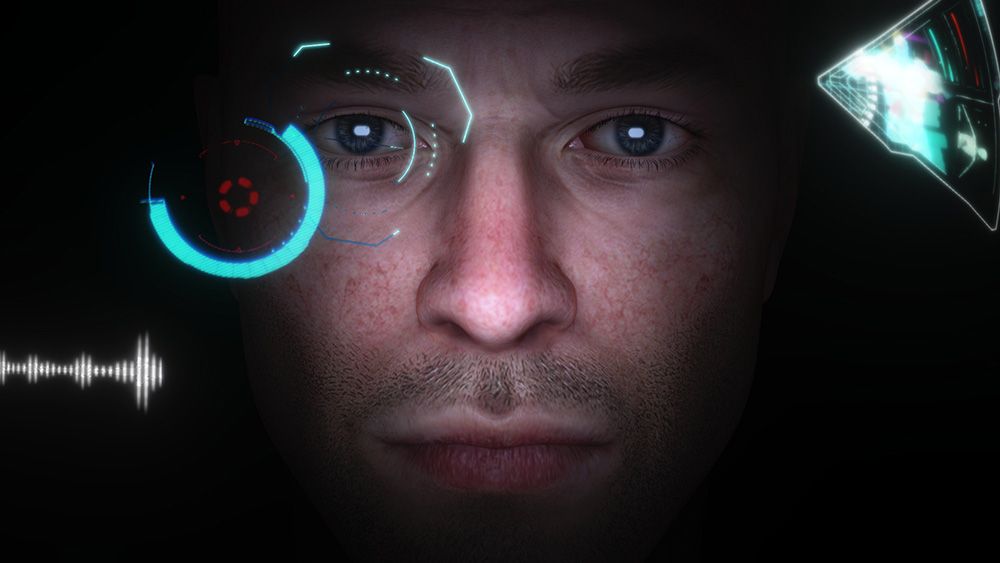
iClone is a powerful real-time animation tool that aims to remove the painful and repetitive aspects from the animation process, and simplify the difficult job of creating realistic digital humans. Like the game engines that gave rise to Machinima, iClone has always focused on being real-time, making it less complex than the more conventional animation tools.
The recent 7.7 update saw the introduction of the Digital Human Shader, which added sub surface scattering, as well as improving the materials on offer, to give skin, teeth, eyes, and hair a much more realistic appearance. It also brought with it Headshot, an AI-based generator that enables users to create character heads from photos of real people.
With more realistic looking characters comes the need for more convincing animation. There are few things more off-putting than a 3D character model that looks realistic, only to become awkward and unnatural when it comes to open its mouth.
For that reason, this article will focus on facial animation. We’ll take a look at some of the tools and techniques that you can use in iClone to help you not only get your animations looking good, but do so relatively quickly. Follow along in the video below, or read on for a written version.
If you’d like to render this video in Unreal Engine make sure you check out the bonus tip at the end, which shows you how to use the Live Link plugin.
01. Touch up the lip sync

This is the least sexy bit, which explains why so many people avoid it, but for now there really isn’t any way to get around it. If you don’t use motion capture, the first area of (facial) animation you should be working on is the lip sync.
iClone won’t always know which phonemes are the best to apply when it does its automatic pass, which means you gotta get in there and clean some of that up manually, replacing incorrect or badly placed phonemes as you see them. One quick pass won’t fix everything, but it can dramatically improve the appearance of the lip sync.
If you are using motion capture, this step is still important. Current methods of capture are great for expressions, but not as good at discerning which mouth shapes you’re going for. Mixing the captured animation with the phonemes in the viseme track can yield excellent results.
02. Clean up the (mocap) performance
Many people don't realise it, but virtually all the good looking motion captured animation you see has gone through some kind of cleanup process first. This is because there’s always a certain amount of noise in the capture – the software doesn't know what’s desirable data and what isn’t; it just tries to capture all the movement it detects. This issue can often be improved by passing the data through various filters, but usually a human hand will also be needed to soften or accentuate parts.
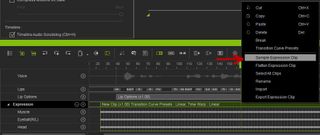
With facial animation captured in iClone there are sometimes gaps in the capture that cause the head or parts of the face to pop suddenly from one position to the next within a couple of frames. To fix the issue, right-click on any clip in need of some love and then click on Sample Expression Clip. This will reveal a key on every frame.
Go through the clip and delete 3-6 keyframes (depending on severity of the jump) from the appropriate track, in any of the places where there’s a sudden pop. Remember to hit Flatten Expression Clip once you’re done.
03. Use Expression presets
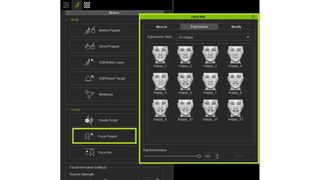
If you rarely use facial mocap, iClone’s Face Key tools are the best place to start when it comes to animating the rest of the face. And even if you are using mocap, the Expression presets are a great way to accentuate any captured expressions that don't quite come out the way you'd hoped.
There are seven categories, each with 12 preset facial expressions that can be dialled up or down to suit your needs. Familiarising yourself with these is a great way to get a good performance very quickly.
04. Liven up expressions with Face Puppet
This technique can be especially helpful if you’re animating everything by hand. Mocap is great at capturing the small passive movements of the facial muscles, but when animating by hand it can be quite difficult to add a keyframe every time you want a tiny twitch here, or some eye noise there.
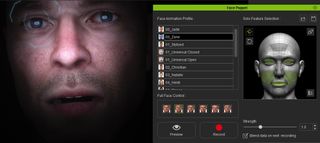
The Face Puppet tool is a simple way to add some of these difficult-to-animate movements in as much time as it takes to play the scene. There are a range of presets that govern the different parts of the face you may wish to control, or you can set them manually. Then just move your mouse around to ramp the movements up or down. It’s not always necessary, but it can make a huge difference to the end result, especially if you’re averse to doing lots of keyframe passes.
05. Focus in on eye movement and blinks
This is one of the most important parts of facial animation and should never be neglected. If you absolutely can’t keyframe eyes, iClone's Look At feature will at least keep your character’s gaze focused on something specific. However, you should be aware that’s a bare-minimum effort – in reality eye movement often precedes head movement by a fraction of a second. If you want a truly realistic result, it's necessary to keyframe your eyes to turn towards where the head is moving, just before the head does.
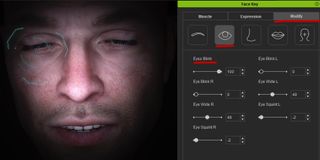
Additionally, blinks are very important in making eye movements look realistic. Big eye movements, like those that come before a head turn, often have a blink halfway through. iClone applies automatic blinks to help make the characters feel alive but these are randomly placed. Help your performance by manually keying blinks on any large eye movements. With practice this doesn’t take very long at all.
06. Don't forget the lower eyelids
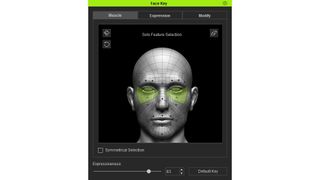
This is related to the previous tip, but deserves its own point. In real life eyes aren’t spheres as they're often represented in 3D models; the part that's exposed bulges outward a bit. This means that when someone looks around, their upper and lower eyelids will bulge out in response to the movement. iClone replicates this effect but for it to do so, you have to make sure that you select the lower eyelids as well as the eyeballs when animating them.
07. Do multiple passes
Natural facial movement is a strange thing. Most of us understand it in an implicit way rather than a detailed, technical way. So one of the most important things you can do after working on some facial animation is to walk away, take a break and come back later.
If you thought your first pass was marvellous, chances are a second look will reveal a few obvious issues that weren’t apparent the first time around. At this point, it’s usually fairly easy to go in and make small tweaks to get things looking a little more natural.
It's always worth doing at least two passes. The first is where the bulk of the work gets done, with the second to address any expressions that were too big or small, blinks that happened too fast, or to add little movements to parts that were too static.
Bonus tip: Try iClone Unreal Live Link – free for indie studios and creators
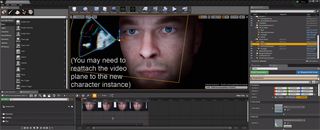
If you want to do something like this in Unreal Engine, it will be very simple with the help with Live Link plugin. Character, facial animation and lighting are all transferred over, then you can make video texture in Unreal Engine. Reallusion recently announced it was making the iClone Unreal Live Link plugin free for indie studios and creators, enabling them to enjoy this powerful connection tool without paying a penny.
Making good looking animation is often not easy, but thankfully Reallusion has been working on this problem for many years. iClone’s many features make a difficult job considerably easier and sometimes fun.
Download the free 30-day trial version of the software and try it for yourself.

Thank you for reading 5 articles this month* Join now for unlimited access
Enjoy your first month for just £1 / $1 / €1
*Read 5 free articles per month without a subscription

Join now for unlimited access
Try first month for just £1 / $1 / €1
Get the Creative Bloq Newsletter
Daily design news, reviews, how-tos and more, as picked by the editors.
Leo got his start in animation back in the days of Quake 2 Machinima, and learned the trade by making short films. He went on to work as a cinematic designer on franchises like Mass Effect and Dragon Age, and is still working in the video games industry today.
Related articles
-

-
-

-

