Create radial patterns using type
Steven Bonner shows you how to transform any typeface into an intricate pattern design by transforming glyphs
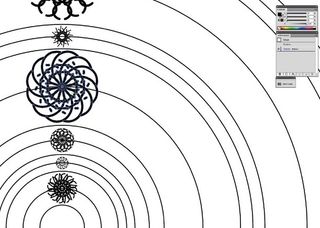
06 Start to align your new shapes with the circles you’ve drawn, and resize them to suit. As before, feel free to experiment here and see what shapes look best at different sizes until you’re happy. Turn on Smart Guides – coupled with the alignment options, they help you get your positioning precise.
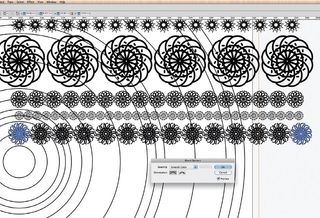
07 Now that you have your basic structure, we can create the multiple shapes that will wrap around our circles. One at a time, Shift+Opt/ Alt+Click on a shape and drag it across to create a copy, then, with both shapes selected, hit Cmd/ Ctrl+Opt/Alt+B to create a blend of the two. It will be applied as Smooth Color by default, but we’ll change this.
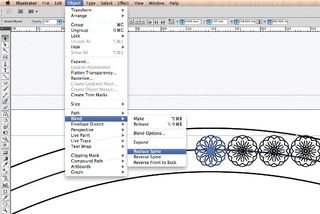
08 It’s really easy to wrap our blend around the circles we drew earlier. Just select a blend, then the circle you want to wrap it around, and go to Object>Blend> Replace Spine and the straight blend spine you created in the previous step will be replaced by the circular one. It will look odd right now, because of the way the Blend tool works on the path, and you’ll be left with a gap. To rectify this, simply select the Scissors tool and click on an actor. This turns the closed circle into a line with a beginning and an end, which the blend recognises and is able to handle in a way you’d expect.
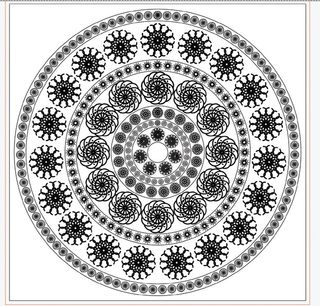
09 Carry on and do the same thing with each of your blends and circles until you have a pattern that’s similar to this. At this point you’ll want closer control over the spacing of each shape, so select a blend and double-click the Blend tool to bring up its dialog box. From here, choose Specified Steps and with Preview clicked on, manually edit the number of copies to adjust the gaps between each shape until you’re happy.
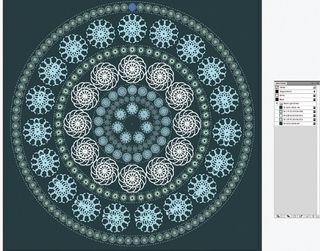
10 Finally, add some colour and play with how the stroke borders look – I dashed them here to accentuate the textile feel of the intricate, lacy pattern. You can take this further and add texture or more painterly effects, make a repeating tile for yardage prints, or give it a neon effect so it looks like Christmas lights – you can do anything you like.
Get the Creative Bloq Newsletter
Daily design news, reviews, how-tos and more, as picked by the editors.

Thank you for reading 5 articles this month* Join now for unlimited access
Enjoy your first month for just £1 / $1 / €1
*Read 5 free articles per month without a subscription

Join now for unlimited access
Try first month for just £1 / $1 / €1
The Creative Bloq team is made up of a group of design fans, and has changed and evolved since Creative Bloq began back in 2012. The current website team consists of eight full-time members of staff: Editor Georgia Coggan, Deputy Editor Rosie Hilder, Ecommerce Editor Beren Neale, Senior News Editor Daniel Piper, Editor, Digital Art and 3D Ian Dean, Tech Reviews Editor Erlingur Einarsson, Ecommerce Writer Beth Nicholls and Staff Writer Natalie Fear, as well as a roster of freelancers from around the world. The ImagineFX magazine team also pitch in, ensuring that content from leading digital art publication ImagineFX is represented on Creative Bloq.
