Create radial patterns using type
Steven Bonner shows you how to transform any typeface into an intricate pattern design by transforming glyphs
As a letterer, I find a lot of beauty in the shape and form of letters, and I like to play with different ways of using them, other than simply laying them out in readable fashion. The shapes are so interesting in themselves that we can use them as you would any other shape object to build new and maybe even more pleasing results.
In this tutorial I’ll show you a quick and easy way to use letters to make some complex, ornate and highly customisable radial patterns.
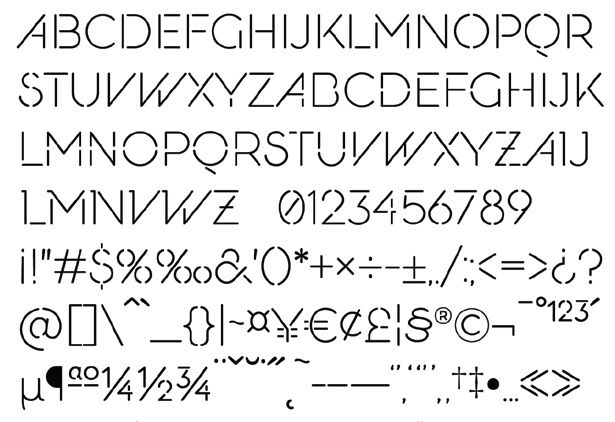
01 First, choose a typeface and type out all of its characters. As well as the standard letters, look for shapes that will create interesting patterns when we move on to the next stages. I’ve used my own typeface, Muirside, as I thought the gaps in the stencil font would add further detail for more varied patterns, but you can use anything you like.
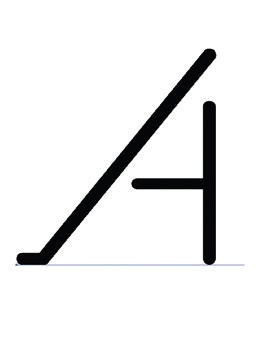
02 Next, type out one of your chosen letters and convert it to an outlined shape by highlighting it and going to Type>Create Outlines (Cmd/ Ctrl+Shift+O).
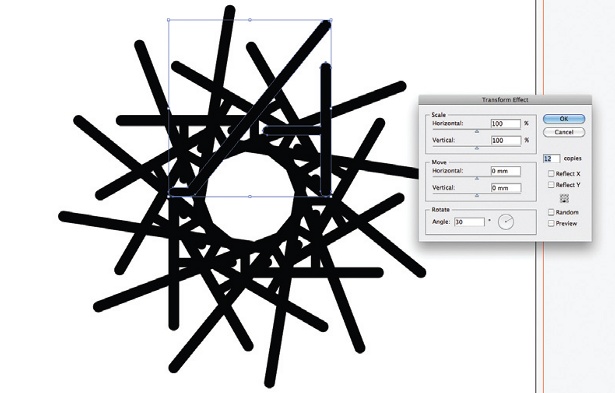
03 With your shape still selected, go to Effect>Distort & Transform>Transform to bring up the Transform Effect box. You’re presented with a few options that give you control over scaling and moving objects precisely, but what we’re interested in are the rotating options. In the bottom right, you’ll see a little grid – this enables you to determine which area of your shape the transform will apply to, so if you click on the bottom-middle square, all rotations or scaling will originate from that point. I’ve chosen 30° for the Rotate field and 12 for the Copies field – these can be any values you like, so experiment with different numbers of copies and angles for different effects. You’ll now end up with a nice snowflake-like shape.

04 Continue with this process and build up a library of smaller radial shapes. Experiment with as many letterforms as you can, as you’ll often be surprised at how what can at first appear to be a rather uninteresting glyph can suddenly turn into something much more pleasing.
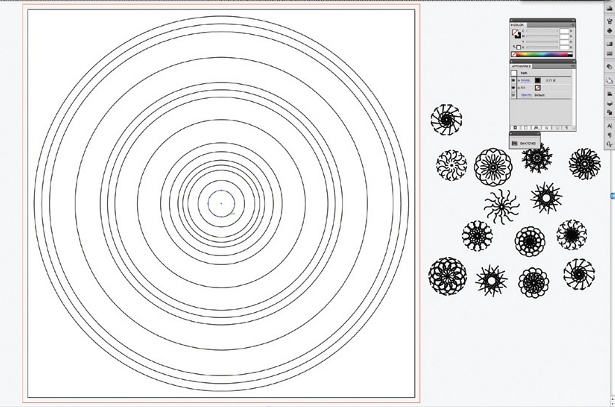
05 Once you’re happy with your ‘snowflakes’, draw a series of ever-decreasing circles on the canvas. These will form the guidelines for the final radial pattern, and we’ll attach new shapes to them. Try to space them unevenly to get a nice variation in the sizes the shapes will be, which will add a more textile-like look to the finished piece. In this instance, I’m basing mine on the idea that a shape will be attached to every second circle, and am using the others as guides or borders.
Get the Creative Bloq Newsletter
Daily design news, reviews, how-tos and more, as picked by the editors.

Thank you for reading 5 articles this month* Join now for unlimited access
Enjoy your first month for just £1 / $1 / €1
*Read 5 free articles per month without a subscription

Join now for unlimited access
Try first month for just £1 / $1 / €1

The Creative Bloq team is made up of a group of art and design enthusiasts, and has changed and evolved since Creative Bloq began back in 2012. The current website team consists of eight full-time members of staff: Editor Georgia Coggan, Deputy Editor Rosie Hilder, Ecommerce Editor Beren Neale, Senior News Editor Daniel Piper, Editor, Digital Art and 3D Ian Dean, Tech Reviews Editor Erlingur Einarsson, Ecommerce Writer Beth Nicholls and Staff Writer Natalie Fear, as well as a roster of freelancers from around the world. The ImagineFX magazine team also pitch in, ensuring that content from leading digital art publication ImagineFX is represented on Creative Bloq.
