Build an iPhone arcade game
Hello Monday walks you through how to turn a rejected concept into a GPS-based arcade game.
- Software: ActionScript 3.0 and Google Static Map API
- Project time: 2 hours
- Skills: Get to grips with ActionScript 3.0, use the Google Static Map API, integrate Adobe AIR into your work
Clients don’t always choose your favourite concept – but that doesn’t mean you should forget about those ideas. We pitched a great concept to a big fashion company recently: they liked it, but went with another option, leaving us with an idea that we loved but no next steps in terms of development. This tutorial is about turning an idea into a useful concept and transforming that into something tangible – in this case, an app.
Beanie and the Balloonist is a real-life arcade game that hooks into Google Maps, locates your position through GPS coordinates and turns that area into your game map. You control the game by moving around in the real world.
First, we invented a storyline: a hero with a mission. Initially this was to run around the streets picking up coins, while being chased. We discussed different character options, settling on a fun, fantasy hero: Beanie – the world’s largest navy bean. The Balloonist is his high-flying, baked bean-loving nemesis. In this tutorial we’ll cover concept and character development, plus how to work with ActionScript 3.0, the Google Static Map API and Adobe AIR for mobile development.
Step 01
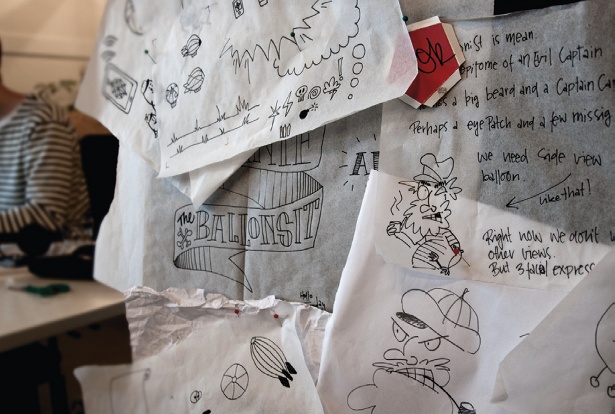
First, sketch out your character and concept ideas. We liked the thought of our bad guy flying around – he needed to be able to cross water and other obstacles, after all. It was also important that his aircraft wasn’t too fast and would be easy for players to shoot down. We could almost hear The Balloonist scheming when we drew the first sketch.
Step 02
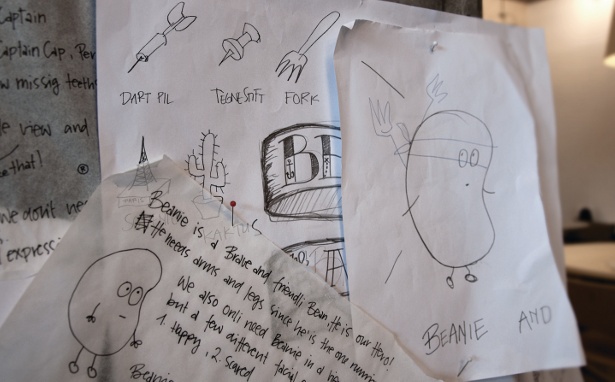
Consider the function of your characters, and design them accordingly. Beanie is a product of The Ballonist’s obsessive food-fantasy. Conceptually he ended up as this campy, 50s-style bean with long arms and legs, since his most important task is to run around. The coins from our original concept were turned into sharp objects: thumbtacks, darts and forks – which are all perfect for puncturing The Balloonist’s aircraft.
Step 03
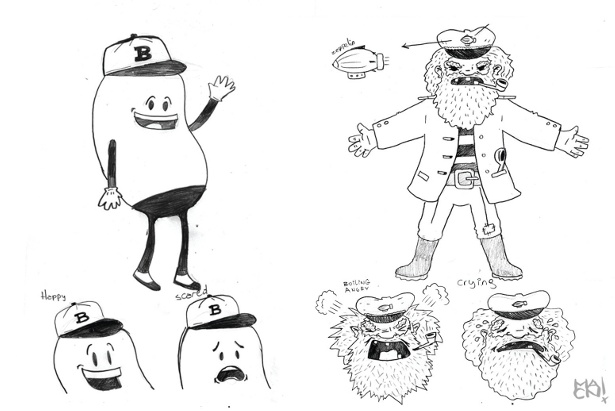
Also consider where users will play your game. Beanie and the Balloonist will be played outside, in the real world, so we chose a black-and-white palette to contrast with users’ colourful surroundings. Normally we draw all characters ourselves, but this personal project allowed us to collaborate with Argentine illustrator Martin Cocchi, who we've always wanted to work with. We contacted him with some rough sketches and a character brief.
Step 04
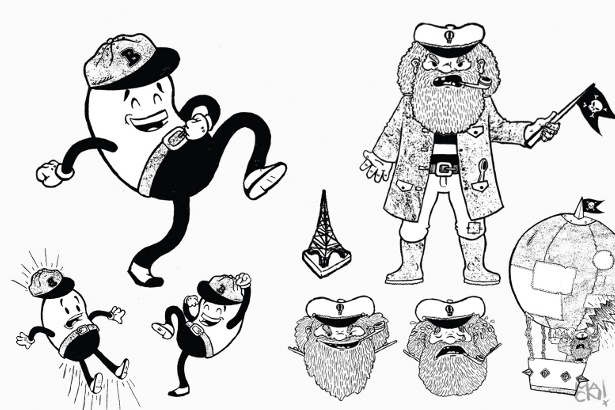
After an initial draft and some minor feedback from our team, Martin drew two complete character sheets. The game interface is very simple, based around just the two characters and a collection of sharp objects.
Step 05
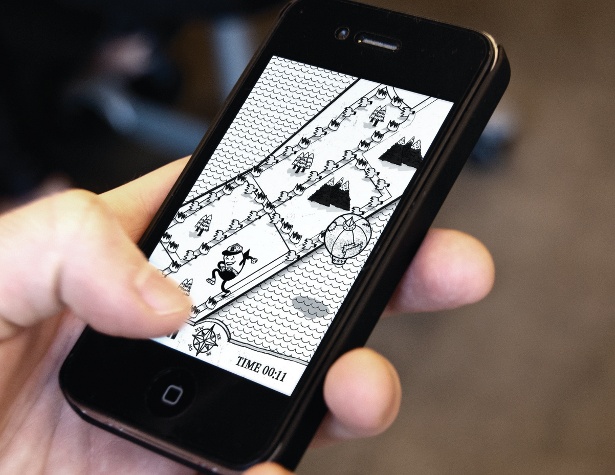
In the gameplay, we skinned the map that the player is walking around on, opting for a simple black-and-white style and some randomly placed ‘Beanie-style’ trees and mountains in the areas where there are no roads.
Get the Creative Bloq Newsletter
Daily design news, reviews, how-tos and more, as picked by the editors.
Step 06
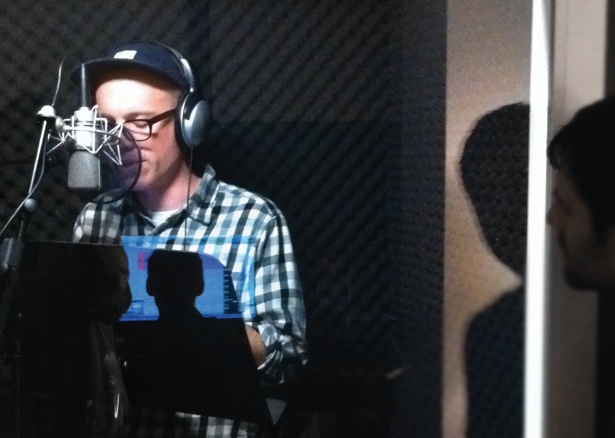
Due to our small budget, we searched among friends and family for voices for our characters. One of Hello Monday’s wives had the perfect Beanie voice, and a friend did an awesome Scottish imitation. If you need voices and money is tight, simply grab your friends and rent a studio for an hour.
Step 07
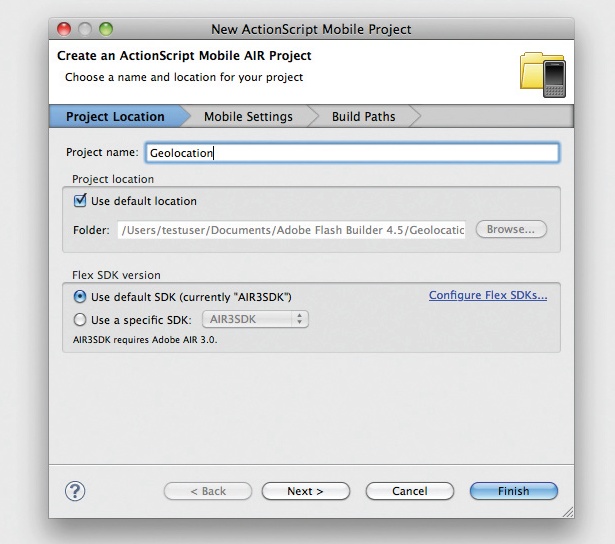
Our game was made using Adobe Flash Builder 4.5, but you can follow using your favourite IDE. Start by creating a new ActionScript mobile AIR project. This will create a document class and an application descriptor XML file. You can find more information about this here.
Step 08
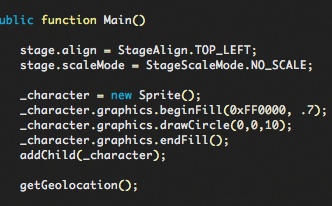
Add a sprite to display the player’s position on the map. This could be anything from an animated character to something much simpler like a small red circle, as in this case.
Step 09
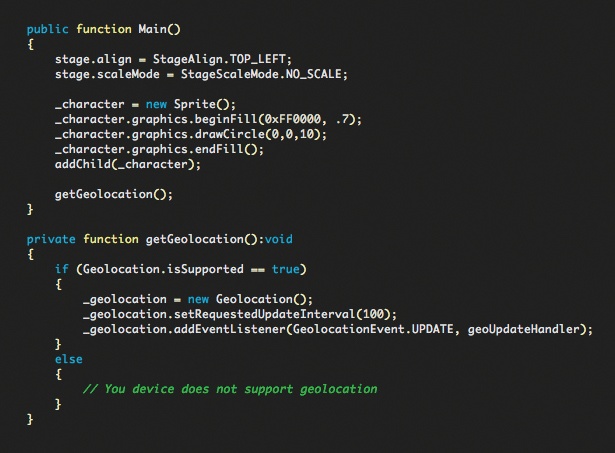
To access your mobile device’s built-in GPS, you need to add an instance of the Geolocation class. First check to see if your device supports Geolocation. Next, adjust how often you want to receive updated information from the GPS through the setRequestedUpdateInterval() method – we chose an update rate of once every 100 milliseconds. If you do not specify the update interval, it will use the default value of your device, which will vary depending on the model. Finding a balance is important because the more it updates, the more battery power it will consume.
Step 10
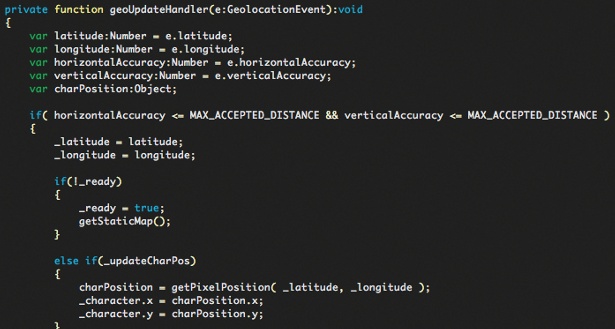
In the update handler, we need to retrieve some information from the GPS. First, we obtain our location, which we get in the form of longitude and latitude coordinates. To make sure our position isn’t displayed too inaccurately, we retrieve the map when the reading is accurate within 12 metres, which is our benchmark for accuracy here.
Step 11
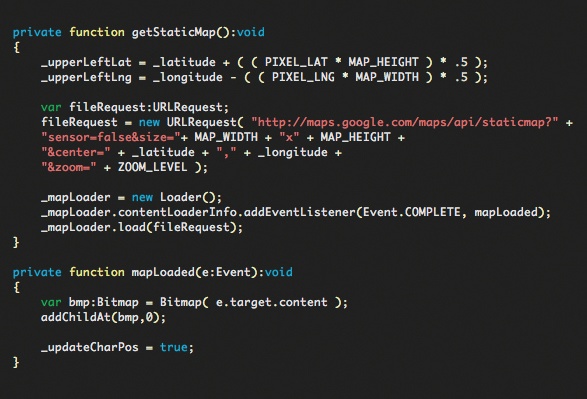
We calculate the upper-left corner of the map, which will be used later in calculating the player’s position in pixels. Next, we make a request to the Google Static Maps API. You can do this by making an HTTP request to http://maps.google apis.com/maps/api/staticmap? followed by a string of concatenated parameters, which will return an image at the specified zoom level and dimensions (the maximum size is restricted to 512x512 pixels). The latitude and longitude we provide will be the centre of the map. You are required to specify a centre and zoom level when you’re not using markers – more on that here.
Step 12
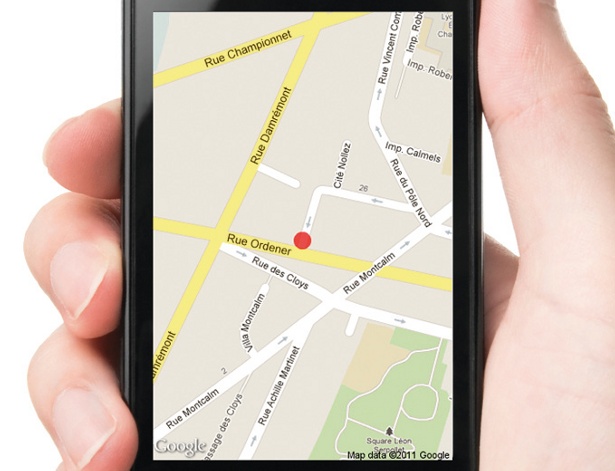
When the map is ready, we add it to the stage and start updating the character’s position (our red circle).
Step 13
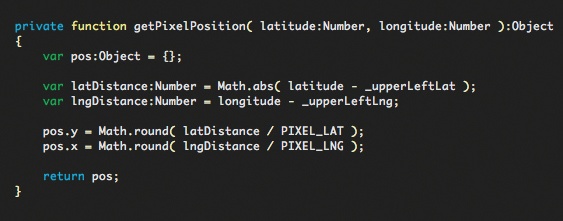
To move the character around the map, we need to convert the latitude and longitude to pixels. First, we calculate the distance to the upper-left corner in latitude/longitude values. Next, we convert this value to pixels. We have to calculate how much one pixel is in latitude/longitude values at a given zoom level, which is done by dividing the map width/height with the distance (in latitude/ longitude) from west to east and north to south – we have hardcoded this value, but you can make a more dynamic method for this by adding more API calls. Just remember that more calls means more processing. When we have this number, it is easy to get the position in pixels by dividing the distance with the one-pixel value. And that's it, you're done.
Liked this? Read these!
- How to build an app
- Download the best free fonts
- Brilliant Wordpress tutorial selection
- The best free web fonts for designers

Thank you for reading 5 articles this month* Join now for unlimited access
Enjoy your first month for just £1 / $1 / €1
*Read 5 free articles per month without a subscription

Join now for unlimited access
Try first month for just £1 / $1 / €1

The Creative Bloq team is made up of a group of art and design enthusiasts, and has changed and evolved since Creative Bloq began back in 2012. The current website team consists of eight full-time members of staff: Editor Georgia Coggan, Deputy Editor Rosie Hilder, Ecommerce Editor Beren Neale, Senior News Editor Daniel Piper, Editor, Digital Art and 3D Ian Dean, Tech Reviews Editor Erlingur Einarsson, Ecommerce Writer Beth Nicholls and Staff Writer Natalie Fear, as well as a roster of freelancers from around the world. The ImagineFX magazine team also pitch in, ensuring that content from leading digital art publication ImagineFX is represented on Creative Bloq.
