Add textures to vectors using Smart Objects
Amy Martino shows you how to use Smart Objects for a non-destructive workflow
In this tutorial I’ll design a fashion illustration using a vector drawing created in Illustrator that’s editable as a Smart Object in Photoshop. I’ll also explain how to create and apply textures to your images in Photoshop to add character to your work.
Importing a drawing as a Smart Object means that you can add effects in Photoshop without altering the original piece – and if you go back to the Illustrator image and make changes to it, these will be reflected automatically in the Photoshop document. It’s a great way to save time by speeding up your workflow.

01 First, draw your illustration. For this step I usually create a moodboard that includes images of clothing as well as pictures that have a colour palette, feeling or mood I really love. For this illustration, I’ve used an image that my friend, photographer Jim Kleckner, showed me recently. It has some great colours and shapes, and is a fantastic place to find some inspiration.
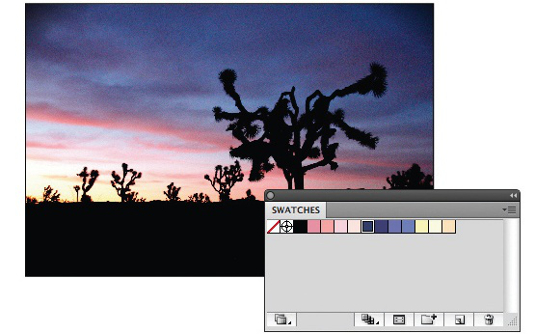
02 Once you have your inspiration, put together a simple colour palette in Illustrator to keep on the side of your design. I brought my photograph into Illustrator and used the Eyedropper tool to sample the colours. Store your samples in the Swatches panel.
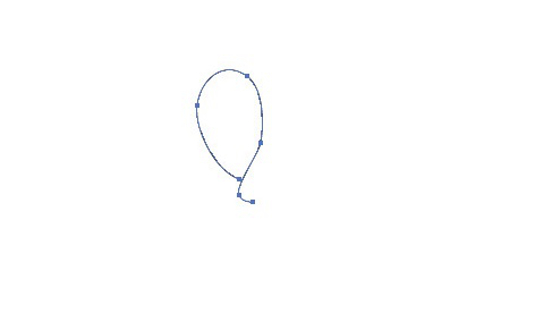
03 Start drawing your image in Illustrator. I began with a silhouette, using my Wacom tablet and the Pencil tool with a 0.75pt stroke.
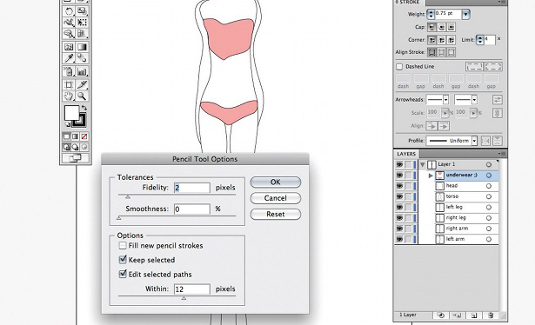
04 You’ll find a silhouette that you can use (AmyMartino_FashionIllustration.ai) on the disc if you choose. I drew some underwear on her so she wouldn’t be embarrassed. When I draw, I tend to set the Fidelity to 2 pixels. This gives clean lines but doesn’t round them out too much. You can set the fidelity of your lines by clicking on the Pencil tool in the Tools panel. This will bring up the Pencil tool options.
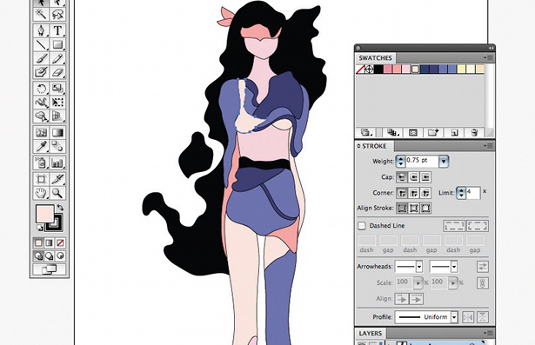
05 In Illustrator, draw two curves to blend between. Remember to go to the Object drop-down and select Blend Options and Specified Steps. Push this up as high as you want, or as your computer can handle – at least 200 steps should yield the desired effect. The key to getting an interesting look is to have a white and black keyline fill on your curves, so that when you make the blend you get a gradient result.
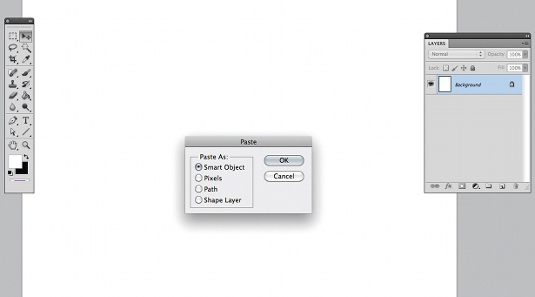
06 Once you have an illustration that you’re happy with, select the entire image and copy and paste it into a new Photoshop file. A dialog box will come up asking what you want to paste it as – select Smart Object.
Get the Creative Bloq Newsletter
Daily design news, reviews, how-tos and more, as picked by the editors.
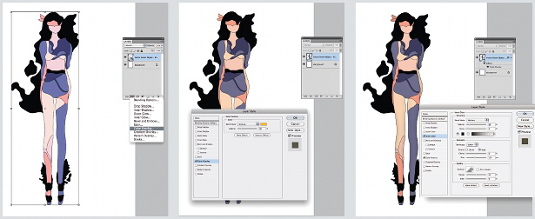
07 Now it’s time to add effects to your illustration. In the Layers panel select the FX option at the bottom of the box. I added a Color Overlay (yellow multiplied at 19%), Gradient Overlay (rainbow colours overlaid at 18%) and an Inner Glow (multiplied at 16%) to my illustration to give it depth and a vintage appearance. Play with the effects until you get the look you want.
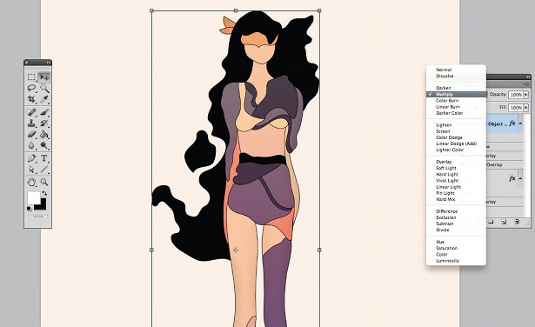
08 Next, choose a background colour. I’ve also multiplied my illustration against the background by selecting Multiply from the drop-down menu at the top of the Layers panel.
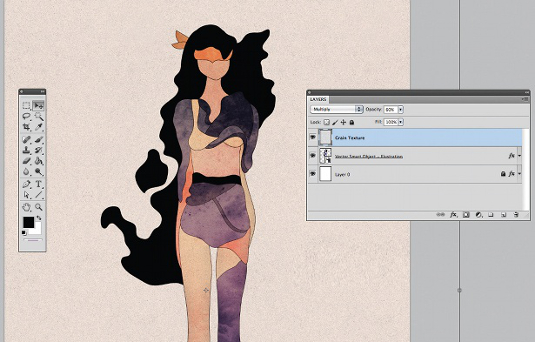
09 Now use textures to give your illustration even more character. There are two files on the disc for you to use in your image if you wish – one is a grain texture called AmyMartino_GrainTexture.jpg and the other is a scan of some watercolour paints that I’ve converted to greyscale (AmyMartino_Watercolors.jpg).
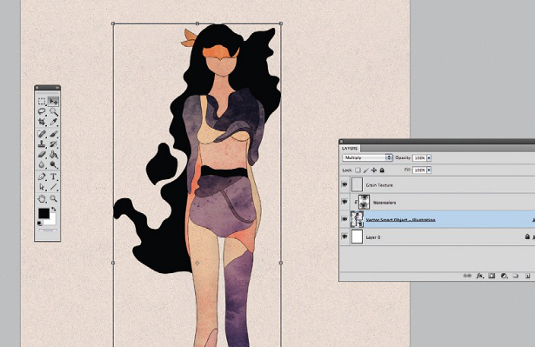
10 Here, we’ll look at how the Smart Object works. In the Layers panel, double-click on the Smart Object of the illustration. This will automatically open the vector object that you created in Illustrator. Let’s say for the purposes of this tutorial that you decide to add a little more detail, such as some circles, to the illustration. Go ahead and make any changes that you want, and hit Save.
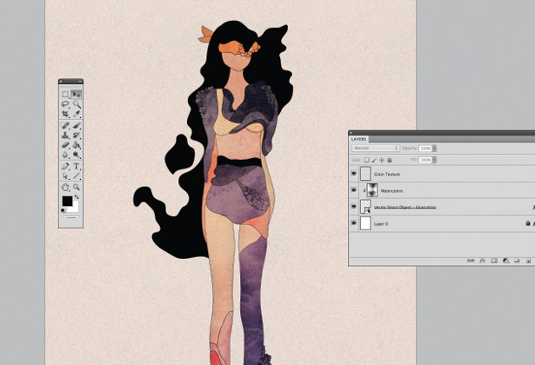
11 Once you’ve saved the illustration, go back to Photoshop and you’ll find the changes automatically reflected in your Photoshop file. What’s so nice about this function is that the effects and textures you add to the illustration remain intact.
Amy Martino
Freelance graphic designer Amy has contributed designs for brands including Nikita, Nike Women and Jetty. She’s also been featured in magazines like Nylon and Lucky.
www.yellowbirdmachine.com

Thank you for reading 5 articles this month* Join now for unlimited access
Enjoy your first month for just £1 / $1 / €1
*Read 5 free articles per month without a subscription

Join now for unlimited access
Try first month for just £1 / $1 / €1

The Creative Bloq team is made up of a group of art and design enthusiasts, and has changed and evolved since Creative Bloq began back in 2012. The current website team consists of eight full-time members of staff: Editor Georgia Coggan, Deputy Editor Rosie Hilder, Ecommerce Editor Beren Neale, Senior News Editor Daniel Piper, Editor, Digital Art and 3D Ian Dean, Tech Reviews Editor Erlingur Einarsson, Ecommerce Writer Beth Nicholls and Staff Writer Natalie Fear, as well as a roster of freelancers from around the world. The ImagineFX magazine team also pitch in, ensuring that content from leading digital art publication ImagineFX is represented on Creative Bloq.
