ZBrush for iPad: everything you need to know
Glen Southern explains the tools and features of ZBrush for iPad.
In this ZBrush for iPad explainer I'll be detailing all of the key tools and features of Maxon's new app for Apple's tablet. I've been using it for a number of months in beta and now the final version is released, everyone should really be giving it a go. For my final thoughts why you should try it, read my ZBrush for iPad review and our interview with its lead developer, Paul Gaboury.
Before I get into what ZBrush for iPad can do, first a reminder of what desktop ZBrush is and who's it's for. ZBrush is software used to create detailed 3D models, like characters, creatures and environments for movies, TV, video games, and animated films.
ZBrush is a powerful digital sculpting tool, with features including painting, texturing and tools for making game assets. It's particularly good for creating complex organic models without needing a powerful computer. Now we have a mobile version for the iPad.
Article continues belowRead our 'ZBrush: everything you need to know' explainer for more details on the desktop version and take a look at our list of the best ZBrush tutorials for inspiration. If you're also interested in the desktop version, read our ZBrush 2023 review. But for now, let's take a look at what some of the core tools in ZBrush for iPad actually do.
ZBrush for iPad explainer: which iPad is best?
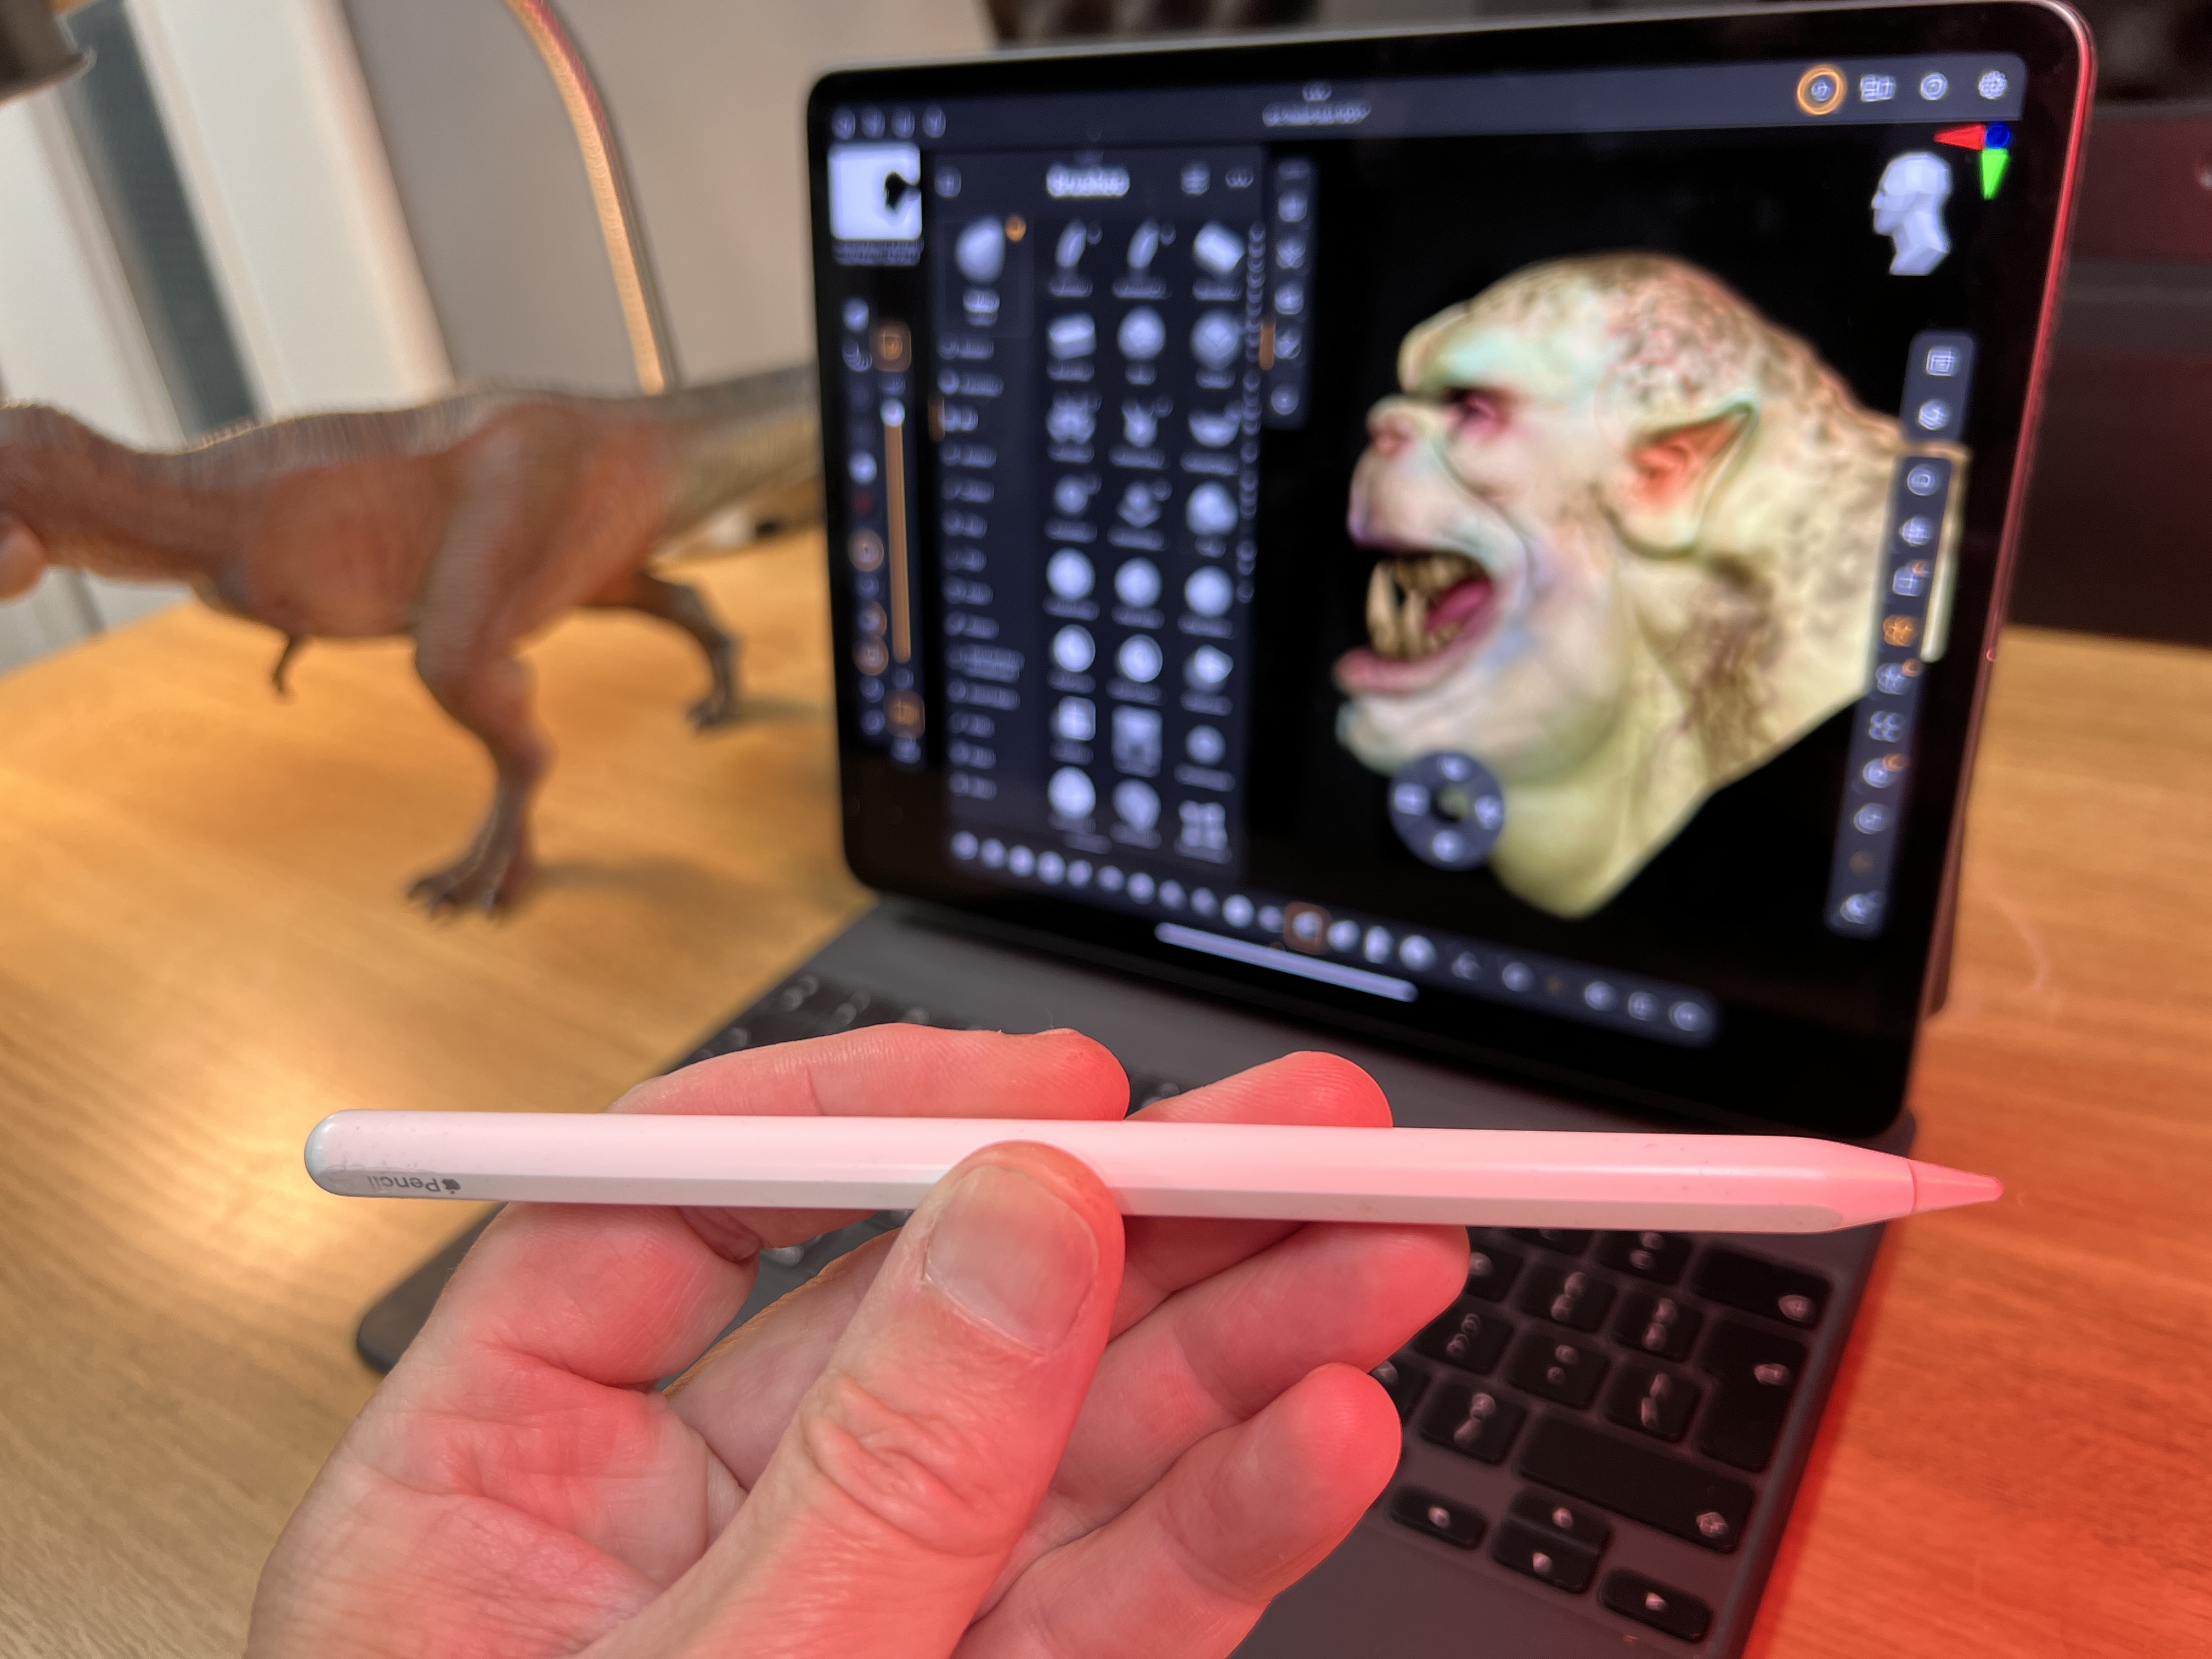
When it comes to the hardware, this is easy. ZBrush for iPad runs on an iPad. Add to that an Apple Pencil and you are ready to go. Which iPad is the next question, and really, I think you have two options that are worth discussing, and it's between using an iPad Pro or iPad Air.
If I were writing this ZBrush for iPad explainer a few years back I would only be recommending the iPad Pro. Generally speaking I always found the iPad Air range to be lacking in power and RAM, but not any more. This latest generation of iPad Air models use the M2 Apple Silicone chip and have 8GB of RAM, which is more than adequate for digital sculpting. If you intend to be using ZBrush for iPad professionally then go for the iPad Pro M4 chip with 16GB of RAM, this will future proof yourself a little.
Read my Apple iPad Pro (M4) review for more details as well as my Apple iPad Air (M2, 2024) review for more information.
Sign up to Creative Bloq's daily newsletter, which brings you the latest news and inspiration from the worlds of art, design and technology.
The new generation Apple Pencil, now called Apple Pencil Pro, is a great update with a some excellent new features, such as the find-me capability as well as barrel roll and additional tap functions built in. It's the same price as the older Apple Pencil 2 so if you are getting a new iPad Pro or iPad Air, you will want the Apple Pencil Pro for using ZBrush. Your finger alone won’t cut it. Read our Apple Pencil Pro review for the full lowdown.
ZBrush for iPad explainer: painting in 3D
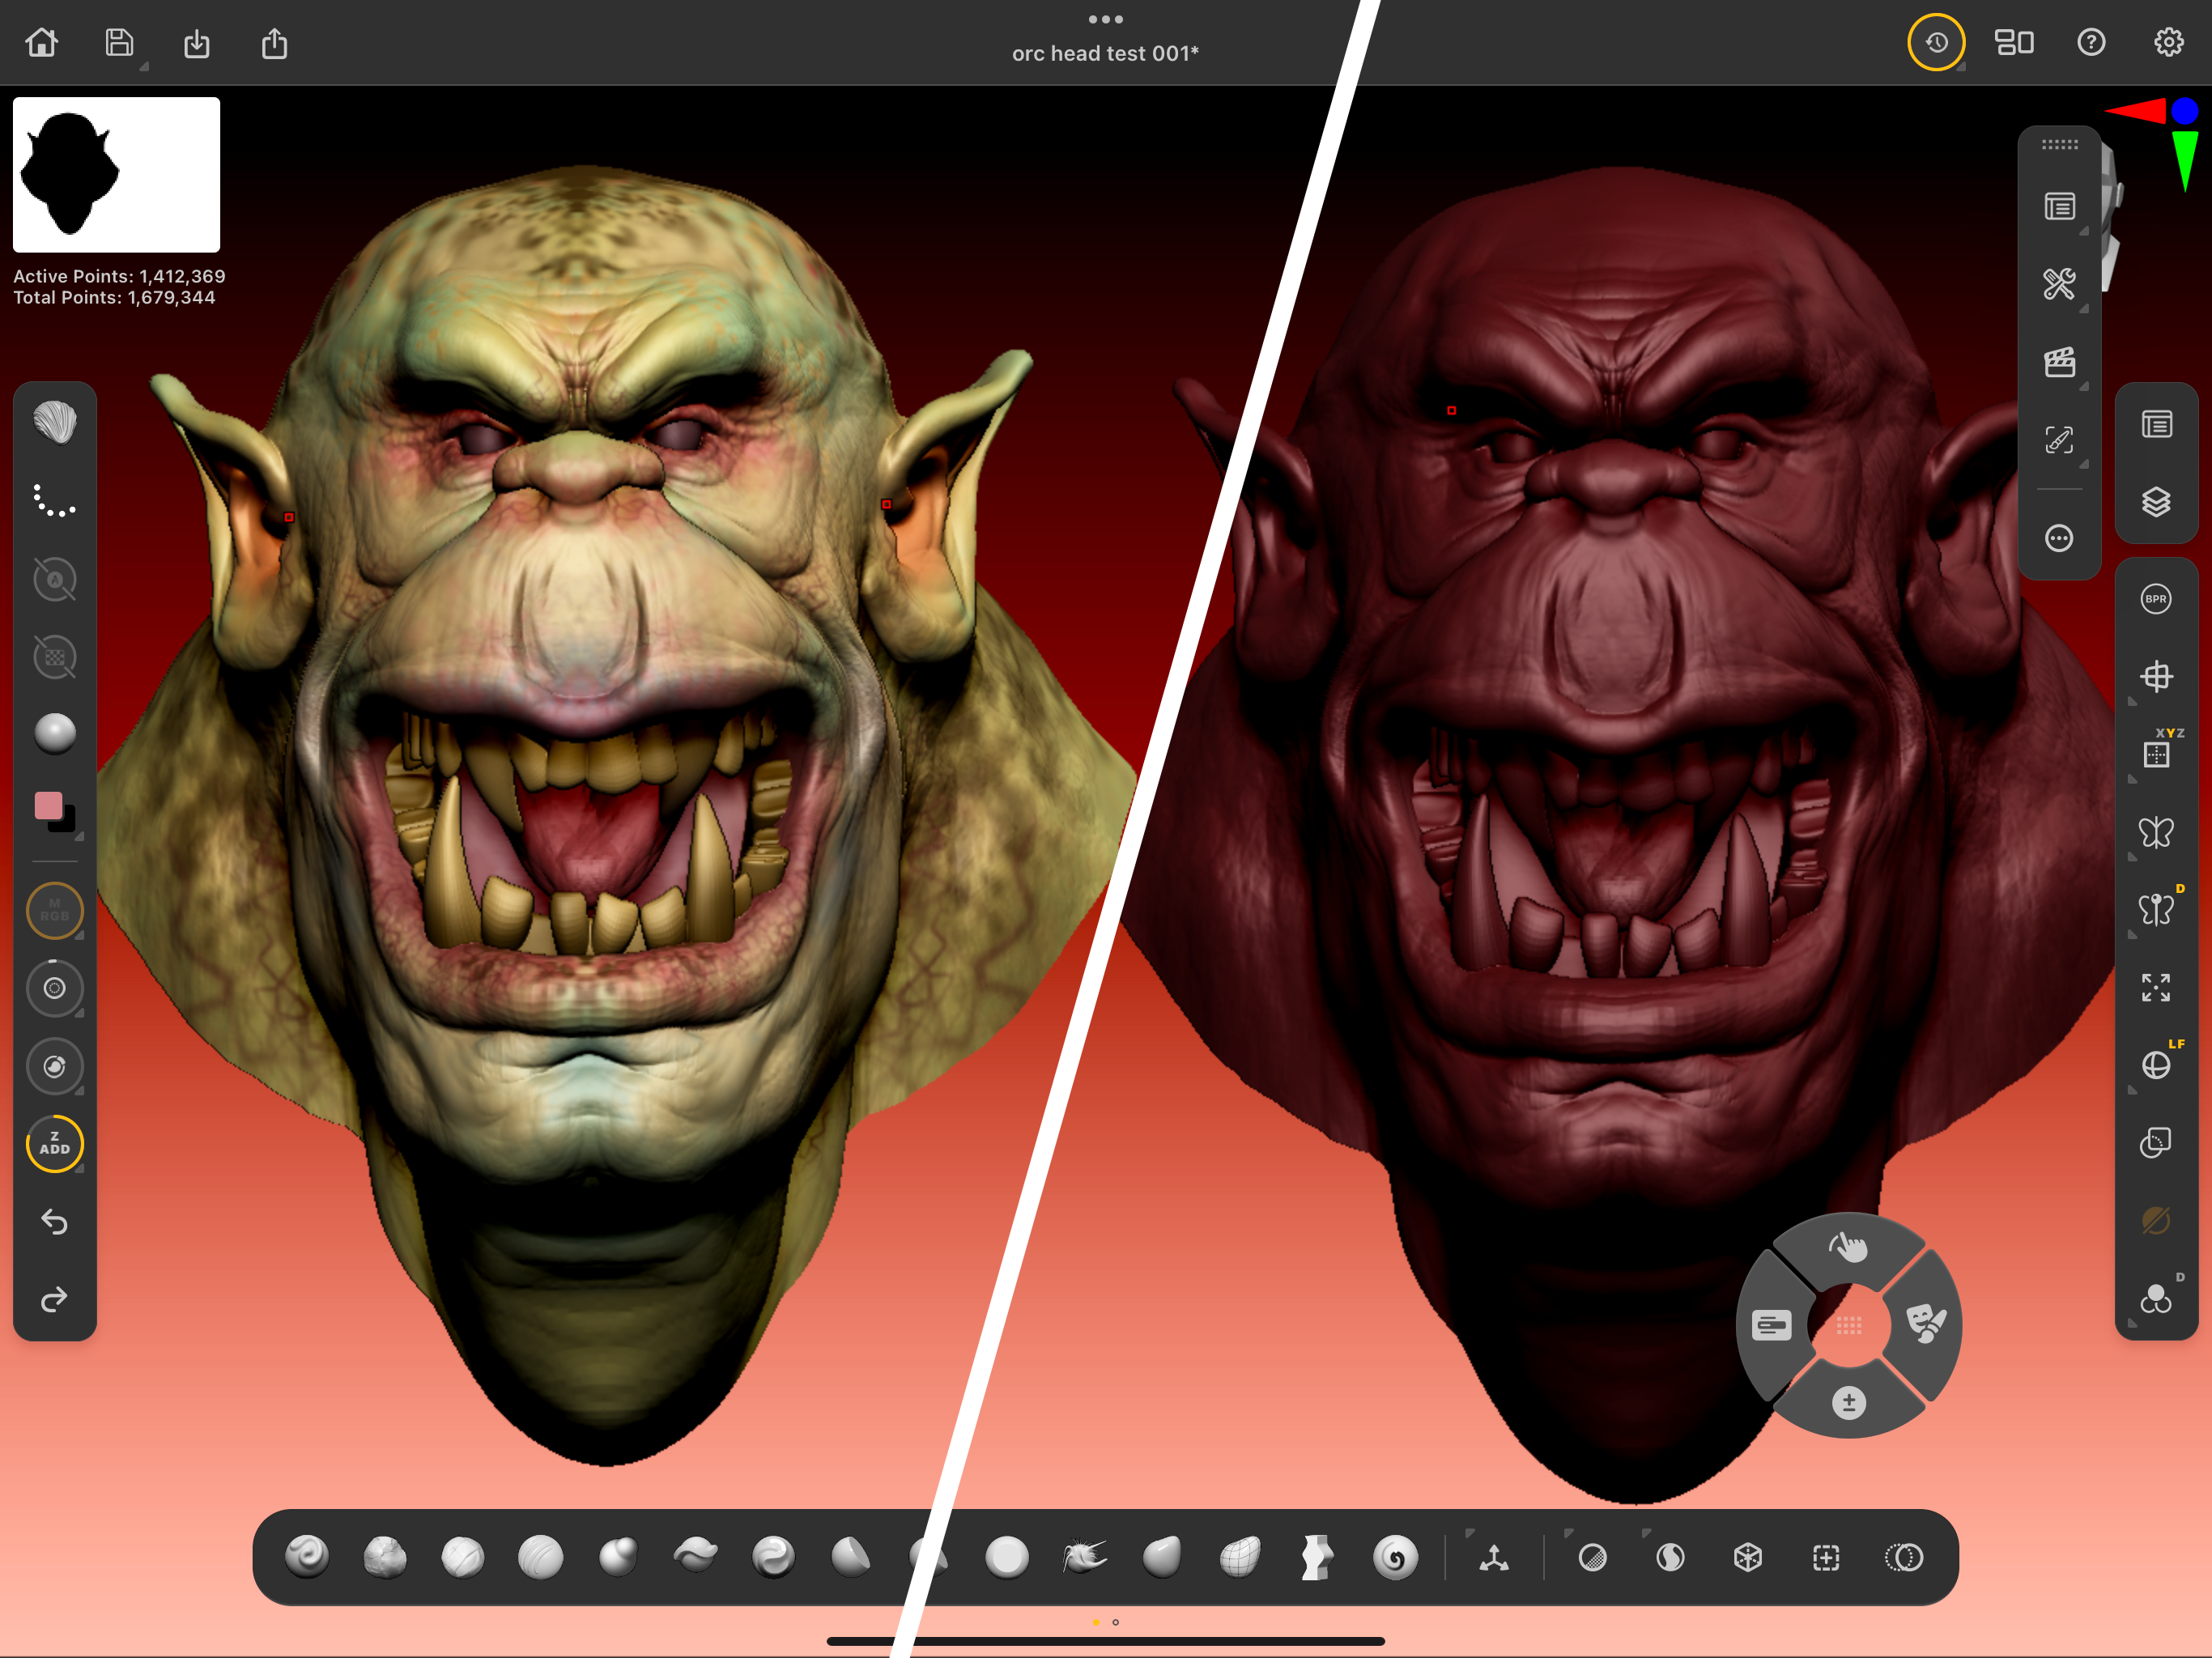
Polypainting is how you paint your models in ZBrush and it’s actually a misnomer. In other programs it is called Vertex Painting because the colour information is actually retained in the points that make up the polygons rather than the other way around.
ZBrush for iPad is just as capable as its desktop big brother and you have the same range of tools with brushes, alpha maps, stroke types and colour palette to enable you to paint however you like.
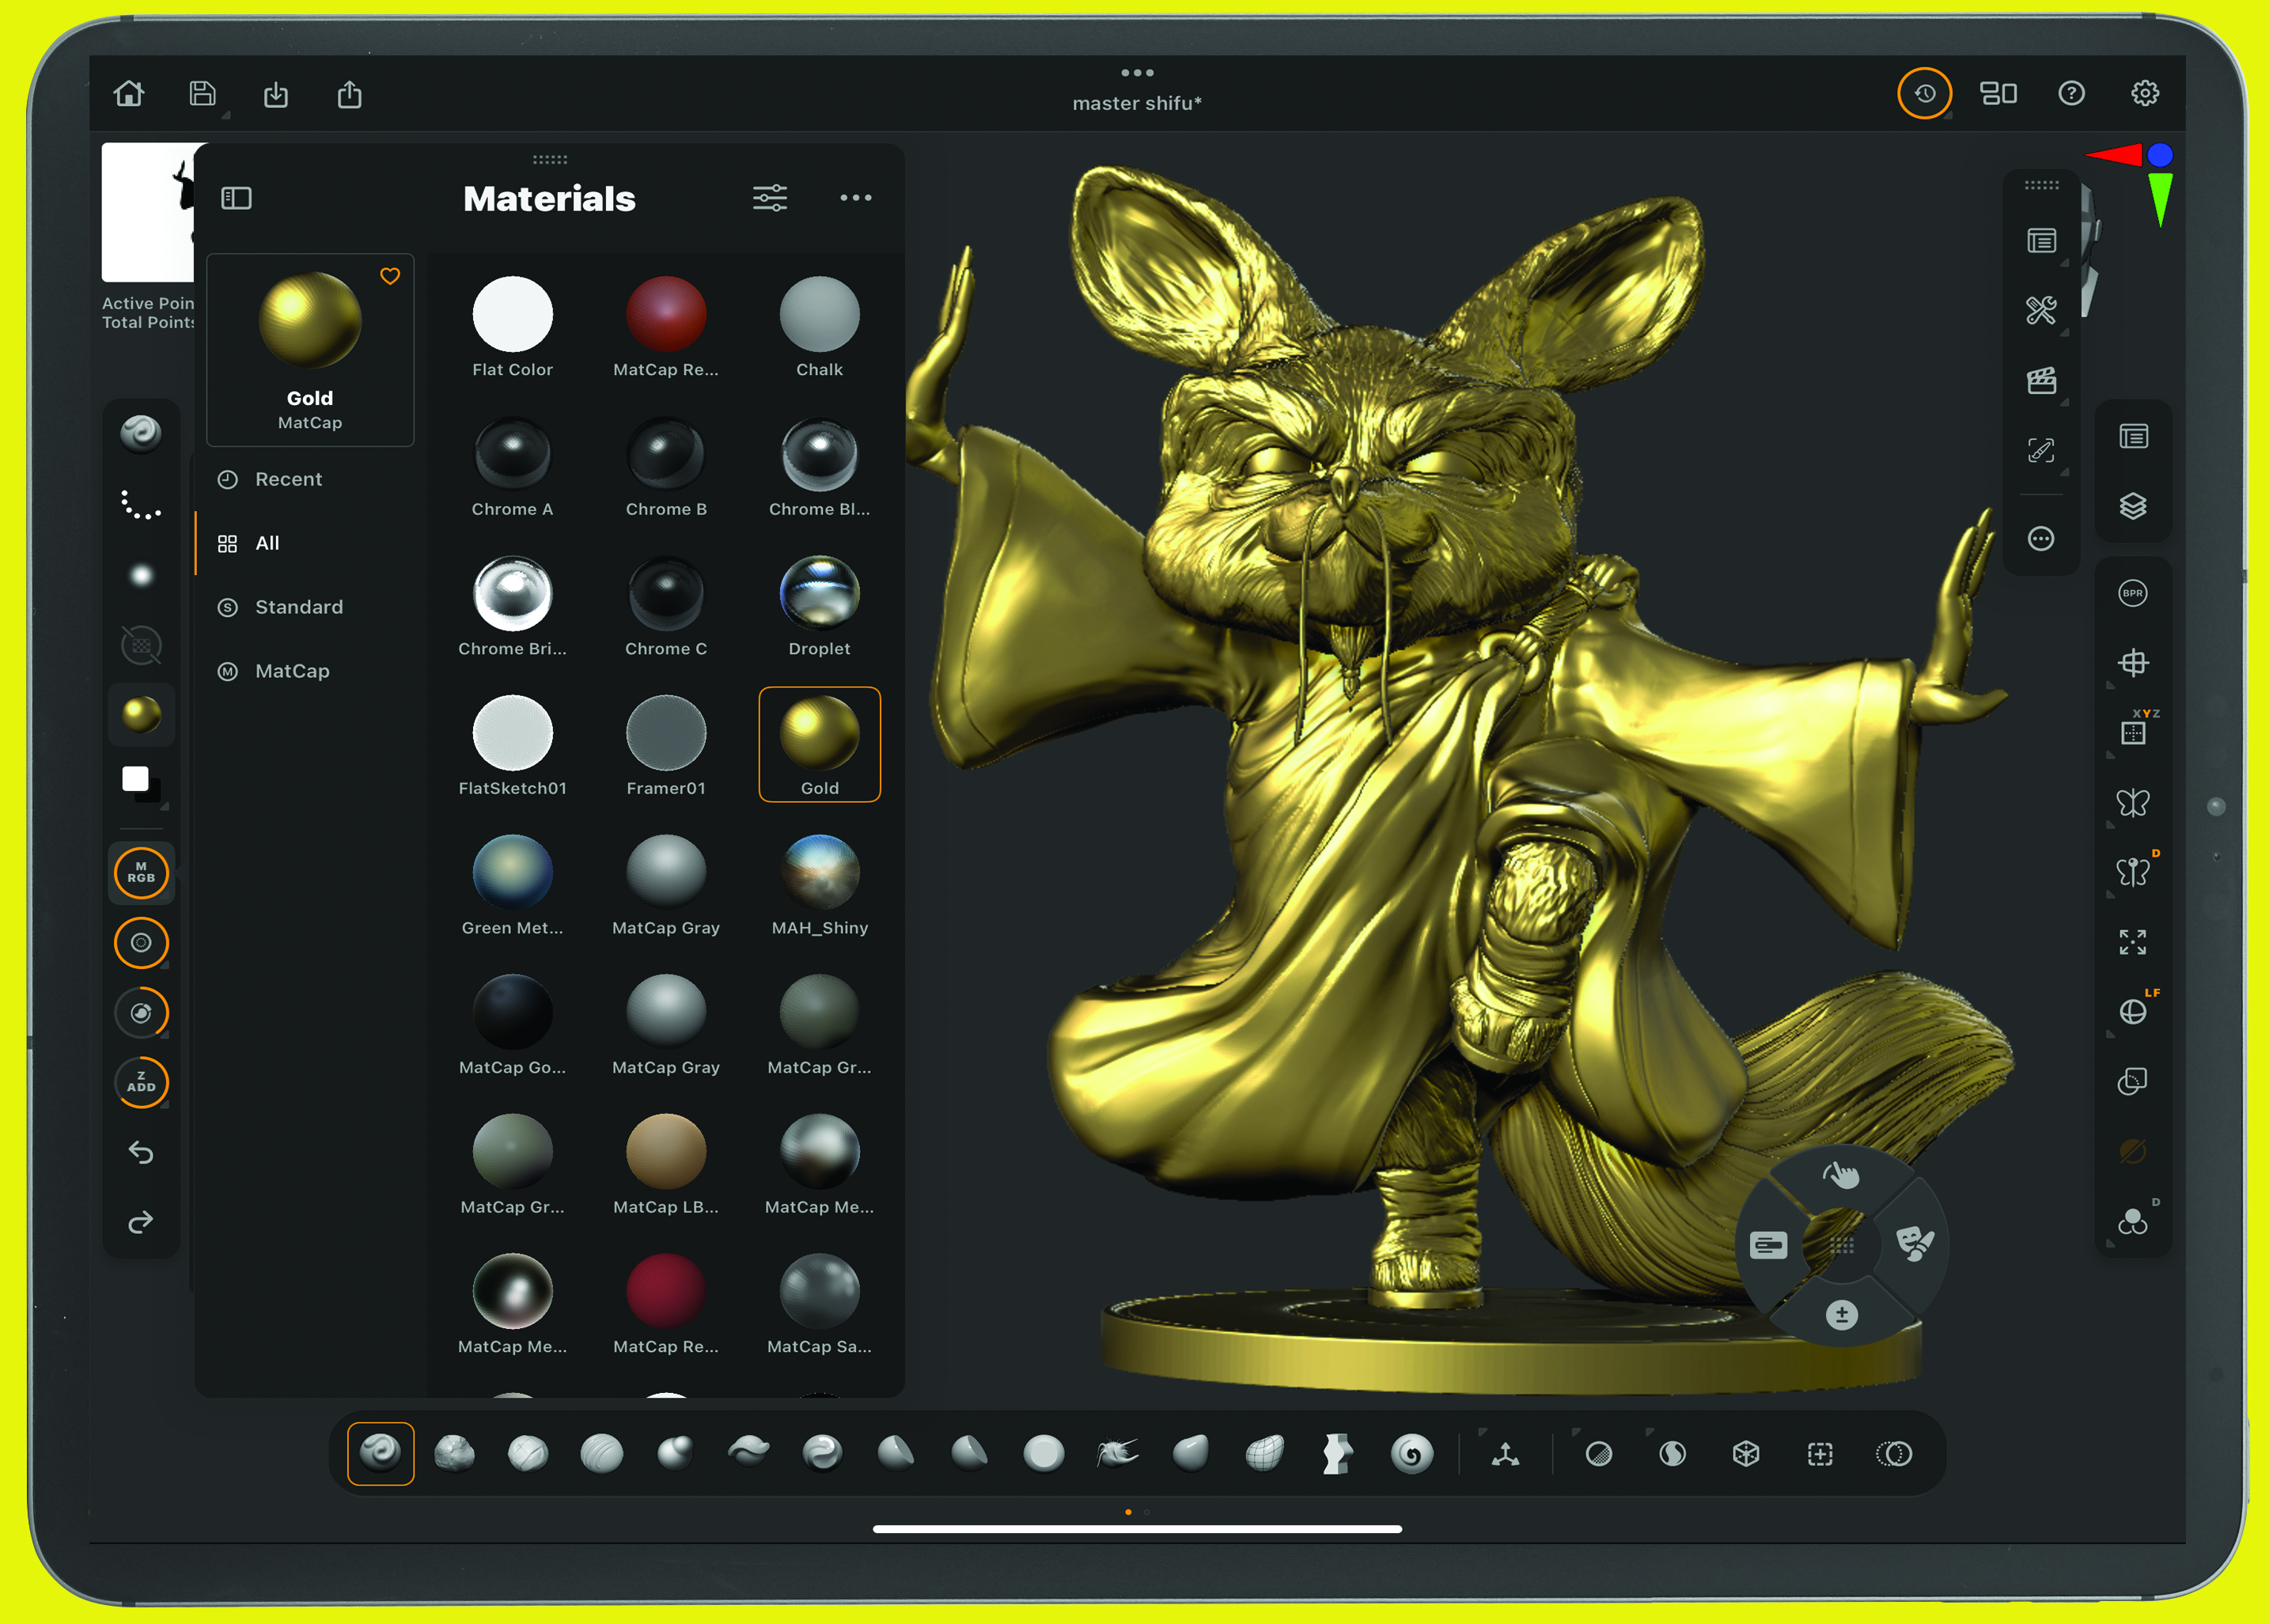
ZBrush for iPad even has a wide range of shaders and materials, including MatCaps and standard materials, that respond to the scene's lighting conditions. All of this can be exported and used in other software as you would expect.
ZBrush for iPad explainer: using Dynamesh
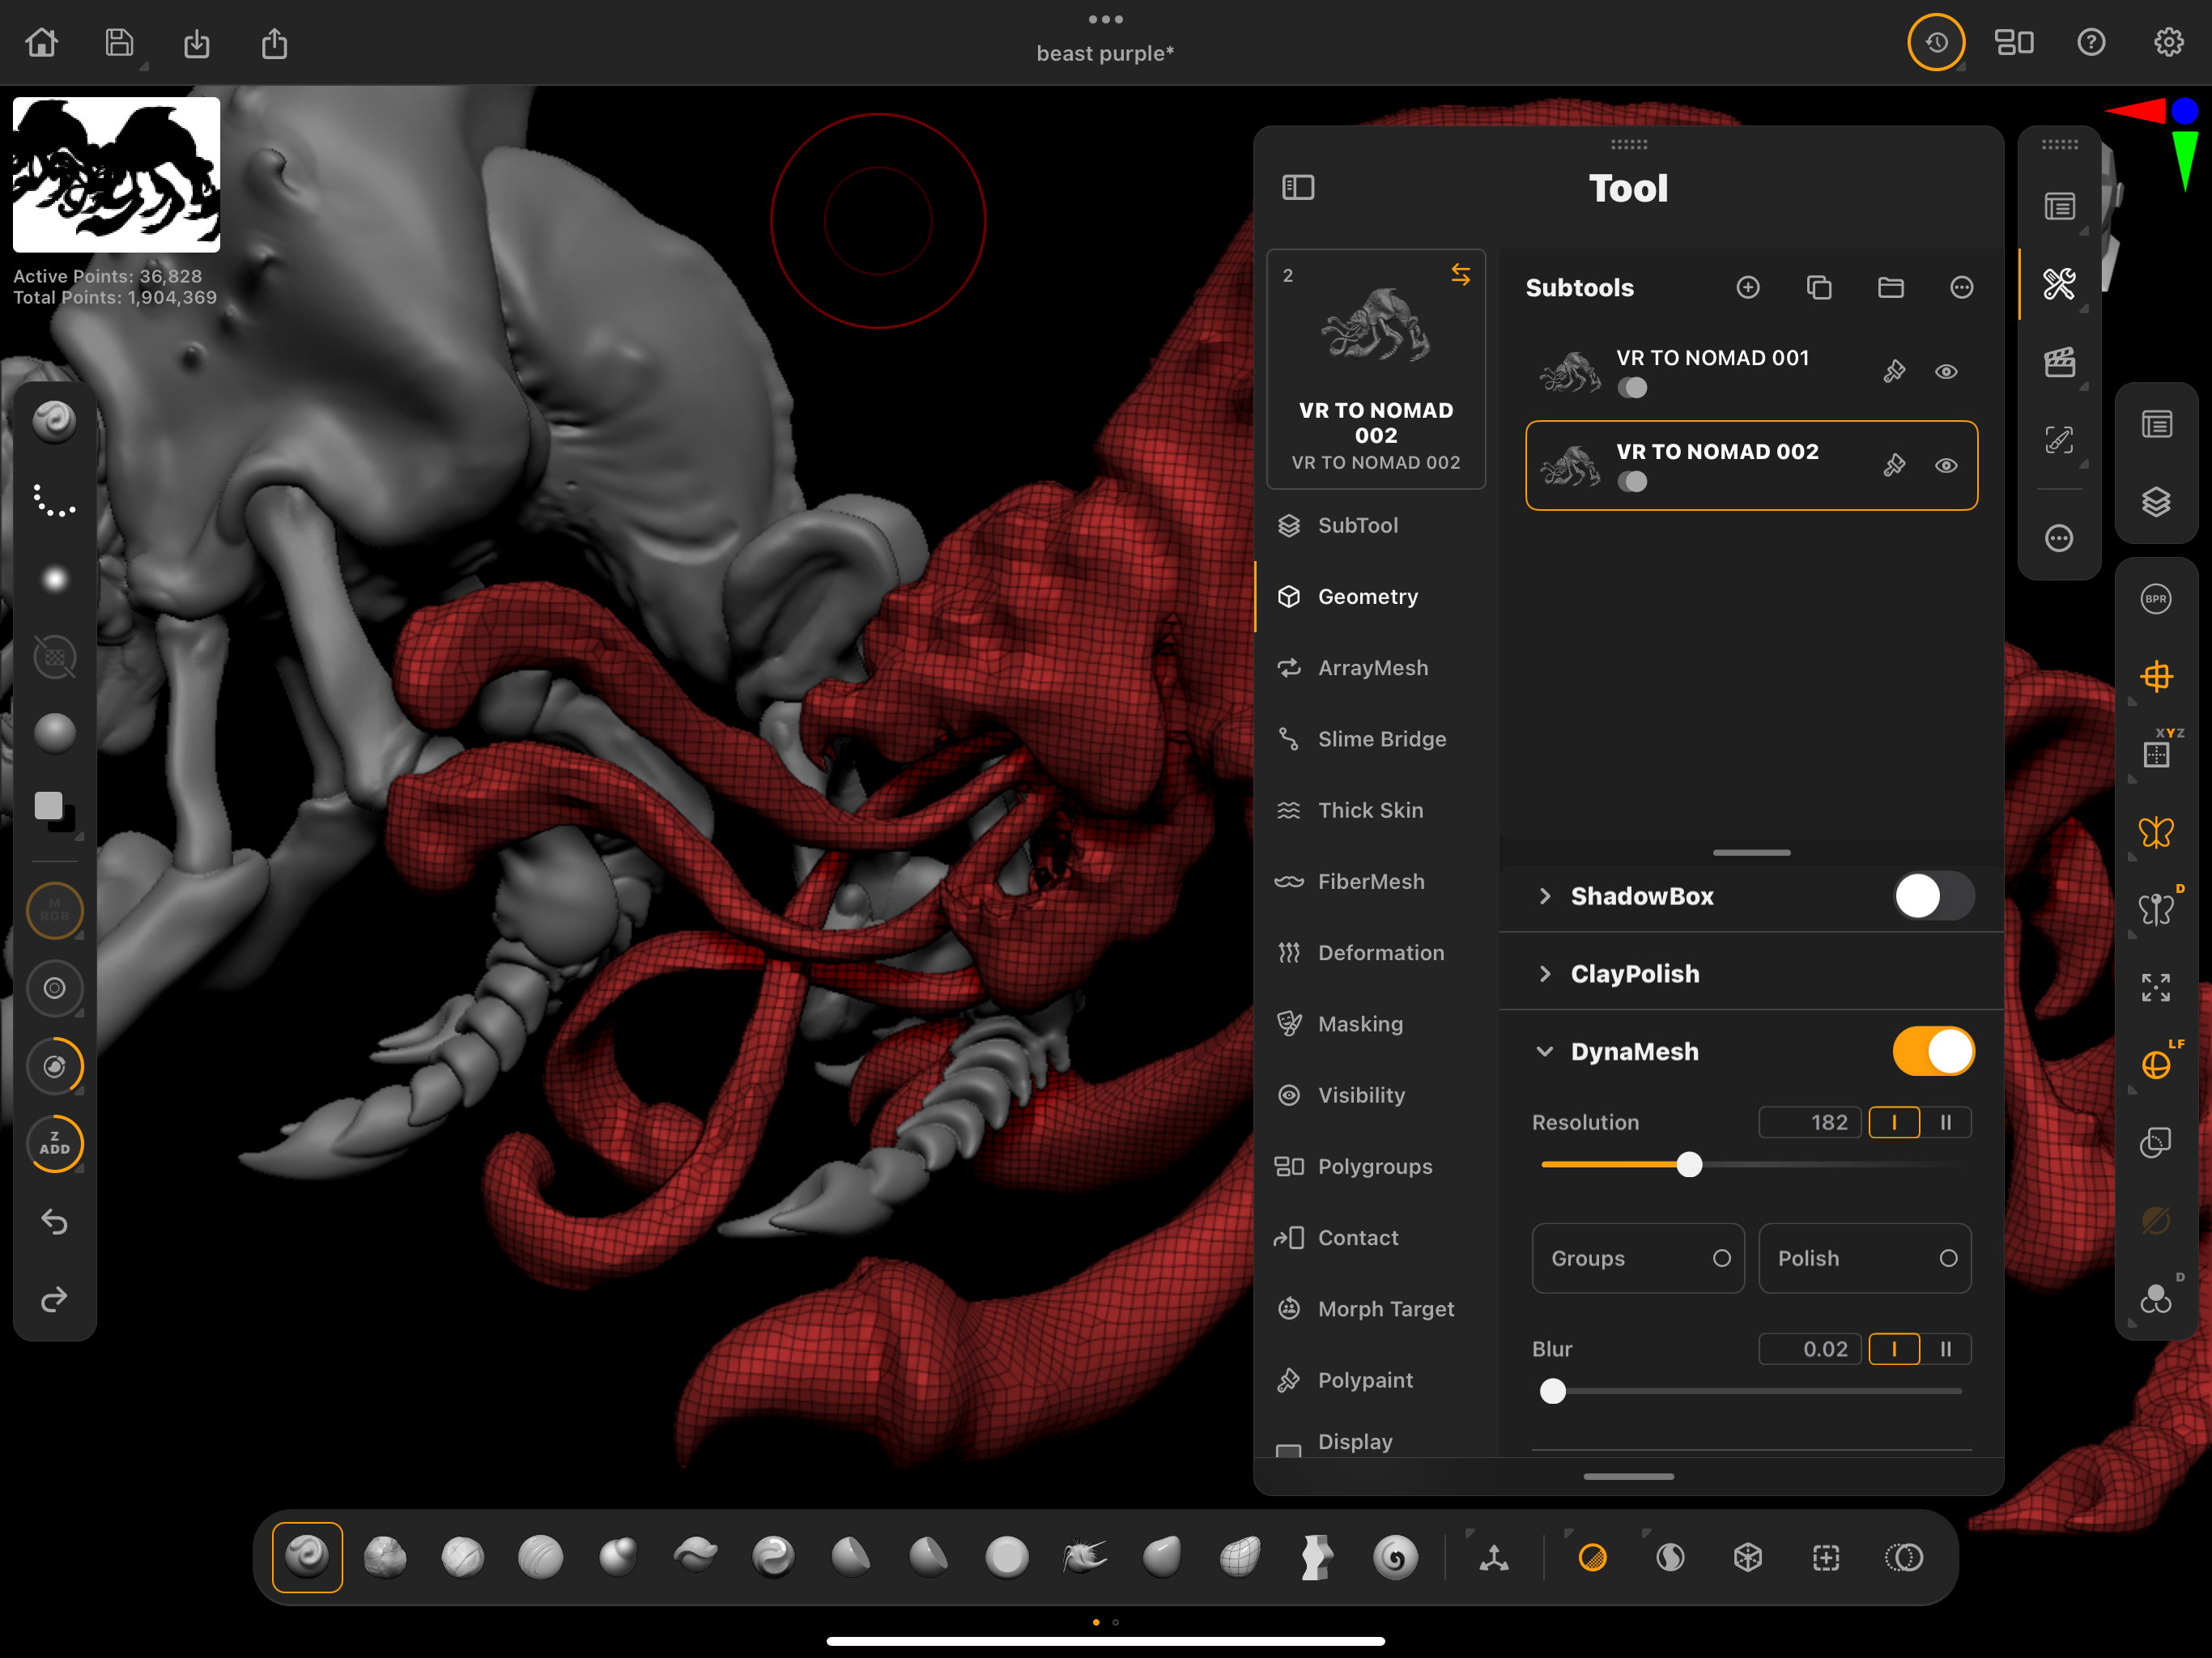
Dynamesh is one of the fundamental tools that digital sculptors need to work efficiently. It’s available in lots of other programs under lots of different names, including Dyntopo in Blender and Voxel Remesh in Nomad Sculpt. Dynamesh has been included in ZBrush for iPad and it works in exactly the same way.
The idea is that at any time during your sculpting session you can call the Dynamesh function and it will re-mesh your entire model with polygons that are distributed evenly across the whole model. If you have stretched out a part of the model and deformed the polygons, Dynamesh will sort that.
In ZBrush for iPad you can input a number to define how many polygons you need. It won’t give you as good topology as seen with tools like ZRemesher on desktop ZBrush, but it is a great tool to help you keep your model clean and even across the whole surface and even more helpful.
This process allows you to add in new models and effectively weld them together as you are sculpting. An example might be an ear being added to a head. (Read my guide, '3 essential ZBrush retopology techniques' for a more.)
ZBrush for iPad explainer: technical tools
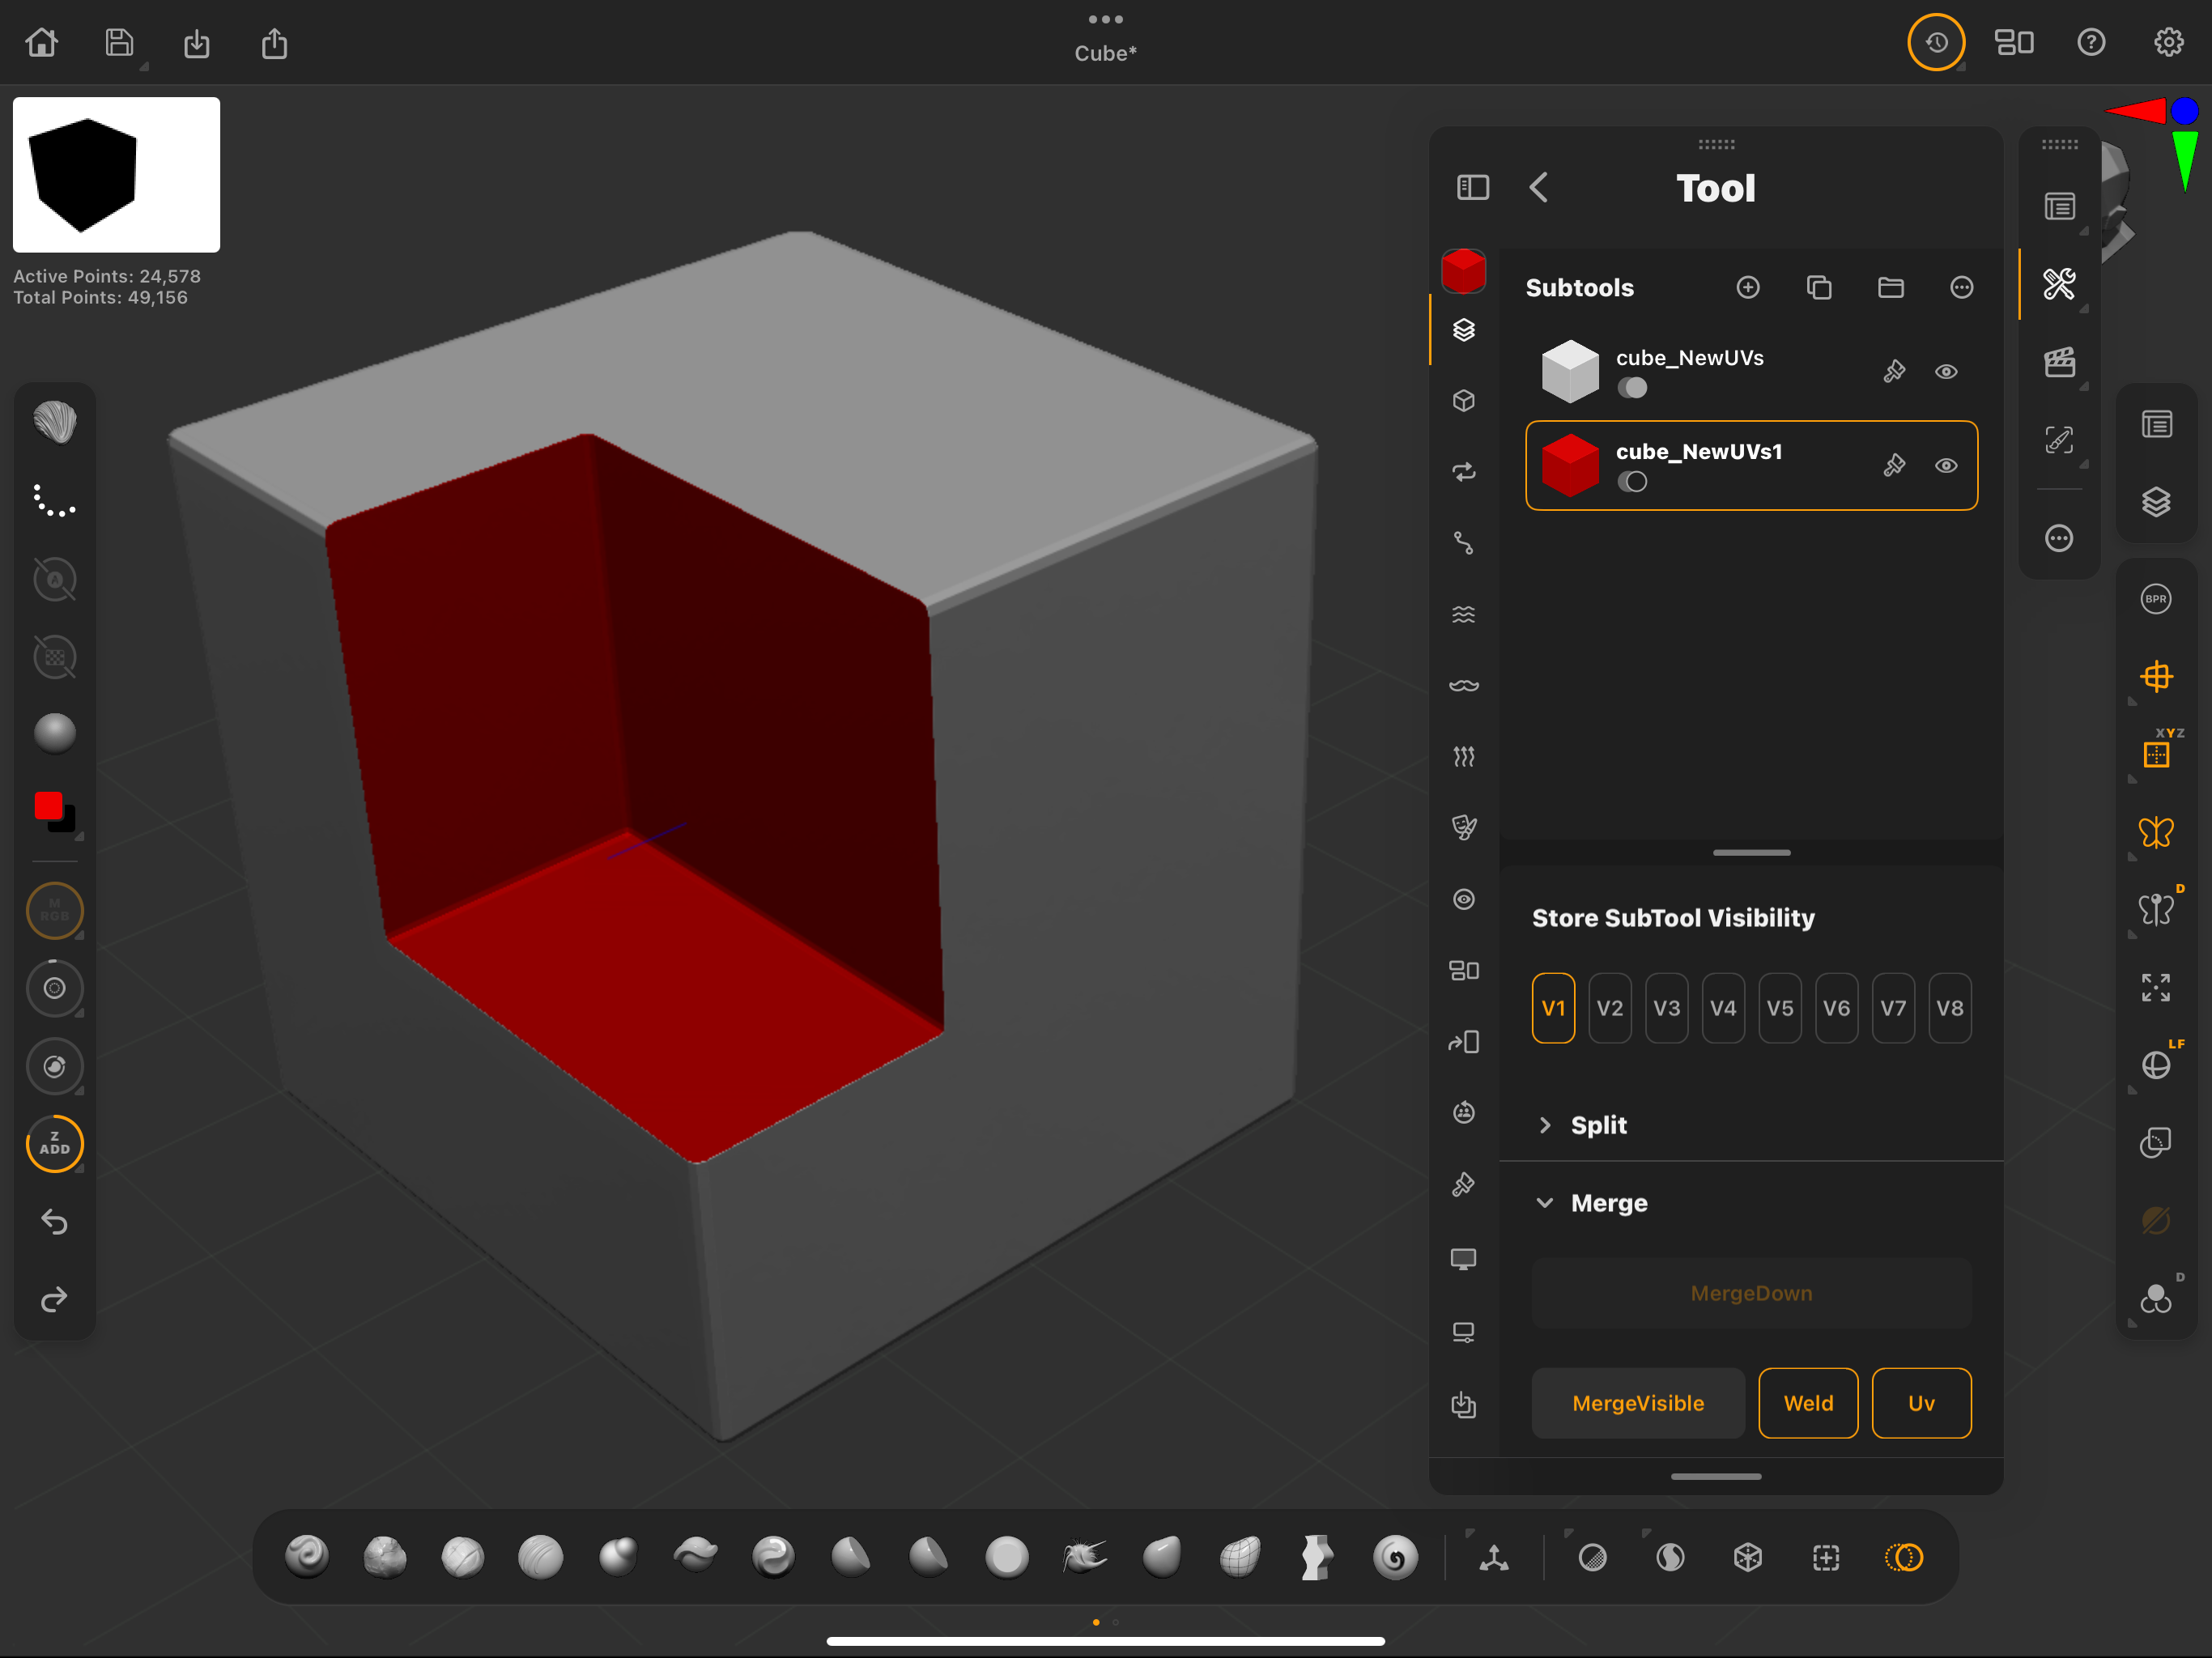
A great example of the technical tools that have made it across from ZBrush on the desktop to ZBrush for iPad is Live Booleans. Booleans give you the ability to extract one model from another, join two models with a union or just leave the intersection between the two.
Most 3D software have some form of Boolean operation and the special thing with the ZBrush implementation is the fact that it remains live. That is, it is non destructive and you can edit it later until you commit it to permanent geometry.
Live Booleans is an essential feature for technical modellers, or anyone who wants to create complex shapes for 3D printing, and it works perfectly on Apple's tablet in ZBrush for iPad.
ZBrush for iPad explainer: using SubTools
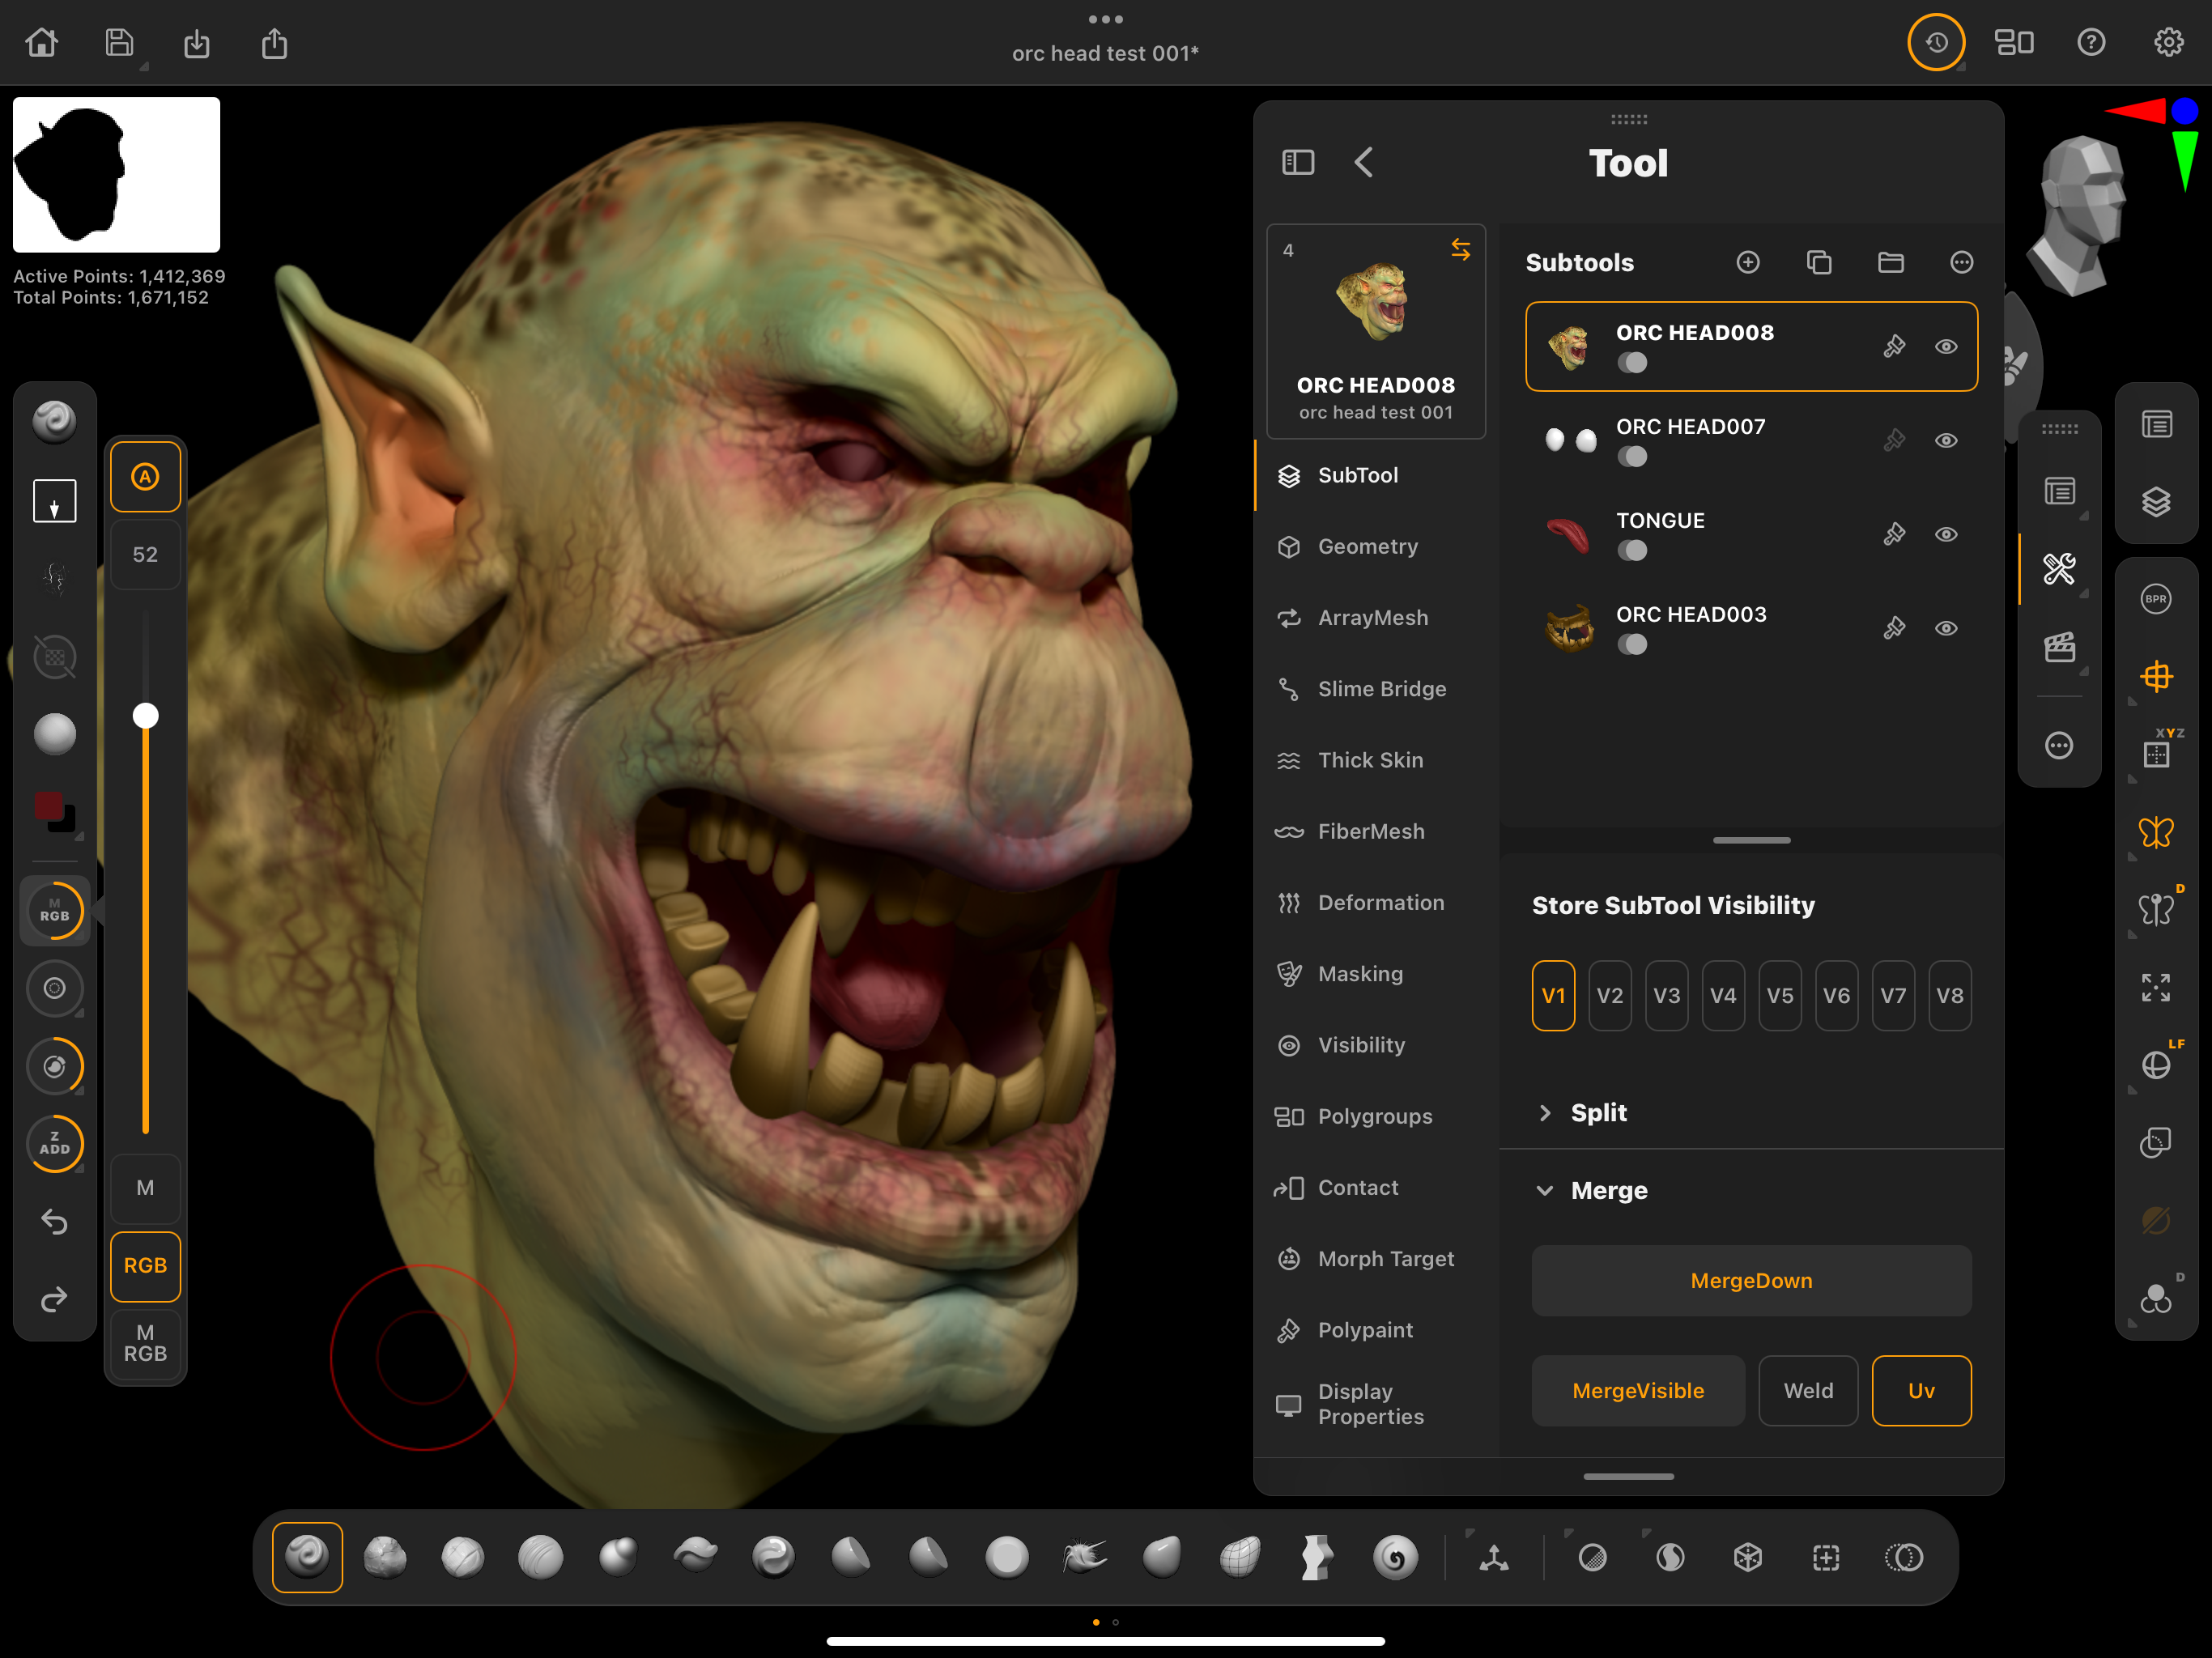
SubTools are basically the scene hierarchy for ZBrush. Each model or SubTools that you create can effectively be on its own ‘layer’, but these are called SubTools. These SubTools can be grouped into folders making them a group and helping you keep the model (or ZTool) organised and easy to understand.
This really matters when you are building a character that has layers of detailed elements, such as armour, weapons, hair, eyes, teeth or jewellery. You can use other grouping methods, such as Poly Groups, which keep the model separate using different colours for different sets of vertices, but learning SubTools and handling the SubTool stack is crucial to learning ZBrush.
As with Photoshop you can do certain things to a SubTool in the stack. You can hide or show it or make it a cutting tool using Live Booleans. Funnily enough, the original ZBrush does have a ‘layer’ feature as well, which is how you create pose morphs or blend shapes that are used in animation packages like Maya or Cinema4D. However, Maxon decided not to include that in ZBrush for iPad.
ZBrush for iPad explainer: the magic of ZSpheres
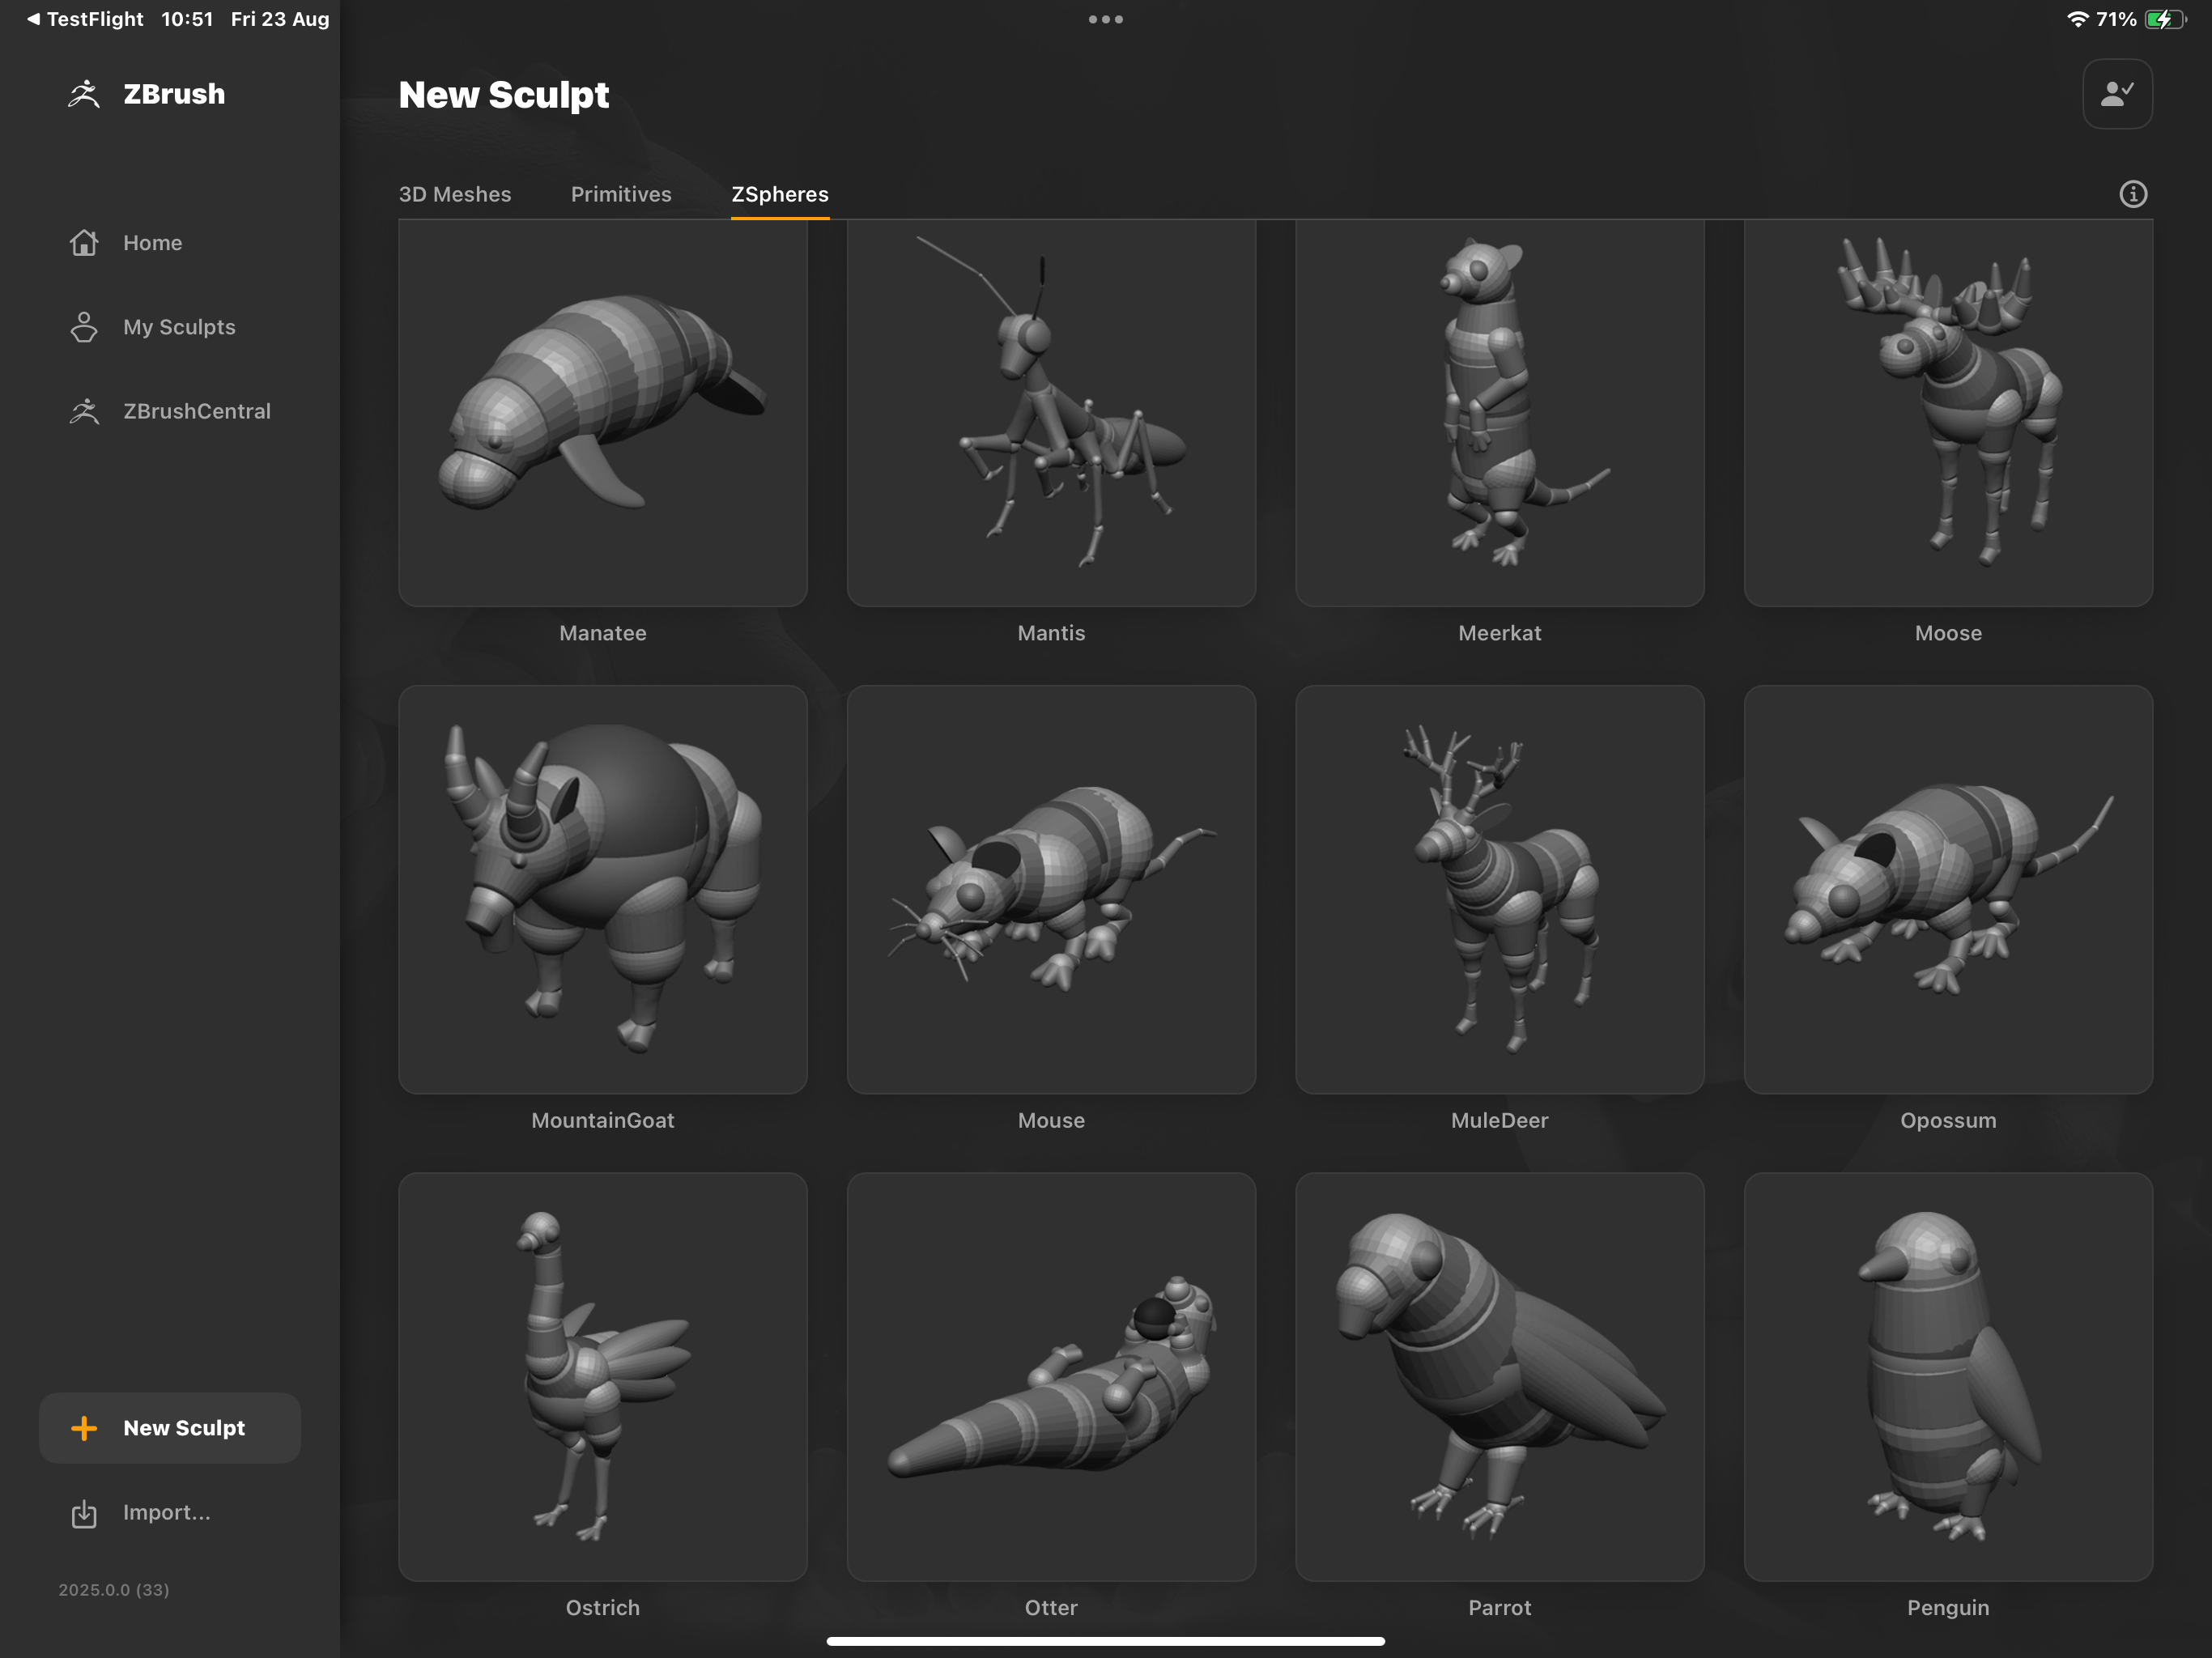
ZSpheres are easy to use but harder to explain. Put simply they are a way to make posable armature that you can then sculpt onto. Think of them as the wire frame you might make to then add clay to in the real world. ZSpheres have been around for over 15 years but only ZBrush has them and artists generally love to use them; and now ZBrush for iPad has them too.
You start with a single sphere and then add more spheres joined together by more spheres. Each sphere can be scaled, rotated and moved and once you have enough together you have a shape that you can manipulate into the required pose.
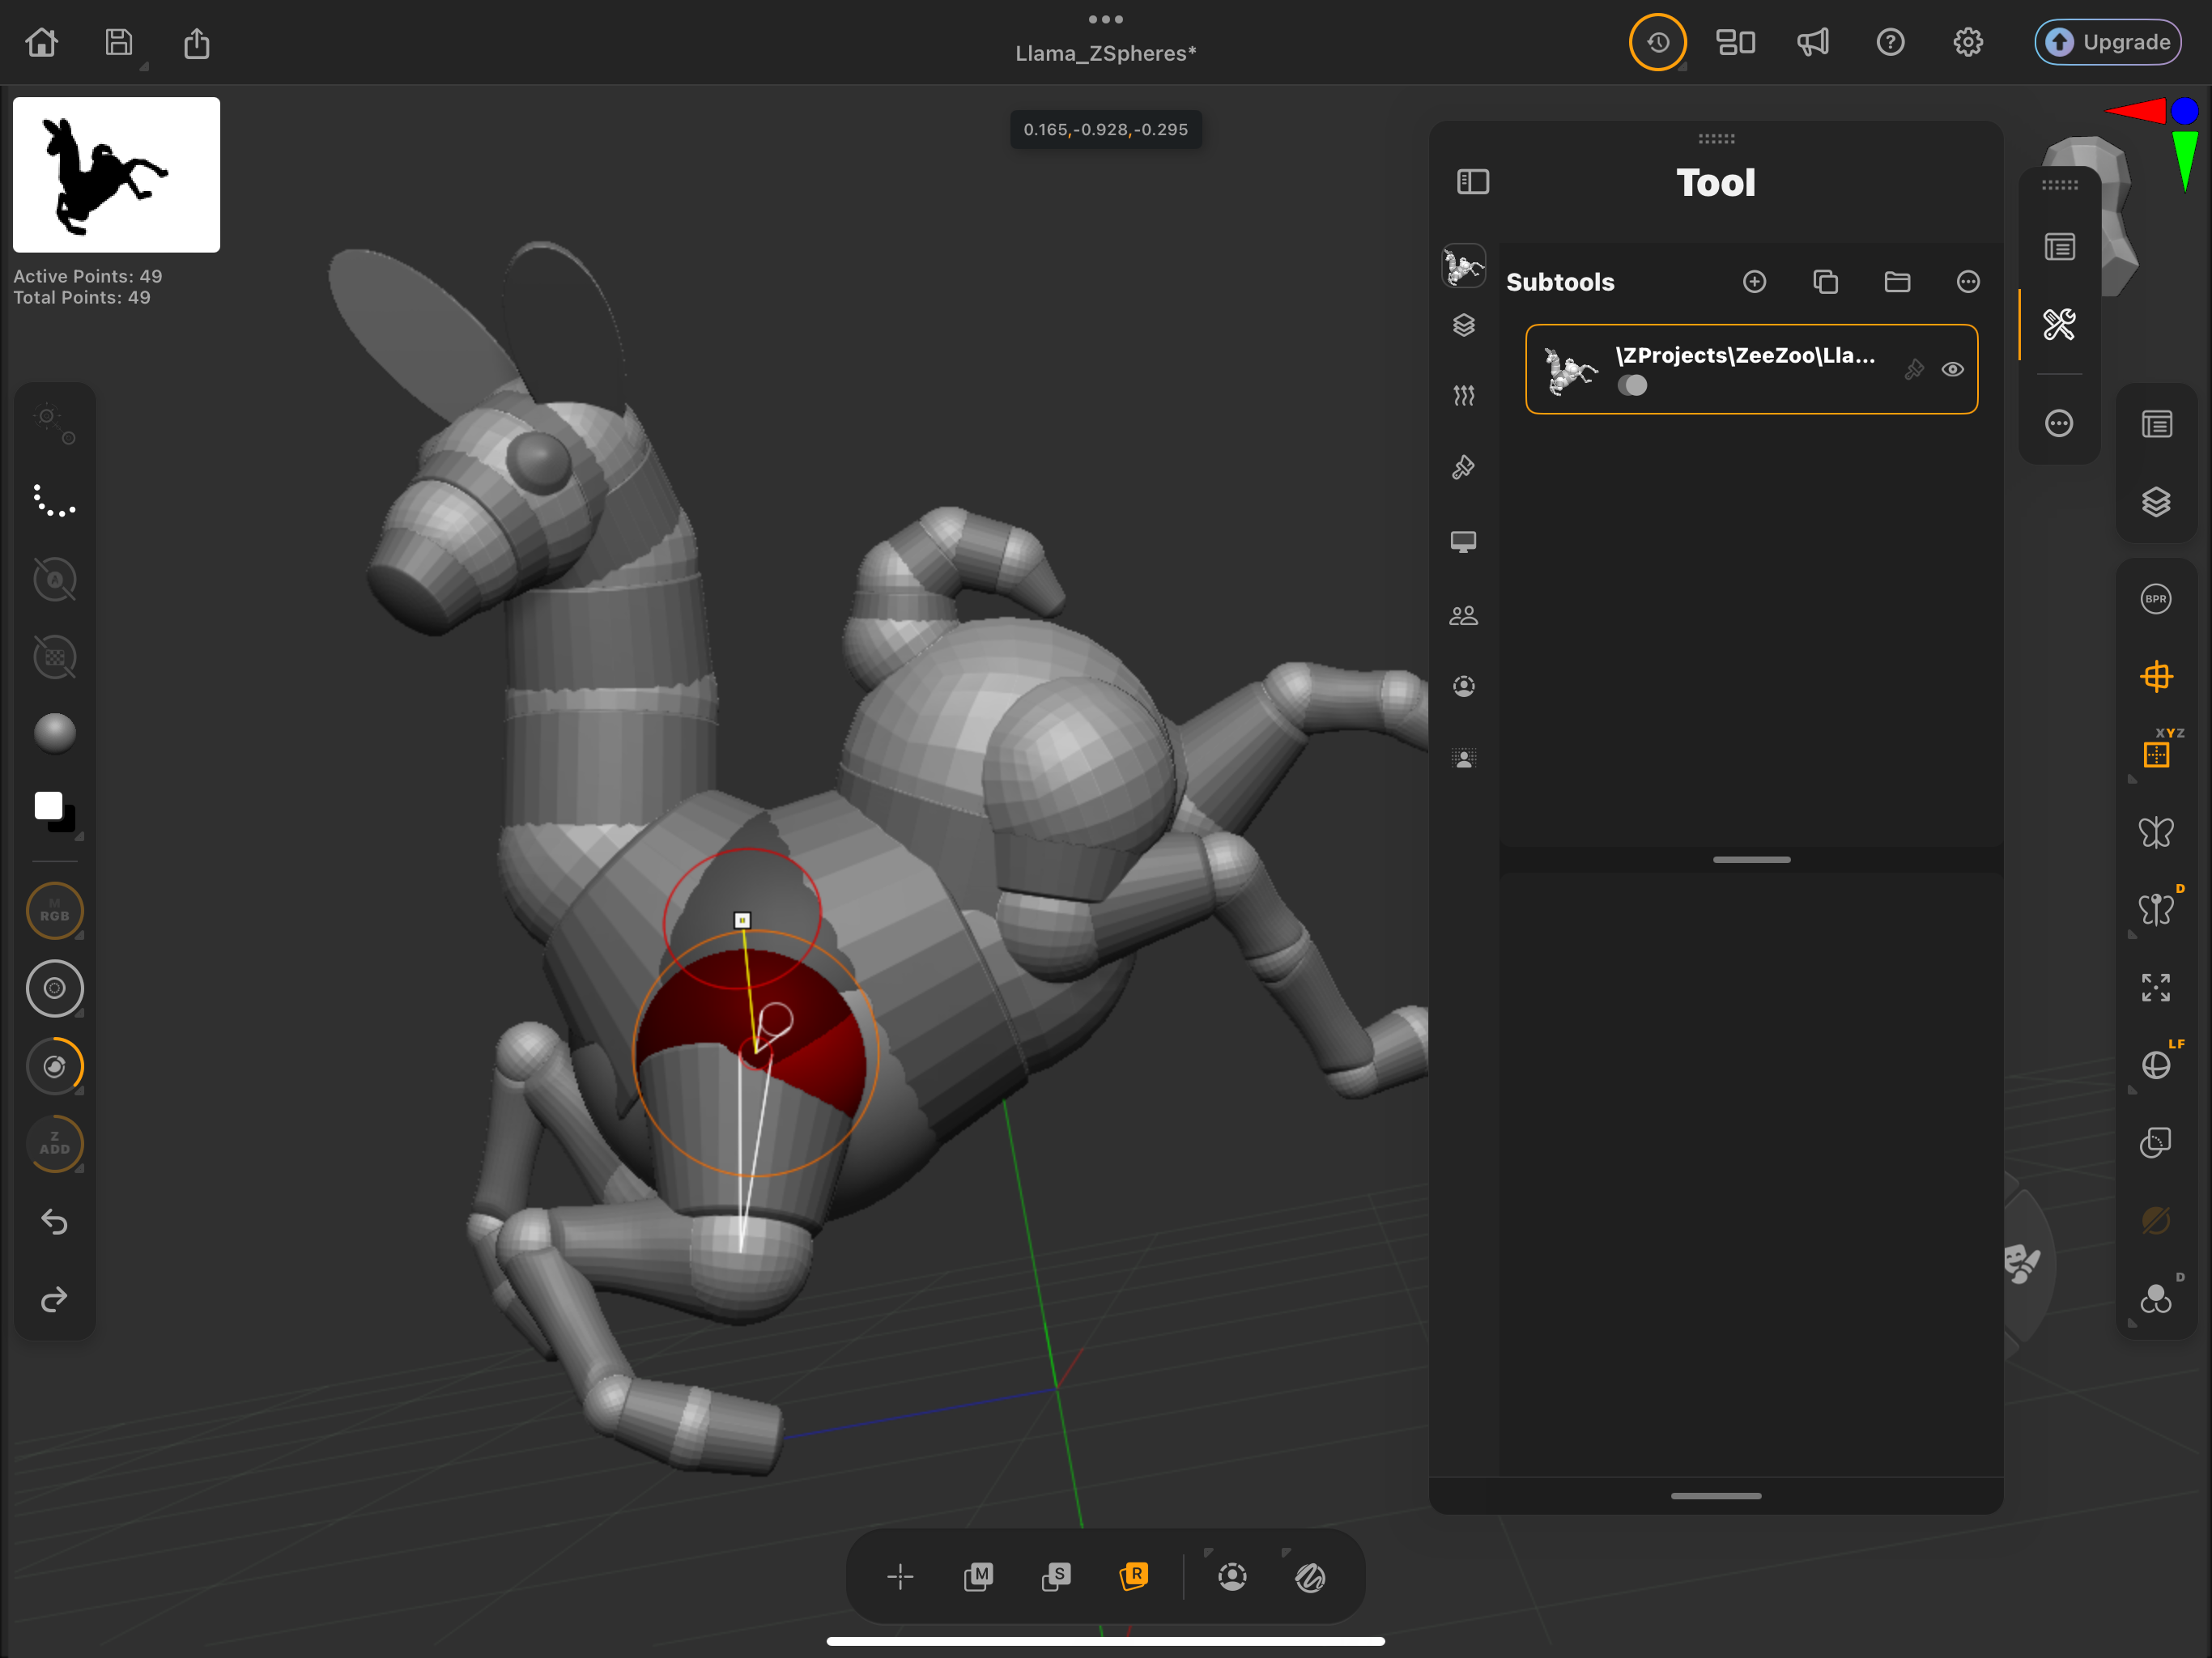
The great thing is that ZSpheres are dynamic and respond in a chain. The technical term is 'forward kinematics' and is best described by saying, if you build an arm and move the bicep the whole arm moves. If you move the forearm, the forearm and the hand move but the bicep doesn’t. It's perfect for posing a character.
Once you are happy with the shape you freeze the ZSphere and then sculpt all your details onto it. It works just the same in all versions and it's a great tool for getting your fist shapes made.
With ZBrush for iPad Maxon has given artists a huge library of ZSphere models to start off with, so you can experiment before making your own. These include male and female heads and bodies as well as animal ZSpheres, making this iPad version a really easy way to get used to 3D modelling.
For more on ZSpheres read my tutorial article, 'Why I'm still using ZBrush ZSpheres in 2023 - these are my tips'.
Zbrush for iPad explainer: using materials
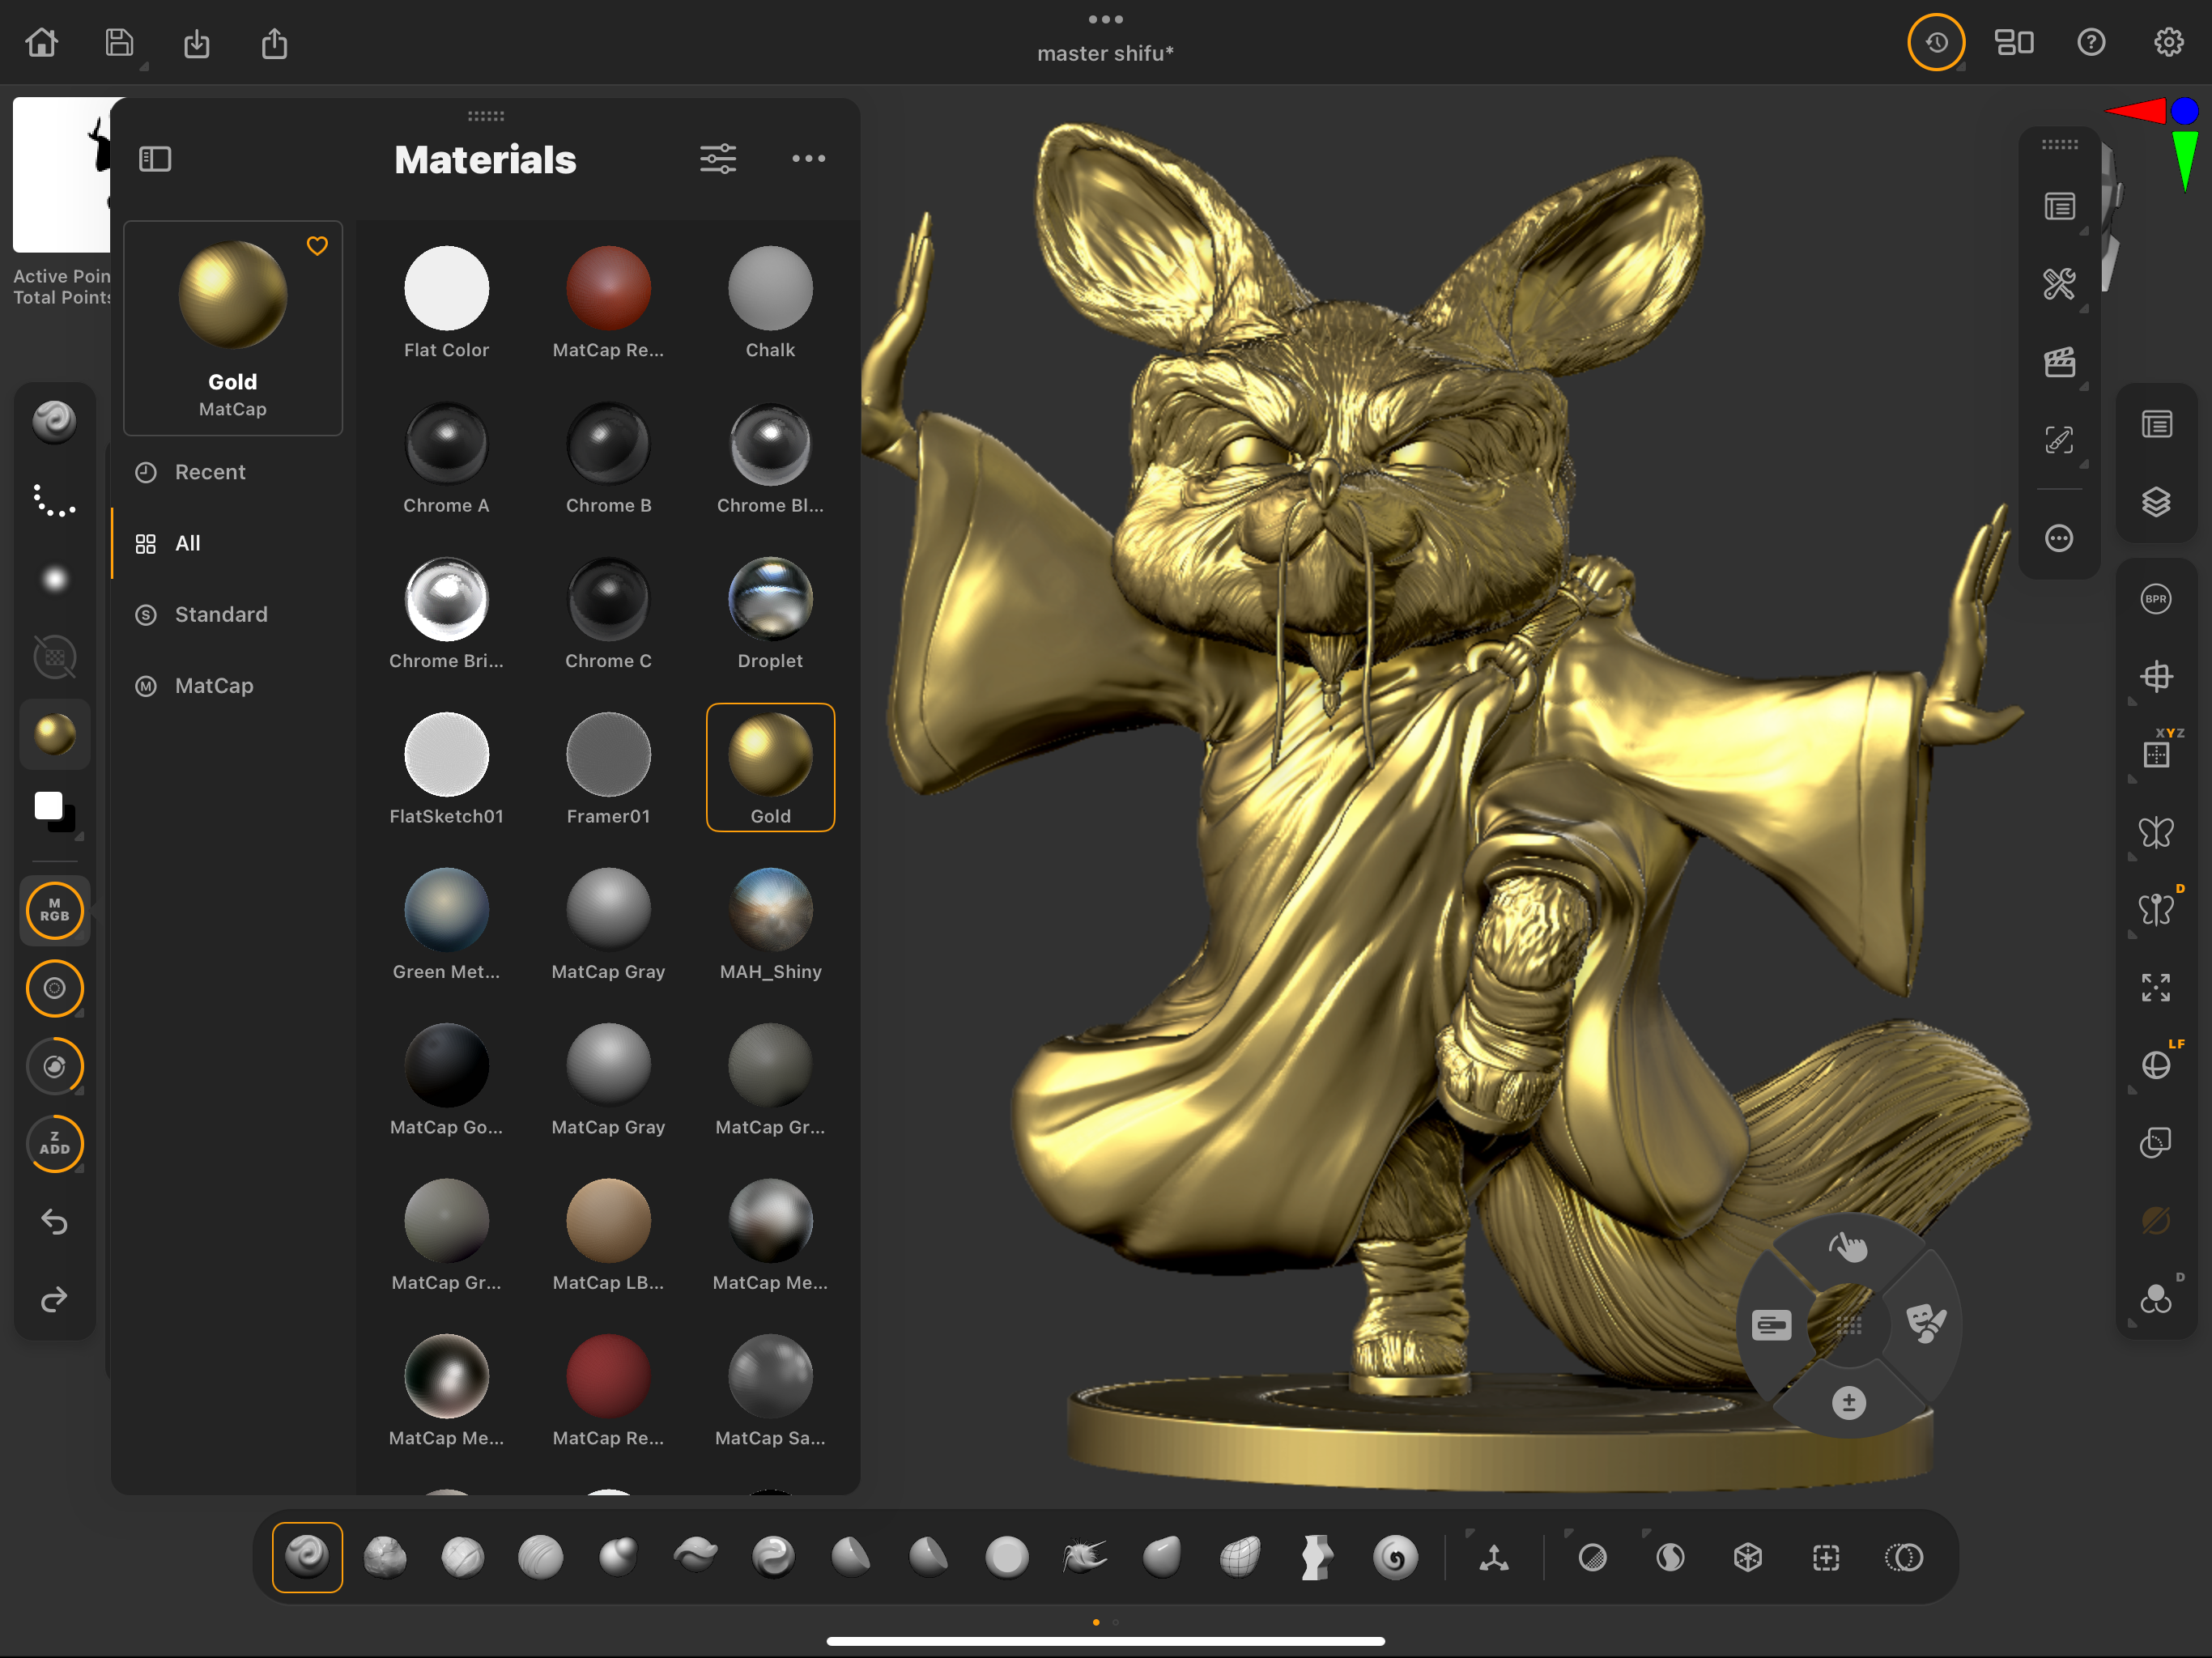
ZBrush really has two types of materials. Those that respond to lights, Standard Materials, and those that don’t, called MatCaps.
Matcaps are a way to show a model using a set type of lighting that is taken from an image. The lighting can’t be moved and it's very limited when you want to refine a render. Matcaps are, however, great when you are just sculpting. A good example is the Red Wax material that you see in most 3D sculpting programs.
The other type of material or ‘Standard’ is better if you want to play around with lights and render settings. There are plenty of modifiers for you to mess around with giving you great flexibility to get the look that you are after. These materials respond to changes in lighting and using the Standard materials allows you to reach a much higher level of detail and accuracy in your work.
Zbrush for iPad explainer: exploring brushes
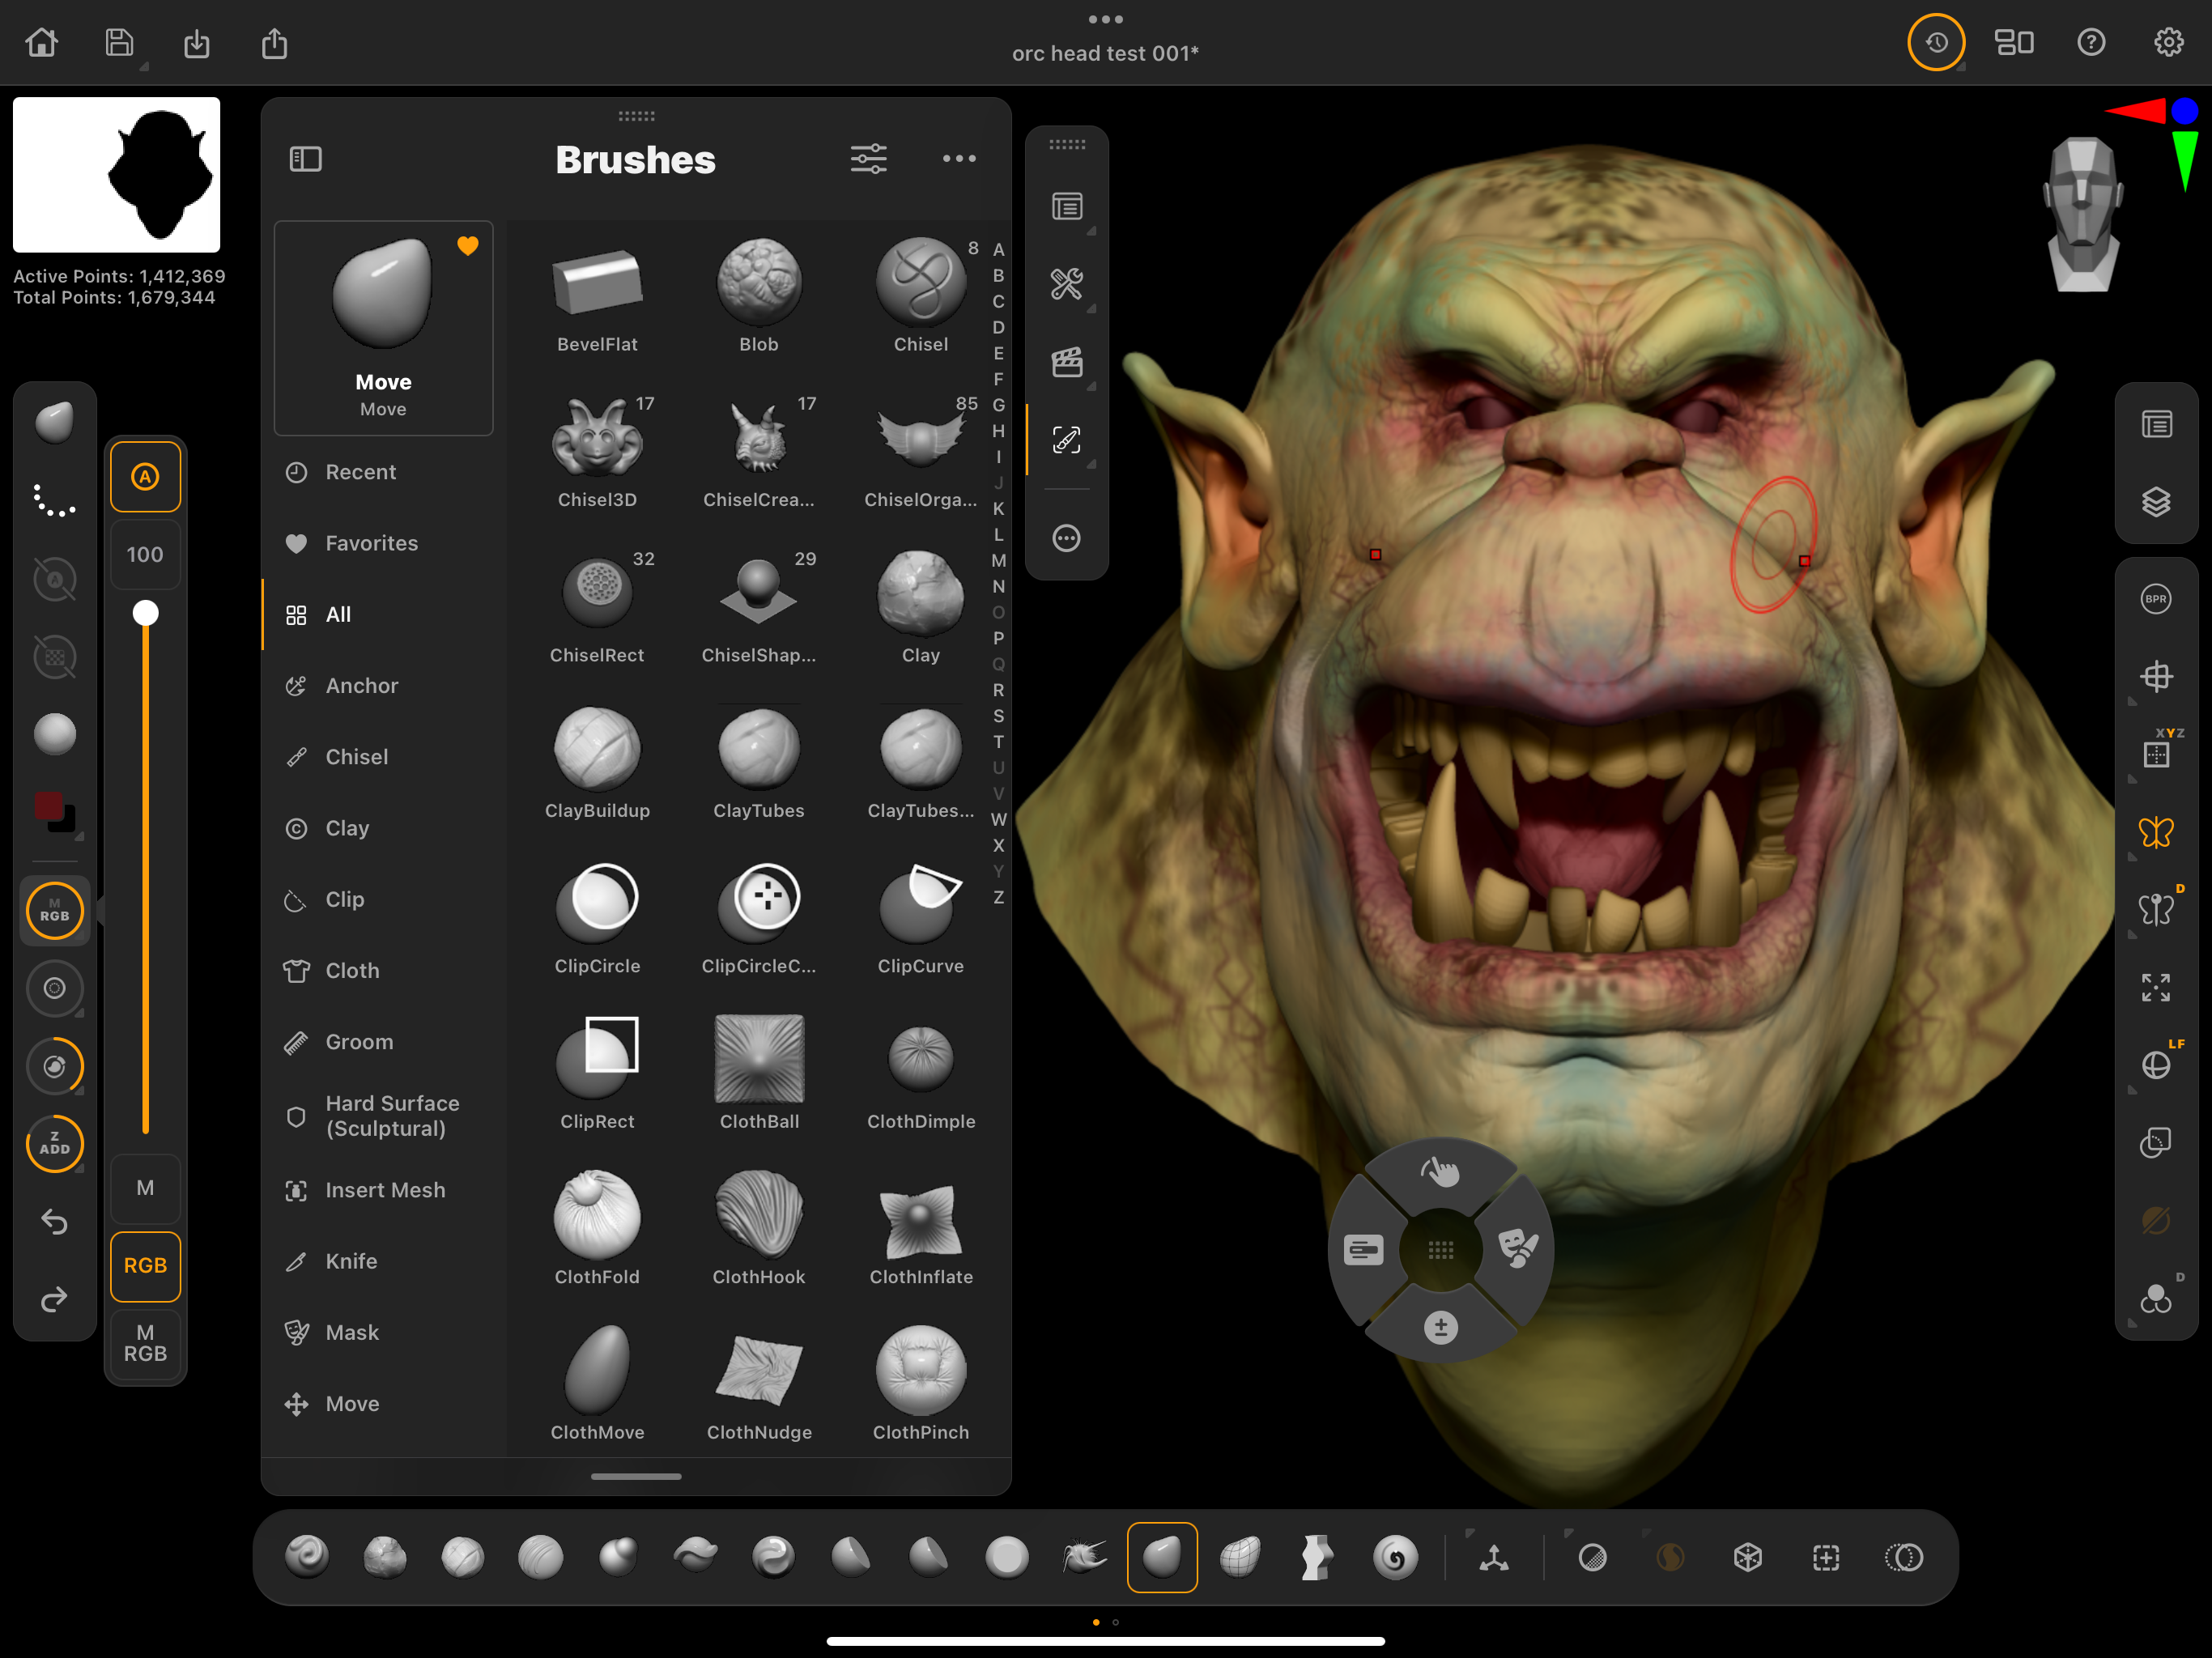
When I first started with ZBrush in the 1990’s the initial release had a couple of Brushes to enable moving geometry around, basic sculpting and adding paint. That has grown to hundreds of Brushes given away with every version of ZBrush and thousands available online from artists making their own collections for very specific uses.
In recent years we’ve gained brushes for manipulating cloth, adding inserted models, different knife tools and so many more. The free version of ZBrush for iPad just gives you a basic set that is good enough to get you up and running. The full version gives you almost everything you could want. Apart from real time rendering.
What's new to ZBrush for iPad over its desktop edition is how Brushes are set in the streamlined UI; Brushes are shown under categories making it very easy for beginners to understand their uses as well as opening up thousdands of Brushes to seasoned ZBrush users who may have become set on their favourites. One good tip for anyone new to ZBrush is to try one new Brush a day and explore what can be done in ZBrush for iPad.
If you're not using ZBrush for iPad then consider the desktop version, and perhaps upgrading to one of the best laptops for 3D modelling.

Glen runs SouthernGFX, a small Cheshire-based studio specialising in character and creature design, which creates assets for TV and film. Clients include SKY, Wacom and Oculus Medium and the studio has an impressive project list that features 3D models for Game of Thrones' house sigils. He's been using and training ZBrush for over 15 years and is a Wacom Ambassador for the UK and Ireland.
