Video tutorial: Bring fluid motion and depth to stills
Using camera mapping, Christopher Kenworthy shows you how to convert a still image into a convincing 3D motion movie
Still images are often the only source material you have to work with, but you can bring them to life by adding a 3D look. By flying your camera past your newly crafted 3D image, you create the illusion of movement, as though you’re looking at a camera tracking and panning around a scene rather than just a visual effect.
This kind of effect is created by splitting your image into foreground and background layers. Foreground content is angled towards the camera, so that motion is exaggerated. The background bit is pushed away from the camera, to minimise motion. When you move your virtual camera, it looks as though your camera is exploring a real location.
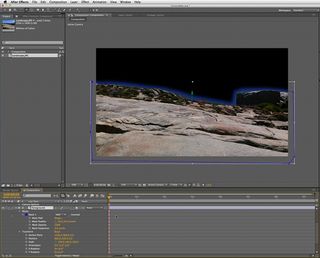
01 Place the image Landscape.jpg in the timeline of a new project. You need to use an image that is larger than the frame, so you can manoeuvre your camera around it. Name this first layer ‘Background’, then duplicate it and name this second one ‘Foreground’. Check the 3D boxes for both layers, and create a new camera.
02 Make the Background layer invisible for now by clicking on the eye icon. Use the Pen tool to click a mask around the foreground objects. This doesn’t need to be extremely exact. So long as you mark out the foreground with reasonable accuracy, you can use the Feather and Expansion tools to fine-tune the mask until it’s right.
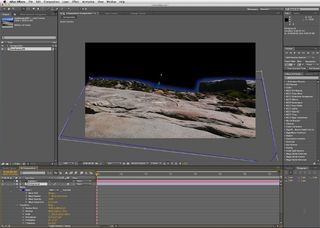
03 Using the Transform settings of the Foreground layer, change the Z Position to -80. This moves the layer closer to the camera, which simulates the foreground being closer to the camera, just as it would be in the real world if you were advancing through a location. Change the X rotation to -30 to tilt the layer towards the camera.

04 Make the Background layer visible, and change its Z position to 380. This pushes it away from the camera so that the camera moves will hardly affect it. To make it appear the same size as it was before, drag the scale up to 130, and adjust the Position settings until it matches up with the foreground.
05 Drag the Unified Camera tool on the image to move around the scene and see how the foreground moves in relation to the background. When you are satisfied with the camera’s starting point, keyframe the camera’s position and point of interest. Go to the end of the composition and use the Unified Camera tool to swing around the image. A keyframe will appear, and you can now render the movie to finish.
Get the Creative Bloq Newsletter
Daily design news, reviews, how-tos and more, as picked by the editors.

Thank you for reading 5 articles this month* Join now for unlimited access
Enjoy your first month for just £1 / $1 / €1
*Read 5 free articles per month without a subscription

Join now for unlimited access
Try first month for just £1 / $1 / €1
The Creative Bloq team is made up of a group of design fans, and has changed and evolved since Creative Bloq began back in 2012. The current website team consists of eight full-time members of staff: Editor Georgia Coggan, Deputy Editor Rosie Hilder, Ecommerce Editor Beren Neale, Senior News Editor Daniel Piper, Editor, Digital Art and 3D Ian Dean, Tech Reviews Editor Erlingur Einarsson and Ecommerce Writer Beth Nicholls and Staff Writer Natalie Fear, as well as a roster of freelancers from around the world. The 3D World and ImagineFX magazine teams also pitch in, ensuring that content from 3D World and ImagineFX is represented on Creative Bloq.
