How to get started in procedural tree and foliage generation.
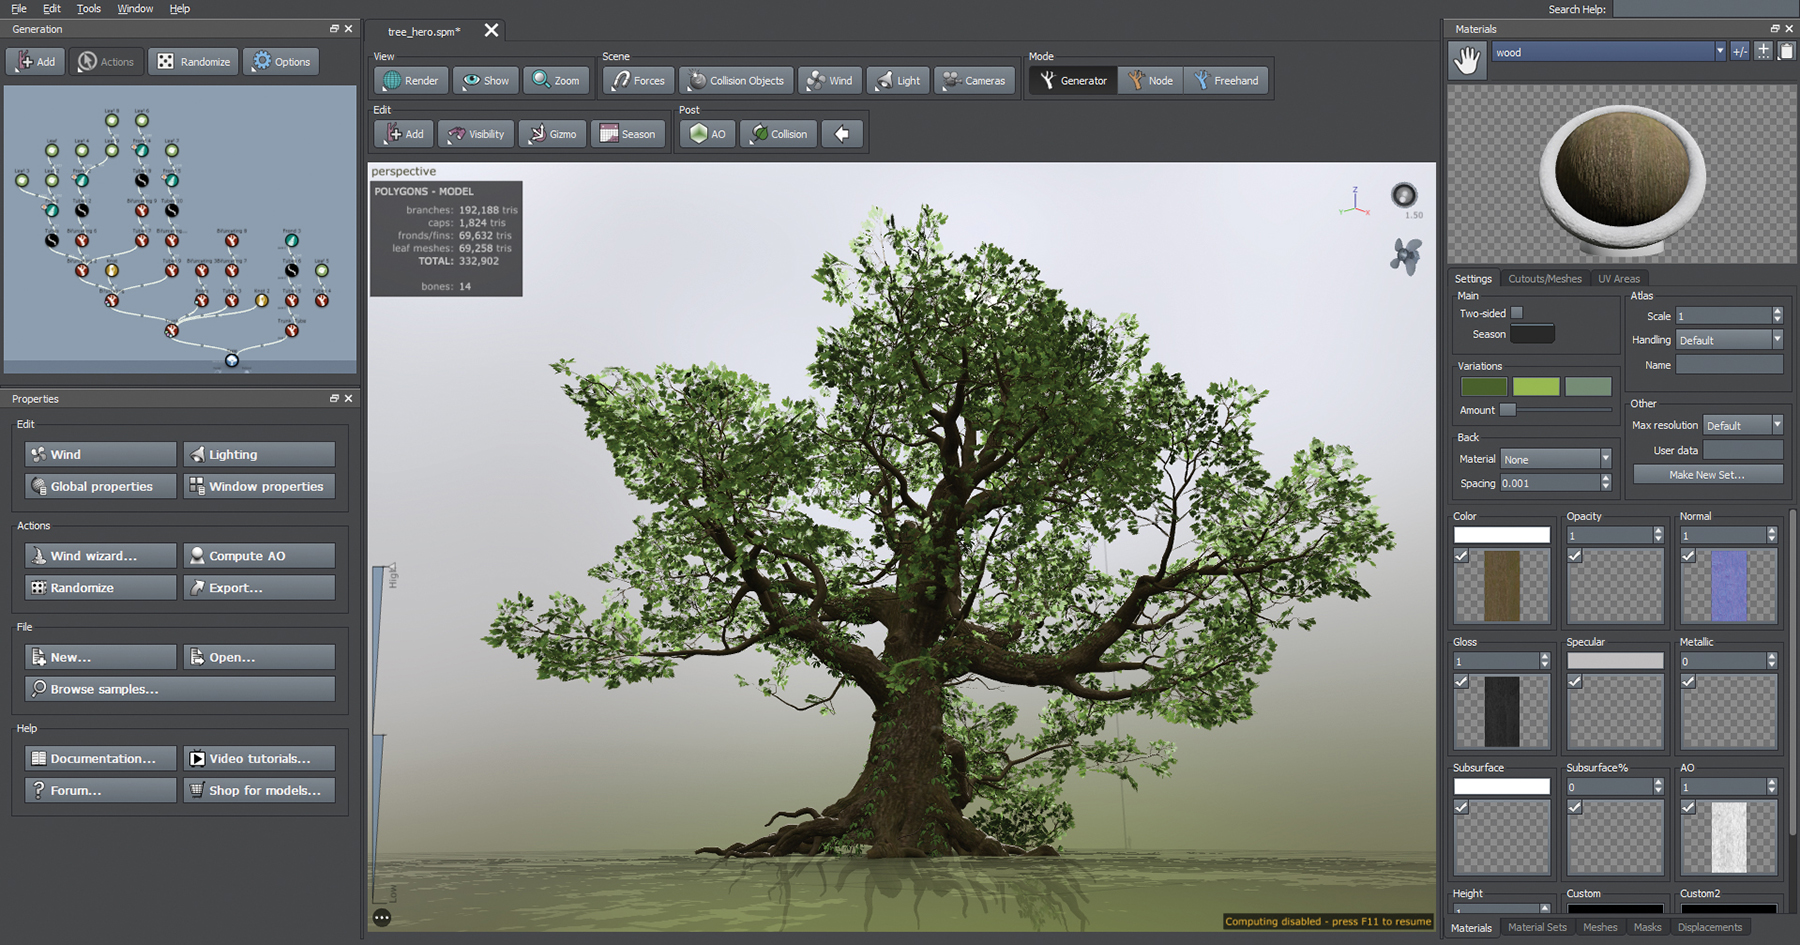
SpeedTree is used in almost every CG industry these days, from video game development to film VFX and Archviz. It's a powerful and flexible software that offers procedural modelling tech in an accessible way. You can read my step-by-step tutorial, 'How to make lifelike trees and vegetation with SpeedTree', for a deep guide, but here I'll explain my top tips to get started.
The procedural capabilities of SpeedTree mean I can focus on the artistic aspects of my work while the software handles much of the heavy lifting. If I don't like what I see, I can simply hit the Randomize button and get infinite variations of my tree that still respect the main parameters that I’ve defined.
This toolset enables me to quickly generate complex tree structures based on a set of parameters that can be tweaked to achieve the look that I’m after. Whether I’m working on a dense forest or a single, intricately detailed creation, SpeedTree’s procedural generation tools allow me to create diverse and natural-looking environments at an efficient rate.
Achieving realism in your 3D tree models requires attention to detail. Use high-quality textures and pay attention to the natural growth patterns of trees. It’s good to vary the size, shape and orientation of branches and leaves to avoid uniformity. Incorporate subtle imperfections such as knots and bends in the trunk to add authenticity too. Lighting also plays a crucial role in realism, so ensure your model reacts accurately to light sources in your scene. Regularly reference real-world trees and study their structure and details to enhance your models.
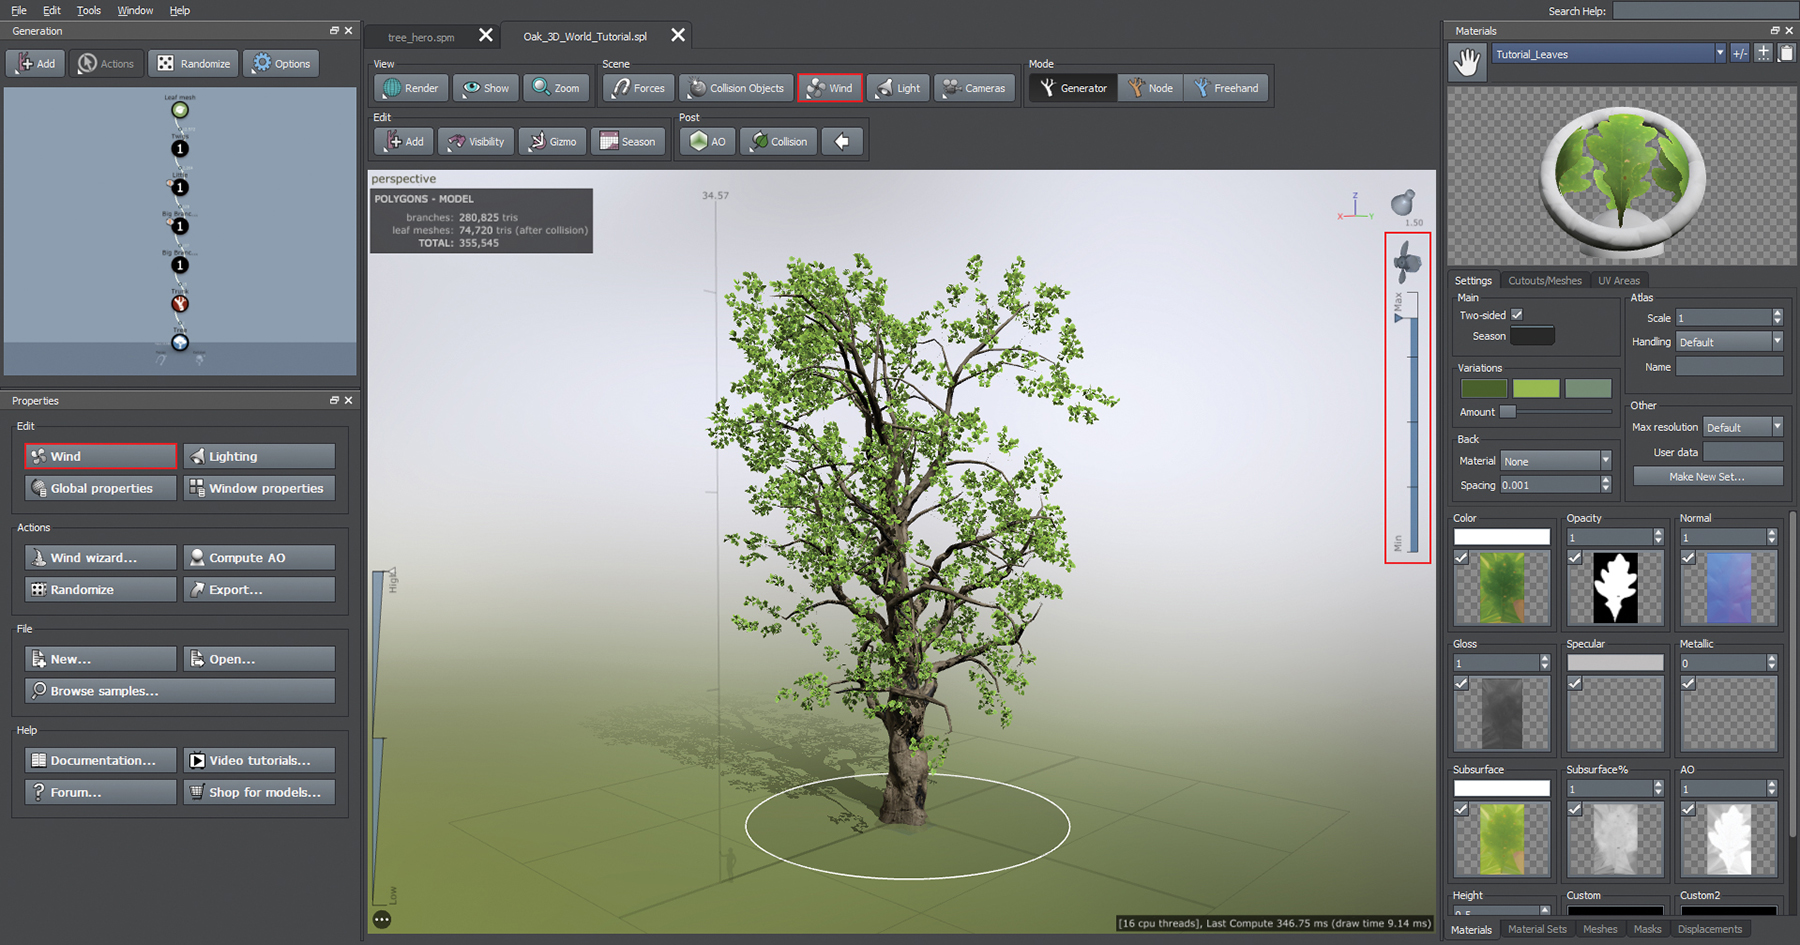
Activate SpeedTree’s Wind tools by pressing ‘8’ while in the viewport. Adjust the strength and direction using the properties to create dynamic, lifelike animations with realistic wind effects.
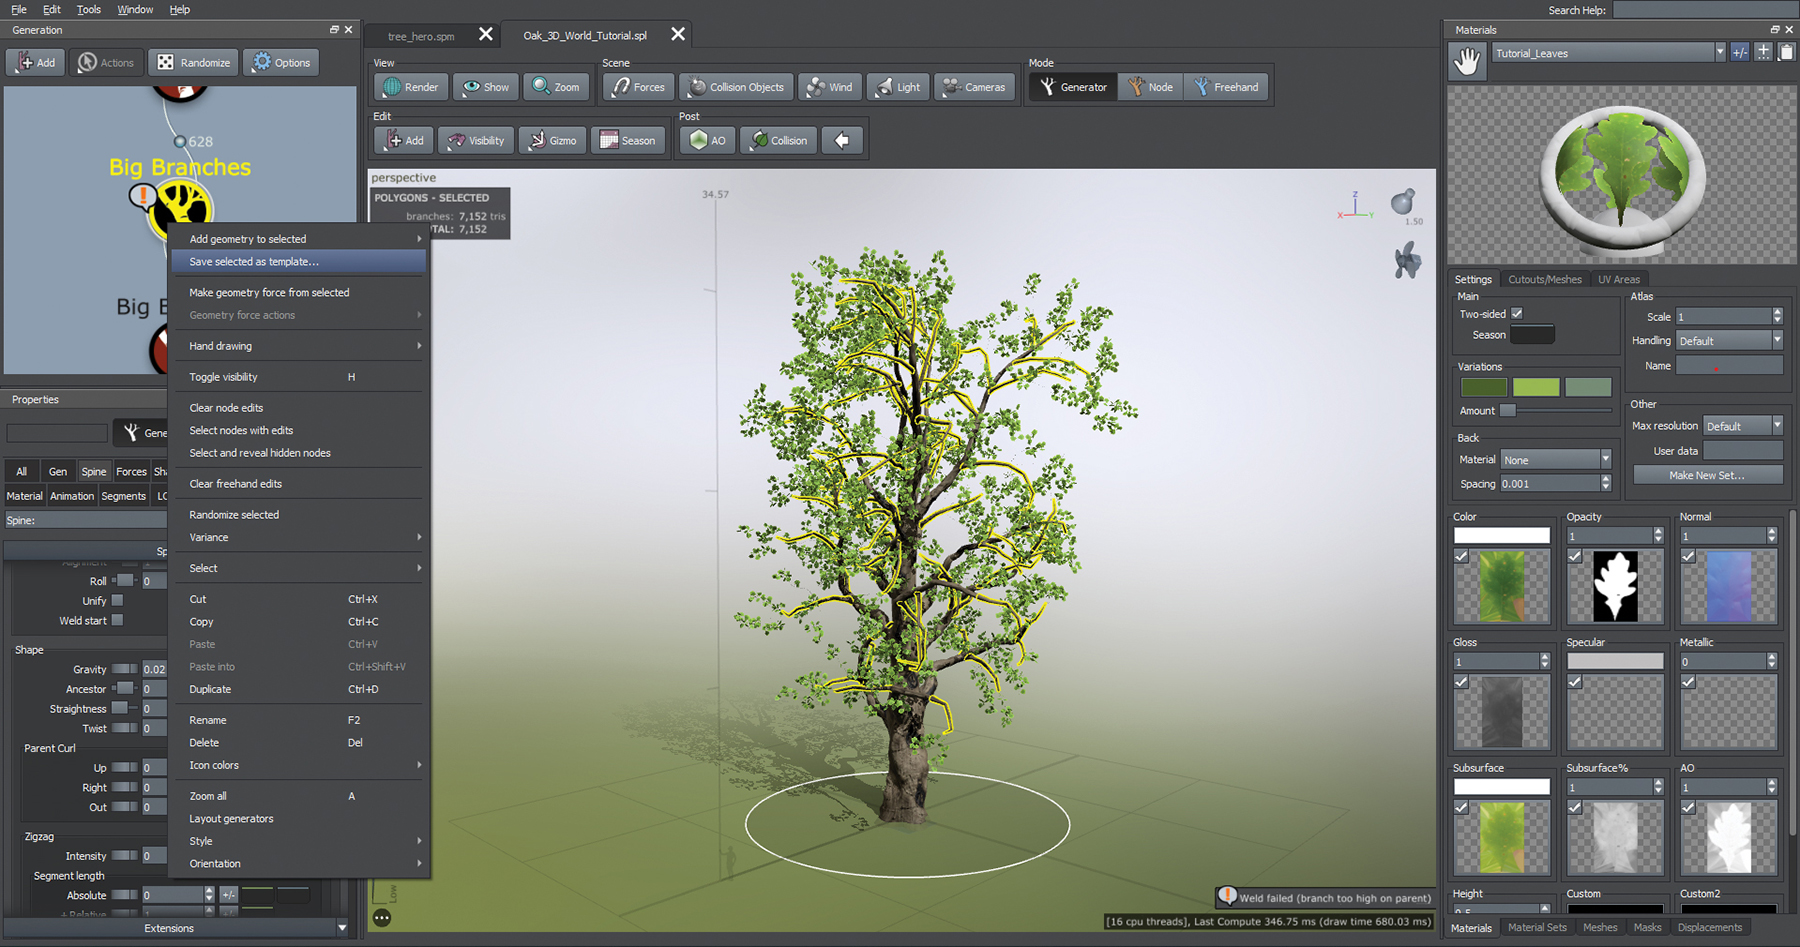
You can save your favourite settings for a specific node as a template for future use by right-clicking on it and choosing Save Template. This feature enables you to quickly apply your preferred node configurations to any new projects, improving efficiency and consistency across your work.
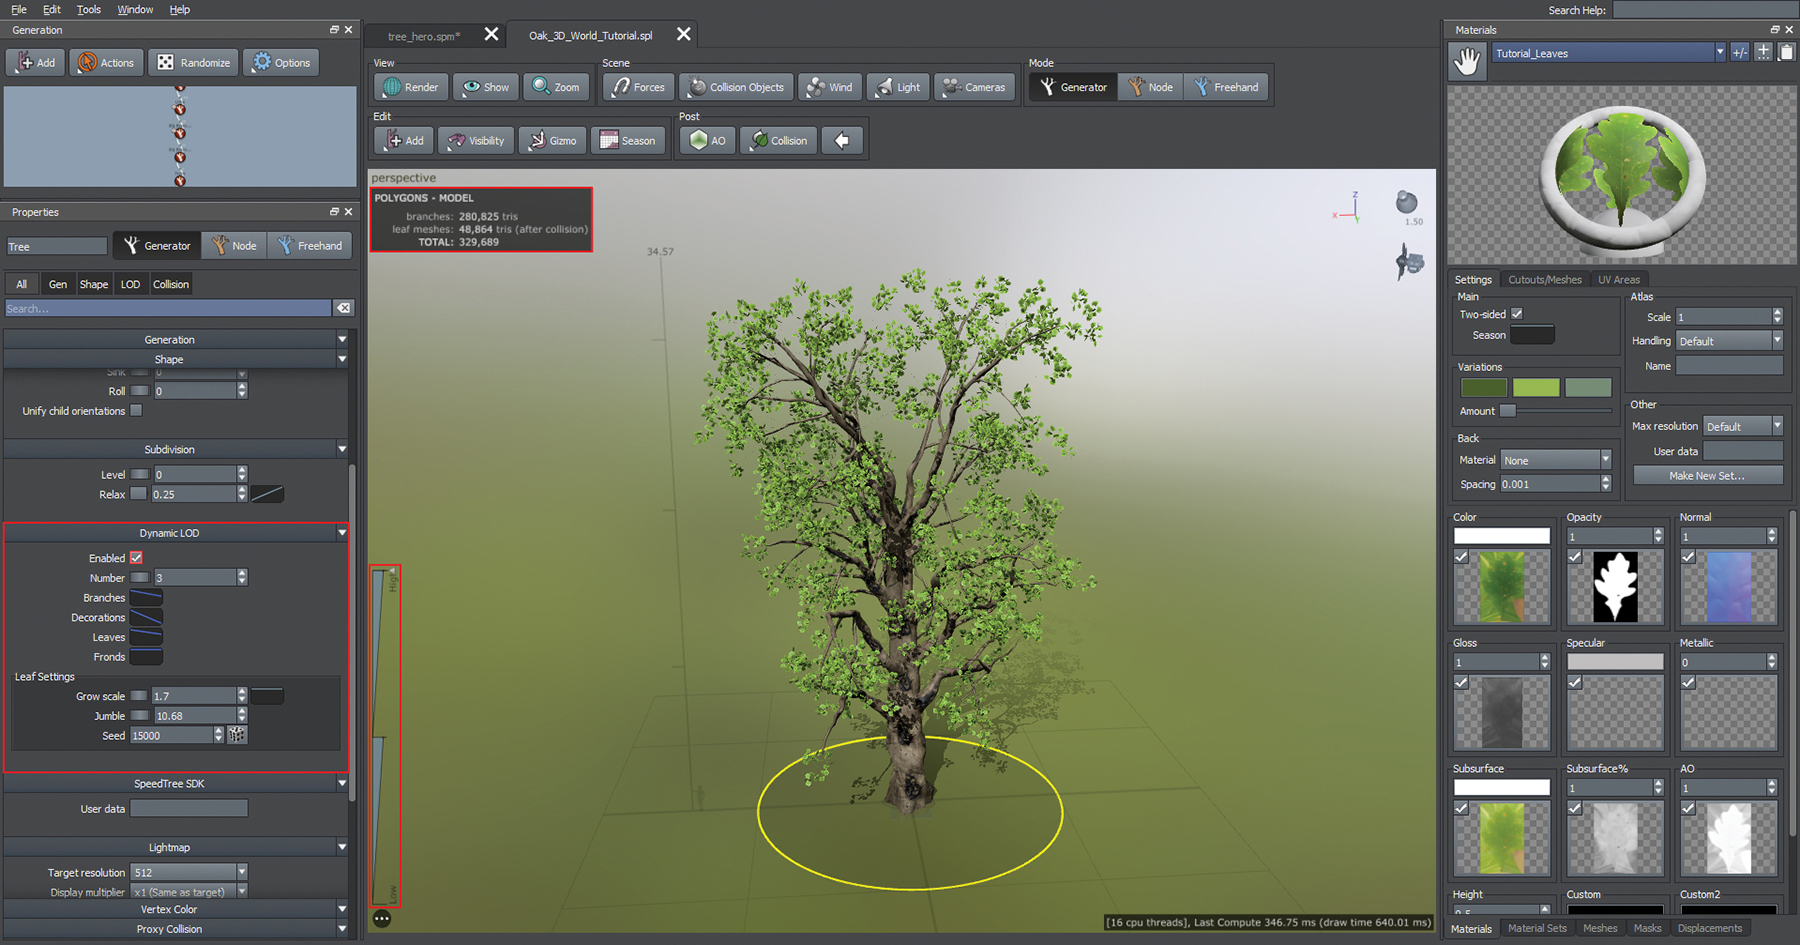
Under the Properties options, you can find Dynamic LOD settings. Use the viewport slider to quickly switch between the different levels of tree detail, which will enhance the performance and visual quality based on your needs.
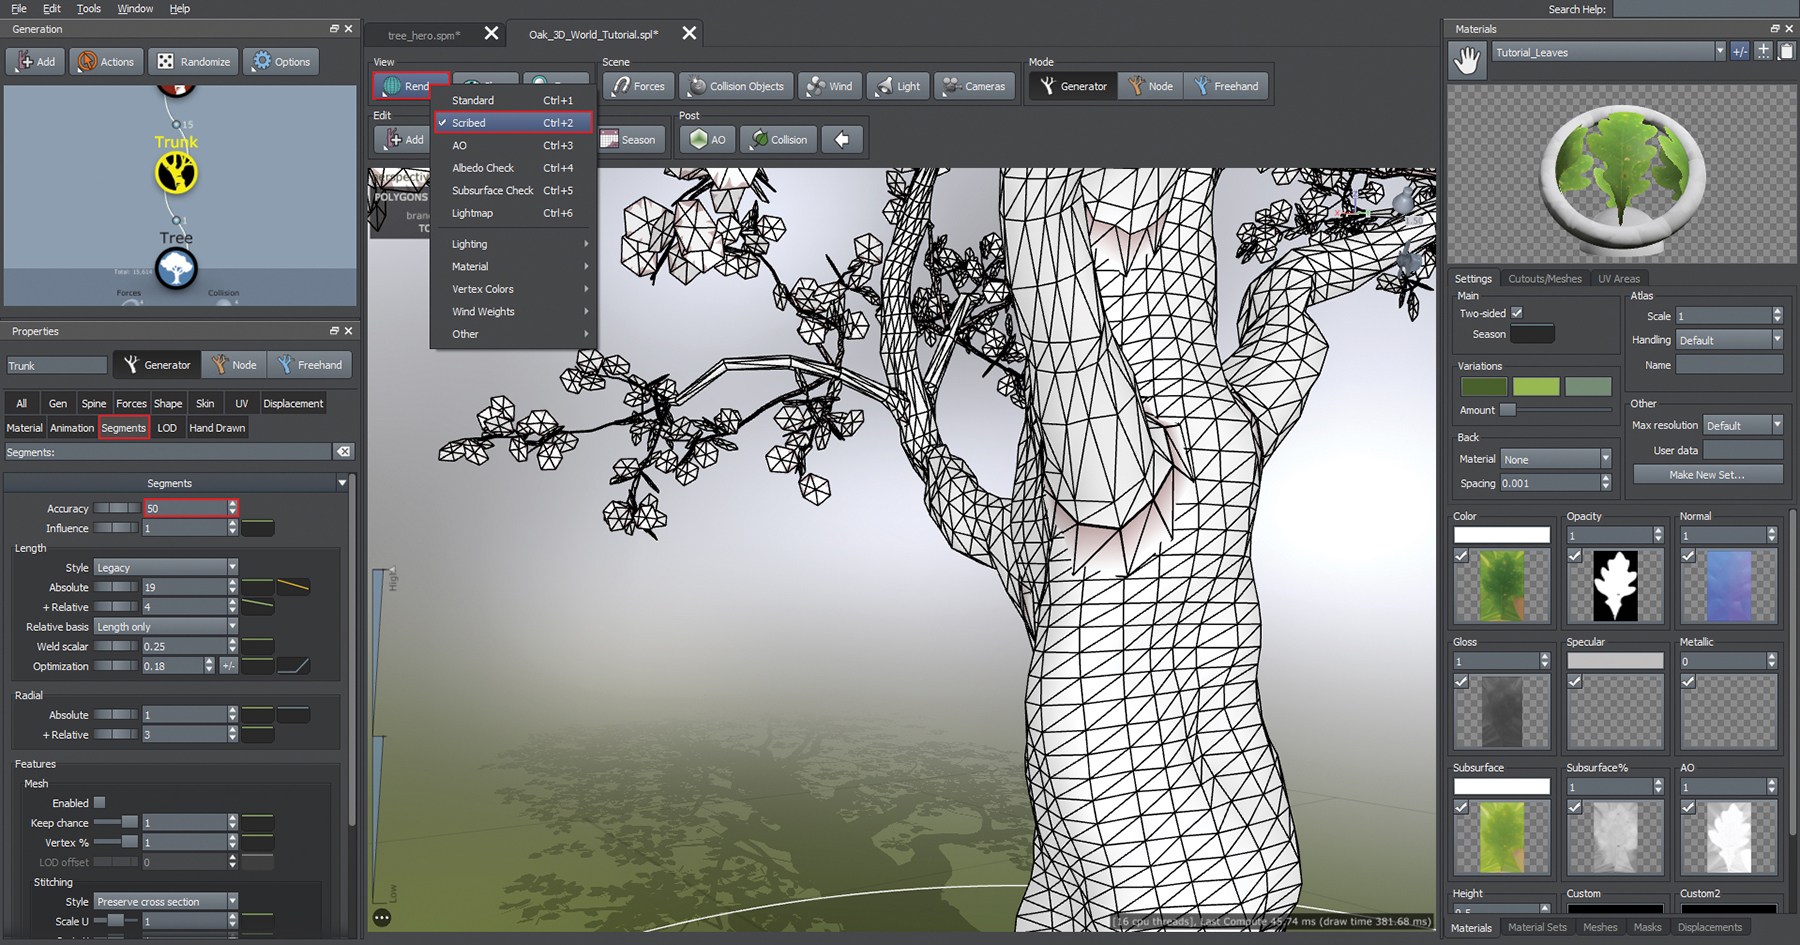
Optimise your models by reducing the polygon count. Switch over to Scribed view to see your model’s wireframe, select the tree part you want to adjust, and then change the segment count. This will ensure smoother performance in real-time applications such as games and VR without sacrificing visual quality.
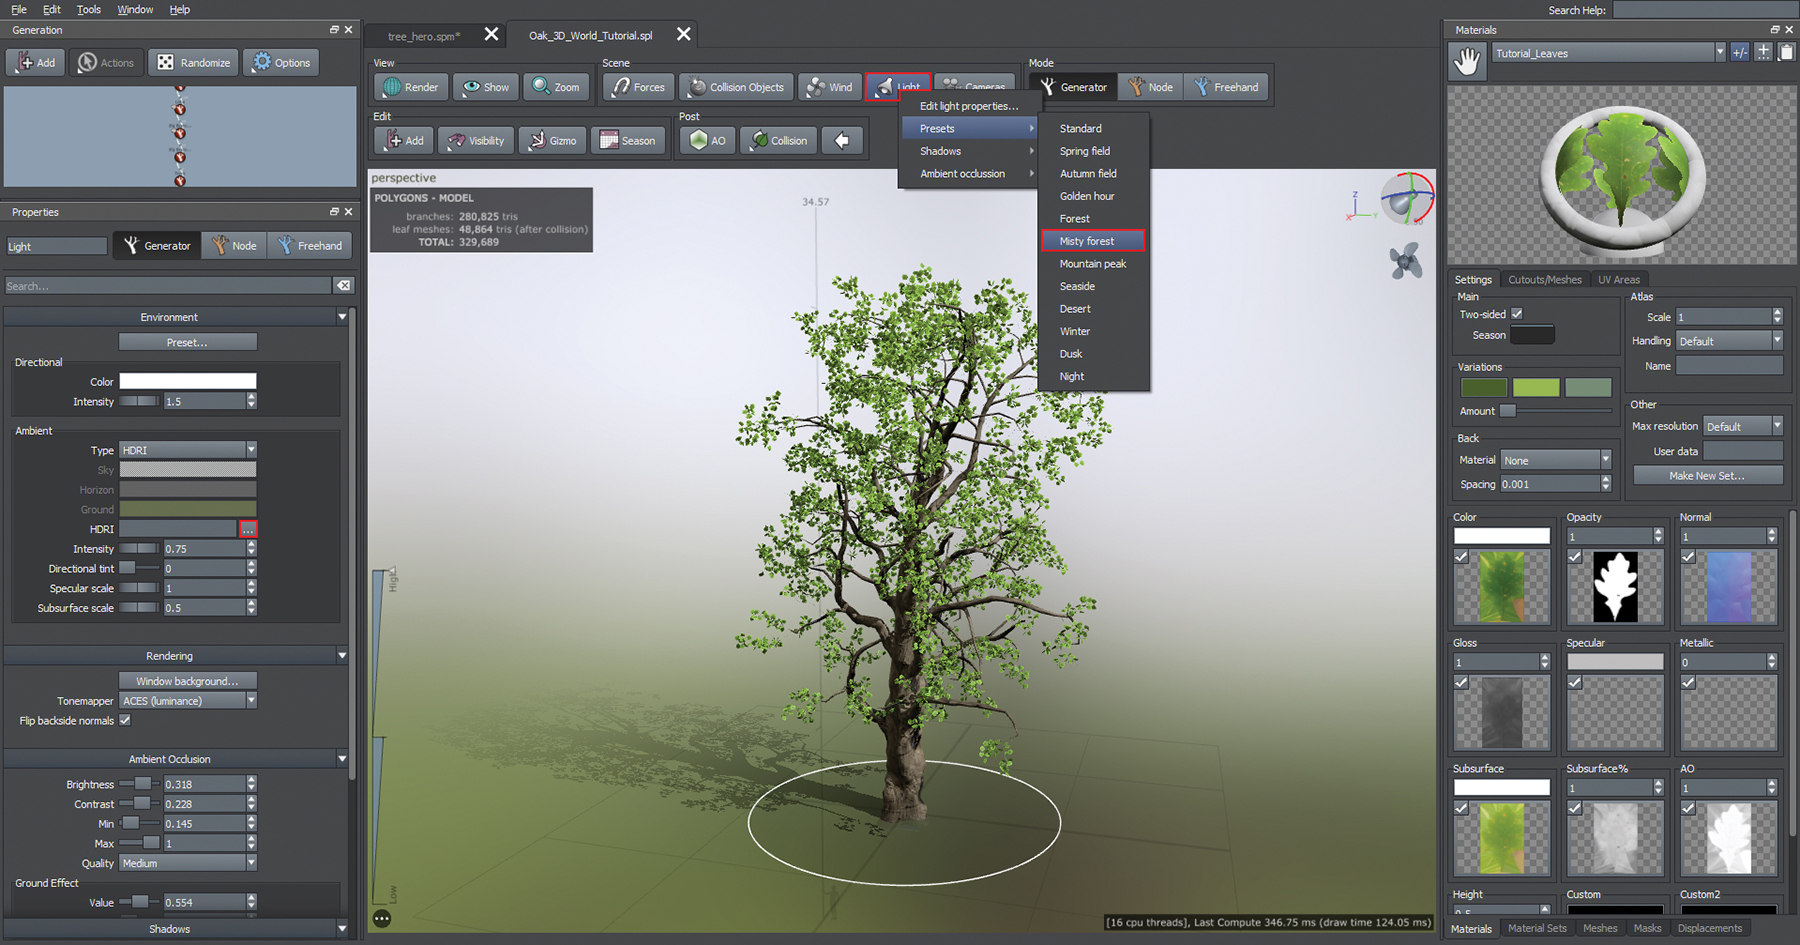
In SpeedTree, you can use various lighting presets to enhance tree visualisation or import your own HDRI. Throughout this tutorial, I’ve used the Misty Forest lighting preset, which provides a realistic, atmospheric look to the trees.
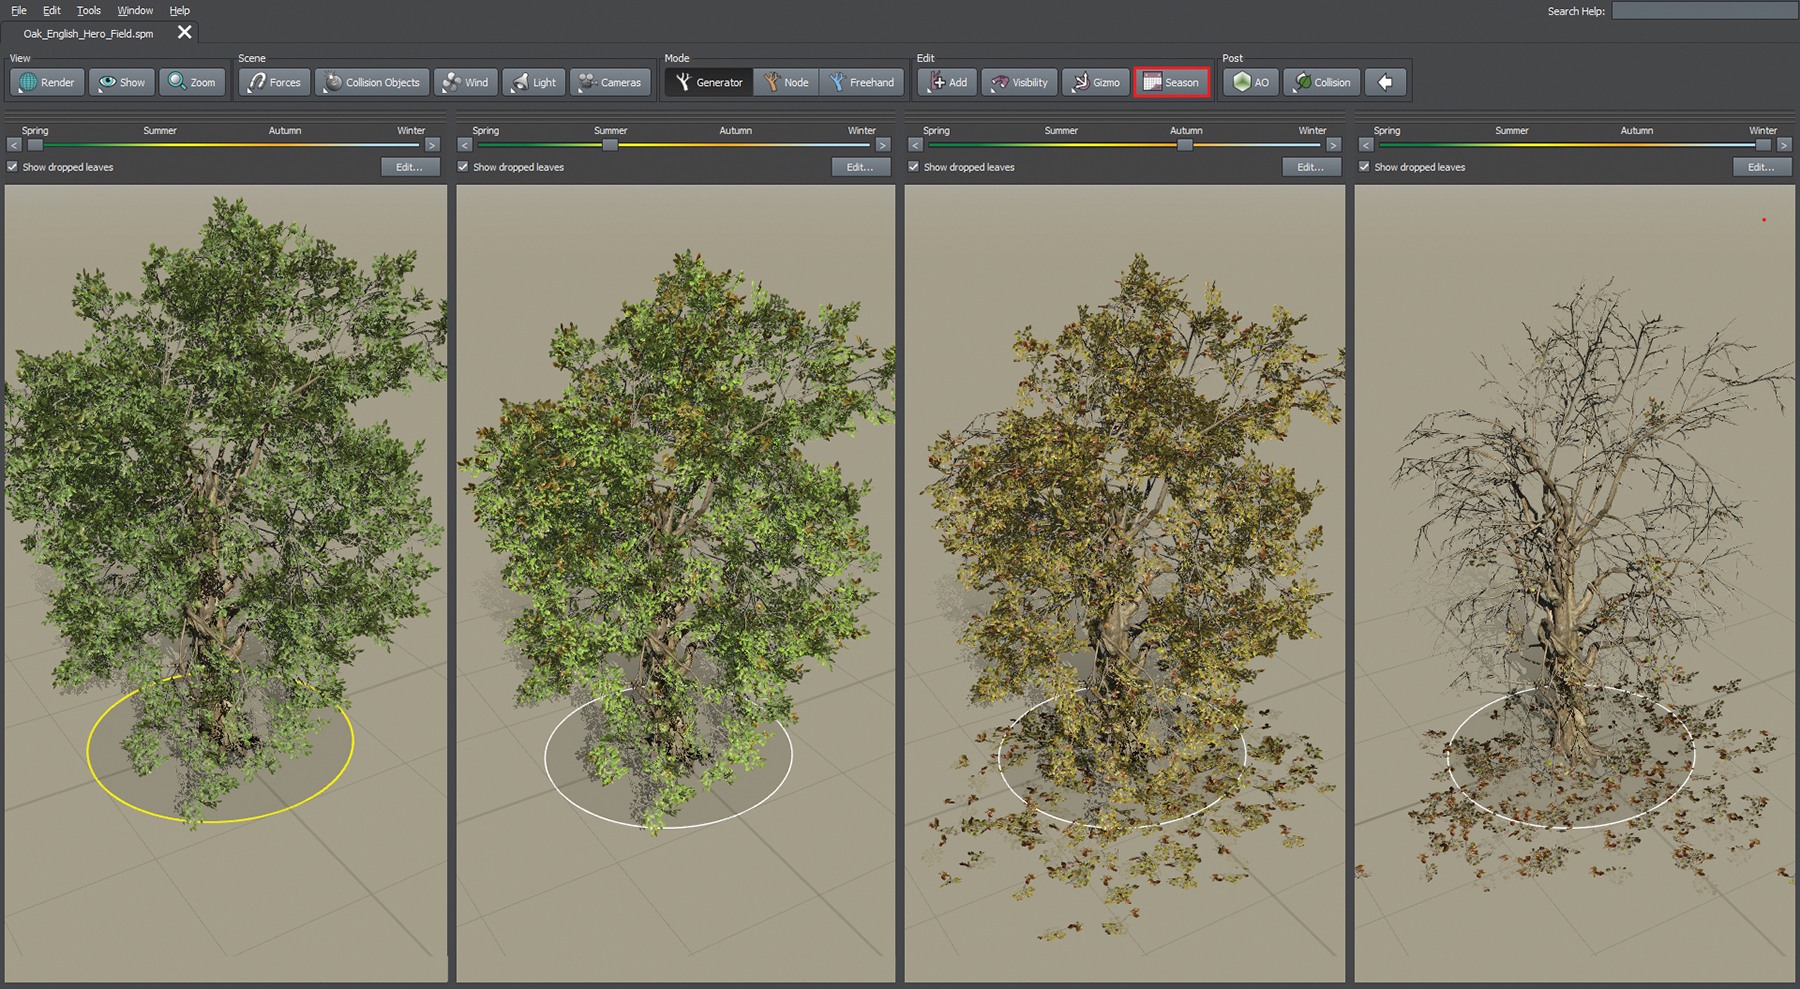
Creating seasonal variations of your tree models can add depth and realism to your projects. With these variations, you can use the same base model across many different scenes and settings, enhancing the storytelling and visual consistency in your project.
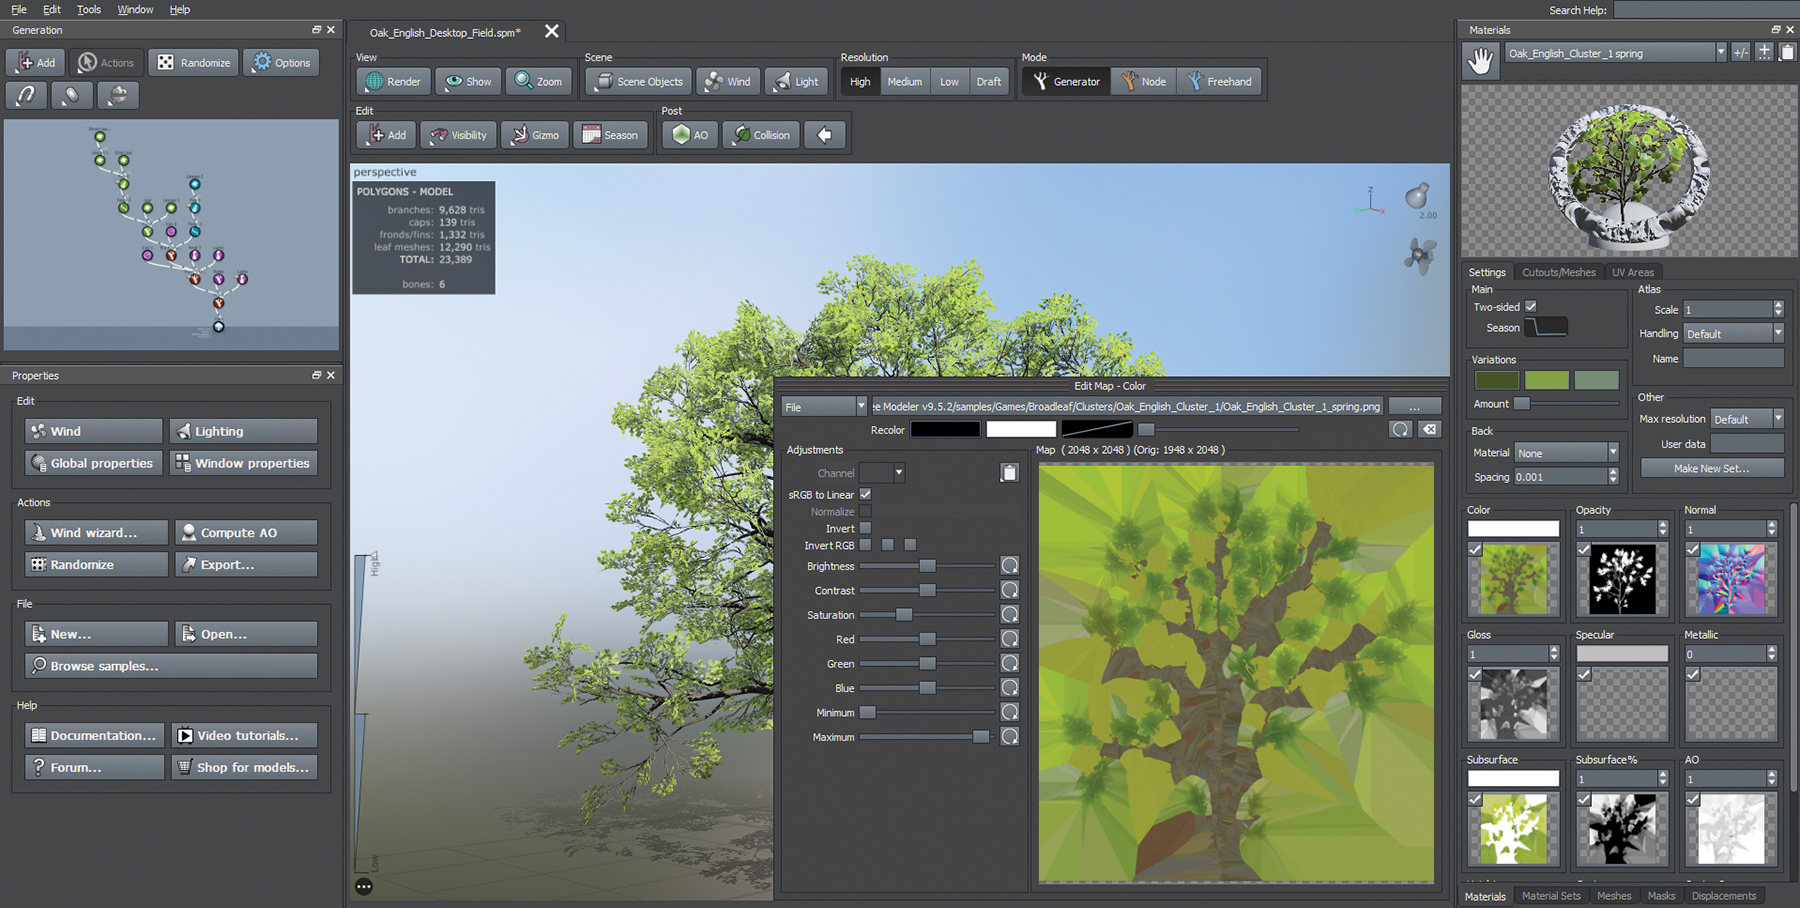
For a spring or summer version, focus on lush green leaves and vibrant textures. Adjust the leaf density and use SpeedTree’s Colour editor to get the desired hue and saturation. For an autumn version, change the leaf colours to reds, oranges and yellows. The seasonal variation tools allow for gradual transitions between colours, which further enhances your project’s realism. Decrease the Leaf Density to mimic natural leaf fall as well. For a winter version, remove most or all of the leaves, leaving only the bare branches. And why not add textures that simulate snow or frost on the branches and trunk?
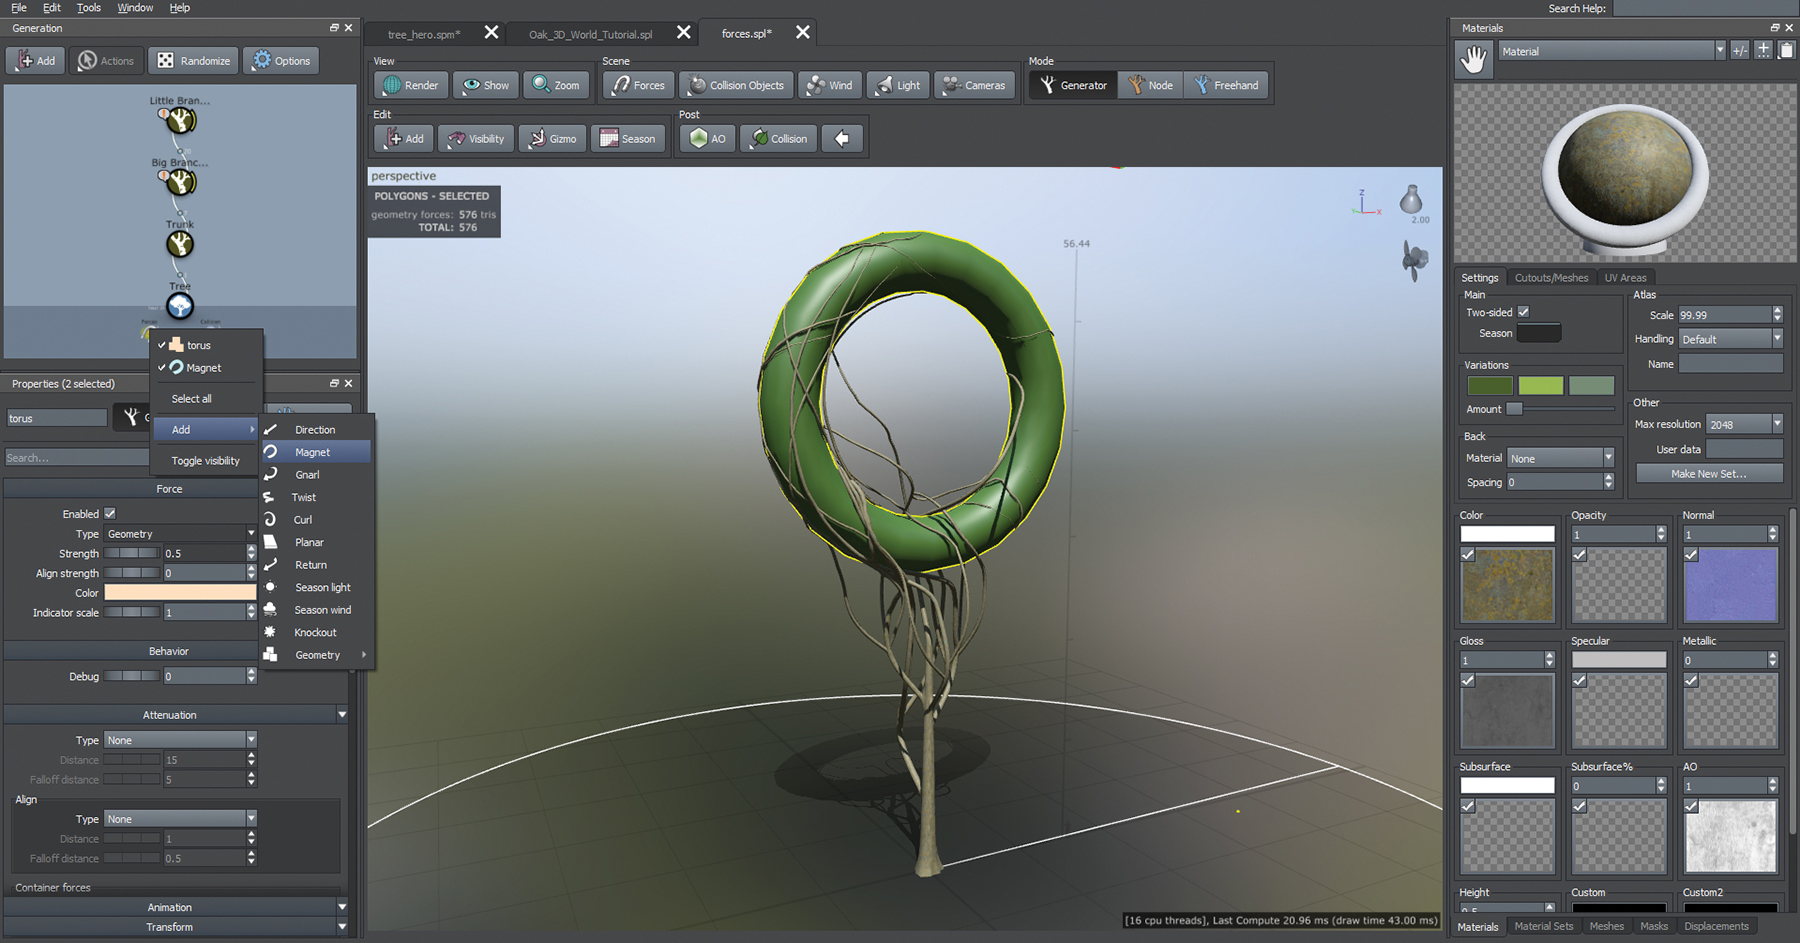
In SpeedTree, Forces are used to shape trees by affecting specific areas determined by a radius around the Force object. This gives you precise control, such as impacting only branches in a particular quadrant.
Various force types influence tree shape uniquely. Direction forces make spines grow towards the arrow’s point, while Magnet forces draw spines to a central point. Gnarl forces twist spines around a vector set by the force’s rotation, Twist forces cause spines to twist along their local up vectors, altered by the force’s rotation, and Curl forces make spines curl inward based on the rotation. Planar forces guide spines to grow along a 2D plane defined by the force’s rotation.
Mesh forces direct spines to grow toward or around a mesh object, and Return forces help branches return to their original growth direction, which is useful for controlling excessively disturbed branches. Season Light forces affect how leaves change season, based on their growth direction towards the force object and fine-tuned using the Leaf Generator’s Anatomical Sensitivity property.
These options allow for more control over the appearance of your tree models. Start by selecting a texture in your previously created material and opening the Material editor. Here you can adjust various parameters such as Brightness, Contrast, and so on. For more realistic bark, use high-resolution textures and apply Normal maps to add depth and detail. Adjust the Specular settings to simulate the reflective properties of different types of bark. For leaves, consider using Translucency maps to allow light to pass through, mimicking the natural behavior of real leaves.
SpeedTree also supports PBR (physically based rendering) materials, which enhance realism by accurately simulating how light interacts with surfaces. Use PBR settings to fine-tune the Metallic and Roughness properties of your materials. Lastly, don’t forget to play with the Color Variation parameter in the Material tab to add slight variations in your leaves.
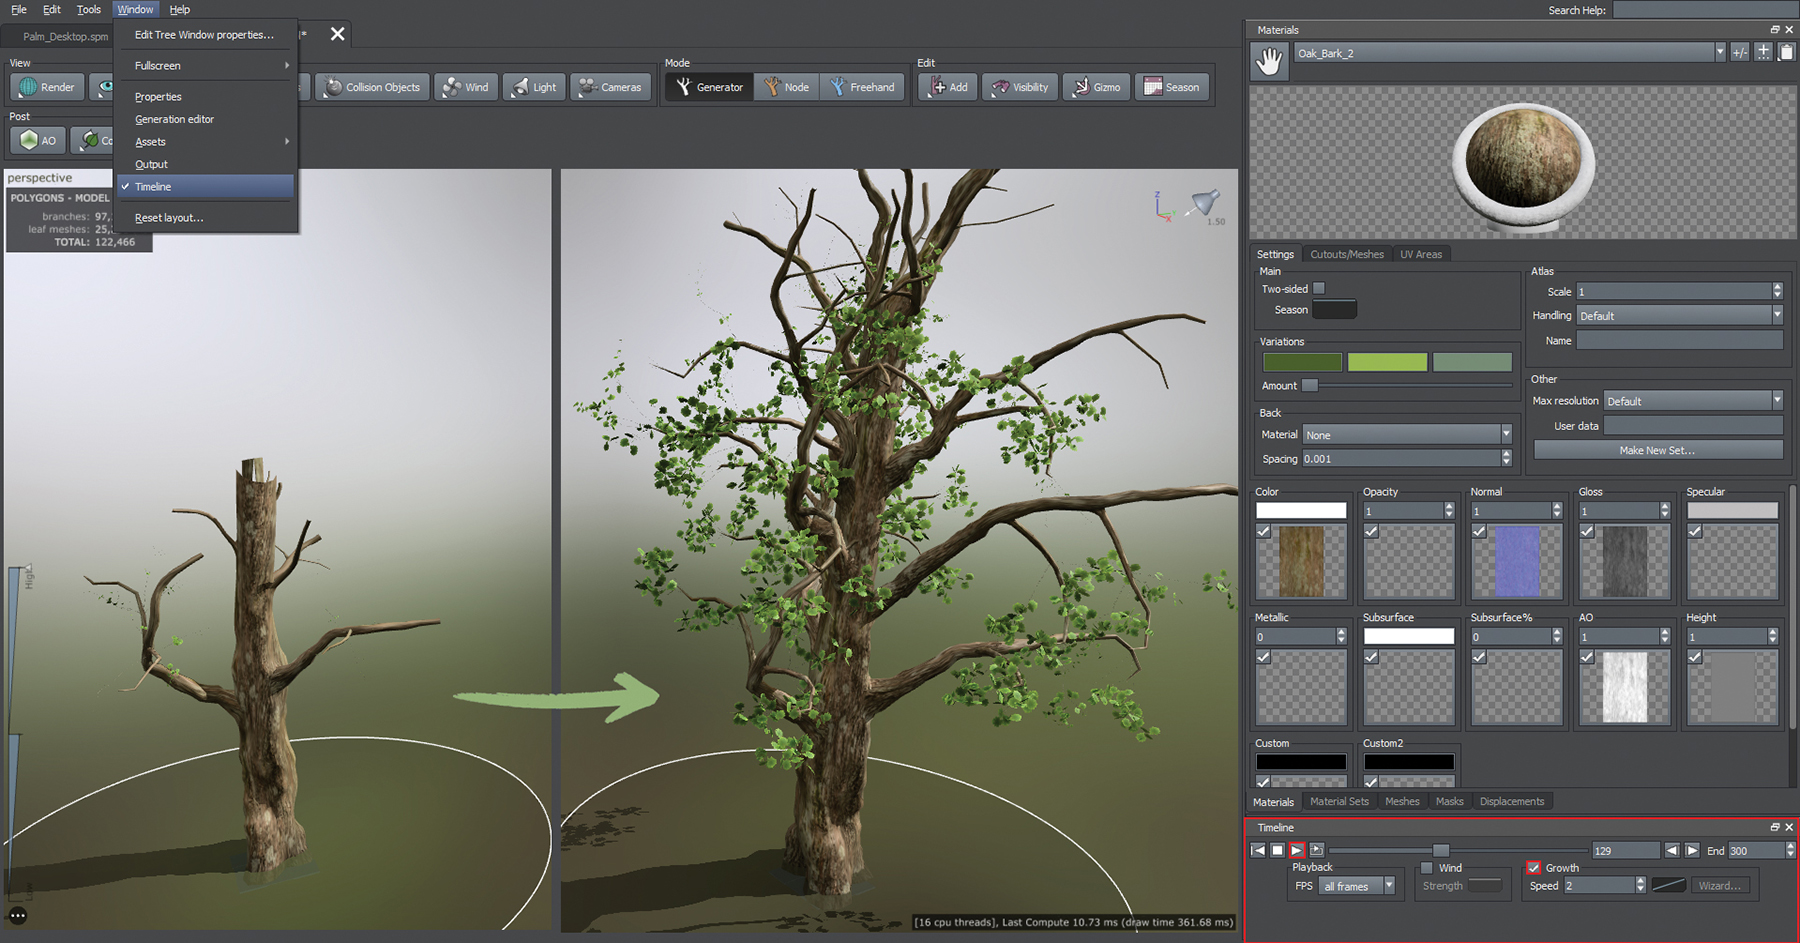
Animating growth adds a dynamic element to your models; perfect for storytelling! Start by selecting the tree model you want to animate and open the Growth editor at the right side of the interface, where you can control the growth stages of your tree. Begin by hitting play and visualising the default growth animation. This should look amazing already, but play with the available parameters to ensure it matches your own taste.
As you progress along the timeline, you can also set specific animations to simulate the growth of secondary branches and leaves. Adjust growth speed and direction to mimic natural growth patterns. Refine the animation by adjusting the timing and smoothing out the transitions to ensure a realistic portrayal of the tree’s development.
Using this feature, the resulting animation can be exported in multiple formats, such as FBX or Alembic. This capability means you can seamlessly integrate the results into various projects and platforms, which makes it easy to create high-quality animations with minimal effort required.
Get the Creative Bloq Newsletter
Daily design news, reviews, how-tos and more, as picked by the editors.
Thank you for reading 5 articles this month* Join now for unlimited access
Mario is a an Adobe Certified Professional in Photoshop, Premiere Pro, and After Effects. He is also a Houdini specialist, and has three years of experience in photography and two years in the VFX / animation industry.
You must confirm your public display name before commenting
Please logout and then login again, you will then be prompted to enter your display name.