Nomad Sculpt for tablets has a smart workaround to achieve CG effects without the need of a desktop computer.
(Image credit: Glen Southern)
Liquids, fur, hair, steam, smoke, fog, fire, magical effects and so much more are all daily requirements in most 3D packages, but are almost always created with a particle system of some type. Desktop software such as Houdini, Blender and Cinema 4D have this type of tool built-in, and there are hundreds of plugins such as X-Particles that specialise in just one aspect of this topic. (Read our guide to the best 3D modelling software for more details.)
Sadly the options on mobile devices are limited for creating and animating this type of particle simulation. However, you can create the visual effect of smoke and fog in other ways, and in this little tutorial I’ll take a look at how to do it in Nomad Sculpt. Bear in mind there’s no animation capability in Nomad Sculpt, so this is mostly useful for imagery in illustration and concept art. (Our guide to the best iPads for drawing is a good place to start our tablet journey, also catch up on ZBrush for iPad.)
Expert tip: Paint it black
(Image credit: Glen Southern)
One tip when you’re masking your alpha maps is to be absolutely sure the black you use is 100 per cent black (#000000 in Hexidecimal or 0,0,0 in RGB). If it isn't, you’ll see a slight haze in the texture on the plane and it will ruin the effect.
The technique we’ll use is similar to hair cards that have been used in game design for decades. We can take a UV-mapped polygon and add an alpha to it that will mask out anything that we don’t want to see. Using a greyscale gradient of some type means the texture gets more transparent as needed.
With the correctly painted alpha maps, we can simulate layered fog or smoke, and this is effective for your scenes presuming that you don’t want to move the camera through the effect. Being a simple polygon means there’s little load on the CPU or GPU, and it won’t impact the overall performance of Nomad Sculpt either.
With fairly recent updates, Nomad Sculpt received UV mapping capabilities and also a range of texture mapping options, including different channels for each type of map. In there we find an Opacity channel along with a Normal map, Diffuse (the basic colour), Metalness and Roughness. If you know programs like Blender or Marmoset Toolbag, you’ll know that this is a PBR (physically based rendering) workflow.
To make the Opacity maps you’ll need to go to a 2D program. As long as you can make your own brushes and export in PNG format, the program will probably be fine. For this tutorial I’m going to use Procreate to make some alpha maps and take them to Nomad Sculpt for use in the Opacity channel.
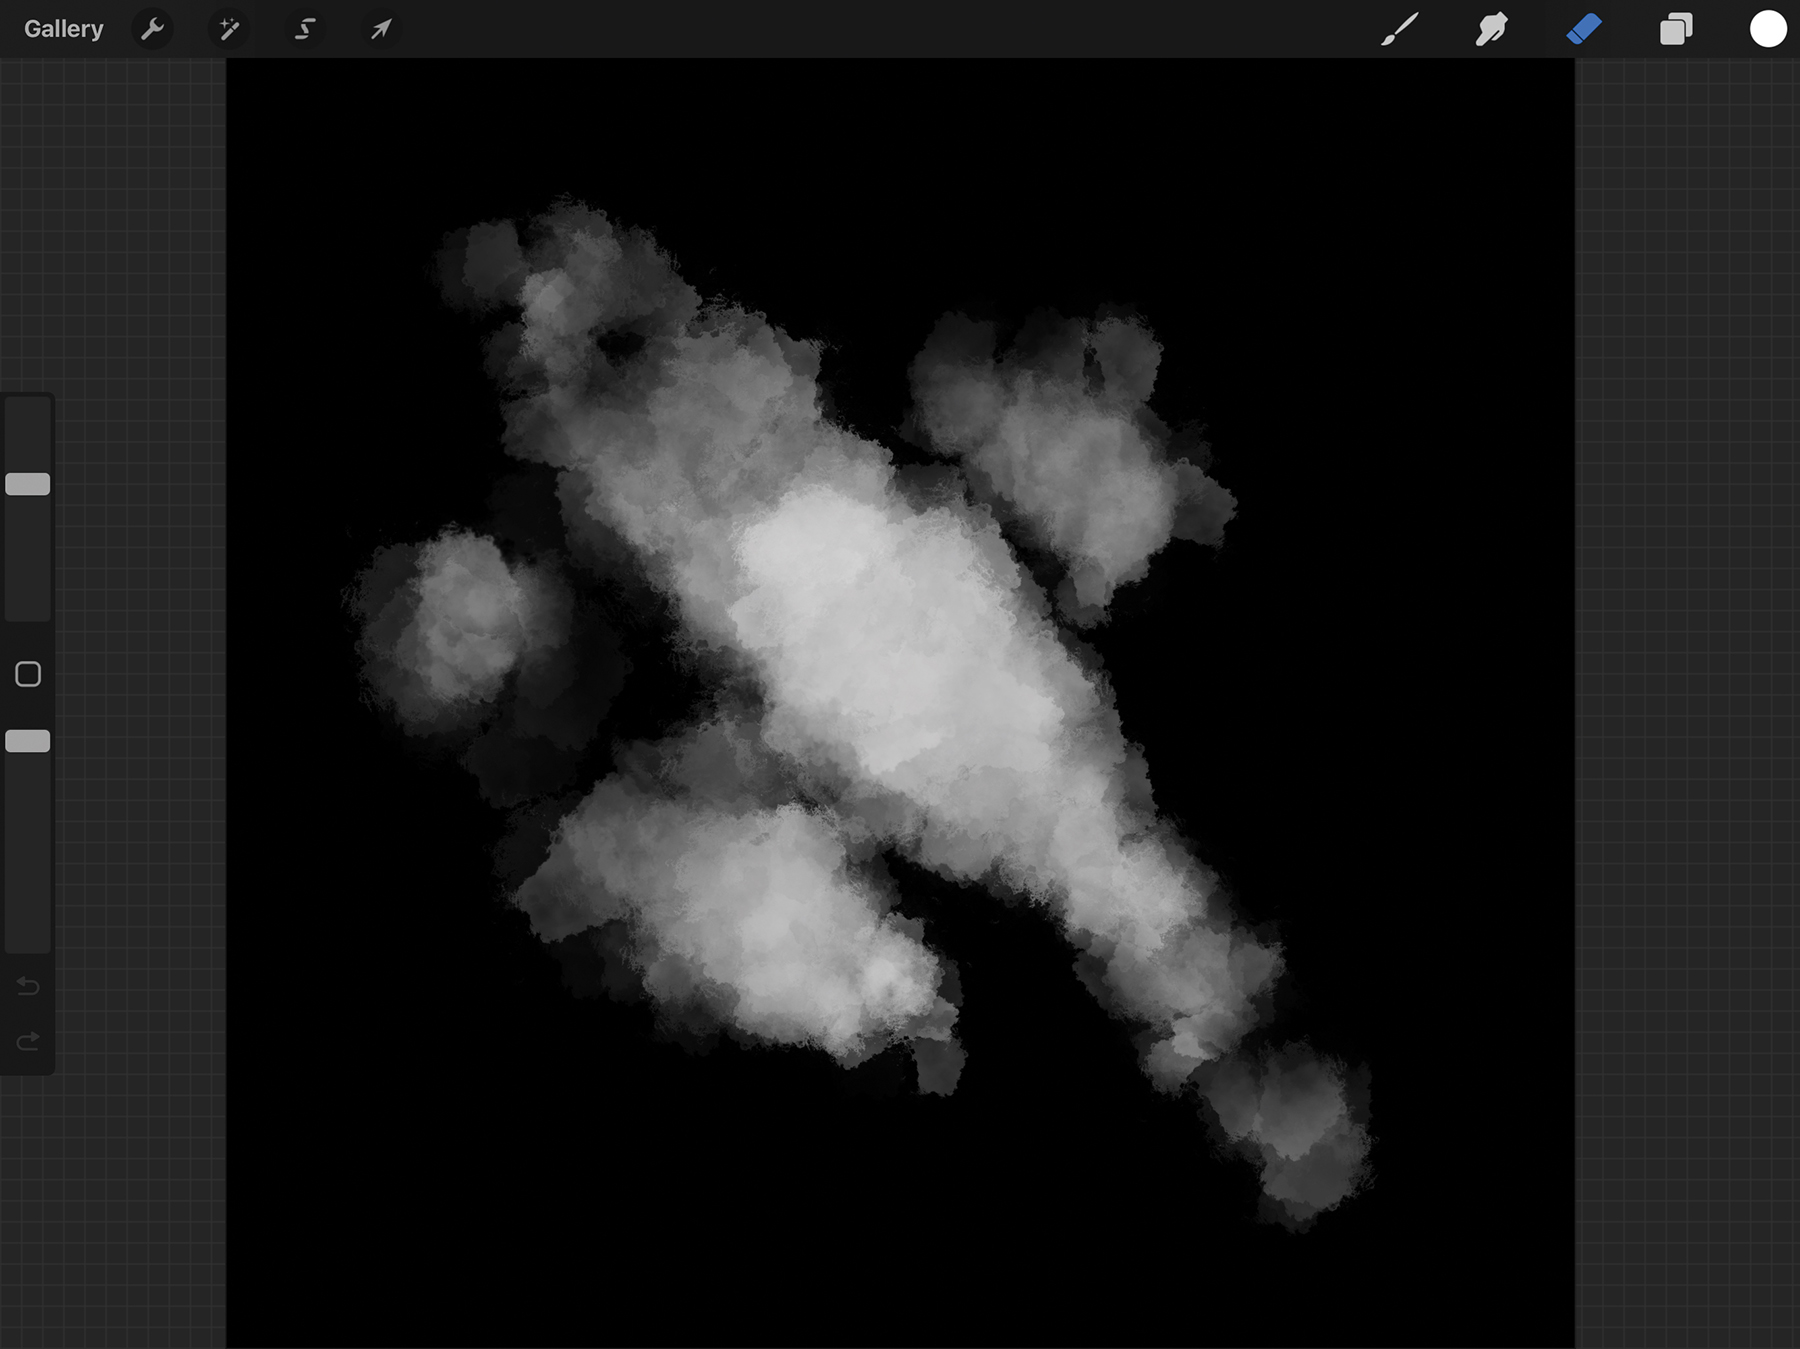
To make the alpha texture we need to use a 2D painting package such as Procreate, which is used here. Make a square document and fill it with black, then find a fairly large brush that has a nice falloff. Often you can find a preset brush that does this job, such as this one called Clouds on my machine. Paint a nice smoke-type effect with lots of white in the centre, only using greyscale.
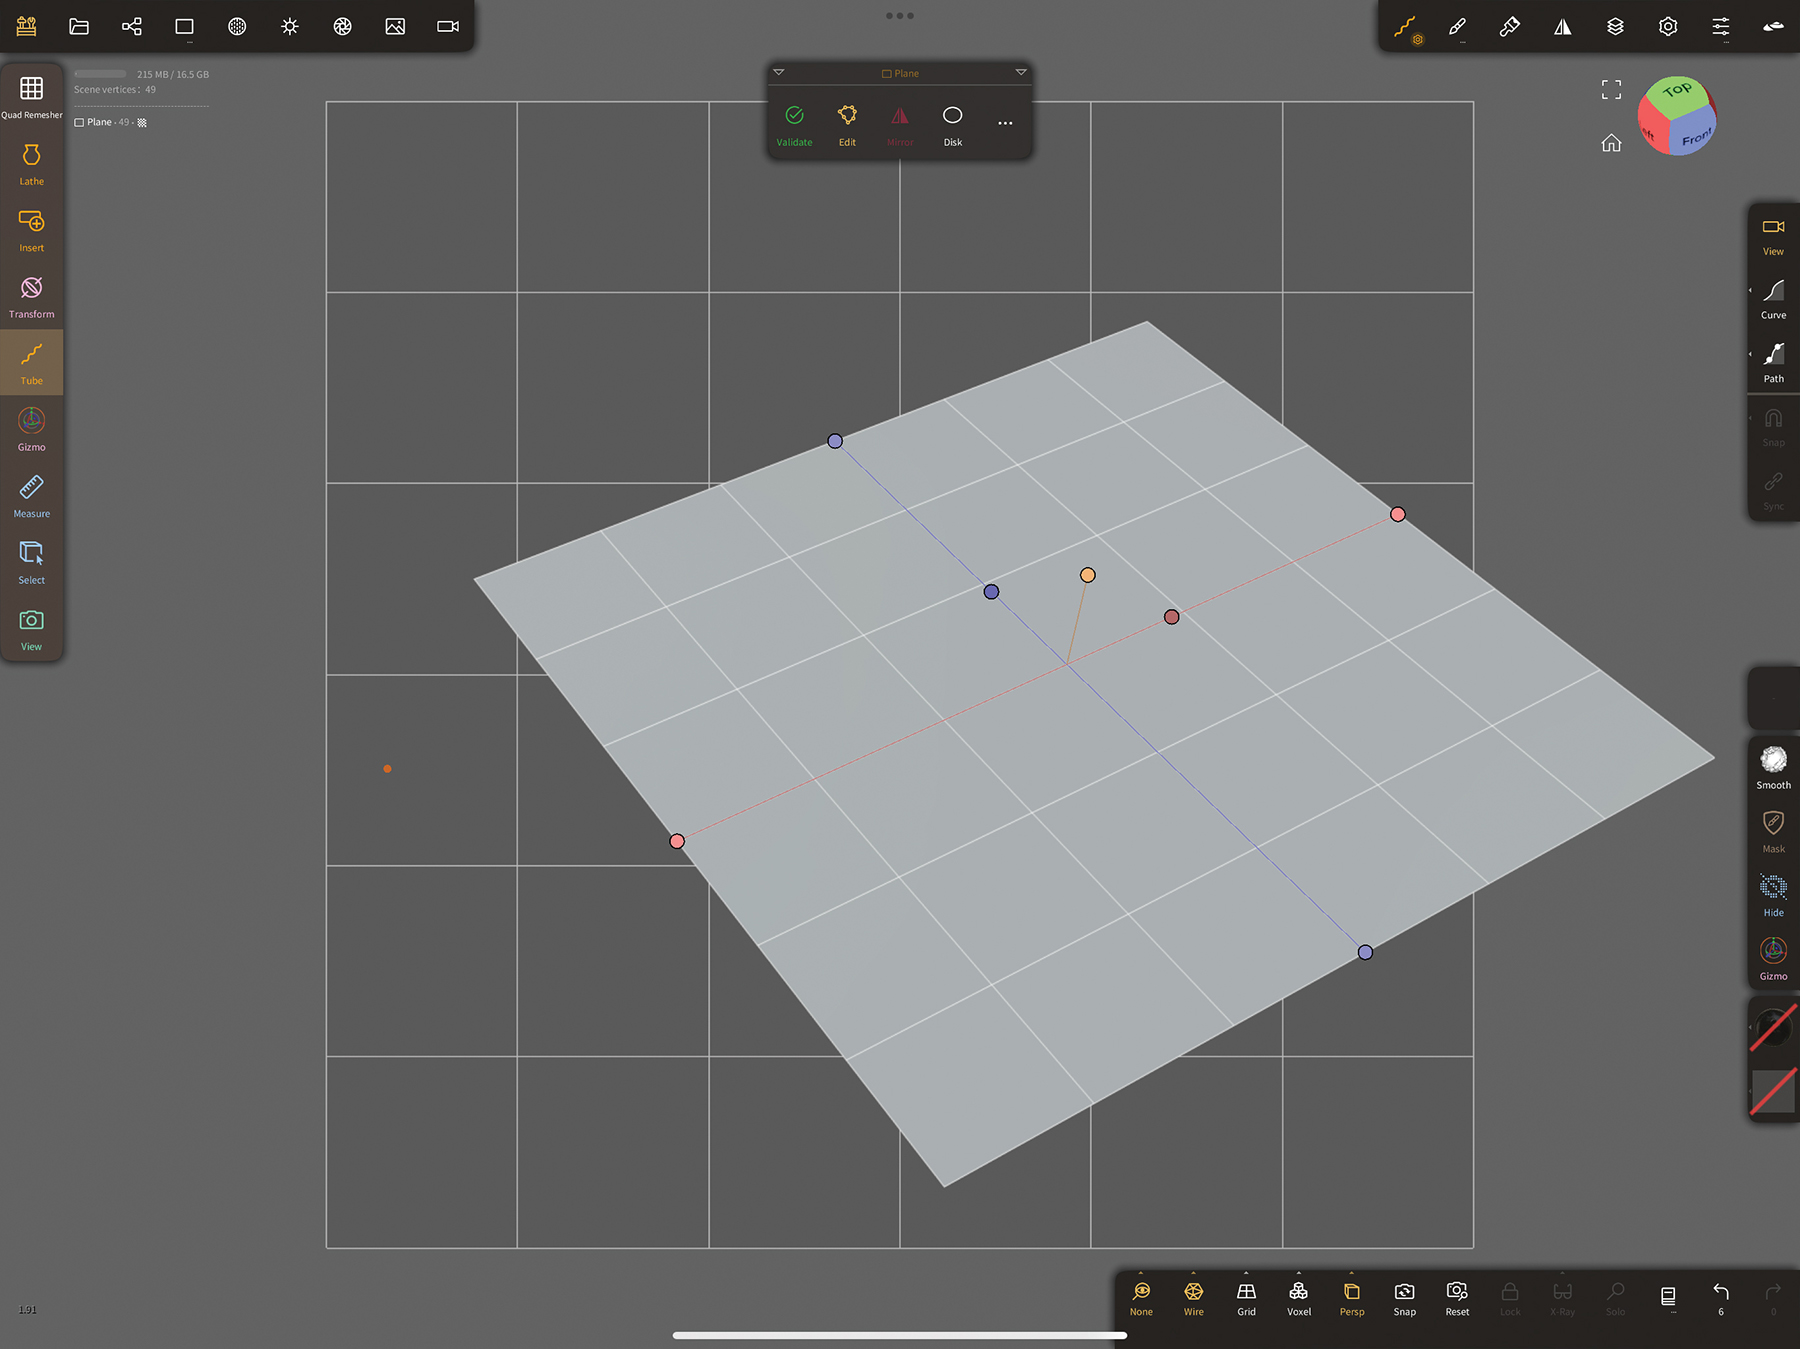
Now jump into Nomad Sculpt, and from the top menu add a plane to the scene. Change the polygon count from the middle menu, putting Wireframe on if needed. At the bottom, hit Inspect and you’ll see that the plane was automatically UV unwrapped, as are all primitives in the latest version of Nomad. Now you can see the UV coordinates in the background. Next add an Opacity map to the sphere.
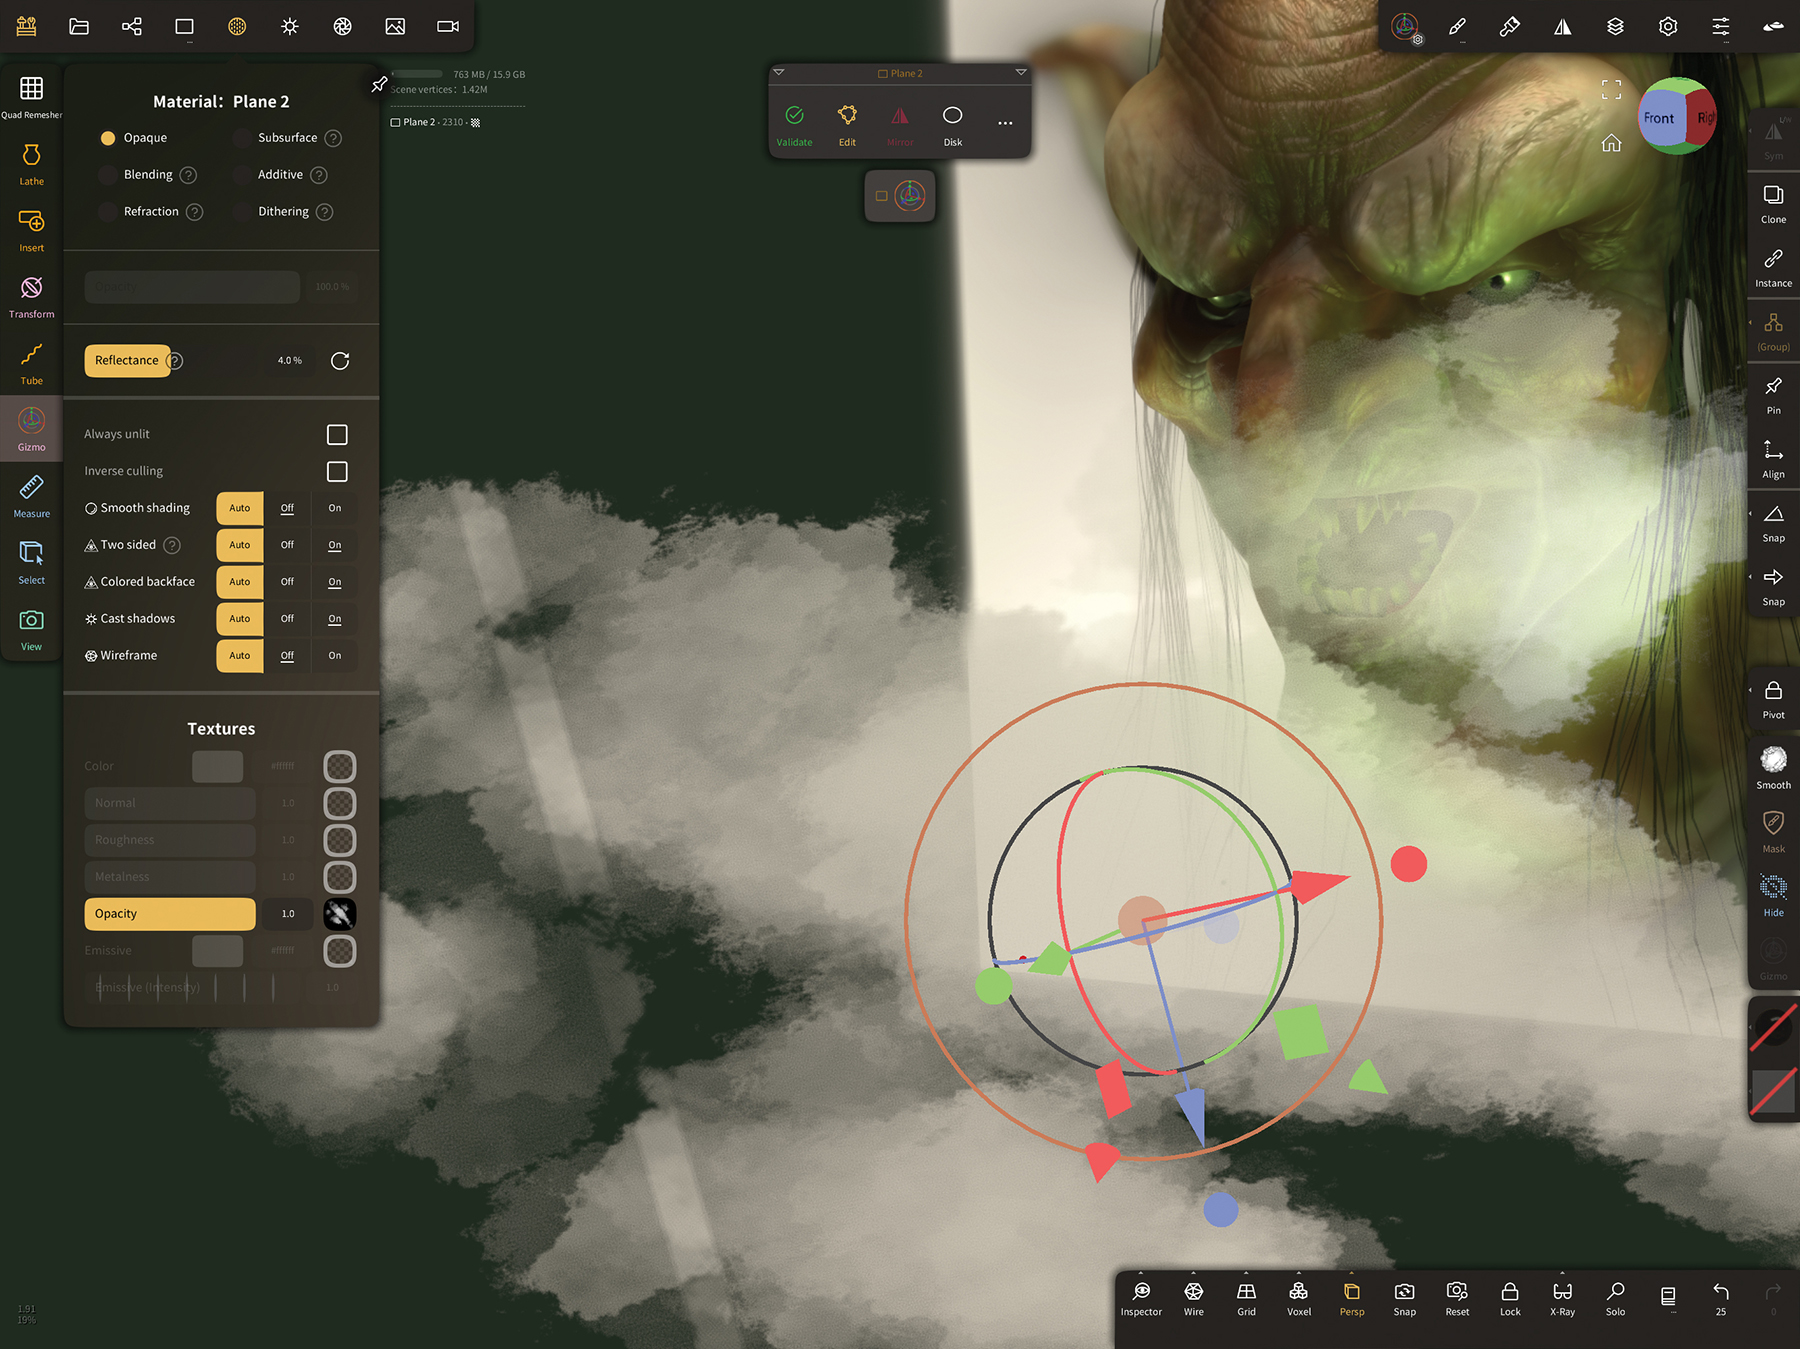
In the Material panel, you’ll see all kinds of channels at the bottom. Look for the Opacity channel and then click to add the image you created. If everything has worked correctly you’ll see that on the plane, anywhere in the scene that was black is now transparent and anything white is fully opaque. The fog is white because there’s no colour or texture applied, just an alpha.
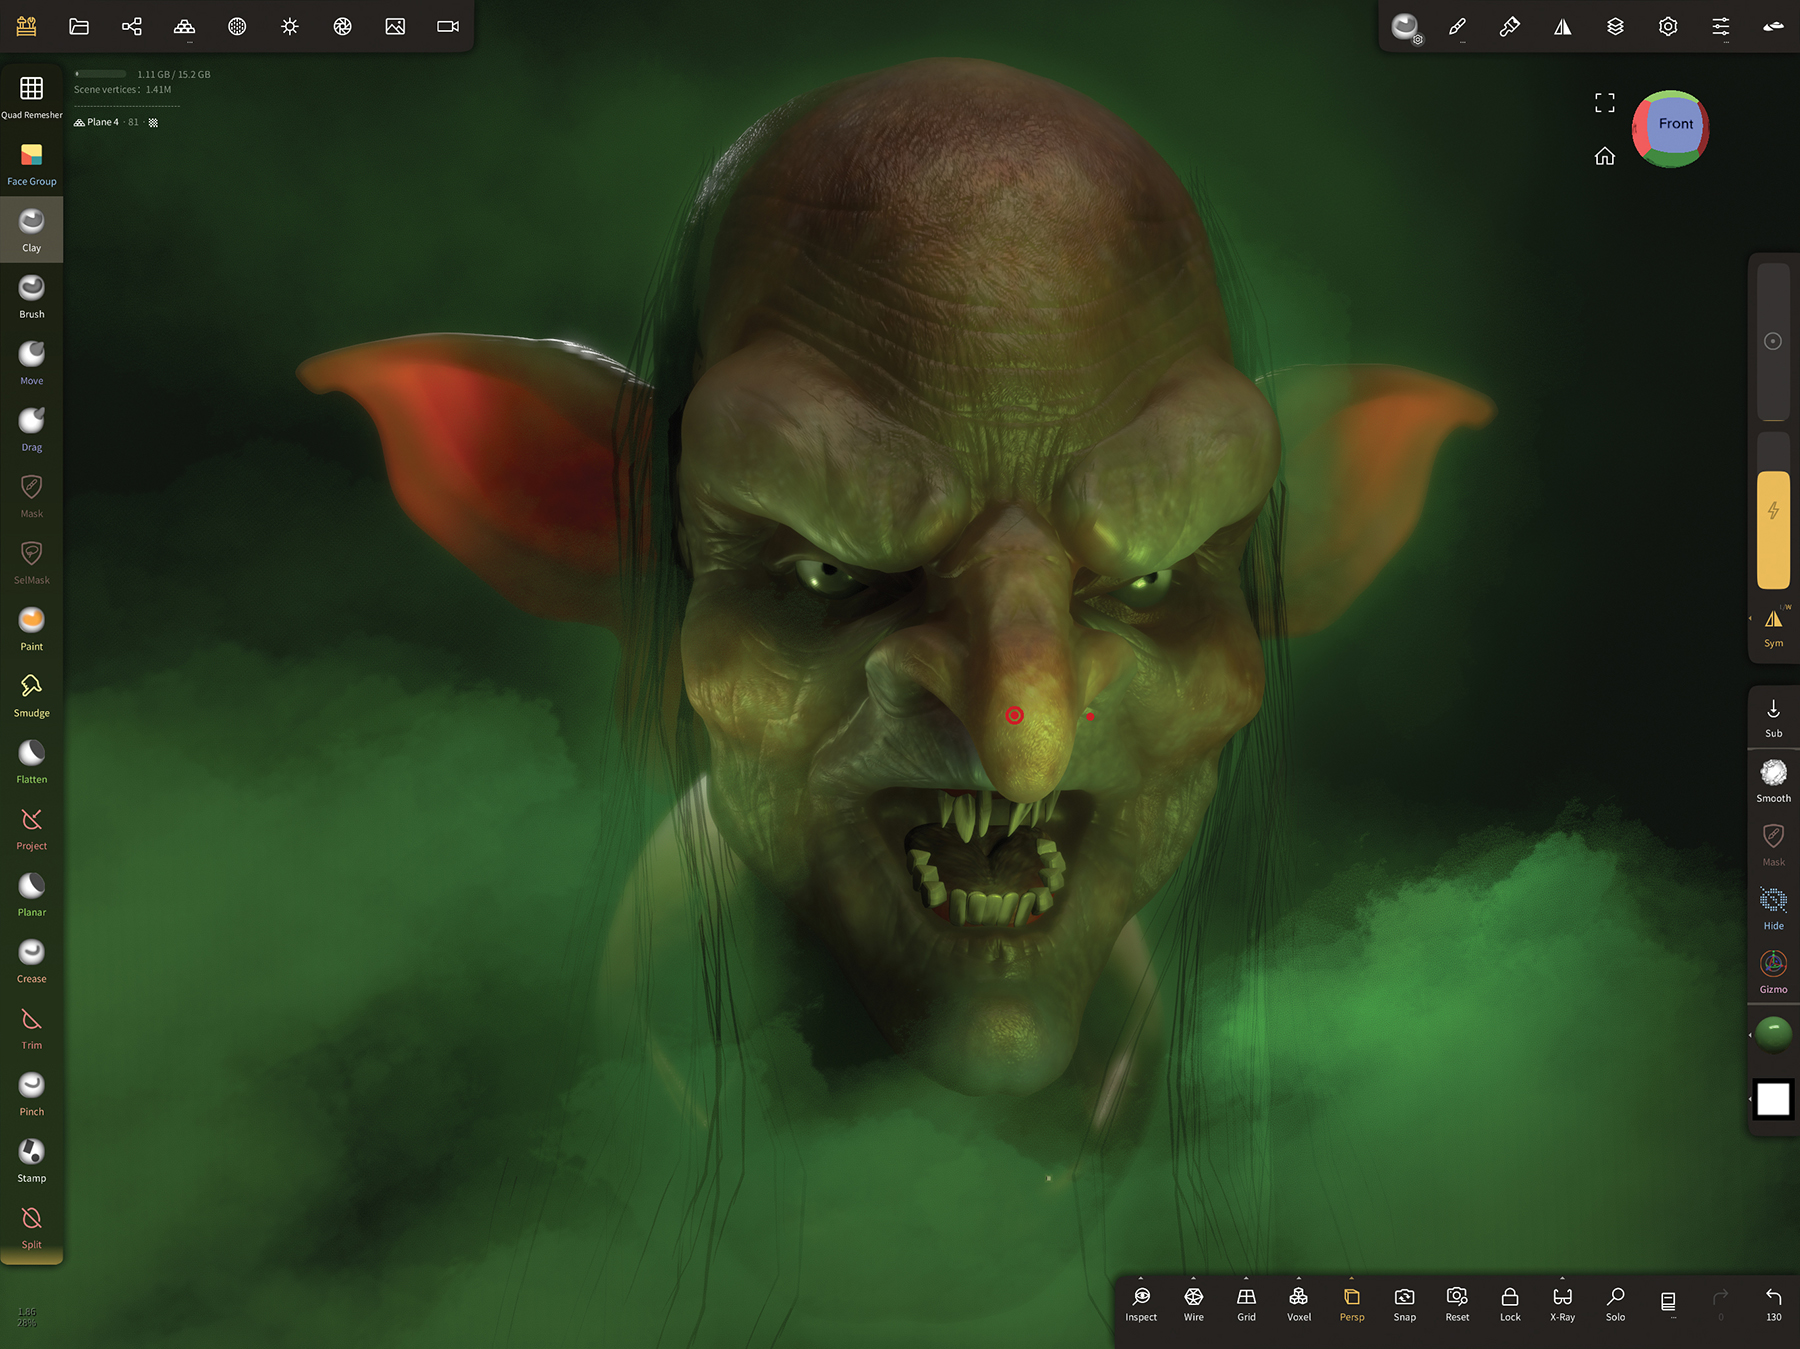
To colour the smoke or fog, you can use the Paintbrush and add the colours you like onto the plane. Here I used a green effect. As the Opacity map is active you’ll only see the colour where the white was. I used a character I’d made, duplicated it, and layered the planes one in front of the other to build up the desired smoky effect.
Do you have a 3D trick or hack? Share your advice in the comments below.
Thank you for reading 5 articles this month* Join now for unlimited access
Glen runs SouthernGFX, a small Cheshire-based studio specialising in character and creature design, which creates assets for TV and film. Clients include SKY, Wacom and Oculus Medium and the studio has an impressive project list that features 3D models for Game of Thrones' house sigils. He's been using and training ZBrush for over 15 years and is a Wacom Ambassador for the UK and Ireland.
You must confirm your public display name before commenting
Please logout and then login again, you will then be prompted to enter your display name.