The key to creating photoreal renders
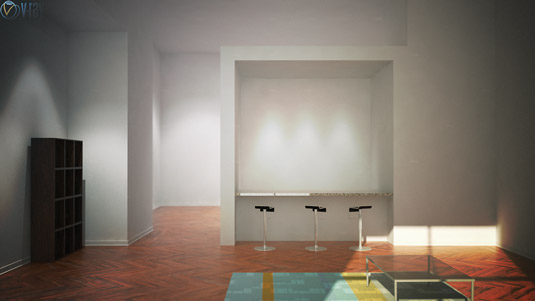
Digital artist Vinnie LaCour shows you how to get the most out of the new features in V-Ray 3.0 for 3ds Max.

Getting renders to read as realistic is one of the more difficult aspects of 3D. Achieving a realistic look is definitely important, but the
thing that really helps to sell it is having the image tell a story or convey a feeling.
Many artists try to achieve this in their scenes using specific render settings or physically based properties, but for me it has always been more about having a setup that can start off as something that could be considered accurate, but then allows the artist the control to adjust and manipulate those properties in order to achieve a certain look or feel in their render.
V-Ray has always done a great job of giving you the tools to set up a scene that renders accurately but also allows you to specifically adjust and finetune your images. V-Ray 3.0 offers a slew of new tools to help speed up your workflow and improve your renders. These include everything from timesaving new user interfaces and increasing speed and performance, to a handful of brand-new features. I'd like to talk about just a few that I've found useful in my day-to-day work.
01. New UI overview

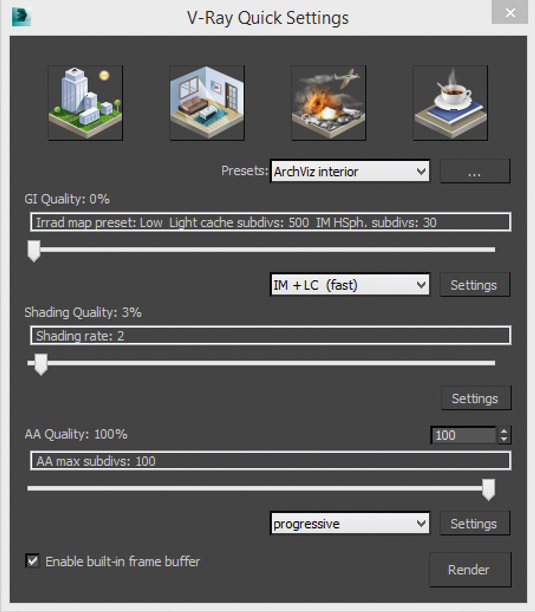
The V-Ray Quick Settings dialog gives you access to preferred render settings, which can then be applied to new scenes for fast previews in a few simple clicks.
This dialog gives you some base settings to get you started, and many options have a Settings button next to them that brings you directly to the render settings dialog where you can tune some of the finer controls. Here you'll notice another addition to the UI – the introduction of Basic, Advanced and Expert modes.
02. Scene setup

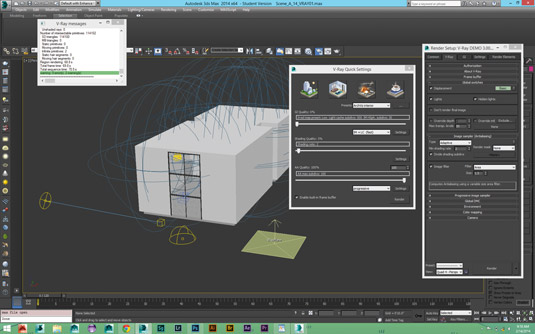
Drop in a few lights and a ground plane, and select VRaySunlight and VRayDomeLight. For lighting tests I add a V-Ray material to the override material slot and exclude glass objects.
Progressive rendering lets you quickly visualise your renders without having to wait for a final frame; you get a quick preview without having to switch renders or change settings. Directly below the Image Sampler rollout is the Progressive rollout, with the min and max samples and max render time.
Get the Creative Bloq Newsletter
Daily design news, reviews, how-tos and more, as picked by the editors.
03. Final corrections

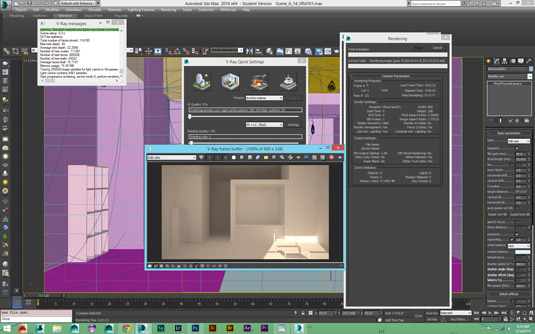
There are also improvements to the V-Ray frame buffer. The new additions to the colour correction menu are handy – I use it to test out colour corrections, or to tune individual materials without re-rendering the entire image, using the new Render Mask feature.
Go to the Image Sampler rollout (V-Ray>Render Settings), switch the Render Mask dropdown to Selected and select the objects you'd like to tweak. Make any edits to the materials applied to those objects and re-render.
This article was originally published in 3D World issue 181.

Thank you for reading 5 articles this month* Join now for unlimited access
Enjoy your first month for just £1 / $1 / €1
*Read 5 free articles per month without a subscription

Join now for unlimited access
Try first month for just £1 / $1 / €1

The Creative Bloq team is made up of a group of art and design enthusiasts, and has changed and evolved since Creative Bloq began back in 2012. The current website team consists of eight full-time members of staff: Editor Georgia Coggan, Deputy Editor Rosie Hilder, Ecommerce Editor Beren Neale, Senior News Editor Daniel Piper, Editor, Digital Art and 3D Ian Dean, Tech Reviews Editor Erlingur Einarsson, Ecommerce Writer Beth Nicholls and Staff Writer Natalie Fear, as well as a roster of freelancers from around the world. The ImagineFX magazine team also pitch in, ensuring that content from leading digital art publication ImagineFX is represented on Creative Bloq.
